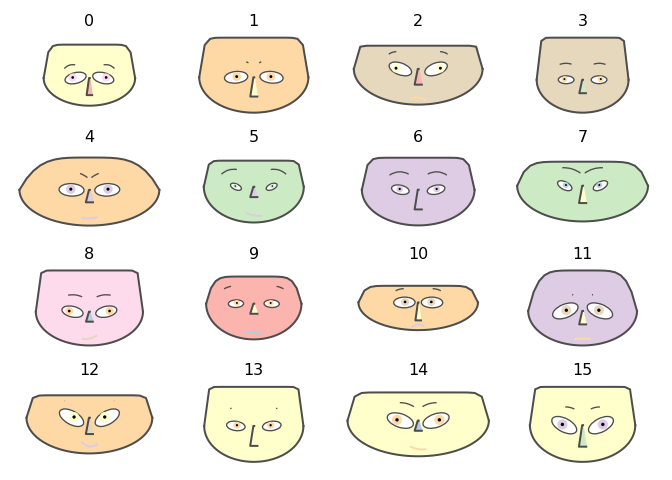
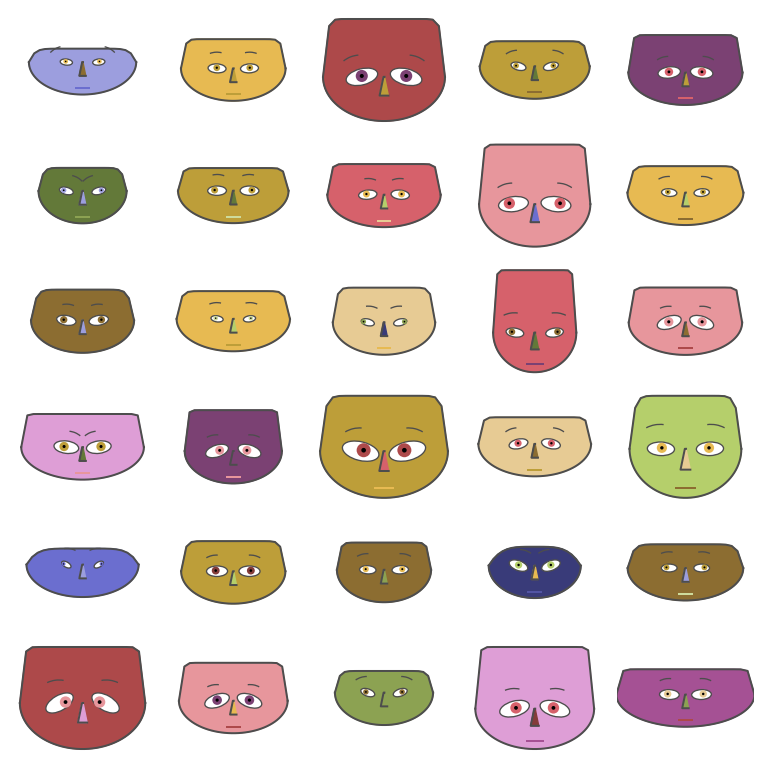
Makes of Chernoff face diagrams.
Project description
Introduction
This Python package implements the function chernoff_face that
generates Chernoff
diagrams.
The design, implementation strategy, and unit tests closely resemble
the Wolfram Repository Function (WFR)
ChernoffFace,
[AAf1], and the original Mathematica package
“ChernoffFaces.m”,
[AAp1].
Installation
To install from GitHub use the shell command:
python -m pip install git+https://github.com/antononcube/Python-packages.git#egg=ChernoffFace\&subdirectory=ChernoffFace
To install from PyPI:
python -m pip install ChernoffFace
Usage examples
Setup
from ChernoffFace import *
import numpy
import matplotlib.cm
Random data
# Generate data
numpy.random.seed(32)
data = numpy.random.rand(16, 12)

# Make Chernoff faces
fig = chernoff_face(data=data,
                    titles=[str(x) for x in list(range(len(data)))],
                    color_mapper=matplotlib.cm.Pastel1)

# Display
fig.tight_layout()
matplotlib.pyplot.show()
 ## Employee attitude data
Get Employee attitude data
dfData=load_employee_attitude_data_frame()
dfData.head()

##    Rating  Complaints  Privileges  Learning  Raises  Critical  Advancement
## 0      43          51          30        39      61        92           45
## 1      63          64          51        54      63        73           47
## 2      71          70          68        69      76        86           48
## 3      61          63          45        47      54        84           35
## 4      81          78          56        66      71        83           47
Get the numerical data of the data frame into an array:
data = dfData.to_numpy()
Rescale the variables:
data2 = variables_rescale(data)
Make the corresponding Chernoff faces using USA state names as titles:
fig = chernoff_face(data=data2,
                    n_columns=5,
                    long_faces=False,
                    color_mapper=matplotlib.cm.tab20b,
                    figsize=(8, 8), dpi=200)
Display:
fig.tight_layout()
matplotlib.pyplot.show()

USA arrests data
Get USA arrests data:
dfData=load_usa_arrests_data_frame()
dfData.head()

##     StateName  Murder  Assault  UrbanPopulation  Rape
## 0     Alabama    13.2      236               58  21.2
## 1      Alaska    10.0      263               48  44.5
## 2     Arizona     8.1      294               80  31.0
## 3    Arkansas     8.8      190               50  19.5
## 4  California     9.0      276               91  40.6
Get the numerical data of the data frame into an array:
data = dfData.to_numpy()
data = data[:, 1:5]
Rescale the variables:
data2 = variables_rescale(data)
Make the corresponding Chernoff faces using USA state names as titles:
fig = chernoff_face(data=data2,
                    n_columns=5,
                    long_faces=False,
                    color_mapper=matplotlib.cm.jet,
                    titles=dfData.StateName.tolist(),
                    figsize=(12, 12), dpi=200)
Display:
fig.tight_layout()
matplotlib.pyplot.show()

References
Articles
[AA1] Anton Antonov, “Making Chernoff faces for data visualization”, (2016), MathematicaForPrediction at WordPress.
Functions and packages
[AAf1] Anton Antonov,
ChernoffFace,
(2019), Wolfram Function
Repository.
[AAp1] Anton Antonov, Chernoff faces implementation in Mathematica, (2016), MathematicaForPrediction at GitHub.
Project details
Download files
Download the file for your platform. If you're not sure which to choose, learn more about installing packages.
Source Distribution
Built Distribution
Hashes for ChernoffFace-0.1.1-py3-none-any.whl
| Algorithm | Hash digest | |
|---|---|---|
| SHA256 | 33c90928b1e7a26cb1f5a486126a74d4e5d692113859e1c22cd950474e66d519 |
|
| MD5 | 761069791631f0b098b31fe1ee482241 |
|
| BLAKE2b-256 | 2a576963a5cecbe9b6b364aa5d56592074358a6ea8343d08f84cb217e9c61c96 |


