Nice gui for ImageMagick
Project description
FotoKilof - GUI for ImageMagick
GUI for the most used (by me) ImageMagick functionality for processing pictures.
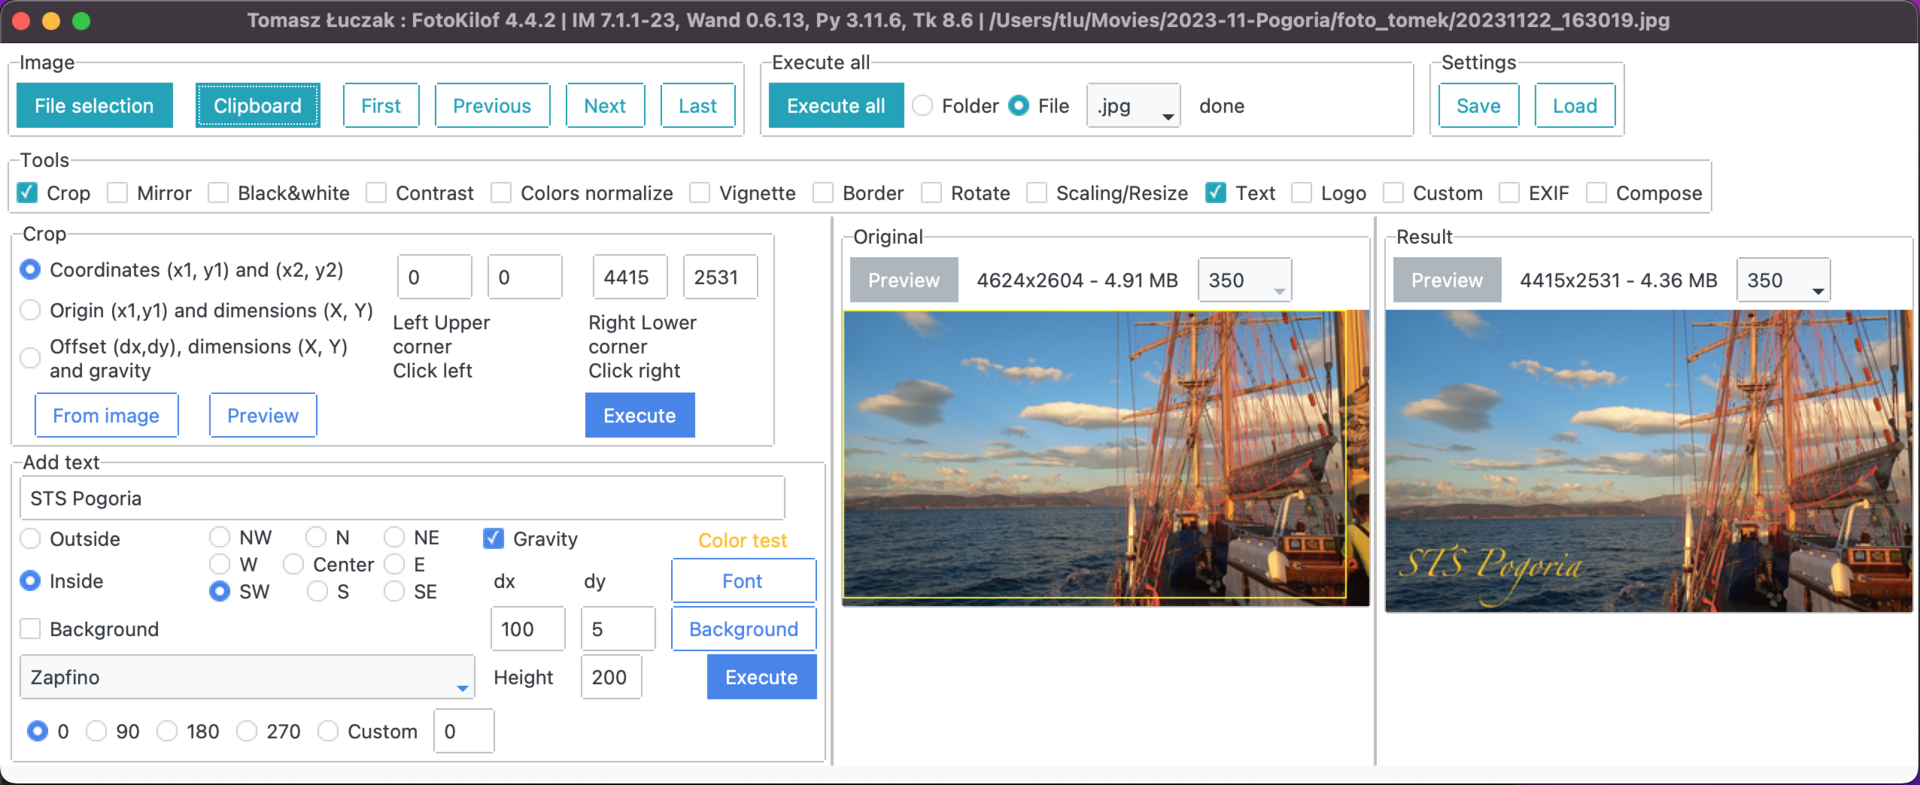
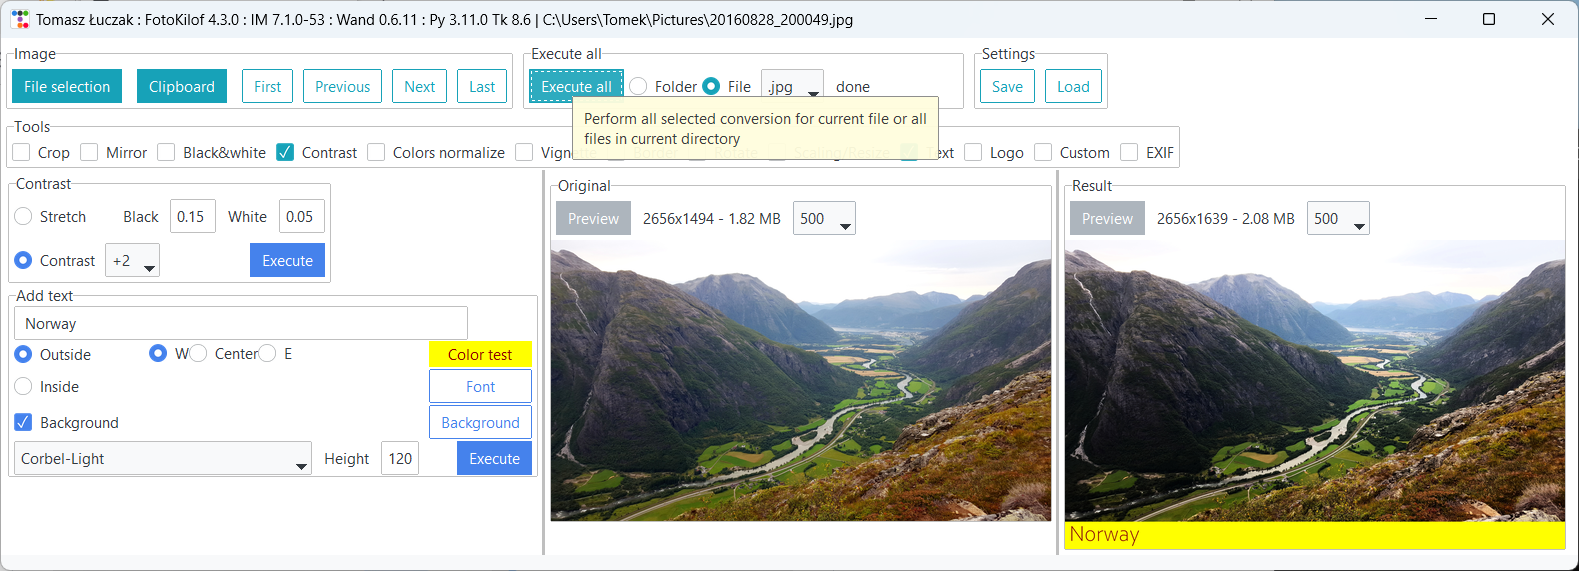
Screenshots
Linux
Mac OSX
Windows
Graphics conversion
- scaling/resize,
- crop,
- text annotation, inside or outside of picture (mems generator),
- border around picture,
- rotation,
- black-white or sepia,
- contrast increase/decrease or normalize or histogram stretching,
- color auto-level or equalize,
- adding logo image o picture,
- file formats: JPG, PNG, TIFF, SVG
- format conversion into JPG, PNG, TIFF.
Functionality:
- processing JPG, PNG, SVG and TIFF images,
- processing picture in the fly, originals are safe,
- processing single file or whole directory,
- take screenshot (Linux) or get picture from clipboard (Windows) and use it as source picture,
- after processing results is copied into clipboard (Windows),
- display selected tools,
- tools selection,
- preview orignal and result,
- predefined rotation: 90, 180 and 270 degree or custom,
- crop selection via click on preview or coordinates,
- crop coordinates:
- two corners (upper left and lower right),
- upper left corner and width plus height,
- gravity, width plus height plus offset,
- text: color, font and size selection,
- customized sepia,
- equalize by channel,
- contrast between -3 and +3,
- customized contrast stretching,
- histograms of original and result pictures,
- fast file navigation: First, Prev, Next, Last,
- own command editor,
- own command can be composed from executed commands,
- is possible to use other ImageMagick commands, eg. -gaussian-blur etc.,
- logging conversion,
- GraphickMagick is supported partialy.
User manual
Available translations
Available: English, Polish, German, Bulgarian and Indonesian.
Run
As pypi package
Recommended option is get as PyPi package by PIP
python3 -m pip install fotokilof
fotokilof
As package
Packages are build from tim to time. The best way is use from PyPi as described above
Download
In Release you can find current binary version for Windows (8.1 and newer) and Linux
Run
- unzip downloaded
fotokilof-* - optionaly make shortcut on the desktop,
- run fotokilof.
Windows
But the best way is to install:
- fresh ImageMagick (remember to add path into
%PATH%environment variable during installation) - fresh Python3 (remember to add path into
%PATH%environment variable during installation) - install from PyPi:
python -m pip install fotokilof
To make life easier, package fotokilof-windows-x64.zip contains ImageMagick binaries.
But binaries can be old, because recommended way is via PyPi.
Requirements
- Windows, Linux, MacOS X, BSD,
- FullHD screen for comfort work.
Thanks
- Friends - some ideas and testing,
- Max von Forell - German translation,
- Bozhidar Kirev - Bulgarian translation,
- Alexander Ignatov - Bulgarian translation,
- Afif Hendrawan - Indonesian translation,
- Sebastian Hiebl - python packaging,
- Matt Sephton - ideas for packing gui,
- emsspree - update german translation, jpeg
Project details
Release history Release notifications | RSS feed
Download files
Download the file for your platform. If you're not sure which to choose, learn more about installing packages.
Source Distribution
FotoKilof-3.7.8.tar.gz
(7.2 MB
view hashes)
Built Distribution
FotoKilof-3.7.8-py3-none-any.whl
(64.7 kB
view hashes)
Close
Hashes for FotoKilof-3.7.8-py3-none-any.whl
| Algorithm | Hash digest | |
|---|---|---|
| SHA256 | a1b2aa7fc34f48bd38b13a90321cd57179d4557b5fb509bafd9c284be44aaa1f |
|
| MD5 | 3514fbab30cb4cad7a30e1d25ec15e34 |
|
| BLAKE2b-256 | 140ac3976f1bfbb56fe3fca85445c7148e6ee76ee7bfc5c2bc3b61b262c6eed3 |


