A package for building molecular dynamics inputs for SPONGE
Project description
Xponge
1. Introduction
Xponge is a lightweight and easy-customizing python package to perform pre- and post-processing of molecular simulations.
Xponge is mainly designed for the molecular dynamics (MD) program SPONGE), but it can also output some general format files such as mol2 and PDB, so it may help the other molecular modelling programs too.
2. Installation
Xponge
Xponge, the python package itself is easy to install, and there are two ways to install.
Your python version > 3.6, you can just directly pip install the Xponge package.
(1) pip
pip install Xponge
(2) source
-
2.1 download or clone the source of this repository
-
2.2 open the directory where you download or clone the repository
-
2.3 run the command
python setup.py install
After the installation, you can use the following command to test whether your installation is successful.
python -m Xponge test -o test
or just
Xponge test
You can use any visulization tool such as VMD and pymol to see the generated PDB file and the mol2 file to check the results. You can also compare all the files you get with the files in the gitee or github repository.
Dependent packages
Although the basic usage of Xponge do not depend on other packages, some complicated functions (quantum mechanics calculation for example) rely on some other packages. When an ImportError is raised, you need to install the module yourself. Most of the module can be installed via pip, while the RDKit package should be installed via conda.
Here is the list of all packages which may be used
| package name | description | how to install |
|---|---|---|
| XpongeLib | c/c++ compiled library for Xponge | pip install XpongeLib |
| pyscf | quantum chemistry | pip install pyscf |
| geometric | geometry optimization | pip install geometric |
| rdkit | cheminformatics | conda install -c rdkit rdkit |
| MDAnalysis | trajectory analysis | pip install MDAnalysis |
3. Usage
Xponge has two ways to use. One way is to direct to use Xponge or python -m Xponge in the command line, the other way is to write python scripts and then use python to execute the scripts.
For the first way to use, the command Xponge in the command line now only support a few well-wrapped subcommands. Use Xponge -h to see the detailed usage. As for the second way to use, the detailed API documents can be seen in the gitee or github repository
Here we will give some detailed and well-classified instructions on what you can do with Xponge.
Creating Systems
the existing force fields in Xponge now
| Force Field Style | Molecule Type | Force Field | Module |
|---|---|---|---|
| AMBER | protein | ff14SB | Xponge.forcefield.AMBER.ff14SB |
| protein | ff19SB | Xponge.forcefield.AMBER.ff19SB | |
| lipids | lipid14 | Xponge.forcefield.AMBER.lipid14 | |
| lipids | lipid17 | Xponge.forcefield.AMBER.lipid17 | |
| organic molecules | gaff | Xponge.forcefield.AMBER.gaff | |
| water/ions | tip3p | Xponge.forcefield.AMBER.tip3p | |
| water/ions | spce | Xponge.forcefield.AMBER.spce | |
| water/ions | opc | Xponge.forcefield.AMBER.opc | |
| water/ions | tip4pew | Xponge.forcefield.AMBER.tip4pew | |
| CHARMM27 | protein | protein | Xponge.forcefield.CHARMM27.protein |
| water/ions | tip3p | Xponge.forcefield.CHARMM27.tip3p | |
| water/ions | tips3p | Xponge.forcefield.CHARMM27.tips3p |
(1) Existing Force Field, Existing Residue Type, No Initial Coordinate
Here, let's build an alanine tetrapeptide molecule in vacuum under the ff14SB force field.
First of all, you need to import the force field module
import Xponge
import Xponge.forcefield.AMBER.ff14SB
You can get some information on the references.
Reference for ff14SB.py:
  James A. Maier, Carmenza Martinez, Koushik Kasavajhala, Lauren Wickstrom, Kevin E. Hauser, and Carlos Simmerling
    ff14SB: Improving the accuracy of protein side chain and backbone parameters from ff99SB
    Journal of Chemical Theory and Computation 2015 11 (8), 3696-3713
    DOI: 10.1021/acs.jctc.5b00255
You can print all of the residue types imported. (This is not compulsory to create the system, but helpful for you to understand Xponge)
print(Xponge.ResidueType.types)
Then you can get,
{'ACE': Type of Residue: ACE, 'ASH': Type of Residue: ASH, 'CYM': Type of Residue: CYM, 'GLH': Type of Residue: GLH, 'LYN': Type of Residue: LYN, 'NME': Type of Residue: NME, 'NALA': Type of Residue: NALA, 'ALA': Type of Residue: ALA, 'CALA': Type of Residue: CALA, 'NARG': Type of Residue: NARG, 'ARG': Type of Residue: ARG, 'CARG': Type of Residue: CARG, 'NASN': Type of Residue: NASN, 'ASN': Type of Residue: ASN, 'CASN': Type of Residue: CASN, 'NASP': Type of Residue: NASP, 'ASP': Type of Residue: ASP, 'CASP': Type of Residue: CASP, 'NCYS': Type of Residue: NCYS, 'CYS': Type of Residue: CYS, 'CCYS': Type of Residue: CCYS, 'NCYX': Type of Residue: NCYX, 'CYX': Type of Residue: CYX, 'CCYX': Type of Residue: CCYX, 'NGLN': Type of Residue: NGLN, 'GLN': Type of Residue: GLN, 'CGLN': Type of Residue: CGLN, 'NGLU': Type of Residue: NGLU, 'GLU': Type of Residue: GLU, 'CGLU': Type of Residue: CGLU, 'NGLY': Type of Residue: NGLY, 'GLY': Type of Residue: GLY, 'CGLY': Type of Residue: CGLY, 'NHID': Type of Residue: NHID, 'HID': Type of Residue: HID, 'CHID': Type of Residue: CHID, 'NHIE': Type of Residue: NHIE, 'HIE': Type of Residue: HIE, 'CHIE': Type of Residue: CHIE, 'NHIP': Type of Residue: NHIP, 'HIP': Type of Residue: HIP, 'CHIP': Type of Residue: CHIP, 'NHE': Type of Residue: NHE, 'HYP': Type of Residue: HYP, 'CHYP': Type of Residue: CHYP, 'NILE': Type of Residue: NILE, 'ILE': Type of Residue: ILE, 'CILE': Type of Residue: CILE, 'NLEU': Type of Residue: NLEU, 'LEU': Type of Residue: LEU, 'CLEU': Type of Residue: CLEU, 'NLYS': Type of Residue: NLYS, 'LYS': Type of Residue: LYS, 'CLYS': Type of Residue: CLYS, 'NMET': Type of Residue: NMET, 'MET': Type of Residue: MET, 'CMET': Type of Residue: CMET, 'NPHE': Type of Residue: NPHE, 'PHE': Type of Residue: PHE, 'CPHE': Type of Residue: CPHE, 'NPRO': Type of Residue: NPRO, 'PRO': Type of Residue: PRO, 'CPRO': Type of Residue: CPRO, 'NSER': Type of Residue: NSER, 'SER': Type of Residue: SER, 'CSER': Type of Residue: CSER, 'NTHR': Type of Residue: NTHR, 'THR': Type of Residue: THR, 'CTHR': Type of Residue: CTHR, 'NTRP': Type of Residue: NTRP, 'TRP': Type of Residue: TRP, 'CTRP': Type of Residue: CTRP, 'NTYR': Type of Residue: NTYR, 'TYR': Type of Residue: TYR, 'CTYR': Type of Residue: CTYR, 'NVAL': Type of Residue: NVAL, 'VAL': Type of Residue: VAL, 'CVAL': Type of Residue: CVAL, 'HIS': Type of Residue: HIE, 'NHIS': Type of Residue: NHIE, 'CHIS': Type of Residue: CHIE}
All of the residue type will be stored in the main dict too, and the residues can be linked by adding and multiplying, so you can use the following simple command to get an alanine tetrapeptide molecule.
protein = ACE + ALA * 3 + NME
Now what you need to do is just to save your protein in a format you like. The functions to save are Save_PDB, Save_SPONGE_Input, Save_Mol2 and Save_NPZ now.
Save_PDB(protein, "protein.pdb")
Save_SPONGE_Input(protein, "protein")
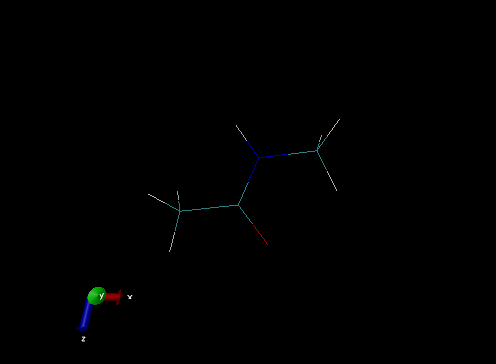
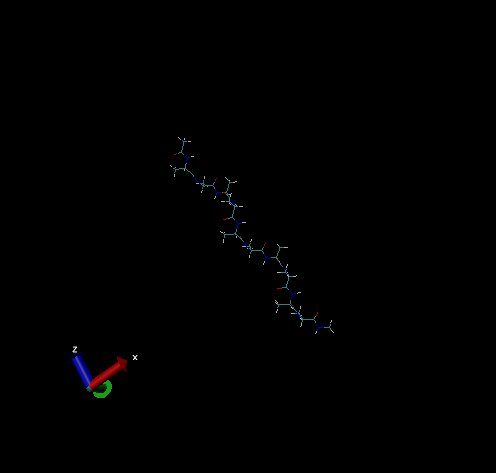
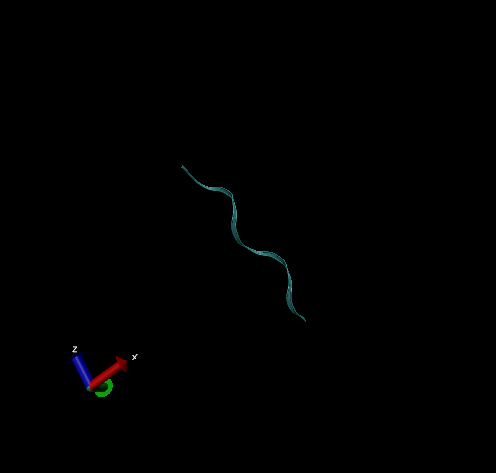
You can use VMD to visualize the molecule
vmd protein.pdb
You can also use the SPONGE VMD plugin to visualize the molecule
vmd -sponge_mass ./protein_mass.txt -sponge_crd ./protein_coordinate.txt
Then you can see,
Also, you can do the molecular dynamics simulations by SPONGE. Here, we modify the last line of the file "protein_coordinate.txt" to "50.0 50.0 50.0 90.0 90.0 90.0" to avoid the error that the system is too small for SPONGE to do the simulation.
Write a "mdin.txt" file of SPONGE, and run
basic test of Xponge
    mode = NVT
    thermostat = Andersen_thermostat
    dt = 2e-3
    constrain_mode = SHAKE
    cutoff = 8.0
    step_limit = 5000
    default_in_file_prefix = protein
Then we can get
---------------------------------------------------------------------------------------
        step =         1000,         time =        2.000,  temperature =       305.35,
   potential =        47.21,           LJ =        -3.73,          PME =      -232.74,
     nb14_LJ =        26.62,      nb14_EE =       196.30,         bond =        12.74,
       angle =        16.63,     dihedral =        32.51,
---------------------------------------------------------------------------------------
        step =         2000,         time =        4.000,  temperature =       194.94,
   potential =        51.01,           LJ =        -2.02,          PME =      -229.18,
     nb14_LJ =        30.27,      nb14_EE =       188.48,         bond =        12.04,
       angle =        22.31,     dihedral =        30.75,
---------------------------------------------------------------------------------------
        step =         3000,         time =        6.000,  temperature =       246.57,
   potential =        49.60,           LJ =        -4.42,          PME =      -222.75,
     nb14_LJ =        31.28,      nb14_EE =       189.09,         bond =        11.10,
       angle =        16.47,     dihedral =        30.80,
---------------------------------------------------------------------------------------
        step =         4000,         time =        8.000,  temperature =       273.81,
   potential =        55.53,           LJ =        -4.54,          PME =      -231.54,
     nb14_LJ =        30.79,      nb14_EE =       196.70,         bond =         9.60,
       angle =        18.88,     dihedral =        29.40,
---------------------------------------------------------------------------------------
        step =         5000,         time =       10.000,  temperature =       344.12,
   potential =        48.44,           LJ =        -5.35,          PME =      -230.99,
     nb14_LJ =        29.09,      nb14_EE =       198.53,         bond =         6.32,
       angle =        19.48,     dihedral =        31.79,
---------------------------------------------------------------------------------------
Some contents are the same in the following examples, so the unnecessary results will not be shown in the following examples.
The complete python script is
import Xponge
import Xponge.forcefield.AMBER.ff14SB
protein = ACE + ALA * 3 + NME
Save_PDB(protein, "protein.pdb")
Save_SPONGE_Input(protein, "protein")
(2) Existing Force Field, Existing Residue Type, Initial Coordinate
Now, it is recommended to load from a PDB file.
First of all, you need to import the force field module.
import Xponge
import Xponge.forcefield.AMBER.ff14SB
Then, you need to load a PDB file.
example file: Generated by [H++](H++ (web-based computational prediction of protonation states and pK of ionizable groups in macromolecules) (vt.edu))
protein = loadpdb("0.15_80_10_pH6.5_6lzg.result.pdb")
The complete python script is
import Xponge
import Xponge.forcefield.AMBER.ff14SB
protein = loadpdb("0.15_80_10_pH6.5_6lzg.result.pdb")
Save_PDB(protein, "protein.pdb")
Save_SPONGE_Input(protein, "protein")
ATTENSION
1. Protein Data Bank (PDB) format is a standard for files containing atomic coordinates. If you want to modify a PDB file yourself, please make sure that you understand the format
   2. The pdb files downloaded from the online PDB services, [RCSB]([RCSB PDB: Homepage](https://www.rcsb.org/)) for example, do not include hydrogen. The simplest way to do is to use `protein.Add_Missing_Atoms()`, but some more complicated pre-processes by online services such as H++ may be more accurate.
(3) Existing Force Field, Non-existing Residue Type, Known Information
A new Xponge.ResidueType instance need to be created, and then the following steps are just like (1) and (2).
There are two ways to create a new Xponge.ResidueType instance, and here I take a water residue under gaff as an example here.
mol2
The first way to create a new Xponge.ResidueType instance is to load a mol2 file. Here we write a mol2 file named "WAT.mol2",
@<TRIPOS>MOLECULE
TP3
    3     2     1     0     1
SMALL
USER_CHARGES
@<TRIPOS>ATOM
  1 O       0.000000    0.000000    0.000000 oh    1 WAT    -0.8340 ****
  2 H1      0.957200    0.000000    0.000000 ho    1 WAT     0.4170 ****
  3 H2     -0.239988    0.926627    0.000000 ho    1 WAT     0.4170 ****
@<TRIPOS>BOND
    1     1     2 1
    2     1     3 1
@<TRIPOS>SUBSTRUCTURE
      1  WAT              1 ****               0 ****  ****
Then in python,
import Xponge
import Xponge.forcefield.AMBER.gaff
TP3 = loadmol2("WAT.mol2")
Save_SPONGE_Input(TP3, "tp3")
ATTENSION
- Xponge will create a new Xponge.ResidueType according to the residue names in the mol2 file ("WAT" here), and the return value of
loadmol2is a Xponge.Molecule ("TP3" here). Only the residue type name will be used when loading the PDB files.- The atom type in the mol2 file should match the atom types in the force field, for the example here, the atom type for the oxygen atom and the hydrogen atoms should be the atom types in gaff "oh" and "ho", instead of the element name "O" and "H".
python
It is also okay to direct use a python script.
import Xponge
import Xponge.forcefield.AMBER.gaff
#Create a new residue type
WAT = Xponge.ResidueType(name = "WAT")
#Add atoms to the residue type
WAT.Add_Atom(name = "O", atom_type = Xponge.AtomType.types["oh"], x = 0, y = 0, z = 0)
WAT.O.Update(**{"charge[e]": -0.8340})
WAT.Add_Atom(name = "H1", atom_type = Xponge.AtomType.types["ho"], x = 0.9572, y = 0, z = 0)
WAT.H1.Update(**{"charge[e]": 0.4170})
WAT.Add_Atom(name = "H2", atom_type = Xponge.AtomType.types["ho"], x = -0.239988, y = 0.926627, z = 0)
WAT.H2.Update(**{"charge[e]": 0.4170})
#Add connectivity to the residue type
WAT.Add_Connectivity(WAT.O, WAT.H1)
WAT.Add_Connectivity(WAT.O, WAT.H2)

Save_SPONGE_Input(WAT, "TP3")
(4) Existing Force Field, Non-existing Residue Type, Unknown Information
A new Xponge.ResidueType instance need to be created, and then the following steps are just like (1) and (2).
PubChem
Xponge can directly get the basic information from the PubChem database by name or smiles. Here, take the ethyl 2,6-dimethylbenzoate under gaff as an example.
import Xponge
import Xponge.forcefield.AMBER.gaff

# Get the basic information from the PubChem database by name
assign = Get_Assignment_From_PubChem("ethyl 2,6-dimethylbenzoate", "name")
# by smiles
#assign = Get_Assignment_From_PubChem("CCOC(=O)C1=C(C=CC=C1C)C", "smiles")

# Determin the atom type for each atom
assign.Determine_Atom_Type("GAFF")

# Save the assignment to a mol2 file
Save_Mol2(assign, "EDF_ASN.mol2")

# Get the chemical equivalent atoms and calculate the RESP charge
equivalence = Determine_Equal_Atoms(assign)
# Here in fact, "q" is None, the real charges are stored in assign.charge.
q = assign.Calculate_Charge("RESP", basis = "6-311g*", grid_density = 1,
    extra_equivalence = equivalence, opt = True)
# You can give your own charge, too
#q = np.array([0 for i in range(assign.atom_numbers)])

# Convert the assignment to a Xponge.ResidueType
EDF = assign.To_ResidueType("EDF", q)

# If you want to use GAFF and do not know the parameters in the default GAFF module, you need to run the following line. This is a standard step for GAFF.
Xponge.forcefield.AMBER.gaff.parmchk2_gaff(EDF, "EDF.frcmod")

Save_Mol2(EDF, "EDF.mol2")
The final file "EDF.mol2" is like this
@<TRIPOS>MOLECULE
EDF
 27 27 1 0 1
SMALL
USER_CHARGES
@<TRIPOS>ATOM
     1    O    1.826   -0.000    0.361   os     1      EDF  -0.563454
     2   O1    1.320   -0.002   -1.787    o     1      EDF  -0.656809
     3    C   -0.453   -0.000   -0.196   ca     1      EDF  -0.456248
     4   C1   -1.103   -1.216   -0.002   ca     1      EDF   0.283884
     5   C2   -1.101    1.217   -0.003   ca     1      EDF   0.283884
     6   C3   -2.432   -1.197    0.395   ca     1      EDF  -0.284050
     7   C4   -2.431    1.200    0.394   ca     1      EDF  -0.284050
     8   C5   -3.091    0.002    0.592   ca     1      EDF  -0.137956
     9   C6    0.979   -0.001   -0.654    c     1      EDF   1.049933
    10   C7   -0.382   -2.527   -0.219   c3     1      EDF  -0.396791
    11   C8   -0.379    2.527   -0.221   c3     1      EDF  -0.396791
    12   C9    3.218   -0.000    0.060   c3     1      EDF   0.506223
    13  C10    3.968    0.001    1.373   c3     1      EDF  -0.267413
    14    H   -2.953   -2.125    0.550   ha     1      EDF   0.170890
    15   H1   -2.951    2.129    0.548   ha     1      EDF   0.170890
    16   H2   -4.122    0.002    0.899   ha     1      EDF   0.163931
    17   H3   -0.010   -2.607   -1.234   hc     1      EDF   0.118938
    18   H4    0.467   -2.623    0.451   hc     1      EDF   0.118938
    19   H5   -1.041   -3.366   -0.037   hc     1      EDF   0.118938
    20   H6   -0.007    2.605   -1.236   hc     1      EDF   0.118938
    21   H7   -1.037    3.366   -0.041   hc     1      EDF   0.118938
    22   H8    0.470    2.622    0.449   hc     1      EDF   0.118938
    23   H9    3.449   -0.875   -0.533   h1     1      EDF  -0.046089
    24  H10    3.449    0.872   -0.535   h1     1      EDF  -0.046089
    25  H11    5.037    0.001    1.189   hc     1      EDF   0.064160
    26  H12    3.723    0.880    1.958   hc     1      EDF   0.064160
    27  H13    3.723   -0.876    1.960   hc     1      EDF   0.064160
@<TRIPOS>BOND
     1      1      9 1
     2      1     12 1
     3      2      9 1
     4      3      4 1
     5      3      5 1
     6      3      9 1
     7      4      6 1
     8      4     10 1
     9      5      7 1
    10      5     11 1
    11      6      8 1
    12      6     14 1
    13      7      8 1
    14      7     15 1
    15      8     16 1
    16     10     17 1
    17     10     18 1
    18     10     19 1
    19     11     20 1
    20     11     21 1
    21     11     22 1
    22     12     13 1
    23     12     23 1
    24     12     24 1
    25     13     25 1
    26     13     26 1
    27     13     27 1
@<TRIPOS>SUBSTRUCTURE
    1      EDF      1 ****               0 ****  ****
mol2
You can also get an assignment from a standard mol2 file.
ATTENTION
The mol2 file for the assignments is in the standard format, pay attention to the difference in the bond orders and the atom types.
Simply replace the Get_Assignment_From_PubChem with Get_Assignment_From_Mol2
assign = Get_Assignment_From_Mol2("EDF_ASN.mol2")
# ^   ^   ^   ^   ^   ^   ^   ^   ^   ^   ^   ^   ^
# |   |   |   |   |   |   |   |   |   |   |   |   |
#assign = Get_Assignment_From_PubChem("ethyl 2,6-dimethylbenzoate", "name")
python
Here, take water under gaff as an example.
import Xponge
import Xponge.forcefield.AMBER.gaff
assign = Xponge.assign.Assign()
assign.Add_Atom(element = "O", x = 0, y = 0, z = 0)
assign.Add_Atom(element = "H", x = 0.9572, y = 0, z = 0)
assign.Add_Atom(element = "H", x = -0.239988, y = 0.926627, z = 0)
assign.Add_Bond(0,1,1)
assign.Add_Bond(0,2,1)

# ATTENSION, detailed information on rings and bond types should be determined before the atom type assigning, though no influence on water
assign.Determine_Ring_And_Bond_Type()

assign.Determine_Atom_Type("GAFF")
assign.Calculate_Charge("RESP", extra_equivalence = [[1,2]])

WAT = assign.To_ResidueType("WAT")

# If you want to use GAFF and do not know the parameters in the default GAFF module, you need to run the following line. This is a standard step for GAFF.
Xponge.forcefield.AMBER.gaff.parmchk2_gaff(WAT, "WAT.frcmod")

Save_Mol2(WAT, "WAT.mol2")
The final file "WAT.mol2" is like this
@<TRIPOS>MOLECULE
WAT
 3 2 1 0 1
SMALL
USER_CHARGES
@<TRIPOS>ATOM
     1    O    0.000    0.000    0.000   oh     1      WAT  -0.799534
     2    H    0.957    0.000    0.000   ho     1      WAT   0.399767
     3   H1   -0.240    0.927    0.000   ho     1      WAT   0.399767
@<TRIPOS>BOND
     1      1      2 1
     2      1      3 1
@<TRIPOS>SUBSTRUCTURE
    1      WAT      1 ****               0 ****  ****
(5) Existing Force Field, Non-existing Residue Type, Multi-Residue in One Molecule
mol2
Take an alanine dipeptide molecule under ff14SB as an example
In fact, all the information of an alanine dipeptide molecule is known in ff14SB. We just take an example here. We will create a new residue type named "FALA" here, which is the same as the ALA residue type exactly.
Write a mol2 file named dipeptide.mol2 first
@<TRIPOS>MOLECULE
ACE
 22 21 3 0 1
SMALL
USER_CHARGES
@<TRIPOS>ATOM
     1   H1    0.466   -8.051    1.242   HC     1      ACE   0.112300
     2  CH3    0.289   -7.339    0.436   CT     1      ACE  -0.366200
     3   H2   -0.703   -6.901    0.548   HC     1      ACE   0.112300
     4   H3    0.352   -7.853   -0.524   HC     1      ACE   0.112300
     5    C    1.325   -6.213    0.457    C     1      ACE   0.597200
     6    O    2.209   -6.195    1.311    O     1      ACE  -0.567900
     7    N    1.275   -5.267   -0.433    N     2      FALA  -0.415700
     8    H    0.563   -5.249   -1.150    H     2      FALA   0.271900
     9   CA    2.256   -4.201   -0.413   CX     2      FALA   0.033700
    10   HA    2.199   -3.671    0.538   H1     2      FALA   0.082300
    11   CB    3.668   -4.752   -0.580   CT     2      FALA  -0.182500
    12  HB1    3.744   -5.277   -1.532   HC     2      FALA   0.060300
    13  HB2    4.384   -3.930   -0.561   HC     2      FALA   0.060300
    14  HB3    3.888   -5.443    0.234   HC     2      FALA   0.060300
    15    C    2.009   -3.207   -1.539    C     2      FALA   0.597300
    16    O    1.072   -3.368   -2.318    O     2      FALA  -0.567900
    17    N    2.791   -2.179   -1.682    N     3      NME  -0.415700
    18    H    3.571   -2.011   -1.063    H     3      NME   0.271900
    19  CH3    2.555   -1.233   -2.754   CT     3      NME  -0.149000
    20 HH31    1.686   -1.546   -3.331   H1     3      NME   0.097600
    21 HH32    2.374   -0.244   -2.333   H1     3      NME   0.097600
    22 HH33    3.429   -1.195   -3.405   H1     3      NME   0.097600
@<TRIPOS>BOND
     1      1      2 1
     2      2      3 1
     3      2      4 1
     4      2      5 1
     5      5      6 1
     6      5      7 1
     7      7      8 1
     8      7      9 1
     9      9     10 1
    10      9     11 1
    11      9     15 1
    12     11     12 1
    13     11     13 1
    14     11     14 1
    15     15     16 1
    16     15     17 1
    17     17     18 1
    18     17     19 1
    19     19     20 1
    20     19     21 1
    21     19     22 1
@<TRIPOS>SUBSTRUCTURE
    1      ACE      1 ****               0 ****  ****
    2      ALA      7 ****               0 ****  ****
    3      NME     17 ****               0 ****  ****
Then load the mol2 file
import Xponge
import Xponge.forcefield.AMBER.ff14SB

protein = loadmol2("dipeptide.mol2")
If you do not want to use + or * to get a new molecule from the residue types, you do not need to do more now. Otherwise, you should give the linkage information as the follow part do
res = Xponge.ResidueType.types["FALA"]
res.head = "N"  # the head of the residue(the atom to link the previous residue)is the atom with a atom name "N"
res.head_length = 1.3  # the bond length to link the previous residue is 1.3 angstrom
res.head_next = "CA" # the head next atom of the residue(the second atom to link the previous residue)is the atom with a atom name "CA"
res.tail = "C" # the tail of the residue(the atom to link the latter residue)is the atom with a atom name "C"
res.tail_length = 1.3 # the bond length to link the latter residue is 1.3 angstrom
res.tail_next = "CA" # the tail next atom of the residue(the second atom to link the latter residue)is the atom with a atom name "CA"

import numpy as np
#When linking to the previous residue, the angle of the CA-N-tail of the preivous residue is 120/180 * np.pi
res.head_link_conditions.append({"atoms":["CA", "N"], "parameter": 120/180 * np.pi})
#When linking to the previous residue, the dihedral of the H-CA-N-tail of the preivous residue is -np.pi
res.head_link_conditions.append({"atoms":["H", "CA", "N"], "parameter": -np.pi})
#When linking to the latter residue, the angle of the CA-C-head of the latter residue is 120/180 * np.pi
res.tail_link_conditions.append({"atoms":["CA", "C"], "parameter": 120/180 * np.pi})
#When linking to the latter residue, the dihedral of the O-CA-C-head of the latter residue is -np.pi
res.tail_link_conditions.append({"atoms":["O", "CA", "C"], "parameter": -np.pi})
There are 6 degrees of freedom when linking two residues, 1 bond, 2 angles and 3 dihedral, where the only bond is determined by the bond length, and one of the dihedrals is the main chain dihedral (tail_next - tail - head - head_next). The main chain dihedral is set to 180 degrees to prevent overlap. Define an angle and a dihedral condition for the previous residue and the next residue respectively to fix the remaining 4 degrees.
If you want the terminal residue to use a different structure when loading the PDB file, then you need to do like this
Xponge.GlobalSetting.Add_PDB_Residue_Name_Mapping("head", "FALA", "NALA")
Xponge.GlobalSetting.Add_PDB_Residue_Name_Mapping("tail", "FALA", "CALA")
In particular, additional settings are required to discriminate different proton states for histidine and disulfide bonds for cysteine
# These codes have been written in Xponge. You do not need to do this for the existing histidine and cysteine.
Xponge.GlobalSetting.HISMap["DeltaH"] = "HD1"
Xponge.GlobalSetting.HISMap["EpsilonH"] = "HE2"
Xponge.GlobalSetting.HISMap["HIS"].update({"HIS": {"HID":"HID", "HIE":"HIE", "HIP":"HIP"},
                                    "CHIS":{"HID":"CHID", "HIE":"CHIE", "HIP":"CHIP"},
                                    "NHIS":{"HID":"NHID", "HIE":"NHIE", "HIP":"NHIP"}})
Xponge.ResidueType.types["CYX"].connect_atoms["ssbond"] = "SG"
python
Create a new Xponge.ResidueType instance like (2) do, and then following the steps of creating from the mol2 files.
(6) Non-existing Force Field, New Parameters Only
string/text file/npz file
Take an example of nitro-methane in the form of an OPLSAA force field constructed in the combination of AMBER force field. The data were obtained from GMXTPP.
import Xponge
import Xponge.forcefield.AMBER

# New atom types from string
Xponge.AtomType.New_From_String("""name  mass  charge[e] LJtype
opls_760  14.01   0.54   opls_760
opls_761  16.00  -0.37   opls_761
opls_762  12.01   0.02   opls_762
opls_763  1.008   0.06   opls_763""")

# New LJ information from string
Xponge.forcefield.BASE.LJ.LJType.New_From_String("""name  sigma[nm]  epsilon[kJ/mol]
opls_760-opls_760 0.3250000    0.5020800
opls_761-opls_761 0.2960000    0.7112800
opls_762-opls_762 0.3500000    0.2761440
opls_763-opls_763 0.2500000    0.0627600
""")

# New bond information from dict
temp_dict =  {"opls_762-opls_763": {"b[nm]":0.109, "k[kJ/mol·nm^-2]": 284512},
              "opls_762-opls_760": {"b[nm]":0.14900, "k[kJ/mol·nm^-2]": 313800},
              "opls_760-opls_761": {"b[nm]":0.1225, "k[kJ/mol·nm^-2]": 460240}}
Xponge.forcefield.BASE.BOND.BondType.New_From_Dict(temp_dict)

# New angle information from a text file
Xponge.forcefield.BASE.ANGLE.AngleType.New_From_File("test_angle.txt")

# New proper dihedral information from string
Xponge.forcefield.BASE.DIHEDRAL.ProperType.New_From_String("""name phi0[degree] k[kJ/mol] periodicity  reset
opls_763-opls_762-opls_760-opls_761  0 0 0 1
""")

# New improper dihedral information from string
Xponge.forcefield.BASE.DIHEDRAL.ImproperType.New_From_String("""name phi0[degree] k[kJ/mol] periodicity
opls_761-opls_761-opls_760-X 180.0     43.93200   2
""")

# New non bonded 1-4 energy parameter from string
Xponge.forcefield.BASE.NB14.NB14Type.New_From_String("""name kLJ kee
opls_763-opls_761 0.5 0.5
""")

# New Residue Type
NIM = Xponge.ResidueType(name = "NIM")
# Add atoms to the new residue type
NIM.Add_Atom(name = "CT", atom_type = Xponge.AtomType.types["opls_762"], x = 1.107, y = 1.13, z = 1.117)
NIM.Add_Atom(name = "HC1", atom_type = Xponge.AtomType.types["opls_763"], x = 1.143, y = 1.029, z = 1.117)
NIM.Add_Atom(name = "HC2", atom_type = Xponge.AtomType.types["opls_763"], x = 1.143, y = 1.18, z = 1.03)
NIM.Add_Atom(name = "HC3", atom_type = Xponge.AtomType.types["opls_763"], x = 1., y = 1.13, z = 1.117)
NIM.Add_Atom(name = "NO", atom_type = Xponge.AtomType.types["opls_760"], x = 1.156, y = 1.199, z = 1.237)
NIM.Add_Atom(name = "ON1", atom_type = Xponge.AtomType.types["opls_761"], x = 1.177, y = 1.321, z = 1.234)
NIM.Add_Atom(name = "ON2", atom_type = Xponge.AtomType.types["opls_761"], x = 1.177, y = 1.135, z = 1.341)

# Add connectivity to the new residue type
NIM.Add_Connectivity(NIM.CT, NIM.HC1)
NIM.Add_Connectivity(NIM.CT, NIM.HC2)
NIM.Add_Connectivity(NIM.CT, NIM.HC3)
NIM.Add_Connectivity(NIM.CT, NIM.NO)
NIM.Add_Connectivity(NIM.ON1, NIM.NO)
NIM.Add_Connectivity(NIM.ON2, NIM.NO)

Save_PDB(NIM)
Save_SPONGE_Input(NIM)
Here is the contents of the text file "test_angle.txt"
name b[degree] k[kJ/mol·rad^-2]
opls_763-opls_762-opls_763  107.800    276.144
opls_763-opls_762-opls_760  105.000    292.880
opls_762-opls_760-opls_761  117.500    669.440
opls_761-opls_760-opls_761  125.000    669.440
parmdat file/frcmod file
parmdat and frcmod files are AMBER-style files. Here, take the implementation of ff19SB as an example.
import Xponge
import Xponge.forcefield.AMBER

# loadparmdat returns the coresponding strings
atoms, bonds, angles, propers, impropers, LJs = loadparmdat("parm19.dat")

# New From String
Xponge.AtomType.New_From_String(atoms)
Xponge.forcefield.BASE.BOND.BondType.New_From_String(bonds)
Xponge.forcefield.BASE.ANGLE.AngleType.New_From_String(angles)
Xponge.forcefield.BASE.DIHEDRAL.ProperType.New_From_String(propers)
Xponge.forcefield.BASE.DIHEDRAL.ImproperType.New_From_String(impropers)
Xponge.forcefield.BASE.LJ.LJType.New_From_String(LJs)

# loadfrcmod returns the coresponding strings
atoms, bonds, angles, propers, impropers, LJs, cmap = loadfrcmod("ff19SB.frcmod")

# New From String
Xponge.AtomType.New_From_String(atoms)
Xponge.forcefield.BASE.BOND.BondType.New_From_String(bonds)
Xponge.forcefield.BASE.ANGLE.AngleType.New_From_String(angles)
Xponge.forcefield.BASE.DIHEDRAL.ProperType.New_From_String(propers)
Xponge.forcefield.BASE.DIHEDRAL.ImproperType.New_From_String(impropers)
Xponge.forcefield.BASE.LJ.LJType.New_From_String(LJs)

from Xponge.forcefield.BASE import RCMAP
Xponge.forcefield.BASE.RCMAP.CMAP.Residue_Map.update(cmap)
forcefield.itp file
forcefield.itp files are the GROMACS-style files. Here, take the implementation of the protein force field of CHARMM27 as an example.
import Xponge
import Xponge.forcefield.CHARMM27
# loadffitp returns a dict
output = loadffitp("forcefield.itp")
# New from string
Xponge.AtomType.New_From_String(output["atomtypes"])
Xponge.forcefield.BASE.BOND.BondType.New_From_String(output["bonds"])
output["dihedrals"] += "X-X-X-X 0 0 1 0\n"
Xponge.forcefield.BASE.DIHEDRAL.ProperType.New_From_String(output["dihedrals"])
Xponge.forcefield.BASE.LJ.LJType.New_From_String(output["LJ"])
Xponge.forcefield.BASE.UREY_BRADLEY.UreyBradleyType.New_From_String(output["Urey-Bradley"])
Xponge.forcefield.BASE.IMPROPER.ImproperType.New_From_String(output["impropers"])
Xponge.forcefield.BASE.NB14_EXTRA.NB14Type.New_From_String(output["nb14_extra"])
Xponge.forcefield.BASE.NB14.NB14Type.New_From_String(output["nb14"])
# For atom-based cmap, New_From_Dict should be used
Xponge.forcefield.BASE.ACMAP.CMAP.New_From_Dict(output["cmaps"])
loadffitpis not fully functional at the moment, and does not always support the function form which GROMACS supports. For the unsupported form, it will raise an error.
loadffitpis only used to load the force field itp files. As an example, it only load the contents of [ bondtypes ] instead of the contents of [ bonds ].
loadffitpwill not look for files in the GROMACS path. For example, if you write a line#include “xxx.itp”in yyy.itp, Xponge will only look for "xxx.itp" file under the same folder of the file yyy.itp.
(7) Non-existing Force Field, New Force Field Format
New Non Bonded Force
The information of non bonded forces can be seen as the property of the atom. Take the electrostatic force and the Lennard Jones force as examples.
Electrostatic
This is implemented in Xponge.forcefield.BASE.CHARGE
import Xponge
# Add a new property to the AtomType class
Xponge.AtomType.Add_Property({"charge":float})

# Set the unit of charge
# The meaning of the three parameters is that the unit of the proper "charge" (the first parameter) is the same as "charge" (the second parameter),and the basic unit is "e" (the third parameter).
Xponge.AtomType.Set_Property_Unit("charge", "charge", "e")

#The decorator "@Xponge.Molecule.Set_Save_SPONGE_Input" is used to append the following function to the list which will be used when "Save_SPONGE_Input"
#See the API document for detailed information
@Xponge.Molecule.Set_Save_SPONGE_Input
def write_charge(self):
    towrite = "%d\n"%(len(self.atoms))
    towrite += "\n".join(["%.6f"%(atom.charge * 18.2223) for atom in self.atoms])
    return towrite
Lennard Jones
This is implemented in Xponge.forcefield.BASE.LJ
from ... import *

# Add a new property to the AtomType class
AtomType.Add_Property({"LJtype":str})

# Generate a new pairwise force type class to manage the LJ information
LJType = Generate_New_Pairwise_Force_Type("LJ", {"epsilon": float, "rmin": float, "sigma":float, "A":float, "B":float})

# Set units for properties
LJType.Set_Property_Unit("rmin", "distance", "A")
LJType.Set_Property_Unit("sigma", "distance", "A")
LJType.Set_Property_Unit("epsilon", "energy", "kcal/mol")
LJType.Set_Property_Unit("A", "energy·distance^6", "kcal/mol·A^6")
LJType.Set_Property_Unit("B", "energy·distance^12", "kcal/mol·A^12")

# Add a new unit transfer function
@GlobalSetting.Add_Unit_Transfer_Function(LJType)
def LJ_Unit_Transfer(self):
    if self.A != None and self.B != None:
        if self.B == 0 or self.A == 0:
            self.sigma = 0
            self.epsilon = 0
        else:
            self.sigma = (self.A / self.B) ** (1/6)
            self.epsilon = 0.25 * self.B * self.sigma ** (-6)
        self.A = None
        self.B = None
    if self.sigma != None:
        self.rmin = self.sigma * (4 ** (1/12) / 2)
        self.sigma = None

# Functions you define as you like
def Lorentz_Berthelot_For_A(epsilon1, rmin1, epsilon2, rmin2):
    return np.sqrt(epsilon1 * epsilon2) * ((rmin1 + rmin2) ** 12)

def Lorents_Berthelot_For_B(epsilon1, rmin1, epsilon2, rmin2):
    return np.sqrt(epsilon1 * epsilon2) * 2 * ((rmin1 + rmin2) ** 6)

# the function to be used when "Save_SPONGE_Input"
def write_LJ(self):
    LJtypes = []
    LJtypemap = {}
    for atom in self.atoms:
        if atom.LJtype not in LJtypemap.keys():
            LJtypemap[atom.LJtype] = len(LJtypes)
            LJtypes.append(atom.LJtype)

    As = []
    Bs = []
    for i in range(len(LJtypes)):
        LJ_i = LJType.types[LJtypes[i] + "-" + LJtypes[i]]
        for j in range(len(LJtypes)):
            LJ_j = LJType.types[LJtypes[j] + "-" + LJtypes[j]]
            finded = False
            findnames = [LJtypes[i] + "-" + LJtypes[j], LJtypes[j] + "-" + LJtypes[i]]
            for findname in findnames:
                if findname in LJType.types.keys():
                    finded = True
                    LJ_ij = LJType.types[findname]
                    As.append(LJType.combining_method_A(LJ_ij.epsilon, LJ_ij.rmin, LJ_ij.epsilon, LJ_ij.rmin))
                    Bs.append(LJType.combining_method_B(LJ_ij.epsilon, LJ_ij.rmin, LJ_ij.epsilon, LJ_ij.rmin))
                    break
            if not finded:
                    As.append(LJType.combining_method_A(LJ_i.epsilon, LJ_i.rmin, LJ_j.epsilon, LJ_j.rmin))
                    Bs.append(LJType.combining_method_B(LJ_i.epsilon, LJ_i.rmin, LJ_j.epsilon, LJ_j.rmin))

    checks = {}
    count = 0
    for i in range(len(LJtypes)):
        check_string_A = ""
        check_string_B = ""
        for j in range(len(LJtypes)):
            check_string_A += "%16.7e"%As[count] + " "
            check_string_B += "%16.7e"%Bs[count] + " "
            count += 1

        checks[i] = check_string_A+check_string_B

    same_type = { i: i for i in range(len(LJtypes))}
    for i in range(len(LJtypes)-1, -1, -1):
        for j in range(i+1, len(LJtypes)):
            if checks[i] == checks[j]:
                same_type[j] = i

    real_LJtypes = []
    real_As = []
    real_Bs = []
    tosub = 0
    for i in range(len(LJtypes)):

        if same_type[i] == i:
            real_LJtypes.append(LJtypes[i])
            same_type[i] -= tosub
        else:
            same_type[i] = same_type[same_type[i]]
            tosub += 1

    for i in range(len(real_LJtypes)):
        LJ_i = LJType.types[real_LJtypes[i] + "-" + real_LJtypes[i]]
        for j in range(i+1):
            LJ_j = LJType.types[real_LJtypes[j] + "-" + real_LJtypes[j]]
            finded = False
            findnames = [real_LJtypes[i] + "-" + real_LJtypes[j], real_LJtypes[j] + "-" + real_LJtypes[i]]
            for findname in findnames:
                if findname in LJType.types.keys():
                    finded = True
                    LJ_ij = LJType.types[findname]
                    real_As.append(LJType.combining_method_A(LJ_ij.epsilon, LJ_ij.rmin, LJ_ij.epsilon, LJ_ij.rmin))
                    real_Bs.append(LJType.combining_method_B(LJ_ij.epsilon, LJ_ij.rmin, LJ_ij.epsilon, LJ_ij.rmin))
                    break
            if not finded:
                    real_As.append(LJType.combining_method_A(LJ_i.epsilon, LJ_i.rmin, LJ_j.epsilon, LJ_j.rmin))
                    real_Bs.append(LJType.combining_method_B(LJ_i.epsilon, LJ_i.rmin, LJ_j.epsilon, LJ_j.rmin))


    towrite = "%d %d\n\n"%(len(self.atoms), len(real_LJtypes))
    count = 0
    for i in range(len(real_LJtypes)):
        for j in range(i+1):
            towrite += "%16.7e"%real_As[count] + " "
            count += 1
        towrite +="\n"
    towrite += "\n"

    count = 0
    for i in range(len(real_LJtypes)):
        for j in range(i+1):
            towrite += "%16.7e"%real_Bs[count] + " "
            count += 1
        towrite +="\n"
    towrite += "\n"
    towrite += "\n".join(["%d"%(same_type[LJtypemap[atom.LJtype]]) for atom in self.atoms])
    return towrite

Molecule.Set_Save_SPONGE_Input("LJ")(write_LJ)
New Bonded Force
Atom-Specific Bonded Force
The simplest example is the harmonic bond in Xponge.forcefield.BASE.BOND.
from ... import *

# See the API document for detailed information
BondType = Generate_New_Bonded_Force_Type("bond", "1-2", {"k":float, "b":float}, True)

# Set units
BondType.Set_Property_Unit("k", "energy·distance^-2", "kcal/mol·A^-2")
BondType.Set_Property_Unit("b", "distance", "A")

@Molecule.Set_Save_SPONGE_Input("bond")
def write_bond(self):
    bonds = []
    for bond in self.bonded_forces.get("bond",[]):
        order = list(range(2))
        if bond.k != 0:
            if self.atom_index[bond.atoms[order[0]]] > self.atom_index[bond.atoms[order[-1]]]:
                temp_order = order[::-1]
            else:
                temp_order = order
            bonds.append("%d %d %f %f"%(self.atom_index[bond.atoms[temp_order[0]]]
            , self.atom_index[bond.atoms[temp_order[1]]], bond.k, bond.b))

    if (bonds):
        towrite = "%d\n"%len(bonds)
        bonds.sort(key = lambda x: list(map(int, x.split()[:2])))
        towrite += "\n".join(bonds)

        return towrite
A more complicated example is the dihedral force of AMBER-style force fields in Xponge.forcefield.BASE.DIHEDRAL.
from ... import *

ProperType = Generate_New_Bonded_Force_Type("dihedral", "1-2-3-4", {"k":float, "phi0": float, "periodicity":int}, True, ["k", "phi0", "periodicity"])

ProperType.Set_Property_Unit("k", "energy", "kcal/mol")
ProperType.Set_Property_Unit("phi0", "angle", "rad")


ImproperType = Generate_New_Bonded_Force_Type("improper", "1-3-2-3", {"k":float, "phi0": float, "periodicity":int}, False)
ImproperType.topology_matrix = [[1, 3, 2, 3],
                                [1, 1, 2, 3],
                                [1, 1, 1, 2],
                                [1, 1, 1, 1]]

ImproperType.Set_Property_Unit("k", "energy", "kcal/mol")
ImproperType.Set_Property_Unit("phi0", "angle", "rad")

@ImproperType.Set_Same_Force_Function
def Improper_Same_Force(cls, atom_list):

    temp = []
    if type(atom_list) == str:
        atom_list_temp = [ atom.strip() for atom in atom_list.split("-")]
        center_atom = atom_list_temp.pop(2)
        for atom_permutation in permutations(atom_list_temp):
            atom_permutation = list(atom_permutation)
            atom_permutation.insert(2, center_atom)
            temp.append("-".join(atom_permutation))
    else:
        atom_list_temp = [ atom for atom in atom_list]
        center_atom = atom_list_temp.pop(2)
        for atom_permutation in permutations(atom_list_temp):
            atom_permutation = list(atom_permutation)
            atom_permutation.insert(2, center_atom)
            temp.append(atom_permutation)
    return temp

@Molecule.Set_Save_SPONGE_Input("dihedral")
def write_dihedral(self):
    dihedrals = []
    for dihedral in self.bonded_forces.get("dihedral", []):
        order = list(range(4))
        if self.atom_index[dihedral.atoms[order[0]]] > self.atom_index[dihedral.atoms[order[-1]]]:
            temp_order = order[::-1]
        else:
            temp_order = order
        for i in range(dihedral.multiple_numbers):
            if dihedral.ks[i] != 0:
                dihedrals.append("%d %d %d %d %d %f %f"%(self.atom_index[dihedral.atoms[temp_order[0]]]
                , self.atom_index[dihedral.atoms[temp_order[1]]], self.atom_index[dihedral.atoms[temp_order[2]]]
                , self.atom_index[dihedral.atoms[temp_order[3]]], dihedral.periodicitys[i], dihedral.ks[i], dihedral.phi0s[i]))

    for dihedral in self.bonded_forces.get("improper", []):
        order = list(range(4))
        if dihedral.k != 0:
            if self.atom_index[dihedral.atoms[order[0]]] > self.atom_index[dihedral.atoms[order[-1]]]:
                temp_order = order[::-1]
            else:
                temp_order = order
            dihedrals.append("%d %d %d %d %d %f %f"%(self.atom_index[dihedral.atoms[temp_order[0]]]
            , self.atom_index[dihedral.atoms[temp_order[1]]], self.atom_index[dihedral.atoms[temp_order[2]]]
            , self.atom_index[dihedral.atoms[temp_order[3]]], dihedral.periodicity, dihedral.k, dihedral.phi0))


    if (dihedrals):
        towrite = "%d\n"%len(dihedrals)
        dihedrals.sort(key = lambda x: list(map(float, x.split())))
        towrite += "\n".join(dihedrals)

        return towrite
Residue-Specific Bonded Force
Take the cmap in ff19SB as an example, which is implemented in Xponge.forcefield.BASE.RCMAP.
from ... import *

CMAP = Generate_New_Bonded_Force_Type("residue_specific_cmap", "1-2-3-4-5", {}, False)

CMAP.Residue_Map = {}

@Molecule.Set_Save_SPONGE_Input("cmap")
def write_cmap(self):
    cmaps = []
    resolutions = []
    used_types = []
    used_types_map = {}
    atoms = []
    for cmap in self.bonded_forces.get("residue_specific_cmap",[]):
        resname = cmap.atoms[2].residue.type.name
        if resname in CMAP.Residue_Map.keys():
            if CMAP.Residue_Map[resname]["count"] not in used_types_map.keys():
                used_types_map[CMAP.Residue_Map[resname]["count"]] = len(used_types)
                used_types.append(CMAP.Residue_Map[resname]["parameters"])
                resolutions.append(str(CMAP.Residue_Map[resname]["resolution"]))
            cmaps.append("%d %d %d %d %d %d"%(self.atom_index[cmap.atoms[0]], self.atom_index[cmap.atoms[1]],
            self.atom_index[cmap.atoms[2]], self.atom_index[cmap.atoms[3]],
            self.atom_index[cmap.atoms[4]], used_types_map[CMAP.Residue_Map[resname]["count"]]))


    if (cmap):
        towrite = "%d %d\n"%(len(cmaps), len(resolutions))
        towrite += " ".join(resolutions) + "\n\n"

        for i in range(len(used_types_map)):
            resol = int(resolutions[i])
            for j in range(resol):
                for k in range(resol):
                    towrite += "%f "%used_types[i][j * 24 + k]
                towrite += "\n"
            towrite += "\n"

        towrite += "\n".join(cmaps)

        return towrite
Virtual Atoms
Virtual Atoms are also called dummy atoms, virtual interaction sites or . Virtual atoms are treated as a special type of bonded force in Xponge.
To add a new virtual atom type, you need to modify the file Xponge.forcefield.BASE.VIRTUAL_ATOM.
import Xponge

Xponge.GlobalSetting.VirtualAtomTypes["vatom2"] = 3

VirtualType2 = Generate_New_Bonded_Force_Type("vatom2", "1", {"atom0":int, "atom1":int, "atom2":int, "k1":float, "k2":float}, False)

# Register the new virtual atom types in Xponge.GlobalSetting.VirtualAtomTypes
GlobalSetting.VirtualAtomTypes["vatom2"] = 3

@Molecule.Set_Save_SPONGE_Input("virtual_atom")
def write_virtual_atoms(self):
    vatoms = []
    for vatom in self.bonded_forces.get("vatom2",[]):
        vatoms.append("2 %d %d %d %d %f %f"%(self.atom_index[vatom.atoms[0]],
            self.atom_index[vatom.atoms[0]] + vatom.atom0,
            self.atom_index[vatom.atoms[0]] + vatom.atom1,
            self.atom_index[vatom.atoms[0]] + vatom.atom2,
            vatom.k1, vatom.k2))

    if (vatoms):
        towrite = ""
        towrite += "\n".join(vatoms)

        return towrite
(8) Non-existing Force Field, New Atom Type Assignment
Take gaff in Xponge.forcefield.AMBER.gaff as an example.
from Xponge import assign

# Register the new assignment judging rules
GAFF = assign.Judge_Rule("GAFF")

# Using "GAFF.Add_Judge_Rule" to add new judging functions
# Xponge will use the judging functions one by one, and if the function returns "True", Xponge will stop and returns the atom type

# The following codes are the complete judgement of oxygen atoms
@GAFF.Add_Judge_Rule("o")
def temp(i, Assign):
    return Assign.Atom_Judge(i, "O1")

@GAFF.Add_Judge_Rule("op")
def temp(i, Assign):
    return Assign.Atom_Judge(i, "O2") and "RG3" in Assign.atom_marker[i].keys()

@GAFF.Add_Judge_Rule("oq")
def temp(i, Assign):
    return Assign.Atom_Judge(i, "O2") and "RG4" in Assign.atom_marker[i].keys()

@GAFF.Add_Judge_Rule("oh")
def temp(i, Assign):
    tofind = False
    if Assign.Atom_Judge(i, "O2") or Assign.Atom_Judge(i, "O3"):
        for bonded_atom in Assign.bonds[i].keys():
            if Assign.Atom_Judge(bonded_atom, "H1"):
                tofind = True
                break
    return tofind

@GAFF.Add_Judge_Rule("os")
def temp(i, Assign):
    return Assign.Atom_Judge(i, "O2")
After the definition of the judging functions, then you can use the Xponge.assign.Assign instance method Determine_Atom_Type("GAFF") to determine the atom type.
(9) Non-existing Force Field, New Force Field Combination
A combination of force field formats and parameters is necessary for a new force field.
Take the AMBER-style force field as an example.
from Xponge import *
from Xponge.forcefield.BASE import CHARGE, MASS, LJ, BOND, ANGLE, DIHEDRAL, NB14, VIRTUAL_ATOM, EXCLUDE
import os

AMBER_DATA_DIR = os.path.dirname(__file__)

LJ.LJType.combining_method_A = LJ.Lorentz_Berthelot_For_A
LJ.LJType.combining_method_B = LJ.Lorents_Berthelot_For_B

NB14.NB14Type.New_From_String(r"""
name    kLJ     kee
X-X     0.5     0.833333
""")
EXCLUDE.Exclude(4)
Take the CHARMM27 force field as another example.
from Xponge import *
from Xponge.forcefield.BASE import CHARGE, MASS, LJ, BOND, DIHEDRAL, NB14, NB14_EXTRA, UREY_BRADLEY, IMPROPER, VIRTUAL_ATOM, ACMAP, EXCLUDE
import OS

CHARMM27_DATA_DIR = os.path.dirname(__file__)

LJ.LJType.combining_method_A = LJ.Lorentz_Berthelot_For_A
LJ.LJType.combining_method_B = LJ.Lorents_Berthelot_For_B

GlobalSetting.Set_Invisible_Bonded_Forces(["improper"])
DIHEDRAL.ProperType.New_From_String(r"""
name        k reset  phi0 periodicity
X-X-X-X     0 0      0    0
""")
EXCLUDE.Exclude(4)
Structure Pre-processing
(1) Inner Coordinate Imposing
You can use Impose_Bond, Impose_Angle, Impose_Dihedral to impose the inner coordinates.
Impose_Bond
import Xponge
import Xponge.forcefield.AMBER.ff14SB

t = ACE + NME

Save_Mol2(t, "imposing.mol2")

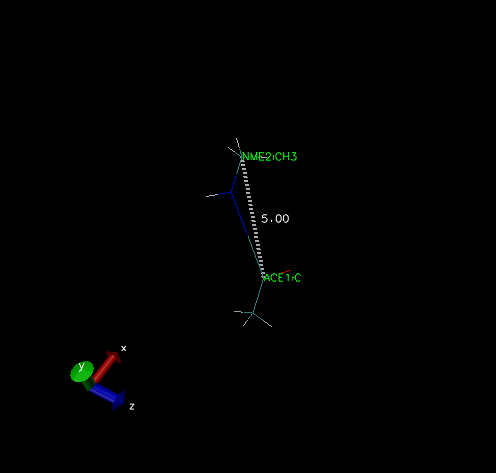
Impose_Bond(t, t.residues[0].C, t.residues[1].N, 5)

Save_Mol2(t, "imposed.mol2")

Impose_Bond(t, t.residues[0].C, t.residues[1].CH3, 5)

Save_Mol2(t, "imposed2.mol2")

#Atoms that are not bonded in the same residue, and atoms that in the same ring cannot be "Impose_Bond", because it is not known to move which atoms to move
#Impose_Bond(t, t.residues[0].C, t.residues[0].H2, 5)
#The code above will raise AssertionError
Visualize the three mol2 files in VMD and we can get
Impose_Angle
import Xponge
import Xponge.forcefield.AMBER.ff14SB

t = ACE + NME

#Impose_Angle rotate the atoms after the third atom and the third atom around the line from the first atom to the second atom
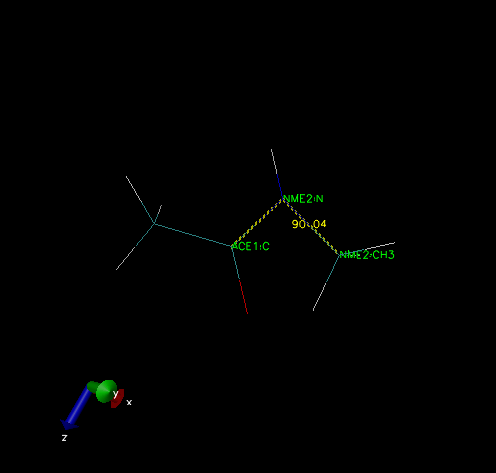
Impose_Angle(t, t.residues[0].C, t.residues[1].N, t.residues[1].CH3, 3.1415926 / 2)

Save_Mol2(t, "imposed.mol2")
Visualize the file in VMD and we can get
Impose_Dihedral
import Xponge
import Xponge.forcefield.AMBER.ff14SB

t = ACE + ALA * 10 + NME

Save_Mol2(t, "imposing.mol2")
for i in range(1,len(t.residues)-1):
    head = t.residues[i-1]
    res = t.residues[i]
    tail = t.residues[i+1]
#Impose_Dihedral rotate the atoms after the third atom and the third atom around the line from the third atom to the second atom
    Impose_Dihedral(t, head.C, res.N, res.CA, res.C, -3.1415926/3)
    Impose_Dihedral(t, res.N, res.CA, res.C, tail.N, -3.1415926/3)

Save_Mol2(t, "imposed.mol2")
Visualize the file "imposing.mol2" in VMD and we can get
Visualize the file "imposed.mol2" in VMD and we can get
(2) Solvents and Ions
import Xponge
import Xponge.forcefield.AMBER.ff14SB
import Xponge.forcefield.AMBER.tip3p

t = NALA + ARG + NME
c = int(round(t.charge))

#Add solvent box, 5 Å for x<0, 10 Å for y<0, 15 Å for z< 0, 30 Å for x>0, 25 Å for y>0, 20 Å for z>0 from the boundary
Process_Box(t, WAT, [5,10,15,30,25,20])

#It is also possible to simply provide a number
#Process_Box(t, WAT, 30)

#Substitution, replacing the part of the residue named "WAT" with a potassium ion and a chloride atom
Ion_Replace(t, lambda res: res.type.name == "WAT", {CL:30 + c, K:30})

#Reorder
#Not necessary, just to look good
t.residues.sort(key = lambda residue: {"CL":2, "K":1, "WAT":3}.get(residue.type.name, 0))

#Print out the charge to make sure it's right
print(t.charge)

Save_PDB(t, "test.pdb")
Save_SPONGE_Input(t, "test")
(3) Rotate
import Xponge
import Xponge.forcefield.AMBER.ff14SB

t = ACE + ALA * 100 + NME

Save_Mol2(t,"before.mol2")

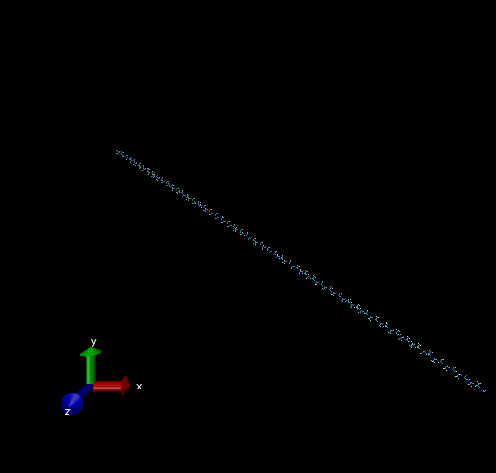
#This function rotate the main axis of the molecule to the disired direction. See the API document for detail
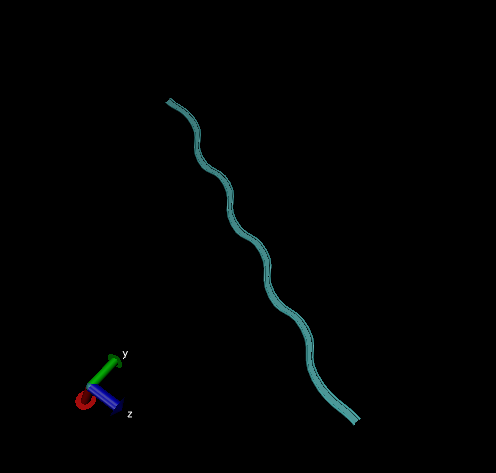
Molecule_Rotate(t)

Save_Mol2(t,"after.mol2")
Visualize the file "before.mol2" in VMD and we can get
Visualize the file "after.mol2" in VMD (look along the z-axis) and we can get
Rotate a little bit, and we can get
(4) Hydrogen Mass Repartition
import Xponge
import Xponge.forcefield.AMBER.ff14SB

t = ACE + ALA + NME

import Xponge.forcefield.AMBER.tip3p
Process_Box(t, WAT, [5,10,15,30,25,20])

HMass_Repartition(t)

Save_SPONGE_Input(t, "test")
Post-processing
(1) Trajectory Analysis
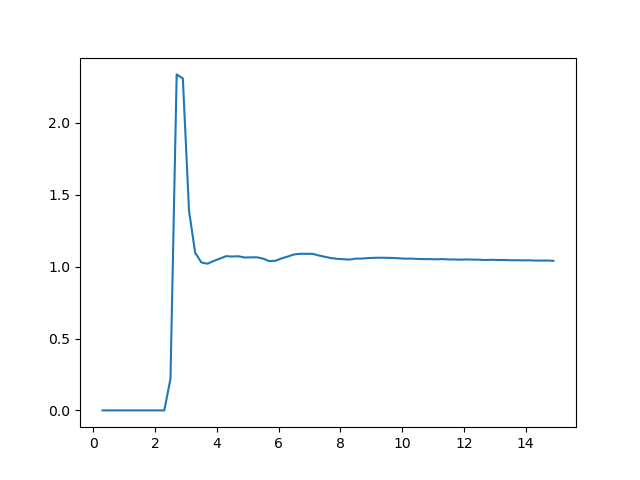
Xponge use the MDAnalysis to do the analysis. Here take the calculation of RDF as an example
from Xponge.analysis.MDAnalysis import Universe
u = Universe("test.pdb", "mdcrd.dat", "mdbox.txt")

#See the API of MDAnalysis for the following lines
O = u.select_atoms("resname WAT and name O")
from MDAnalysis.analysis import rdf as RDF
rdf = RDF.InterRDF(O, O)
rdf.run()
import matplotlib.pyplot as plt
plt.plot(rdf.results.bins[1:], rdf.results.rdf[1:])
plt.show()
The plotted figure looks like
(2) Trajectory Format Transformation
Use python -m Xponge -h to get more information
Automated Workflow
(1) Relative Free Energy Calculation
In the simplest way, you need only one PDB file and two mol2 files of the molecules to mutate, and use the command
Xponge mol2rfe -pdb pdb_file.pdb -r1 the_original_molecule.mol2 -r2 the_mutated_to_molecule.mol2
Then you can calculate the relative free enengy.
Use python -m Xponge mol2rfe -h to get more information.
Project details
Release history Release notifications | RSS feed
Download files
Download the file for your platform. If you're not sure which to choose, learn more about installing packages.
Source Distribution
File details
Details for the file Xponge-1.2.5.11.tar.gz.
File metadata
- Download URL: Xponge-1.2.5.11.tar.gz
- Upload date:
- Size: 522.2 kB
- Tags: Source
- Uploaded using Trusted Publishing? No
- Uploaded via: twine/3.6.0 importlib_metadata/4.8.2 pkginfo/1.8.1 requests/2.24.0 requests-toolbelt/0.9.1 tqdm/4.62.3 CPython/3.7.6
File hashes
| Algorithm | Hash digest | |
|---|---|---|
| SHA256 | c9f98a06715f7a8eb192ac5045349dfc356a85470300b465ffcdfc8b80cd728c |
|
| MD5 | 55ba6e4c7e964c4b13c804c4456c30ce |
|
| BLAKE2b-256 | b3349676106785c0f3f24e7e3d4c2ab00f6ab5cc73b957f8b0e0d6324182411b |


