
Acconeer Exploration Tool





Explore the Next Sense with Acconeer Exploration Tool! Use one of our evaluation kits together with our Python examples and start exploring the world of Acconeer's radar sensor technology. The Python scripts and the Application in this repository will help you to easily stream the radar sensor's data to your local machine to start radar sensor evaluation and/or algorithm development for your application.
To run the Python exploration scripts, you will need an evaluation kit running the included Exploration or Module server, both of which are supplied with the Acconeer SDK and Module SW image.
This release is developed for Acconeer SDK and Module SW A111-v2.15.5 and A121-v1.13.0. Running this version is strongly recommended, as we continuously fix bugs and add features.
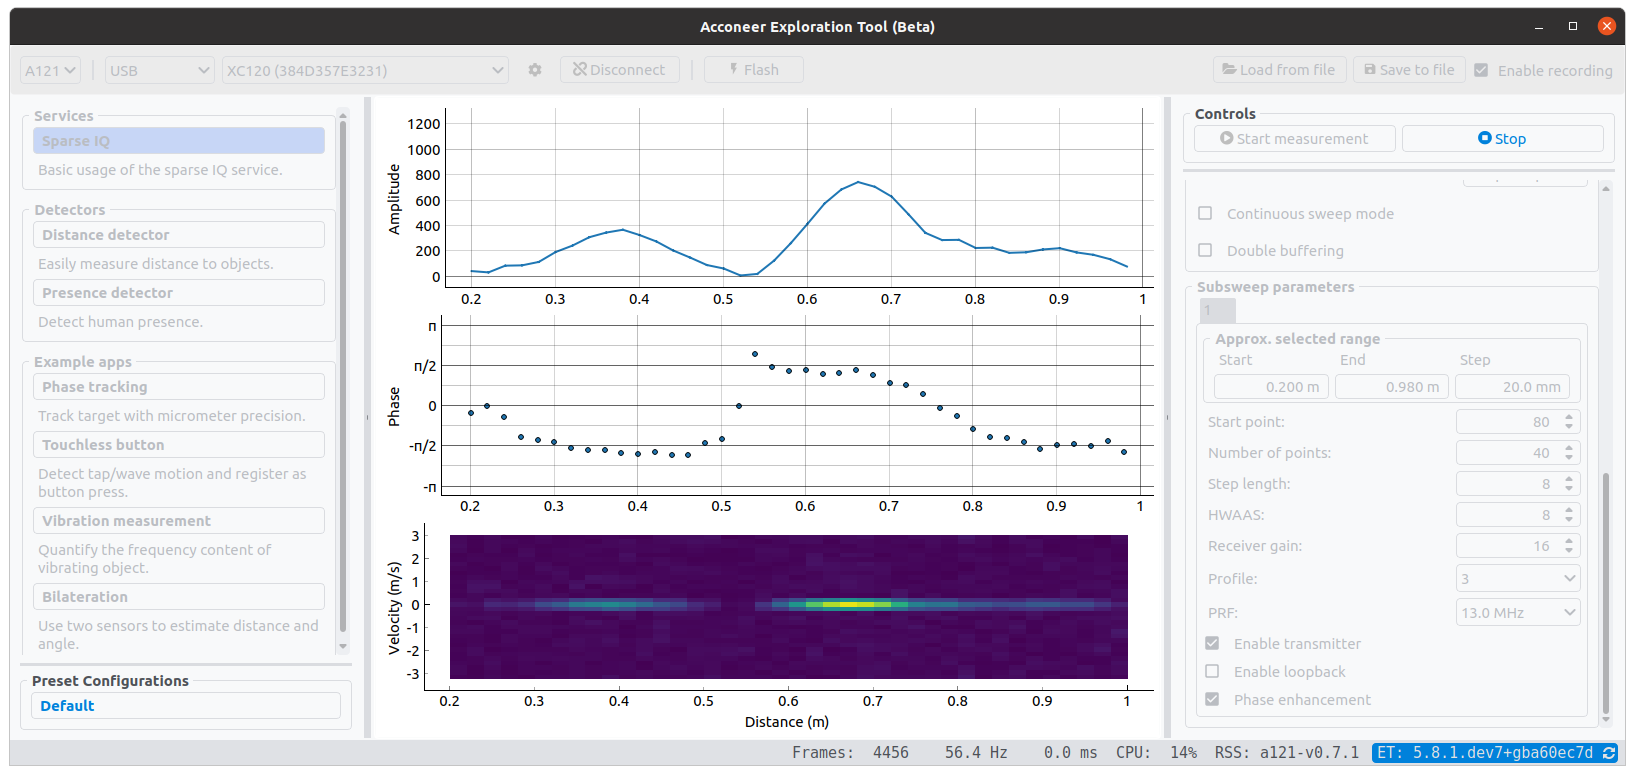
Quickstart
Windows Portable distribution, File-based installation
There is a portable version of the Acconeer Exploration Tool for Windows:
- Download the zip file and extract
- Double click the
update.batfile and wait for the installation to finish, which might take a couple of minutes - Double click the
run_app.bat
For an in-depth evaluation, we recommend a full installation as described below.
Terminal-based installation
To simplify Python installation and dependency management, we recommend using uv. It provides a fast, reliable, and unified way to manage Python environments and execute packages without the overhead of manual configuration.
For detailed setup instructions and advanced features, refer to the official uv documentation.
Install uv in Windows
> winget install --id=astral-sh.uv -e
Install uv in Linux
> curl -LsSf https://astral.sh/uv/install.sh | sh
Run Exploration Tool using uvx
> uvx acconeer-exptool[app]
Documentation
Documentation is available at docs.acconeer.com, where you can also find the FAQ.
What's New in Acconeer Exploration Tool
- See the Changelog.
Setting up your evaluation kit
- XM126
- XM125
- XC120 + XE121 (A121)
- Raspberry Pi (A121 on XE121)
- Raspberry Pi (A111 on XC111+XR111 or XC112+XR112)
- XM112
- XM122
- XM132
For additional resources, head over to the Acconeer developer page. There you will find both a getting started guide and a video showing you how to set up your evaluation kit. There you will also find the SDK download.
Setting up your local machine
Requirements
Python 3.9 or newer. Older versions have limited or no support.
Tested on:
- Python 3 (developed and tested on 3.9, 3.10, 3.11, 3.12 and 3.13)
- Windows 11
- Ubuntu 24.04
Setup
Installing the acconeer-exptool package
Install from PyPI:
python -m pip install --upgrade acconeer-exptool[app]
Depending on your environment, you might have to replace
pythonwithpython3orpy.
For other options, have a look at docs.acconeer.com.
Windows COM port drivers
If no COM port is recognized when plugging in a module, you might need to install a driver. See information about your specific module at docs.acconeer.com
Linux setup
After installing the acconeer-exptool package, you can run
python -m acconeer.exptool.setup
Depending on your environment, you might have to replace
pythonwithpython3orpy.
which interactively configures your machine and downloads needed dependencies.
This is done in order for your machine to work at its best with Exploration tool.
acconeer.exptool.setup performs the steps described in the
Linux setup section on docs.acconeer.com.
Application
Using the application is the easiest way to start exploring Acconeer's radar sensor and our application examples:
python -m acconeer.exptool.app
Depending on your environment, you might have to replace
pythonwithpython3orpy.
In the top right box of the application, named Connection, select the interface you wish to use
- SPI: auto-detects an XM112 connected to USB2 (USB1 is also needed for power)
- Socket: specify the IP address of your Raspberry Pi running the streaming server
- Serial: specify the serial port that is assigned to the sensor
Connections via Serial have the option of choosing a Protocol. The choices are Module and Exploration, where the protocol should match the server installed on the module (Module server or Exploration server, respectively). Choosing the wrong protocol will show an error.
After pressing Connect, a connection should be established. In the box below labelled Scan controls, select the service or processing example you want to test. Now you may tune the sensor and processing settings to your specific setup. Once you press Start measurement, the application will start fetching data from the sensor and plotting the results. After pressing Stop, you can save (and later load data) or just replay the data stored in the buffer.
The ML interface (no longer supported)
Support for the Machine Learning interface in Exploration Tool has been dropped.
If you still need to use it, it is possible to use an old version of Exploration Tool.
From the acconeer-python-exploration directory:
git checkout v3
And follow the instructions in an old version of this document (README.md).
Note that this version of Exploration Tool will not be actively supported. Compatibility with new RSS versions is not guaranteed .
Running an example script on your local machine
If you prefer using the command line for testing and evaluation of our examples you can use the following instructions.
XC111+XR111 or XC112+XR112 (mounted on a Raspberry Pi):
python examples/a111/basic.py -s <your Raspberry Pi IP address>
XM112+XB112 via SPI over USB:
python examples/a111/basic.py -spi
Any module via UART over USB, attempting to auto-detect the serial port:
python examples/a111/basic.py -u
Any module via UART over USB, using a specific serial port:
python examples/a111/basic.py -u <the serial port, for example COM3>
Depending on your environment, you might have to replace
pythonwithpython3orpy.
Choosing which sensor(s) to be used can be done by adding the argument --sensor <id 1> [id 2] .... The default is the sensor on port 1. This is not applicable for the modules.
Scripts can be terminated by pressing Ctrl-C in the terminal.
Disclaimer
Here you find the disclaimer.
FAQ and common issues
See the FAQ at docs.acconeer.com.
3 maintainers


Download files
Download the file for your platform. If you're not sure which to choose, learn more about installing packages.
Source Distribution
Built Distribution
Filter files by name, interpreter, ABI, and platform.
If you're not sure about the file name format, learn more about wheel file names.
Copy a direct link to the current filters
File details
Details for the file acconeer_exptool-7.18.2.tar.gz.
File metadata
- Download URL: acconeer_exptool-7.18.2.tar.gz
- Upload date:
- Size: 1.9 MB
- Tags: Source
- Uploaded using Trusted Publishing? No
- Uploaded via:
twine/6.0.1 CPython/3.12.3
File hashes
| Algorithm | Hash digest | |
|---|---|---|
| SHA256 |
31ded0cf15e2c5b6ce09180f7fd03a8fef94db10769172fe74a3db804fd13f87
|
|
| MD5 |
a326a968b0fa0d6b49e891200d2dd77f
|
|
| BLAKE2b-256 |
dae8758497471deb3efce65d6dc97a07d1988c46a8810d837ff4fb78652d8df7
|
File details
Details for the file acconeer_exptool-7.18.2-py3-none-any.whl.
File metadata
- Download URL: acconeer_exptool-7.18.2-py3-none-any.whl
- Upload date:
- Size: 2.2 MB
- Tags: Python 3
- Uploaded using Trusted Publishing? No
- Uploaded via:
twine/6.0.1 CPython/3.12.3
File hashes
| Algorithm | Hash digest | |
|---|---|---|
| SHA256 |
2eff768c4c227102aa1a5d086a91196b9309754af4b3fa246bb86c628dc7f1bb
|
|
| MD5 |
3e4044f87f641bcff1f431b8be42598d
|
|
| BLAKE2b-256 |
ea24e06772e2e15cb0f8c74248dd094e792e3715733fd5c43d82b9975c187555
|














