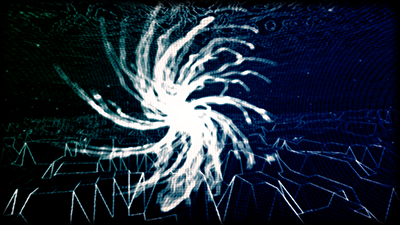
Modern OpenGL 4.1+ Prototype Framework inspired by Django
Project description
demosys-py
A python 3 implementation of a C++ project used to create and prototype demos (see demoscene) in OpenGL. The design of this version is heavily inspired by the Django project.
We only support OpenGL 4.1+ core profiles (no backwards compatibility).
This was originally made for for non-interactive real time graphics combined with music (“real time music videos”). It’s made for people who enjoy playing around with modern OpenGL without having to spend lots of time creating all the tooling to get things up and running.
demosys-py is now on PyPI
pip install demosys-py
Contributing
Any contribution to the project is welcome. Never hesitate to ask questions or submit pull requests (completed or work in progress). The worst thing that can happen is that we or you might learn something. This is supposed to be a fun project.
Also check out the TODO list. Take a stab on what of the features or documentation or suggest new entires.
Running the damned thing
First of all install the latest python 3.6 package (or later) from python.org
Install GLFW binaries for your OS from your favorite package manger or download it from http://www.glfw.org/
If you want working music you will also need to install SDL
Make a virtualenv and install the package: pip install demosys-py.
Run the default test effect: demosys_test runeffect demosys_test.cube
Running from source
Again, make sure you have python 3.6 or later before proceeding. Let’s clone the testdemo project.
- ::
git clone https://github.com/Contraz/demosys-py-test cd demosys-py-test python3 -m virtualenv env source env/bin/activate pip install -r requirements.txt ./manage.py runeffect testdemo.cube
This runs the effect cube in the testdemo package.
Controls
Currently you can control the camera with A, W, S and D. Q and E for y axis movements
Standard yaw/pitch camera rotation with mouse
ESC for exit
SPACE for pause
X for taking png screenshot
I just want to see an example!
Ok, ok! You can find examples in the testdemo.
To create a project with an effect we can use the convenient demosys-admin command.
demosys-admin createproject testdemo
cd testdemo
demosys-admin createeffect cube
We should now have the following stucture with a working effect we can actually run.
testdemo
├── cube
│   ├── effect.py
│   ├── shaders
│   │   └── cube
│   │       ├── cube.glsl
│   └── textures
│       └── cube
│           └── texture.png
The effect.py generated looks something like this:
from demosys.effects import effect
from demosys.opengl import geometry, FBO
from OpenGL import GL

class CubeEffect(effect.Effect):
    """Rotating cube with UVs and normals"""
    def __init__(self):
        self.shader = self.get_shader('cube/cube.glsl')
        self.texture = self.get_texture('cube/texture.png')
        self.cube = geometry.cube(2.0, 2.0, 2.0)

    @effect.bind_target
    def draw(self, time, frametime, target):
        GL.glEnable(GL.GL_DEPTH_TEST)

        # Cheater methods in base class for lazyness
        mv_m = self.create_transformation(rotation=(time * 1.2, time * 2.1, time * 0.25),
                                          translation=(0.0, 0.0, -8.0))
        normal_m = self.create_normal_matrix(mv_m)
        proj_m = self.create_projection(fov=60.0)

        # The VAO and shader will do a a little dance and agree on attributes
        with self.cube.bind(self.shader) as shader:
            shader.uniform_mat4("m_proj", proj_m)
            shader.uniform_mat4("m_mv", mv_m)
            shader.uniform_mat3("m_normal", normal_m)
            shader.uniform_sampler_2d(0, "texture0", self.texture)
        self.cube.draw()
There you go.
Shaders and textures can be easily loaded by using the get_texture and get_shader method inherited from Effect.
The cube objects is a VAO that you bind supplying the shader and the system will figure out the attribute mapping.
Please look in the demosys.opengl.geometry module for the valid attribute names and look at shaders in the testdemo.
You currently define vertex, fragment and geometry shader in one glsl file separated by preprocessors. - Effects not defined in the settings.py module will not run.
That should give you an idea..
Longer Introduction
Anything we draw to the screen must be implemented as an Effect. If that effect is one or multiple things is entirely up to you. An effect is an individual package/directory containing an effect.py module. This package can also contain a shaders and textures directory that demosys will automatically find and load resources from. See the testdemo.
Explore the testdemo project, and you’ll get the point.
Some babble about the current state of the project:
All geometry must be defined using VAOs. There’s a very convenient VAO class for this already making it quick and easy to create them. Look at the demosys.opengl.geometry module for examples.
We support vertex, fragment and geometry shaders for now. A program must currently be written in one single .glsl file separating the shaders with preprocessors. See existing shaders in testdemo.
The Shader class will inspect the linked shader and cache all attributes and uniforms in local dictionaries. This means all uniform*-setters use the name of the uniform instead of the location. Location is resolved internally in the object/class.
The VAOs bind(..) requires you to pass in a shader. This is because the VAO will automatically adapt to the attributes in your shader. During the VAO creation you need to make the name mapping to the attribute name. If you have a VAO with positions, normals, uvs and tangents and pass in a shader that only use position (or any other combination of attributes in the VAO); the VAO class will on-the-fly generate a version internally with only positions.
We only support 2D textures at the moment loaded with PIL/Pillow, but this is trivial to extend.
Resource loading is supported in the Effect class itself. In __init__() you can fetch resources using for example self.get_shader orself.get_texture. This will return a lazy object that will be populated after the loading stage is done.
Resources shared between effects can be put outside effect packages inside your project directory. For example in testproject/resources/shaders and testproject/resources/textures. Make sure you add those paths in the settings file.
We don’t have any scene/mesh loaders. You can hack something in yourself for now or just stick to or extend the geometry module. - We try to do as much validation as possible and give useful feedback when something goes wrong.
The time value passed to the effects draw method is the current duration in the playing music. If no music is loaded, a dummy timer is used.
Settings
The settings.py file must be present in your project and contains (you guessed right!) settings for the framework. This is pretty much identical to Django.
OPENGL
Using these values you are sure it will run on all platforms. OS X only support forward compatible core contexts. This will bump you to the latest version you drivers support.
OPENGL = {
    "version": (4, 1),
    "profile": "core",
    "forward_compat": True,
}
WINDOW
Window properties. If you are using Retina display, be aware that these values refer to the virual size. The actual buffer size will be 2 x.
WINDOW = {
    "size": (1280, 768),
    "vsync": True,
    "resizable": False,
    "fullscreen": False,
    "title": "demosys-py",
    "cursor": False,
}
MUSIC
If MUSIC is defined, demosys will attempt to play. (We have only tried mp3 files!)
PROJECT_DIR = os.path.dirname(os.path.abspath(__file__))
MUSIC = os.path.join(PROJECT_DIR, 'resources/music/tg2035.mp3')
TIMER
This is the timer class that controls time in your project. This defaults to demosys.timers.Timer that is simply keeps track of system time using glfw.
`demosys.timers.MusicTimer` requires MUSIC to be defined and will use the current time in the mp3.
EFFECTS
Effect packages demosys will initialize and use (Same as apps in Django). Currently all effects registered will run simultaneously as we currently don’t have a time line concept for scheduling when they should run. (SOON!)
EFFECTS = (
    'testproject.cube',
)
SHADER_*
DIRS contains absolute paths the FileSystemFinder will look for shader while EffectDirectoriesFinder will look for shaders in all registered effects in the order they were added.
SHADER_DIRS = (
    os.path.join(PROJECT_DIR, 'resources/shaders'),
)

SHADER_FINDERS = (
    'demosys.core.shaderfiles.finders.FileSystemFinder',
    'demosys.core.shaderfiles.finders.EffectDirectoriesFinder',
)
TEXTURE_*
Same principle as shaders.
# Hardcoded paths to shader dirs
TEXTURE_DIRS = (
    os.path.join(PROJECT_DIR, 'resource/textures'),
)

# Finder classes
TEXTURE_FINDERS = (
    'demosys.core.texturefiles.finders.FileSystemFinder',
    'demosys.core.texturefiles.finders.EffectDirectoriesFinder'
)
SCREENSHOT_PATH
Absolute path to the directory screenshots will be saved. If not defined or the directory don’t exist, the current working directory will be used.
SCREENSHOT_PATH = os.path.join(PROJECT_DIR, 'screenshots')Known Issues
The sound player an be a bit wonky at times on startup refusing to play on some platforms. We have tried a few libraries and ended up using pygame’s mixer module.
Audio Requirements: - As the current position in the music is what all draw timers are connected to, we need a library that can deliver this. - Efficient and accurate seeking + pause support - Some way to extract simple data from the music for visualisation
Libraries
GLFW binaries must also be installed. Get from your favourite location. Use version 3.2.1 or later.
pyGLFW for window and context creation + input
PIL/Pillow for texture loading
https://www.pygame.org using the mixer module for music
https://github.com/adamlwgriffiths/Pyrr for math (uses numpy)
Credits
Also thanks to Attila Toth for an excellent tutorial on OpenGL in Python. We do know OpenGL, but had no clue where to start in the Python world.
What inspired us to make this project?
We are old farts from the demoscene
We love Python
We work a lot with Django and love it
Why not combine ideas from our own demosys written in C++ and Django making a Python 3 version?
Project details
Release history Release notifications | RSS feed
Download files
Download the file for your platform. If you're not sure which to choose, learn more about installing packages.
Source Distributions
Built Distribution
Hashes for demosys_py-0.2.2-py3-none-any.whl
| Algorithm | Hash digest | |
|---|---|---|
| SHA256 | 9d544d6959cd328046eddb77ba7d960f85c9de77f945c870bc958e4a8cc04e39 |
|
| MD5 | 2274c93ace354a4bb7b81c0d98f4cc4f |
|
| BLAKE2b-256 | a897c0ebba29c953c5bcc44d77e7c8dbc752dca3064062753f3ea2e0ec5ca739 |


