DQOps Data Quality Operations Center

Project description
DQOps Data Quality Operations Center
DQOps is an DataOps friendly data quality monitoring platform with customizable data quality checks and data quality dashboards. DQOps comes with around 150 predefined data quality checks which helps you monitor the quality of your data.
Key features
- Intuitive graphical interface and access via CLI
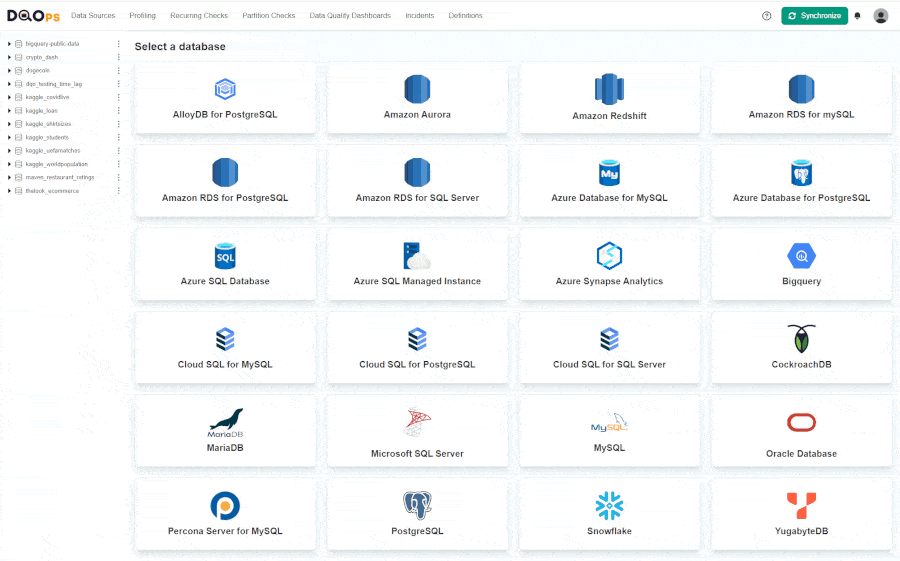
- Support of a number of different data sources: BigQuery, Snowflake, PostgreSQL, Redshift, SQL Server and MySQL
- ~150 build-in table and column checks with easy customization
- Table and column-level checks which allows writing your own SQL queries
- Daily and monthly date partition testing
- Data grouping by up to 9 different data grouping levels
- Build-in scheduling
- Calculation of data quality KPIs which can be displayed on multiple built-in data quality dashboards
- Data quality incident management
Installation
To use DQOps you need:
- Python version 3.8 or greater (for details see Python's documentation and download sites).
- Ability to install Python packages with pip.
DQOps is available on PyPi repository.
-
To install DQOps via pip manager just run
python -m pip install --user dqopsIf you prefer to work with the source code, just clone our GitHub repository https://github.com/dqops/dqo and run
-
Run dqops module to finalize the installation.
python -m dqops -
Create DQOps user home folder.
After installation, you will be asked whether to initialize the DQO user's home folder in the default location. Type Y to create the folder.
The user's home folder locally stores data such as sensor readouts and the data quality check results, as well as data source configurations. You can learn more about data storage here. -
Login to DQOps Cloud.
To use DQOps features, such as storing data quality definitions and results in the cloud or data quality dashboards, you must create a DQOps cloud account.
After creating a user's home folder, you will be asked whether to log in to the DQO cloud. After typing Y, you will be redirected to https://cloud.dqops.com/registration, where you can create a new account, use Google single sign-on (SSO) or log in if you already have an account.
During the first registration, a unique identification code (API Key) will be generated and automatically retrieved by DQO application. The API Key is now stored in the configuration file.
-
Open the DQOps User Interface Console in your browser by CTRL-clicking on the link displayed on the command line (for example http://localhost:8888) or by copying the link.
What you can do with DQOps
DQOps is designed as the primary platform for data quality teams, and for all data engineering or data science teams who want to apply data quality for their data platforms.
The following list shows selected use cases, with examples and best practices.
-
The definition of data quality KPIs describes the formulas used by DQOps to calculate a data quality score, used to measure the quality of data sources
-
You will learn how to create custom data quality dashboards using a custom connector for Looker Studio provided by DQOps. Your data quality dashboards will show the data quality results organized in a format that is easy to understand by your business sponsors.
-
Look at the categories of data quality checks that are supported by DQOps.
-
Learn how to detect timeliness and freshness with DQOps.
-
Learn how to measure data quality incrementally using time partitioned checks that are a unique feature of DQOps, allowing the analysis of financial data, append-only data, or very big tables at a terabyte or petabyte scale.
-
Similar data quality issues are grouped into data quality incidents, learn how grouping data quality issues to incidents, and how to receive notifications using Slack or passed to a webhook.
The following examples also show the whole process of configuring data quality checks, both using YAML files, or using the DQOps user interface.
-
Learn how to detect database and table availability issues.
-
Learn how to configure data volume checks to detect empty or incomplete tables.
-
Detect if columns contain only accepted values.
-
Detect duplicate values in columns by measuring the percentage of duplicates.
-
Validate values in text columns using a regular expression to detect values that are invalid emails.
-
Use schema drift data quality checks to detect table schema changes, such as missing columns, column order change, column data type change, or just that new columns were added or removed from a table.
DQOps client
You can integrate DQOps into data pipelines and ML pipelines by calling a Python client for DQOps. Install the client as a Python package:
python -m pip install --user dqops
The dqops package contains a remote client that can connect to a DQOps instance and perform all operations supported by the user interface.
The DQOps client could be used inside data pipelines or data preparation code to verify the quality of tables.
You can use the unauthenticated client to connect to a local DQOps instance from your data pipeline code. First, create the client object.
from dqops import client

dqops_client = client.Client(base_url="http://localhost:8888")
Alternatively, if you are connecting to a production instance of DQOps that has authentication
enabled, you have to open the user's profile screen in DQOps and generate your DQOps API Key.
Then take the key and use it as the token, when creating an AuthenticatedClient instead.
from dqops import client

dqops_client = client.AuthenticatedClient(base_url="http://localhost:8888", token="Your DQO API Key")
Now, you can call operations on DQOps. The following code shows how to execute data quality checks on data sources that are already registered in DQOps.
from dqops.client.api.jobs import run_checks
from dqops.client.models import CheckSearchFilters, \
                              RunChecksParameters


request_body = RunChecksParameters(
  check_search_filters=CheckSearchFilters(
      column='sample_column',
      column_data_type='string',
      connection='sample_connection',
      full_table_name='sample_schema.sample_table',
      enabled=True
  )
)

check_results = run_checks.sync(
  client=dqops_client,
  json_body=request_body
)
The run_checks operation returns a summary of executed data quality checks and the highest
data quality issue severity level. In the following example, the most severe issue was at an error severity level.
{
  "jobId" : {
    "jobId" : 123456789,
    "createdAt" : "2023-10-11T13:42:00Z"
  },
  "result" : {
    "highest_severity" : "error",
    "executed_checks" : 10,
    "valid_results" : 7,
    "warnings" : 1,
    "errors" : 2,
    "fatals" : 0,
    "execution_errors" : 0
  },
  "status" : "finished"
}
Learn more about the DQOps Python client in the DQOps REST API client reference documentation that shows Python code examples for every operation supported by the client.
Documentation
For full documentation with guides and use cases, visit https://dqops.com/docs/
The getting started guide shows how to start using DQOps.
Also, read the DQOps concept guide to know how DQOps operates, and how to configure data quality checks.
Contact and issues
If you find any issues with the tool, just post it here:
https://github.com/dqops/dqo/issues
or contact us via https://dqops.com/
Release history Release notifications | RSS feed


Download files
Download the file for your platform. If you're not sure which to choose, learn more about installing packages.
Source Distribution
Built Distribution
Filter files by name, interpreter, ABI, and platform.
If you're not sure about the file name format, learn more about wheel file names.
Copy a direct link to the current filters
File details
Details for the file dqops-1.13.1.tar.gz.
File metadata
- Download URL: dqops-1.13.1.tar.gz
- Upload date:
- Size: 565.7 kB
- Tags: Source
- Uploaded using Trusted Publishing? No
- Uploaded via: twine/6.1.0 CPython/3.13.7
File hashes
| Algorithm | Hash digest | |
|---|---|---|
| SHA256 |
8a1ac33b2af90dc0767158ffcd3d2c2838d17888ab621d79a5249bf4f743e718
|
|
| MD5 |
e85c709568998db0398039862237ab8a
|
|
| BLAKE2b-256 |
fd91957e4c6f38ca28595f5438aec6d13aab0f7e0203fa0cad45b3ab539d1481
|
File details
Details for the file dqops-1.13.1-py2.py3-none-any.whl.
File metadata
- Download URL: dqops-1.13.1-py2.py3-none-any.whl
- Upload date:
- Size: 2.0 MB
- Tags: Python 2, Python 3
- Uploaded using Trusted Publishing? No
- Uploaded via: twine/6.1.0 CPython/3.13.7
File hashes
| Algorithm | Hash digest | |
|---|---|---|
| SHA256 |
30402e89240e77c68b70ebd453a683f2191760a0fea9b19d736f3731dc8781ac
|
|
| MD5 |
6f7587f49ea44d5d9cafa2de2206f265
|
|
| BLAKE2b-256 |
e42ed4497d11b9d317b0e08dee68d4f941a148cdcf4a0e423087567afd6a955e
|


