Convert images to plotter-friendly hatched patterns

Project description
hatched
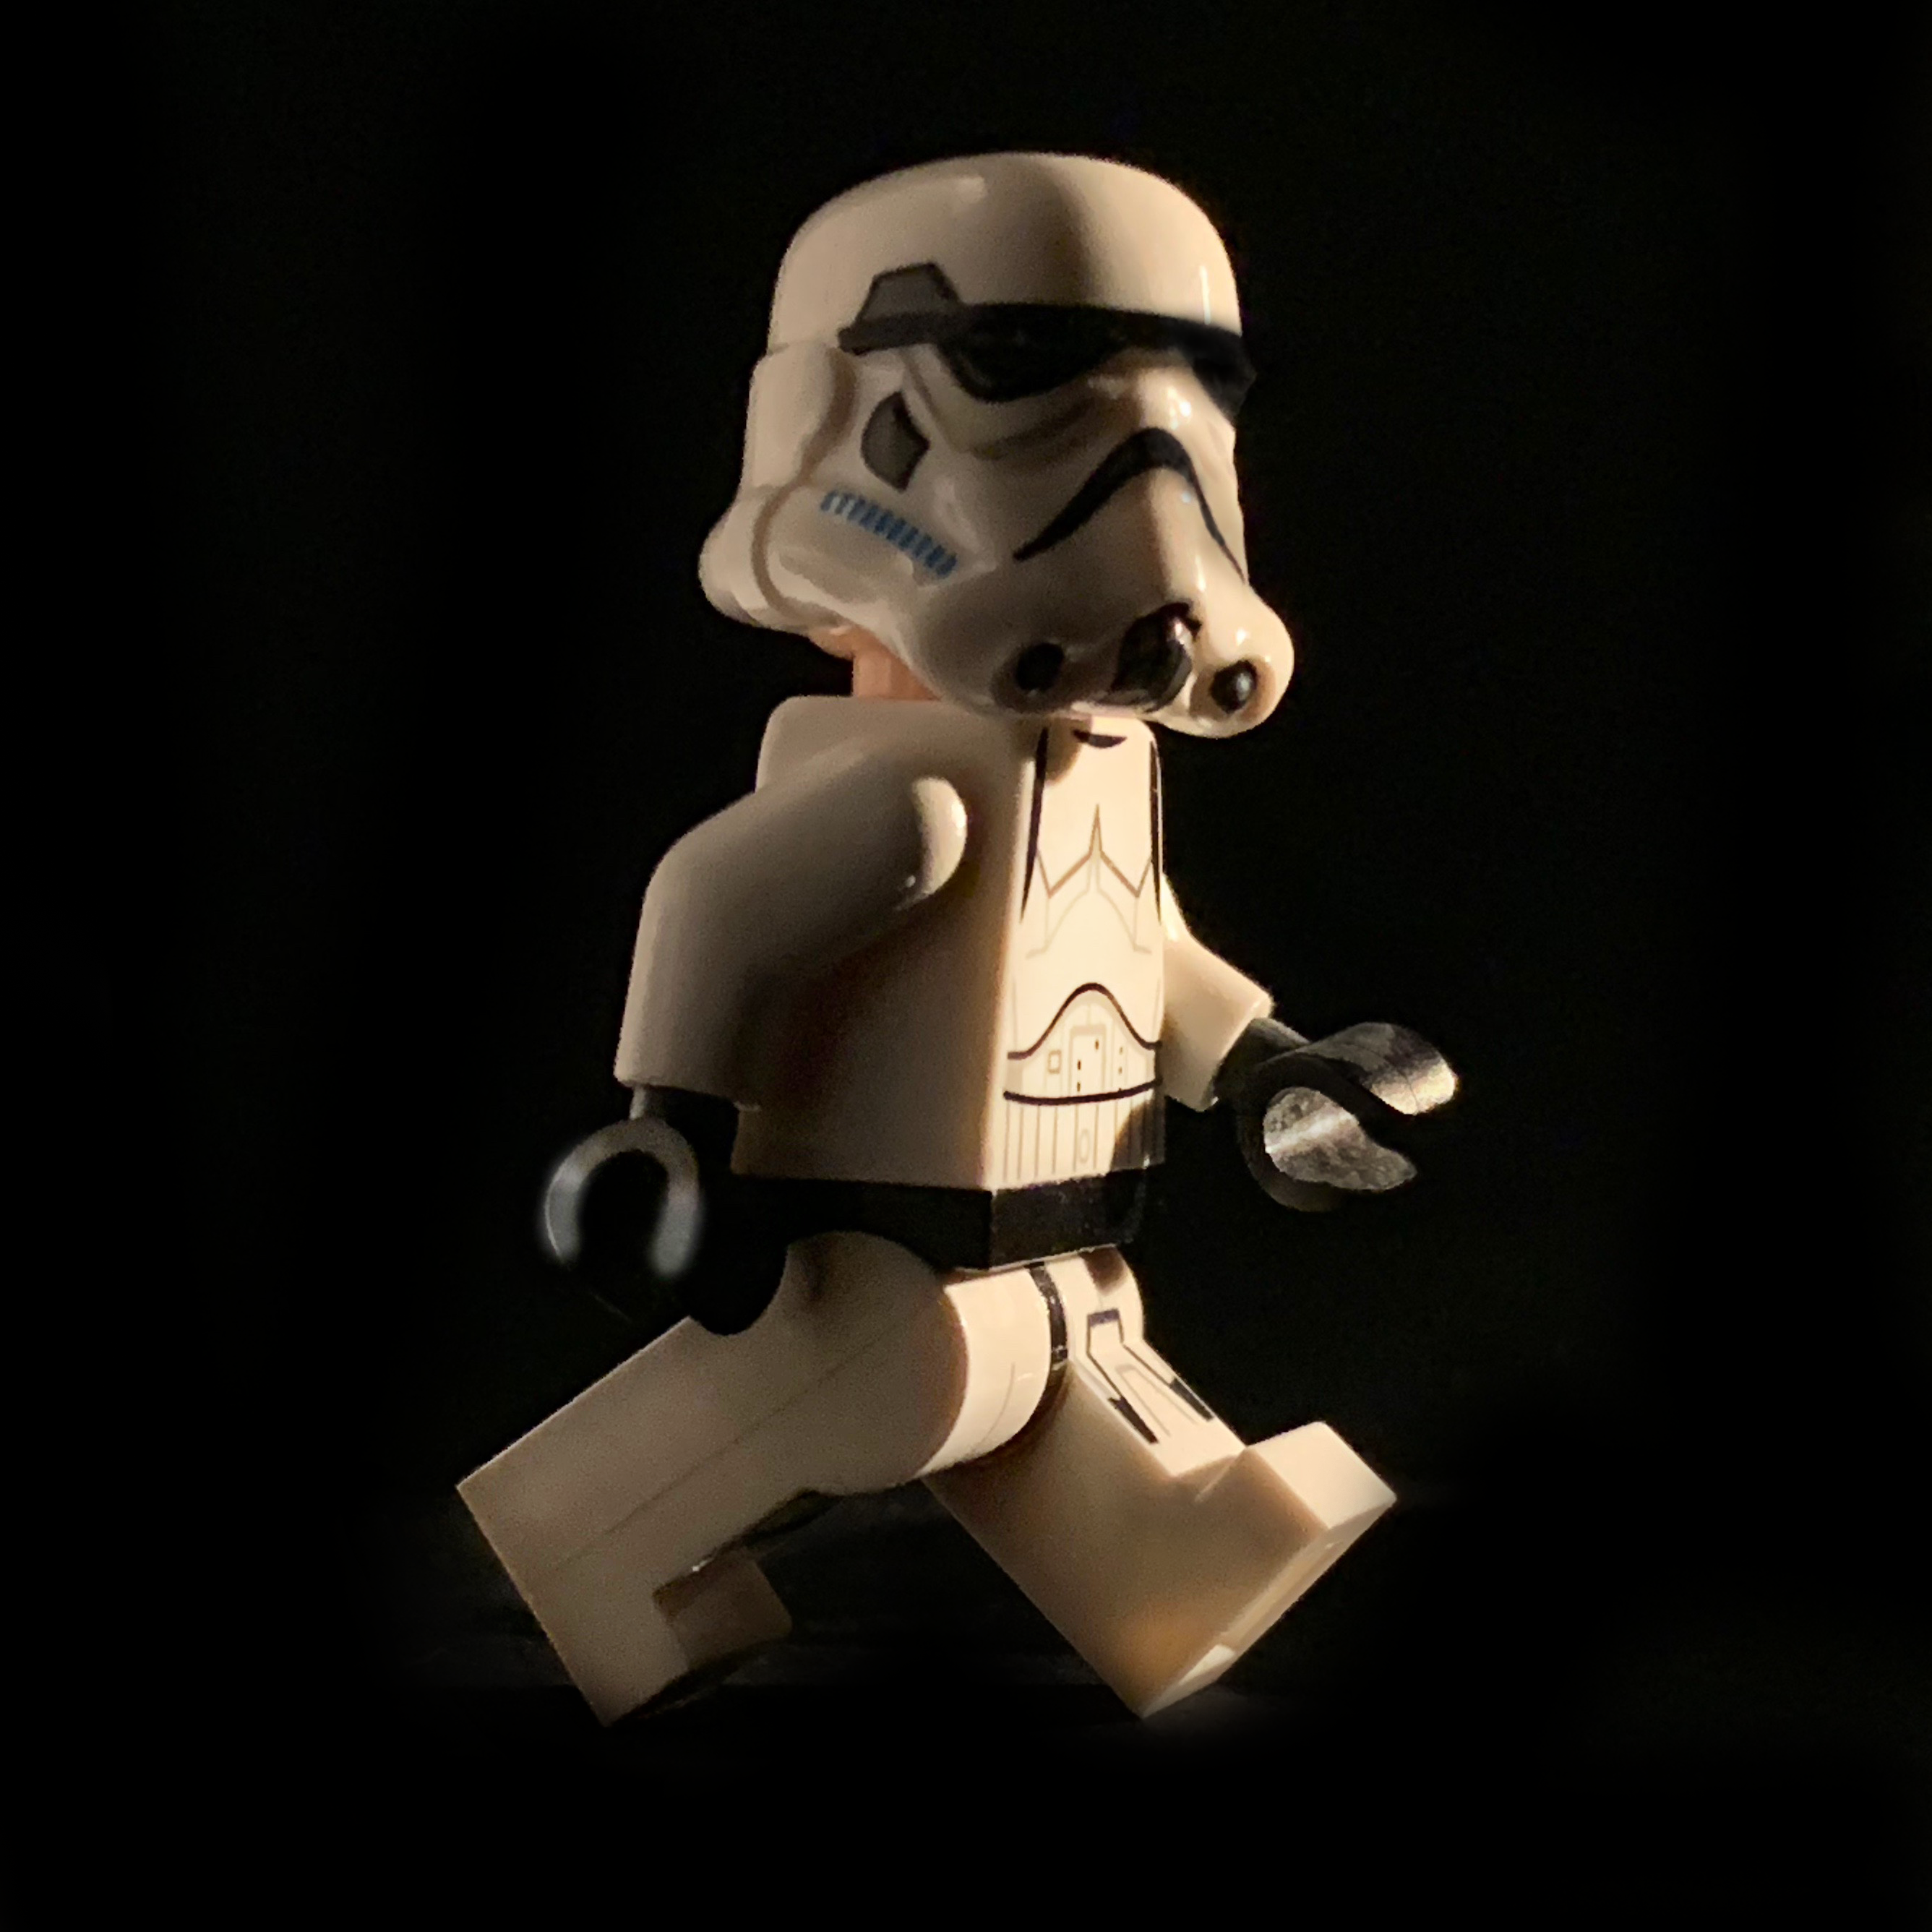
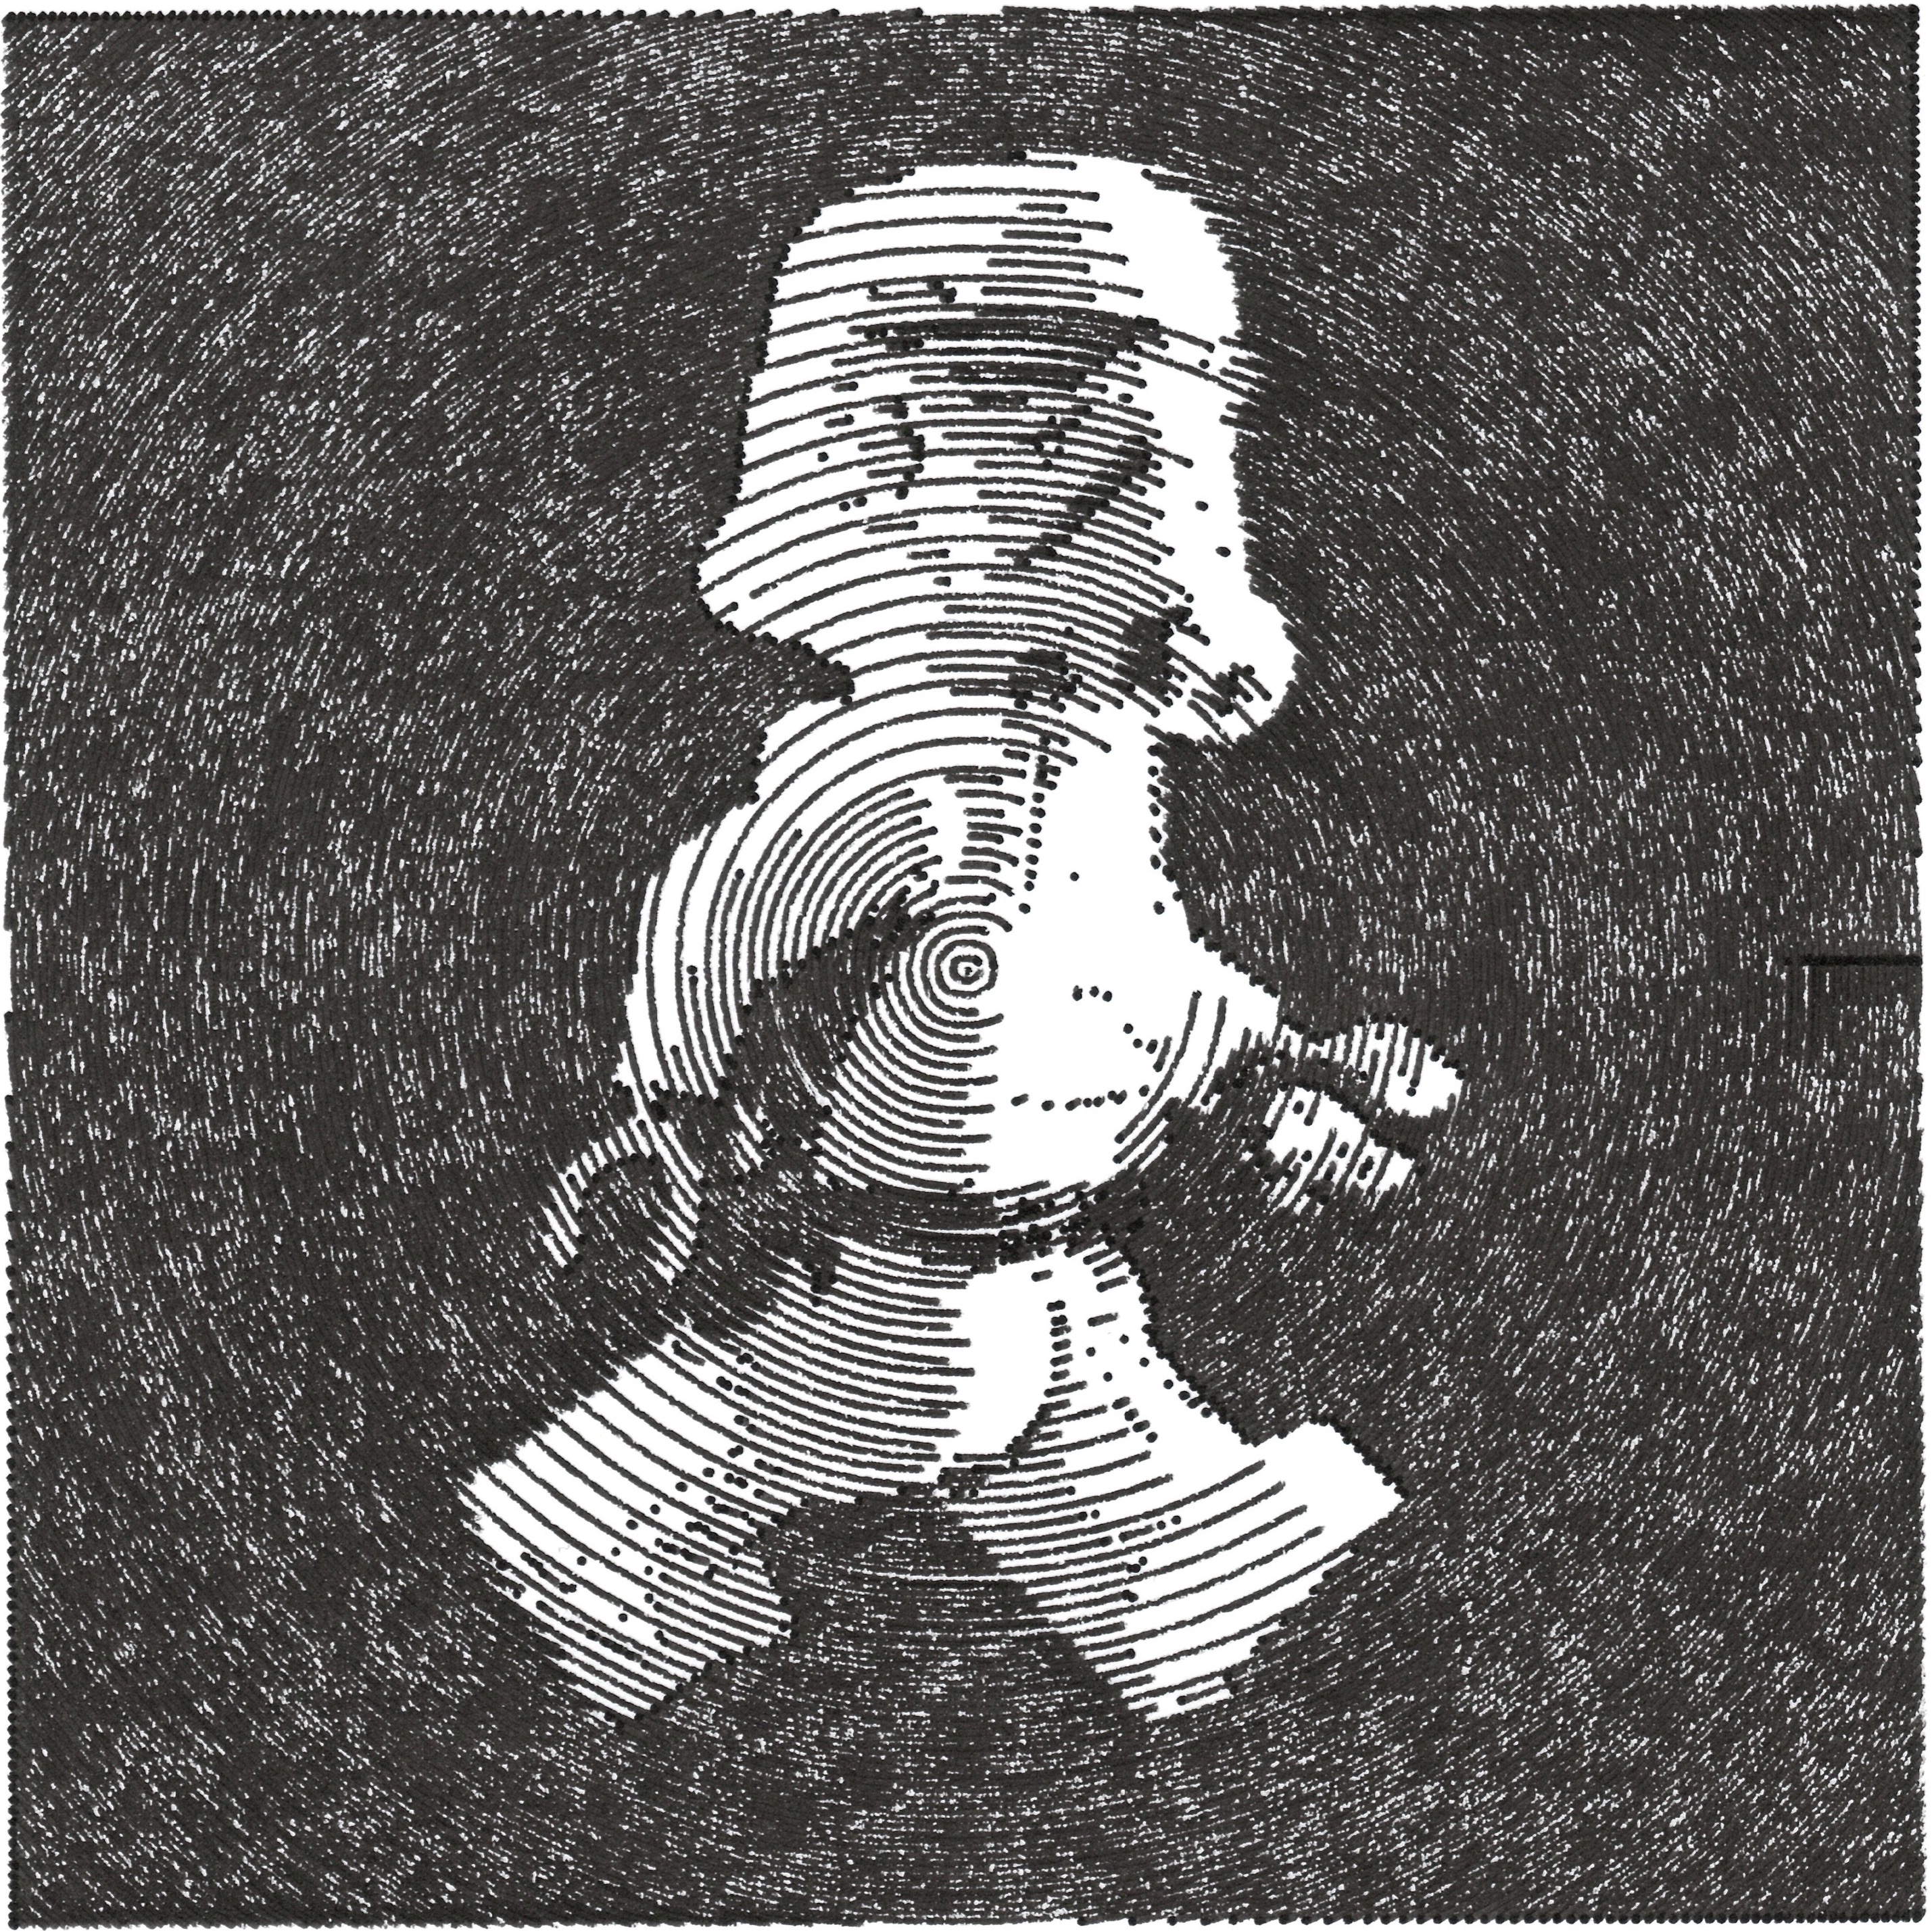
Library and vpype plug-in to convert images to plotter-friendly, hatched patterns.
Built with OpenCV, scikit-image, Shapely, matplotlib and svgwrite. You can reach the author Drawingbots's Discord server.
Getting Started
Using with vpype
Using hatched as a vpype plug-in is the easiest way to get started. See vpype's installation instructions for information on how to install vpype.
If vpype was installed using pipx, use the following command:
$ pipx inject vpype hatched
If vpype was installed using pip in a virtual environment, activate the virtual environment and use the following command:
$ pip install hatched
You can confirm that the installation was successful with the following command, which also happens to tell you all
you need to know to use hatched:
$ vpype hatched --help
Usage: vpype hatched [OPTIONS] FILENAME

  Generate hatched pattern from an image.

  The hatches generated are in the coordinate of the input image. For
  example, a 100x100px image with generate hatches whose bounding box
  coordinates are (0, 0, 100, 100). The `--scale` option, by resampling the
  input image, indirectly affects the generated bounding box. The `--pitch`
  parameter sets the densest hatching frequency,

Options:
  --levels INTEGER...             Pixel value of the 3 thresholds between
                                  black, dark, light and white zones (0-255).
  -s, --scale FLOAT               Scale factor to apply to the image size.
  -i, --interpolation [linear|nearest]
                                  Interpolation used for scaling.
  -b, --blur INTEGER              Blur radius to apply to the image before
                                  applying thresholds.
  -p, --pitch LENGTH              Hatching pitch for the densest zones. This
                                  option understands supported units.
  -x, --invert                    Invert the image (and levels) before
                                  applying thresholds.
  -c, --circular                  Use circular instead of diagonal hatches.
  -o, --center                    Origin of circles relative to the image size.
                                  For example, (0.5, 0.5) corresponds to the
                                  center of the image.
  -a, --angle                     Angle for diagonal hatches (in degrees)
  -d, --show-plot                 Display the contours and resulting pattern
                                  using matplotlib.
  -l, --layer LAYER               Target layer or 'new'.
  --help                          Show this message and exit.
To create a SVG, combine the hatched command with the write command (check vpype's documentation for more
information). Here is an example:
$ vpype hatched --levels 64 128 192 -s 0.5 -p 4 input.jpg layout a4 write output.svg
Using hatched as a library
To play with hatched, you need to checkout the source and install the dependencies in a virtual environment, for example with the following steps:
$ git clone https://github.com/plottertools/hatched.git
$ cd hatched
$ python3 -m venv venv
$ source venv/bin/activate
$ pip install -r requirements.txt
Running the example
Example can then be run by executing the corresponding file:
$ cd examples
$ python skull.py
The processing result is displayed in a matplotlib window:
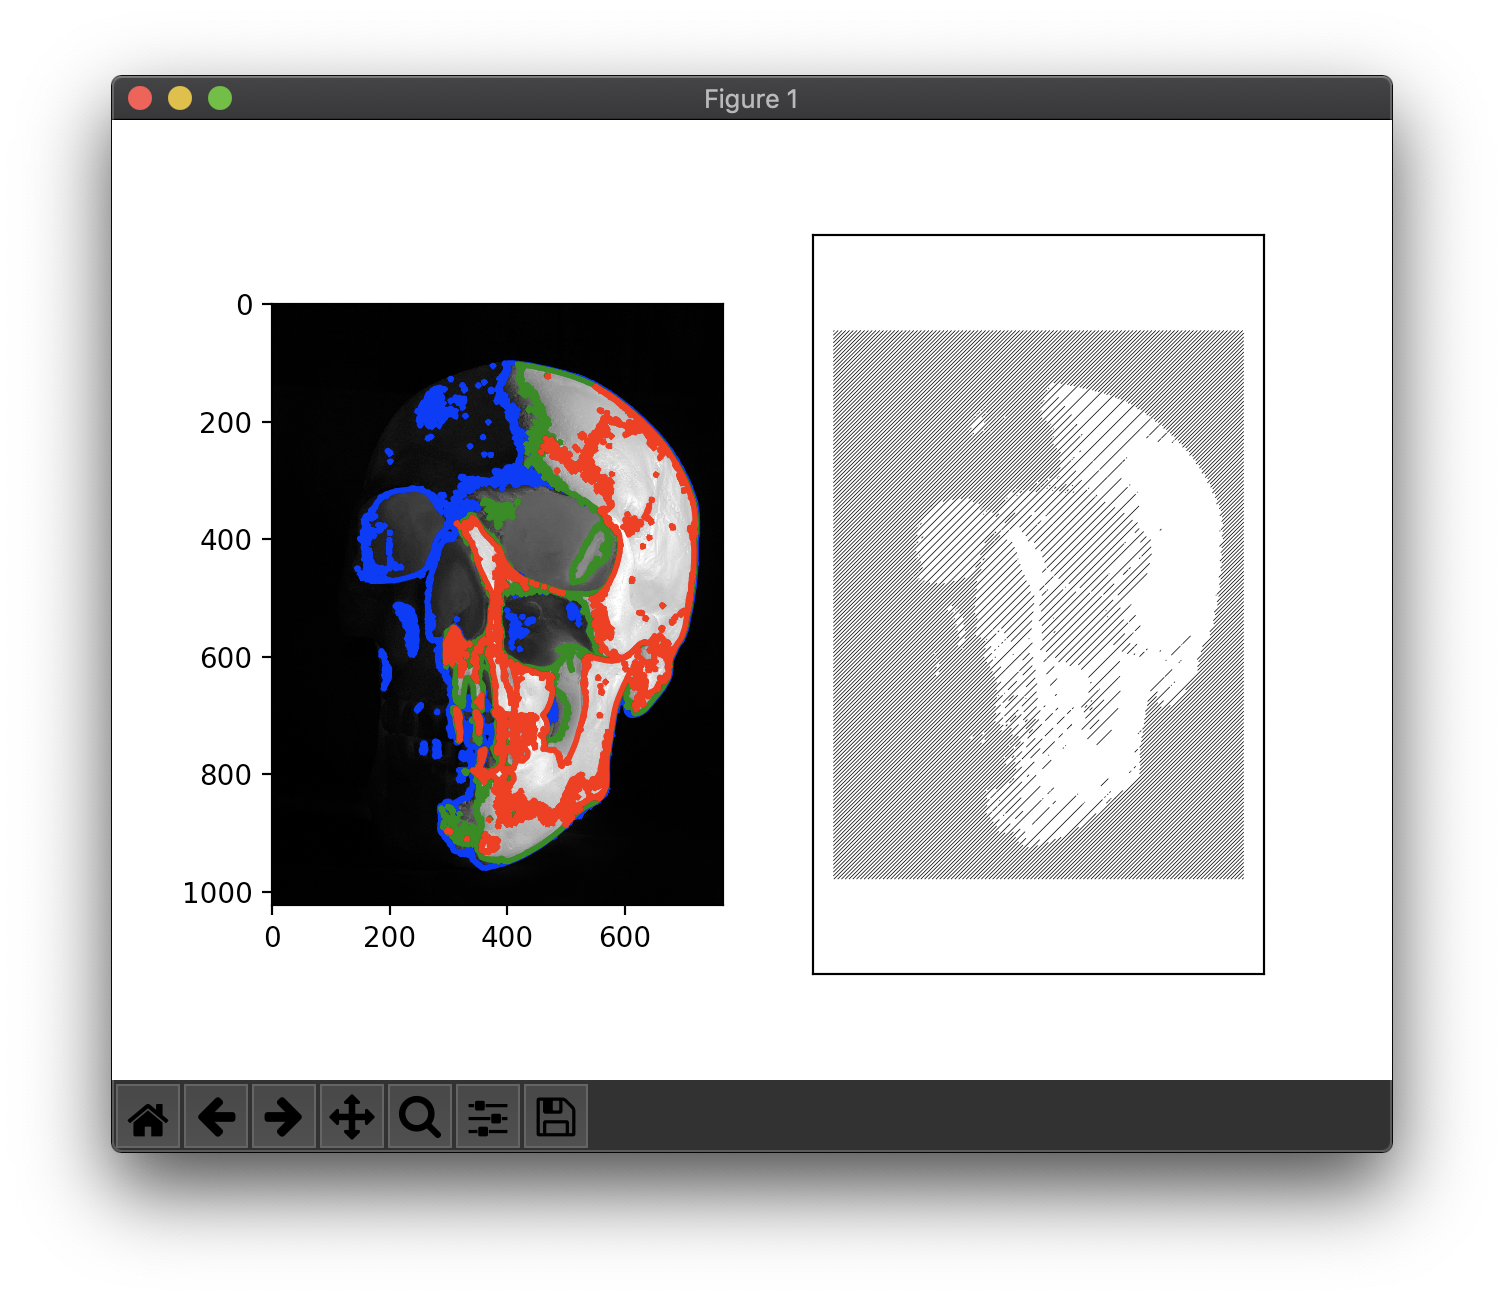
A skull.svg file is also created with the output graphics.
Usage
Call the function hatched.hatch() to process your image. It takes the following parameters:
file_path: input image (most common format are accepted)image_scale: scale factor to apply to the image before processinginterpolation: interpolation to apply for scaling (typically eithercv2.INTER_LINEARorcv2.INTER_NEAREST)blur_radius: blurring radius to apply on the input image (0 to disable)hatch_pitch: hatching pitch in pixel (corresponds to the densest possible hatching)levels: tuple of the n thresholds for different shades (0-255). The plugin only accepts 3 thresholds, but using as a library it accepts any number.h_mirror: apply horizontal mirror on the image if Trueinvert: invert pixel value of the input image before processing (in this case, the level thresholds are inverted as well)circular: use circular hatching instead of diagonalcenter: relative position of cirles' center when using circular hatchinghatch_angle: hatching angle for diagonal hatches (in degrees)show_plot: (default True) display contours and final results with matplotlibsave_svg: (default True) controls whether or not an output SVG file is created
License
This project is licensed under the MIT License - see the LICENSE file for details.
The example image skull.jpg is licenced under a Creative Commons Attribution-NonCommercial-ShareAlike 4.0 International License.

Release history Release notifications | RSS feed


Download files
Download the file for your platform. If you're not sure which to choose, learn more about installing packages.
Source Distribution
Built Distribution
Filter files by name, interpreter, ABI, and platform.
If you're not sure about the file name format, learn more about wheel file names.
Copy a direct link to the current filters
File details
Details for the file hatched-0.2.0.tar.gz.
File metadata
- Download URL: hatched-0.2.0.tar.gz
- Upload date:
- Size: 9.1 kB
- Tags: Source
- Uploaded using Trusted Publishing? No
- Uploaded via: twine/4.0.0 CPython/3.9.12
File hashes
| Algorithm | Hash digest | |
|---|---|---|
| SHA256 |
eb979ed1c2f0ad82a95b14a7fe5f7dc8065191ae9cee8a19833b9cb14a1db662
|
|
| MD5 |
de5bbb851024ac738b4e2b2b6c38ffd2
|
|
| BLAKE2b-256 |
56df8747bb7e5e73eee5dfb6630f9151b3d02260eab5d6bff3860dd02a660389
|
File details
Details for the file hatched-0.2.0-py3-none-any.whl.
File metadata
- Download URL: hatched-0.2.0-py3-none-any.whl
- Upload date:
- Size: 10.0 kB
- Tags: Python 3
- Uploaded using Trusted Publishing? No
- Uploaded via: twine/4.0.0 CPython/3.9.12
File hashes
| Algorithm | Hash digest | |
|---|---|---|
| SHA256 |
6e1489f4c75b13e55ed85b07fe97bdd6326a4799742a9e9920a4f14d932e28e6
|
|
| MD5 |
5548823c9b81a495a68bd6a1d5ae85fe
|
|
| BLAKE2b-256 |
f6015c848a0debf482d9db2d46bb903de97409c04e28100aad112c27c598b6a4
|


