Display images without all the nonsense!

Project description
Install
pip install justshowit
or
pip install git+https://github.com/Jako-K/justshowit
How to use
# Simple
from justshowit import show
show(<your_image_source>)

# More customizable
from justshowit import show_collage, show_grid, play_video...
Demo
Note: The demos presented below are all within a Jupyter notebook. However, if justshowit is used outside a Jupyter environment, all images will be displayed with cv2 instead.
from justshowit import show
import cv2
import numpy as np
import torch
import random
from glob import glob

# Example of different input images
url = "https://raw.githubusercontent.com/Jako-K/justshowit/main/readme_stuff/test_image1.png"
torch_image = torch.ones((3, 200, 300)) * 150
image_bgr = cv2.imread("./readme_stuff/test_image2.jpg")
path1 = "./readme_stuff/test_image2.jpg"
path2 = "./readme_stuff/test_image3.png"
path3 = "./readme_stuff/test_image4.png"
video_path = "./videos/archery.mp4"
# Display a single image
show(url, resize_factor=0.5)

# Display a bunch images with different shapes and formats
show([torch_image, numpy_image, path1, path2, path3]*10,
     title="Bunch of images", max_output_image_size_wh=(1000,500))
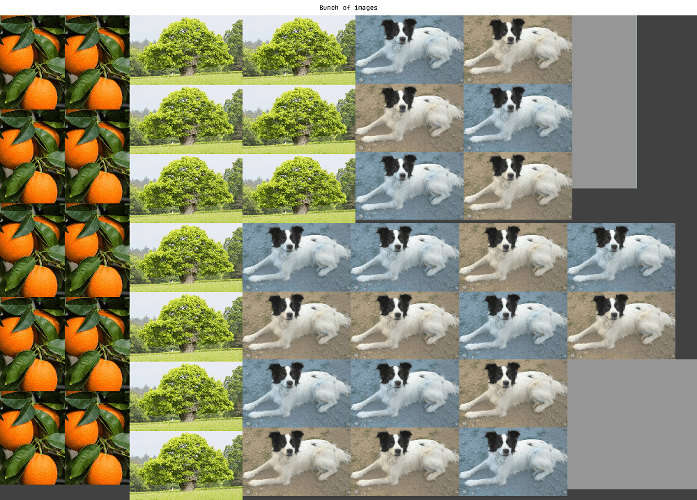
# An appropriate layout will be chosen automatically (a simple grid in this case)
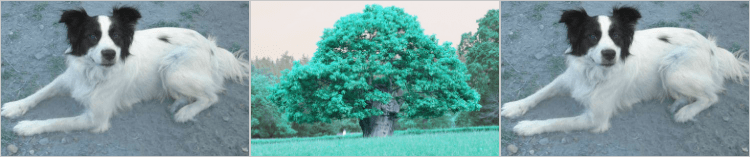
show([path1, path2, path1], resize_factor=0.5, BGR2RGB=True, save_image_path="./test.png")
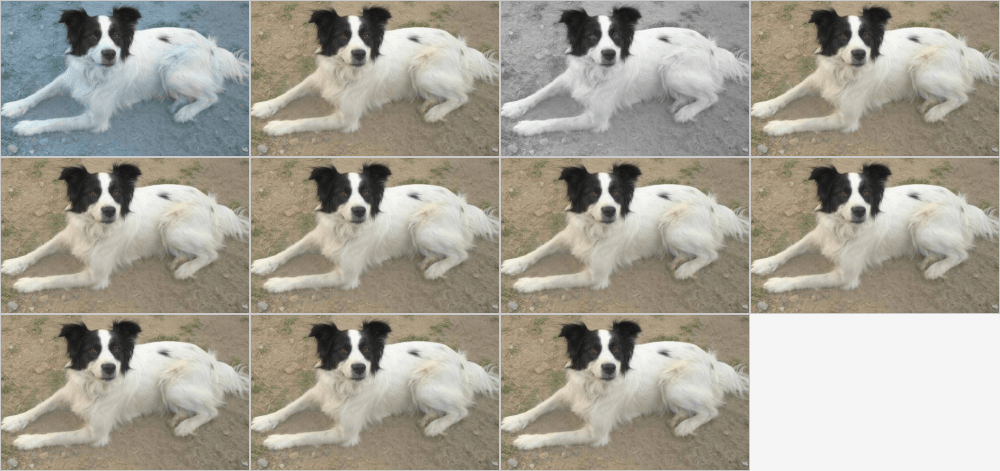
# Work with most image formats: batches, standarized, black and white...
numpy_image_bgr = cv2.imread("./readme_stuff/test_image2.jpg")
numpy_image = cv2.cvtColor(numpy_image_bgr, cv2.COLOR_RGB2BGR)
numpy_image_bw = numpy_image[:,:,0]
numpy_image_01 = numpy_image / 255
numpy_batch = np.stack([numpy_image,numpy_image])

torch_image = torch.tensor(numpy_image).permute(2,0,1)
torch_batch = torch.stack([torch_image,torch_image])
imagenet_mean = torch.tensor([0.485, 0.456, 0.406]).reshape(1, 3, 1, 1)
imagenet_std = torch.tensor([0.229, 0.224, 0.225]).reshape(1, 3, 1, 1)
standardized_batch = (torch_batch.float() / 255.0 - imagenet_mean) / imagenet_std

combined = [numpy_image_bgr, numpy_image, numpy_image_bw, numpy_image_01,
            numpy_batch, torch_image, torch_batch, standardized_batch]

show(combined, resize_factor=0.5)
# Work with videos as well
return_image = show(video_path, return_image=True)
Demo - More customizable
Besides show, there's 5 other functions that allow for greater customization:
show_collage: Pack a bunch of images together in an efficent wayshow_grid: Automatically find a suitable grid layoutshow_grid_configurable: Customizable grid layout (row/col/image text, drop-shadow, margin adjustment, ...)show_video: Display video frames with some customization (frame count, video details, ...)play_video: An interactive video player implemented entirely within cv2
from justshowit import (
    show_collage, show_grid, show_grid_configurable, show_video, play_video
)
some_images = glob("./alot_of_different_images/*")
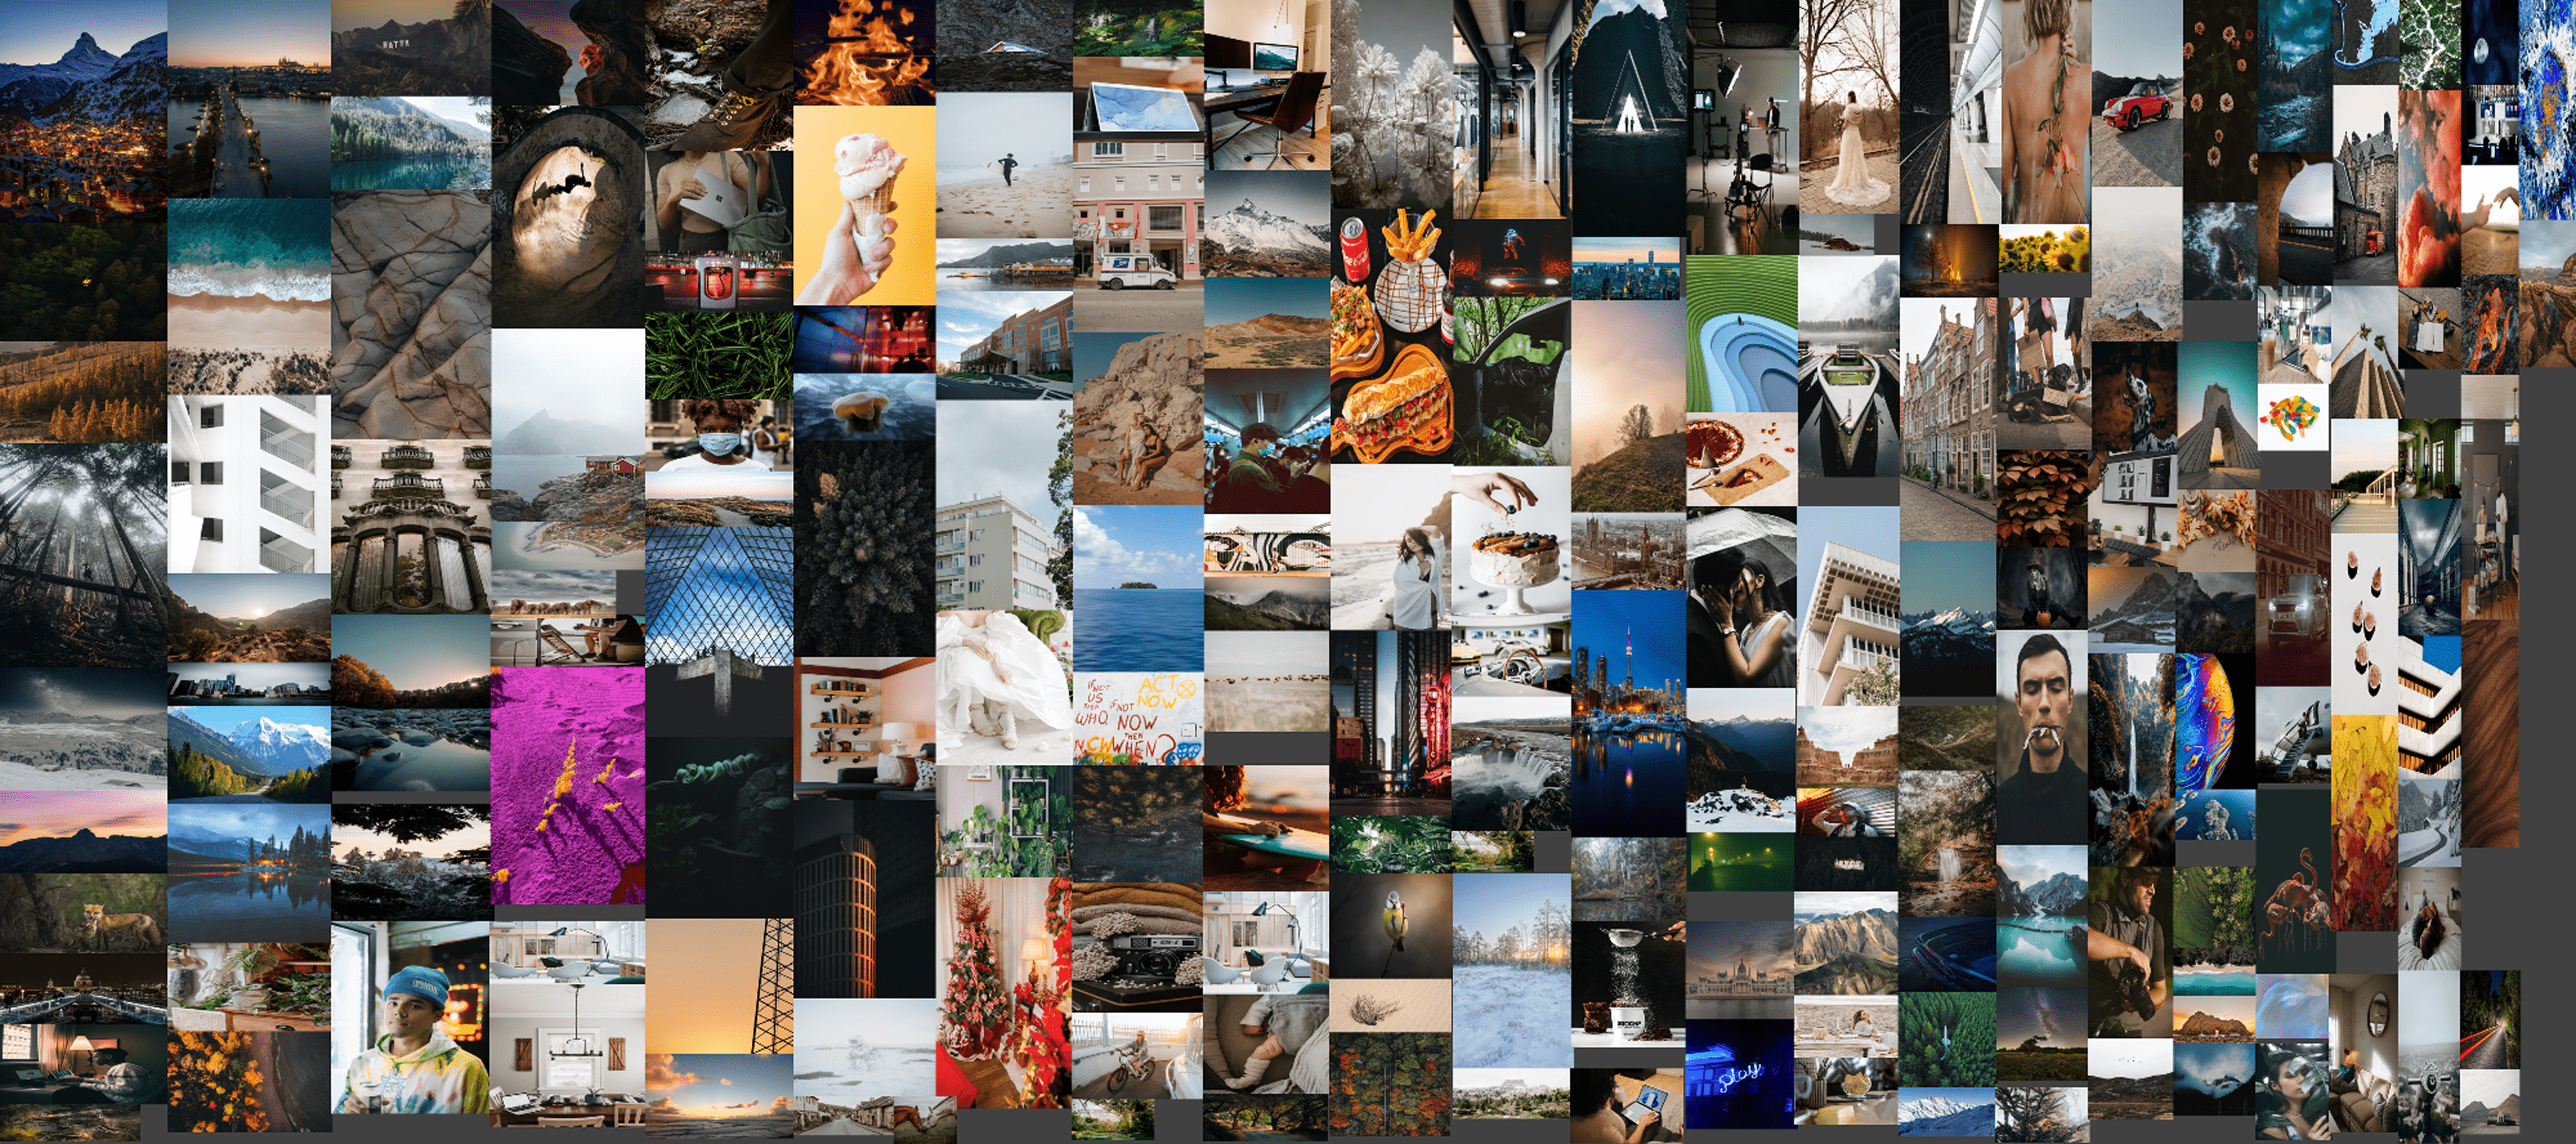
# `show_collage` will try and pack the images within the smallest possible canvas.
# For details about the optimization and packing algorithm see `Implementation details`
# at the bottom of the page.
show_collage(
    image_source = some_images,
    resize_factor=0.5,
    canvas_domains = ((3000, 2000), (7000, 2000)), # Canvas dimensions to try
    overlap_tolerance = 0.1, # How much each image may overlap with each other
    max_output_image_size_wh = (2000,1500),
    save_image_path="readme_6.png"
)
# `show_grid` selects a suitable grid layout based on the shape of the images.
# Images with similar shapes will be resized and displayed in a grid with uniform spacing,
# whereas more diverse images will be shown in a layout as demonstrated below
show_grid(
    image_source = some_images[:48],
    allow_auto_resize = False, # If the function may resize to get a better grid layout
    title = "A nice way to quickly show a lot of images",
)

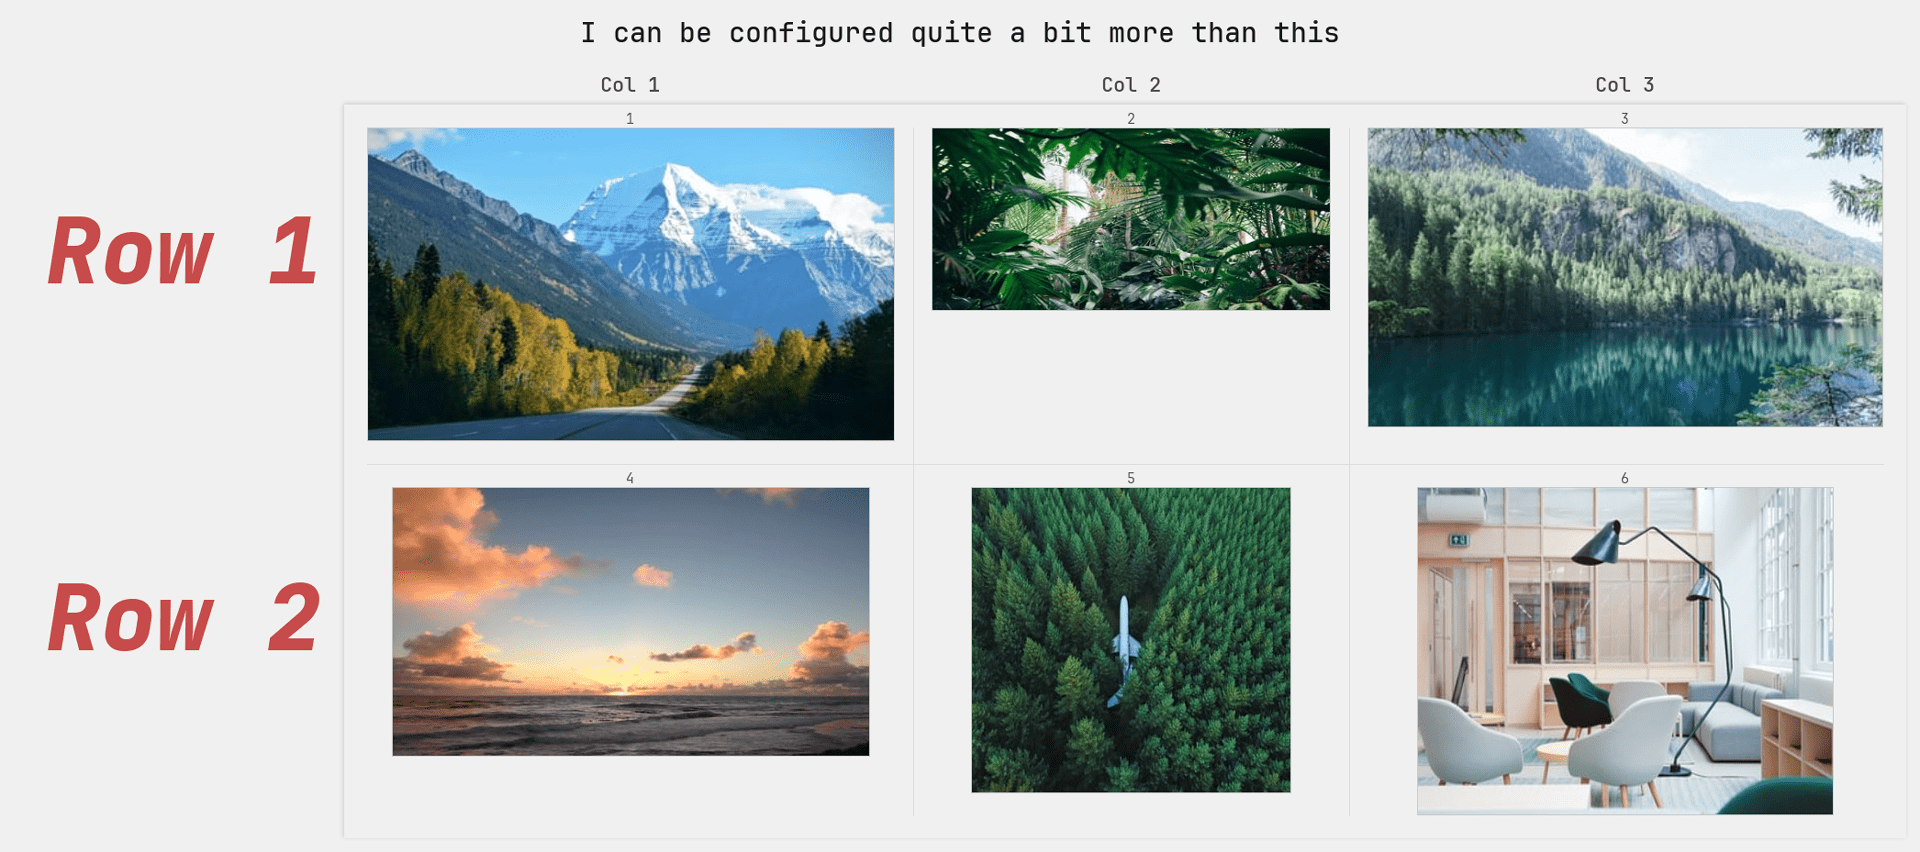
# `show_grid_configurable` is a customizable version of `grid_show`.
# It has a lot of functionality much of which contained within config arguments.
# These are prefixed with `c_` e.g. `c_row_text_config` as shown below.
show_grid_configurable(
    image_source = list(sorted(some_images))[:6],
    title="I can be configured quite a bit more than this",
    cols=3,
    rows=2,
    col_text=["Col 1", "Col 2", "Col 3"],
    row_text=["Row 1", "Row 2"],
    image_text = [*"123456"],
    c_row_text_config = {
        'placement': 'right',
        'font_size': 100,
        'font_thickness': 7,
        'italic': True,
        'color': (200, 75, 75),
        'adjust_draw_distance': 50
    }
)
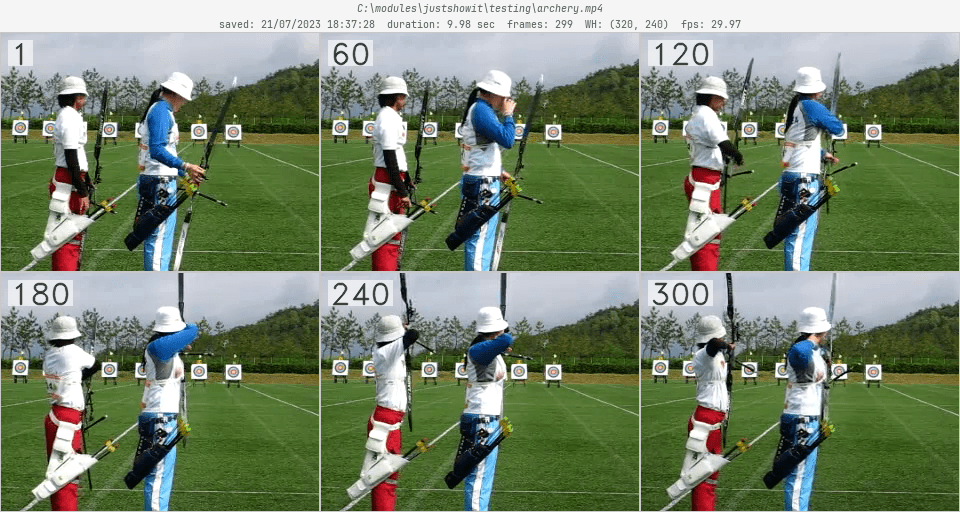
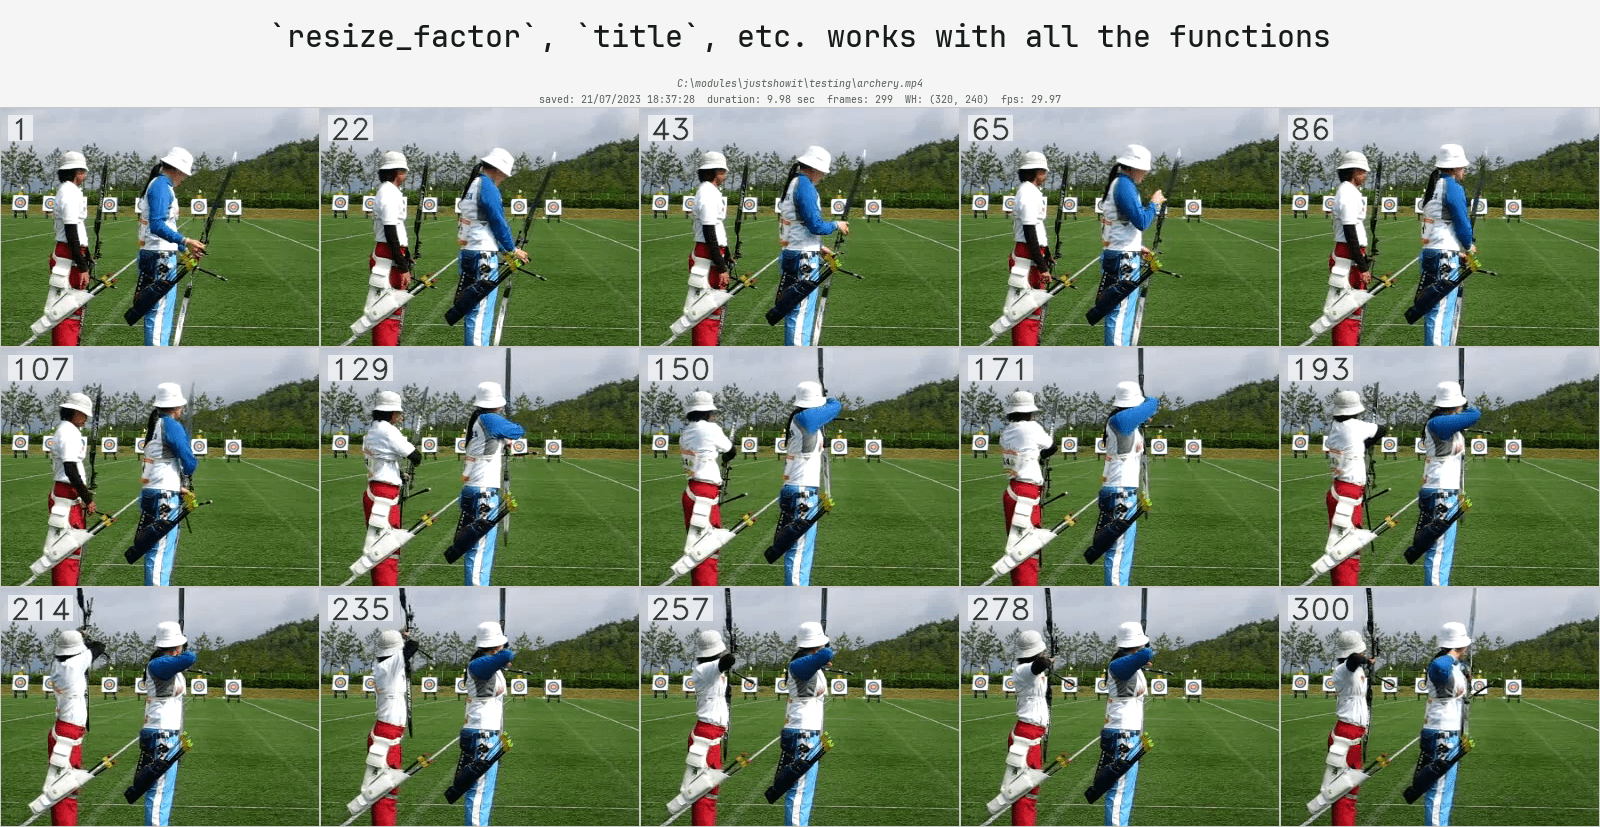
# `show_video` extracts frames and info from a video and display them in a grid
show_video(
    video_path,
    num_frames=15, # The number of equally spaced frames to display
    add_frame_count=True, # Adds a frame count in the left corner
    add_video_details=True, # Display some general info: path, FPS, etc.
    title="`resize_factor`, `title`, etc. works with all the functions",
    save_image_path="readme_9.png"
)
# `play_video` is an interactive video player implemented entirely within cv2.
# Control the speed with numbers 1-9 and pause the video with space.

# With a path
play_video(video_path, add_frame_count=True)
# With a list of images
play_video(some_images, add_frame_count=True)
Extra functions
The functions demoed above use a lot of helpers functions.
I realized that some of them could be useful on there own. They should be pretty self-explanatory:
draw_image_titledraw_text_cv2draw_text_pillowparse_arbitrary_image_sourceparse_image_as_uint8_rgb_numpy_arrayparse_numpy_image_batch_as_uint8_rgb_numpy_arrayparse_torch_image_batch_as_uint8_rgb_numpy_arrayparse_video_to_imagesparse_video_to_images_fixed_count
Implementation details
Finding an effective way to automatically display multiple images turned out to be surprisingly challenging. Through trial and error, I discovered the need to distinguish between two scenarios: (1) when all images have approximately the same shape and aspect ratio, and (2) when some or all images differ in shape and aspect ratio.
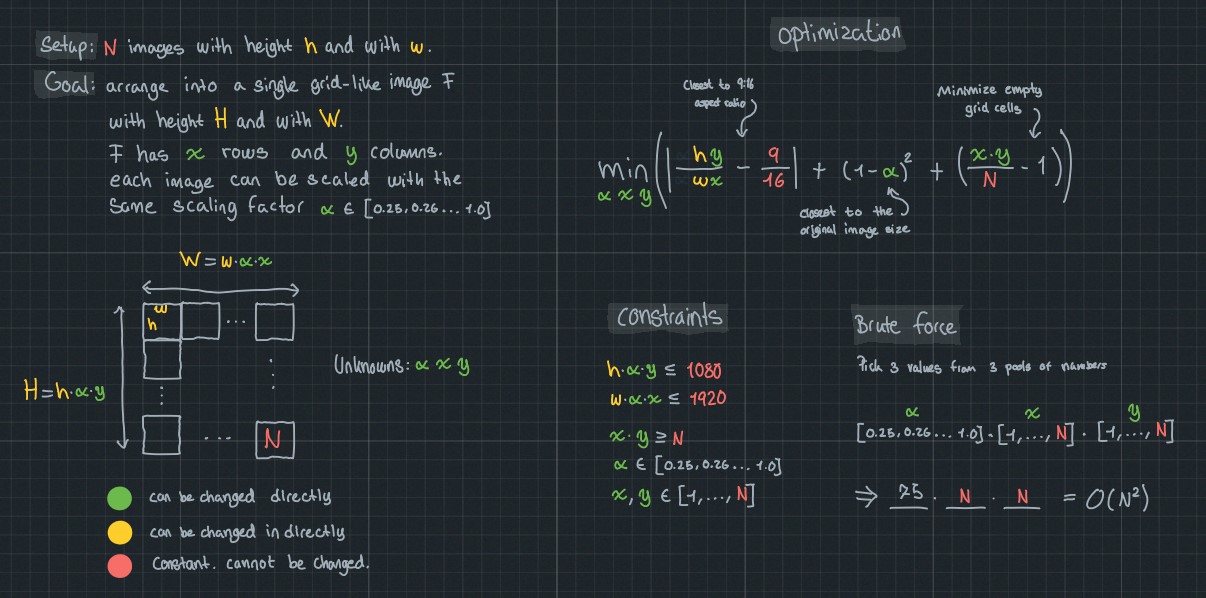
Case 1.
For case (1), a grid layout was used, defined by the number of columns, rows, and image resizing. The layout was automatically chosen based on the minimizationn of three factors: deviation from a desired final aspect ratio (default 1920/1080 pixels), the number of empty cells (e.g., 14 images in a 4x4 grid would have 2 empty cells), and the amount of resizing needed for each image.
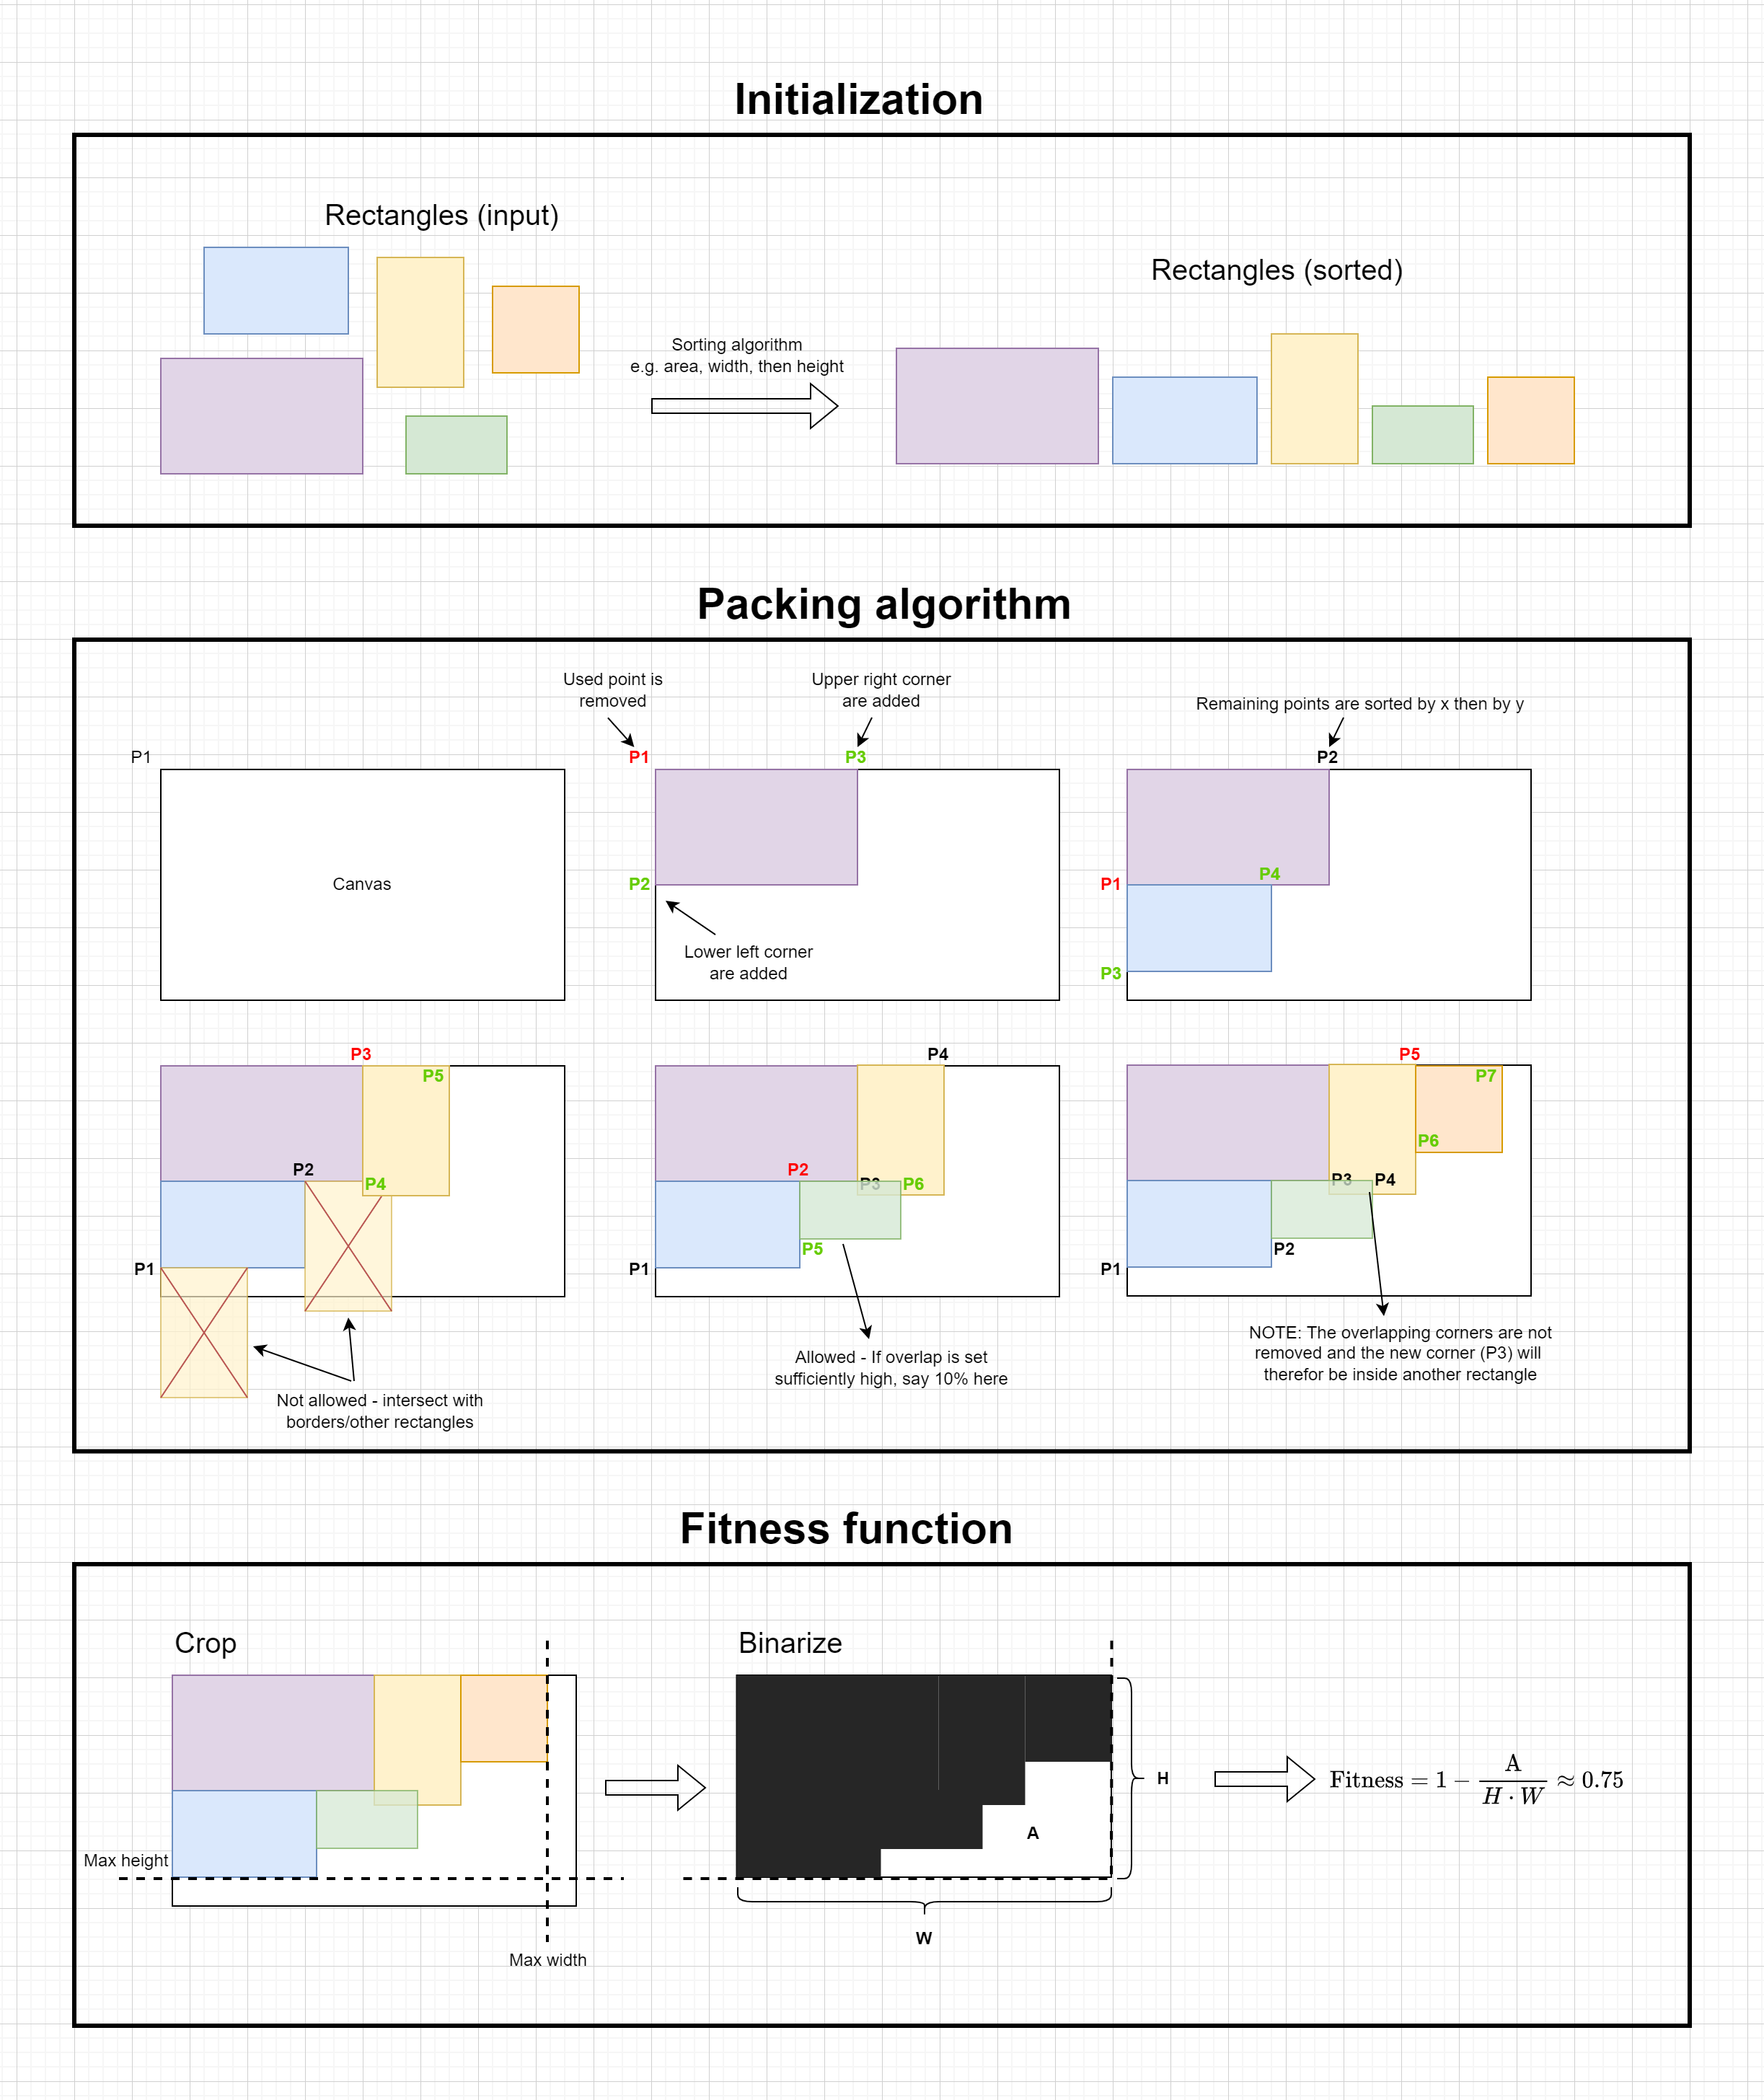
Case 2.
In case (2), a "collage" approach was employed. A set of potential canvases was provided to a packing algorithm, which then attempted to find a visually pleasing layout. Formalizing "visually pleasing" proved challenging and is still a work in progress. An illutstration of the packing algorithm can be seen below (A few details have been left out, but the illustation is mostly complete)


Download files
Download the file for your platform. If you're not sure which to choose, learn more about installing packages.
Source Distribution
Built Distribution
Filter files by name, interpreter, ABI, and platform.
If you're not sure about the file name format, learn more about wheel file names.
Copy a direct link to the current filters
File details
Details for the file justshowit-0.3.6.tar.gz.
File metadata
- Download URL: justshowit-0.3.6.tar.gz
- Upload date:
- Size: 2.1 MB
- Tags: Source
- Uploaded using Trusted Publishing? No
- Uploaded via: twine/5.0.0 CPython/3.11.8
File hashes
| Algorithm | Hash digest | |
|---|---|---|
| SHA256 |
e2196d18b9e3de42d0ff202cda56faf6f4b23d77802677a273cf0ce767d2bc76
|
|
| MD5 |
8996b201c0aaa36a74696133703f56ad
|
|
| BLAKE2b-256 |
f25c9b6de997e11b78bfd0e7534f363d79f4effa6e6cc0ea53dd2a2e7b6719d1
|
File details
Details for the file justshowit-0.3.6-py3-none-any.whl.
File metadata
- Download URL: justshowit-0.3.6-py3-none-any.whl
- Upload date:
- Size: 2.1 MB
- Tags: Python 3
- Uploaded using Trusted Publishing? No
- Uploaded via: twine/5.0.0 CPython/3.11.8
File hashes
| Algorithm | Hash digest | |
|---|---|---|
| SHA256 |
125d398bacb76c3d5a4de9635dd78804033c08466da901d76ebc87accb854ac9
|
|
| MD5 |
24634c7cf7239a61c863498f81612127
|
|
| BLAKE2b-256 |
4f7279da7af586ccddad93cfbde8fd1848deacd570b4f4ef47459b98fe747698
|


