Kompute: Blazing fast, mobile-enabled, asynchronous, and optimized for advanced GPU processing usecases.

Project description


|
KomputeThe general purpose GPU compute framework for cross vendor graphics cards (AMD, Qualcomm, NVIDIA & friends) |
Blazing fast, mobile-enabled, asynchronous, and optimized for advanced GPU acceleration usecases.
💬 Join the Discord & Community Calls 🔋 Documentation 💻 Blog Post ⌨ Examples 💾
Kompute is backed by the Linux Foundation as a hosted project by the LF AI & Data Foundation.

|

|
Principles & Features
- Flexible Python module with C++ SDK for optimizations
- Asynchronous & parallel processing support through GPU family queues
- Mobile enabled with examples via Android NDK across several architectures
- BYOV: Bring-your-own-Vulkan design to play nice with existing Vulkan applications
- Explicit relationships for GPU and host memory ownership and memory management
- Robust codebase with 90% unit test code coverage
- Advanced use-cases on machine learning 🤖, mobile development 📱 and game development 🎮.
- Active community with monthly calls, discord chat and more
Getting Started
Below you can find a GPU multiplication example using the C++ and Python Kompute interfaces.
You can join the Discord for questions / discussion, open a github issue, or read the documentation.
Your First Kompute (C++)
The C++ interface provides low level access to the native components of Kompute, enabling for advanced optimizations as well as extension of components.
void kompute(const std::string& shader) {

    // 1. Create Kompute Manager with default settings (device 0, first queue and no extensions)
    kp::Manager mgr;

    // 2. Create and initialise Kompute Tensors through manager

    // Default tensor constructor simplifies creation of float values
    auto tensorInA = mgr.tensor({ 2., 2., 2. });
    auto tensorInB = mgr.tensor({ 1., 2., 3. });
    // Explicit type constructor supports uint32, int32, double, float and bool
    auto tensorOutA = mgr.tensorT<uint32_t>({ 0, 0, 0 });
    auto tensorOutB = mgr.tensorT<uint32_t>({ 0, 0, 0 });

    std::vector<std::shared_ptr<kp::Tensor>> params = {tensorInA, tensorInB, tensorOutA, tensorOutB};

    // 3. Create algorithm based on shader (supports buffers & push/spec constants)
    kp::Workgroup workgroup({3, 1, 1});
    std::vector<float> specConsts({ 2 });
    std::vector<float> pushConstsA({ 2.0 });
    std::vector<float> pushConstsB({ 3.0 });

    auto algorithm = mgr.algorithm(params,
                                   // See documentation shader section for compileSource
                                   compileSource(shader),
                                   workgroup,
                                   specConsts,
                                   pushConstsA);

    // 4. Run operation synchronously using sequence
    mgr.sequence()
        ->record<kp::OpTensorSyncDevice>(params)
        ->record<kp::OpAlgoDispatch>(algorithm) // Binds default push consts
        ->eval() // Evaluates the two recorded operations
        ->record<kp::OpAlgoDispatch>(algorithm, pushConstsB) // Overrides push consts
        ->eval(); // Evaluates only last recorded operation

    // 5. Sync results from the GPU asynchronously
    auto sq = mgr.sequence();
    sq->evalAsync<kp::OpTensorSyncLocal>(params);

    // ... Do other work asynchronously whilst GPU finishes

    sq->evalAwait();

    // Prints the first output which is: { 4, 8, 12 }
    for (const float& elem : tensorOutA->vector()) std::cout << elem << "  ";
    // Prints the second output which is: { 10, 10, 10 }
    for (const float& elem : tensorOutB->vector()) std::cout << elem << "  ";

} // Manages / releases all CPU and GPU memory resources

int main() {

    // Define a raw string shader (or use the Kompute tools to compile to SPIRV / C++ header
    // files). This shader shows some of the main components including constants, buffers, etc
    std::string shader = (R"(
        #version 450

        layout (local_size_x = 1) in;

        // The input tensors bind index is relative to index in parameter passed
        layout(set = 0, binding = 0) buffer buf_in_a { float in_a[]; };
        layout(set = 0, binding = 1) buffer buf_in_b { float in_b[]; };
        layout(set = 0, binding = 2) buffer buf_out_a { uint out_a[]; };
        layout(set = 0, binding = 3) buffer buf_out_b { uint out_b[]; };

        // Kompute supports push constants updated on dispatch
        layout(push_constant) uniform PushConstants {
            float val;
        } push_const;

        // Kompute also supports spec constants on initalization
        layout(constant_id = 0) const float const_one = 0;

        void main() {
            uint index = gl_GlobalInvocationID.x;
            out_a[index] += uint( in_a[index] * in_b[index] );
            out_b[index] += uint( const_one * push_const.val );
        }
    )");

    // Run the function declared above with our raw string shader
    kompute(shader);
}
Your First Kompute (Python)
The Python package provides a high level interactive interface that enables for experimentation whilst ensuring high performance and fast development workflows.
from .utils import compile_source # using util function from python/test/utils

def kompute(shader):
    # 1. Create Kompute Manager with default settings (device 0, first queue and no extensions)
    mgr = kp.Manager()

    # 2. Create and initialise Kompute Tensors through manager

    # Default tensor constructor simplifies creation of float values
    tensor_in_a = mgr.tensor([2, 2, 2])
    tensor_in_b = mgr.tensor([1, 2, 3])
    # Explicit type constructor supports uint32, int32, double, float and bool
    tensor_out_a = mgr.tensor_t(np.array([0, 0, 0], dtype=np.uint32))
    tensor_out_b = mgr.tensor_t(np.array([0, 0, 0], dtype=np.uint32))

    params = [tensor_in_a, tensor_in_b, tensor_out_a, tensor_out_b]

    # 3. Create algorithm based on shader (supports buffers & push/spec constants)
    workgroup = (3, 1, 1)
    spec_consts = [2]
    push_consts_a = [2]
    push_consts_b = [3]

    # See documentation shader section for compile_source
    spirv = compile_source(shader)

    algo = mgr.algorithm(params, spirv, workgroup, spec_consts, push_consts_a)

    # 4. Run operation synchronously using sequence
    (mgr.sequence()
        .record(kp.OpTensorSyncDevice(params))
        .record(kp.OpAlgoDispatch(algo)) # Binds default push consts provided
        .eval() # evaluates the two recorded ops
        .record(kp.OpAlgoDispatch(algo, push_consts_b)) # Overrides push consts
        .eval()) # evaluates only the last recorded op

    # 5. Sync results from the GPU asynchronously
    sq = mgr.sequence()
    sq.eval_async(kp.OpTensorSyncLocal(params))

    # ... Do other work asynchronously whilst GPU finishes

    sq.eval_await()

    # Prints the first output which is: { 4, 8, 12 }
    print(tensor_out_a)
    # Prints the first output which is: { 10, 10, 10 }
    print(tensor_out_b)

if __name__ == "__main__":

    # Define a raw string shader (or use the Kompute tools to compile to SPIRV / C++ header
    # files). This shader shows some of the main components including constants, buffers, etc
    shader = """
        #version 450

        layout (local_size_x = 1) in;

        // The input tensors bind index is relative to index in parameter passed
        layout(set = 0, binding = 0) buffer buf_in_a { float in_a[]; };
        layout(set = 0, binding = 1) buffer buf_in_b { float in_b[]; };
        layout(set = 0, binding = 2) buffer buf_out_a { uint out_a[]; };
        layout(set = 0, binding = 3) buffer buf_out_b { uint out_b[]; };

        // Kompute supports push constants updated on dispatch
        layout(push_constant) uniform PushConstants {
            float val;
        } push_const;

        // Kompute also supports spec constants on initalization
        layout(constant_id = 0) const float const_one = 0;

        void main() {
            uint index = gl_GlobalInvocationID.x;
            out_a[index] += uint( in_a[index] * in_b[index] );
            out_b[index] += uint( const_one * push_const.val );
        }
    """

    kompute(shader)
Interactive Notebooks & Hands on Videos
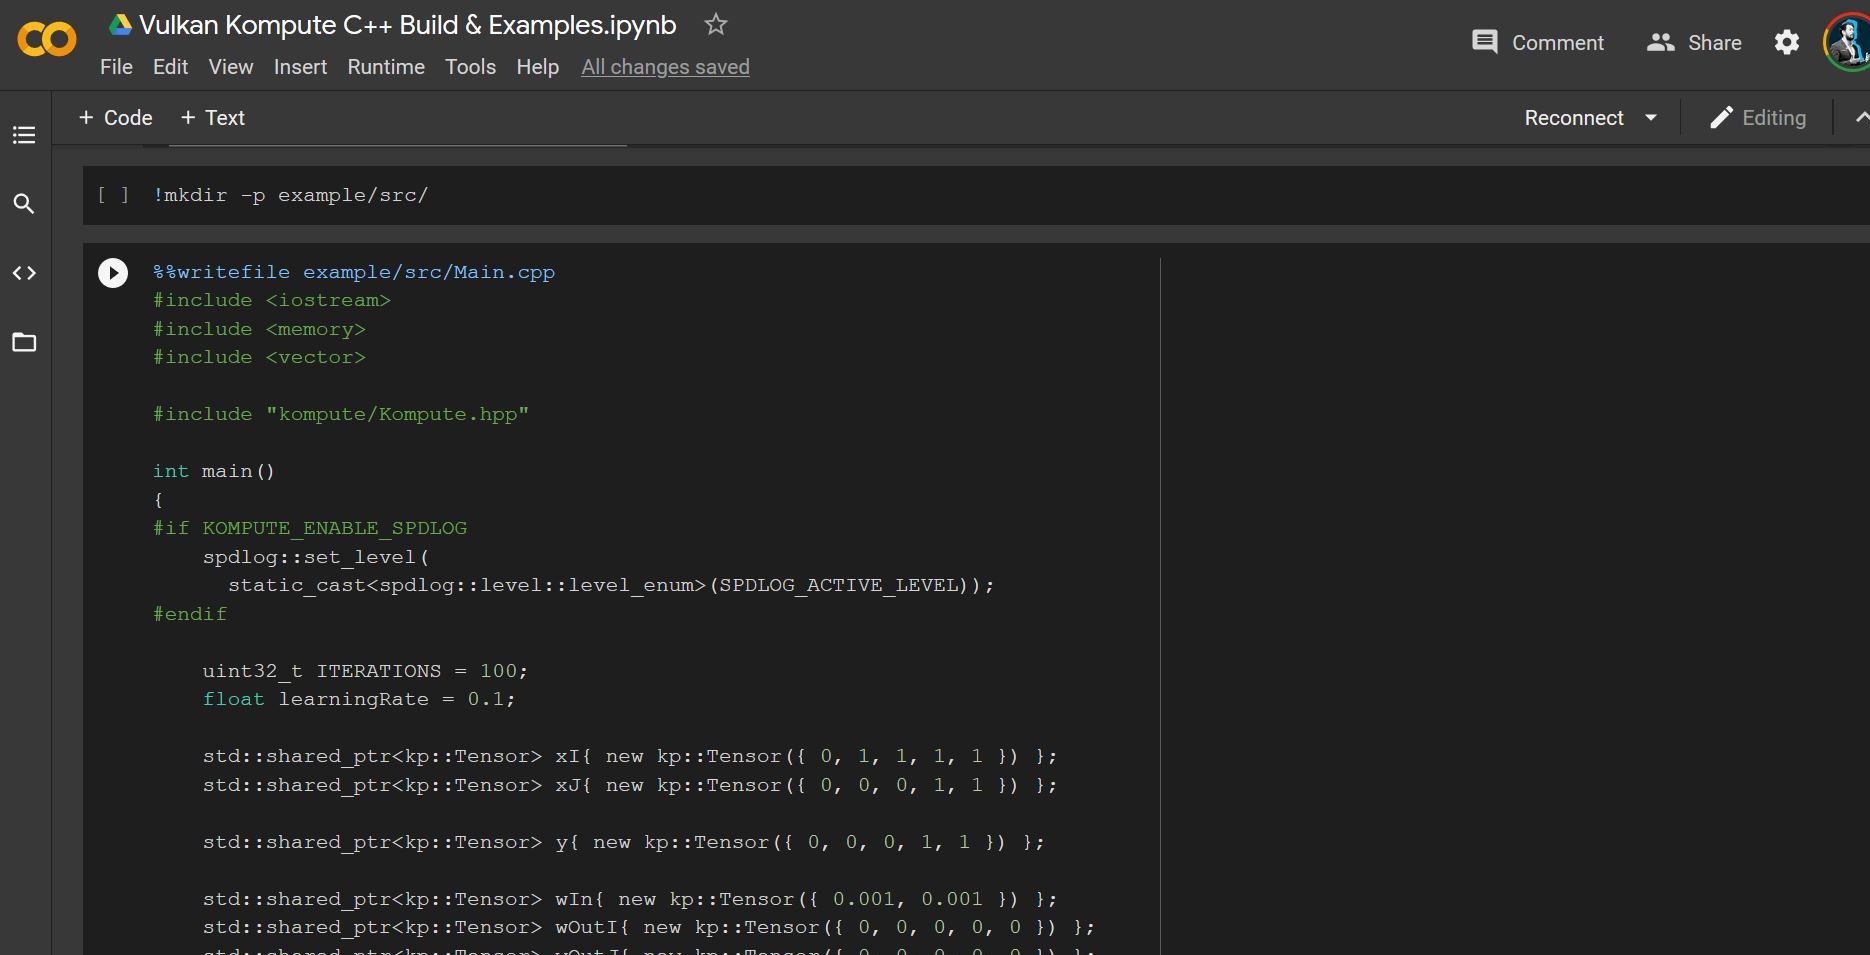
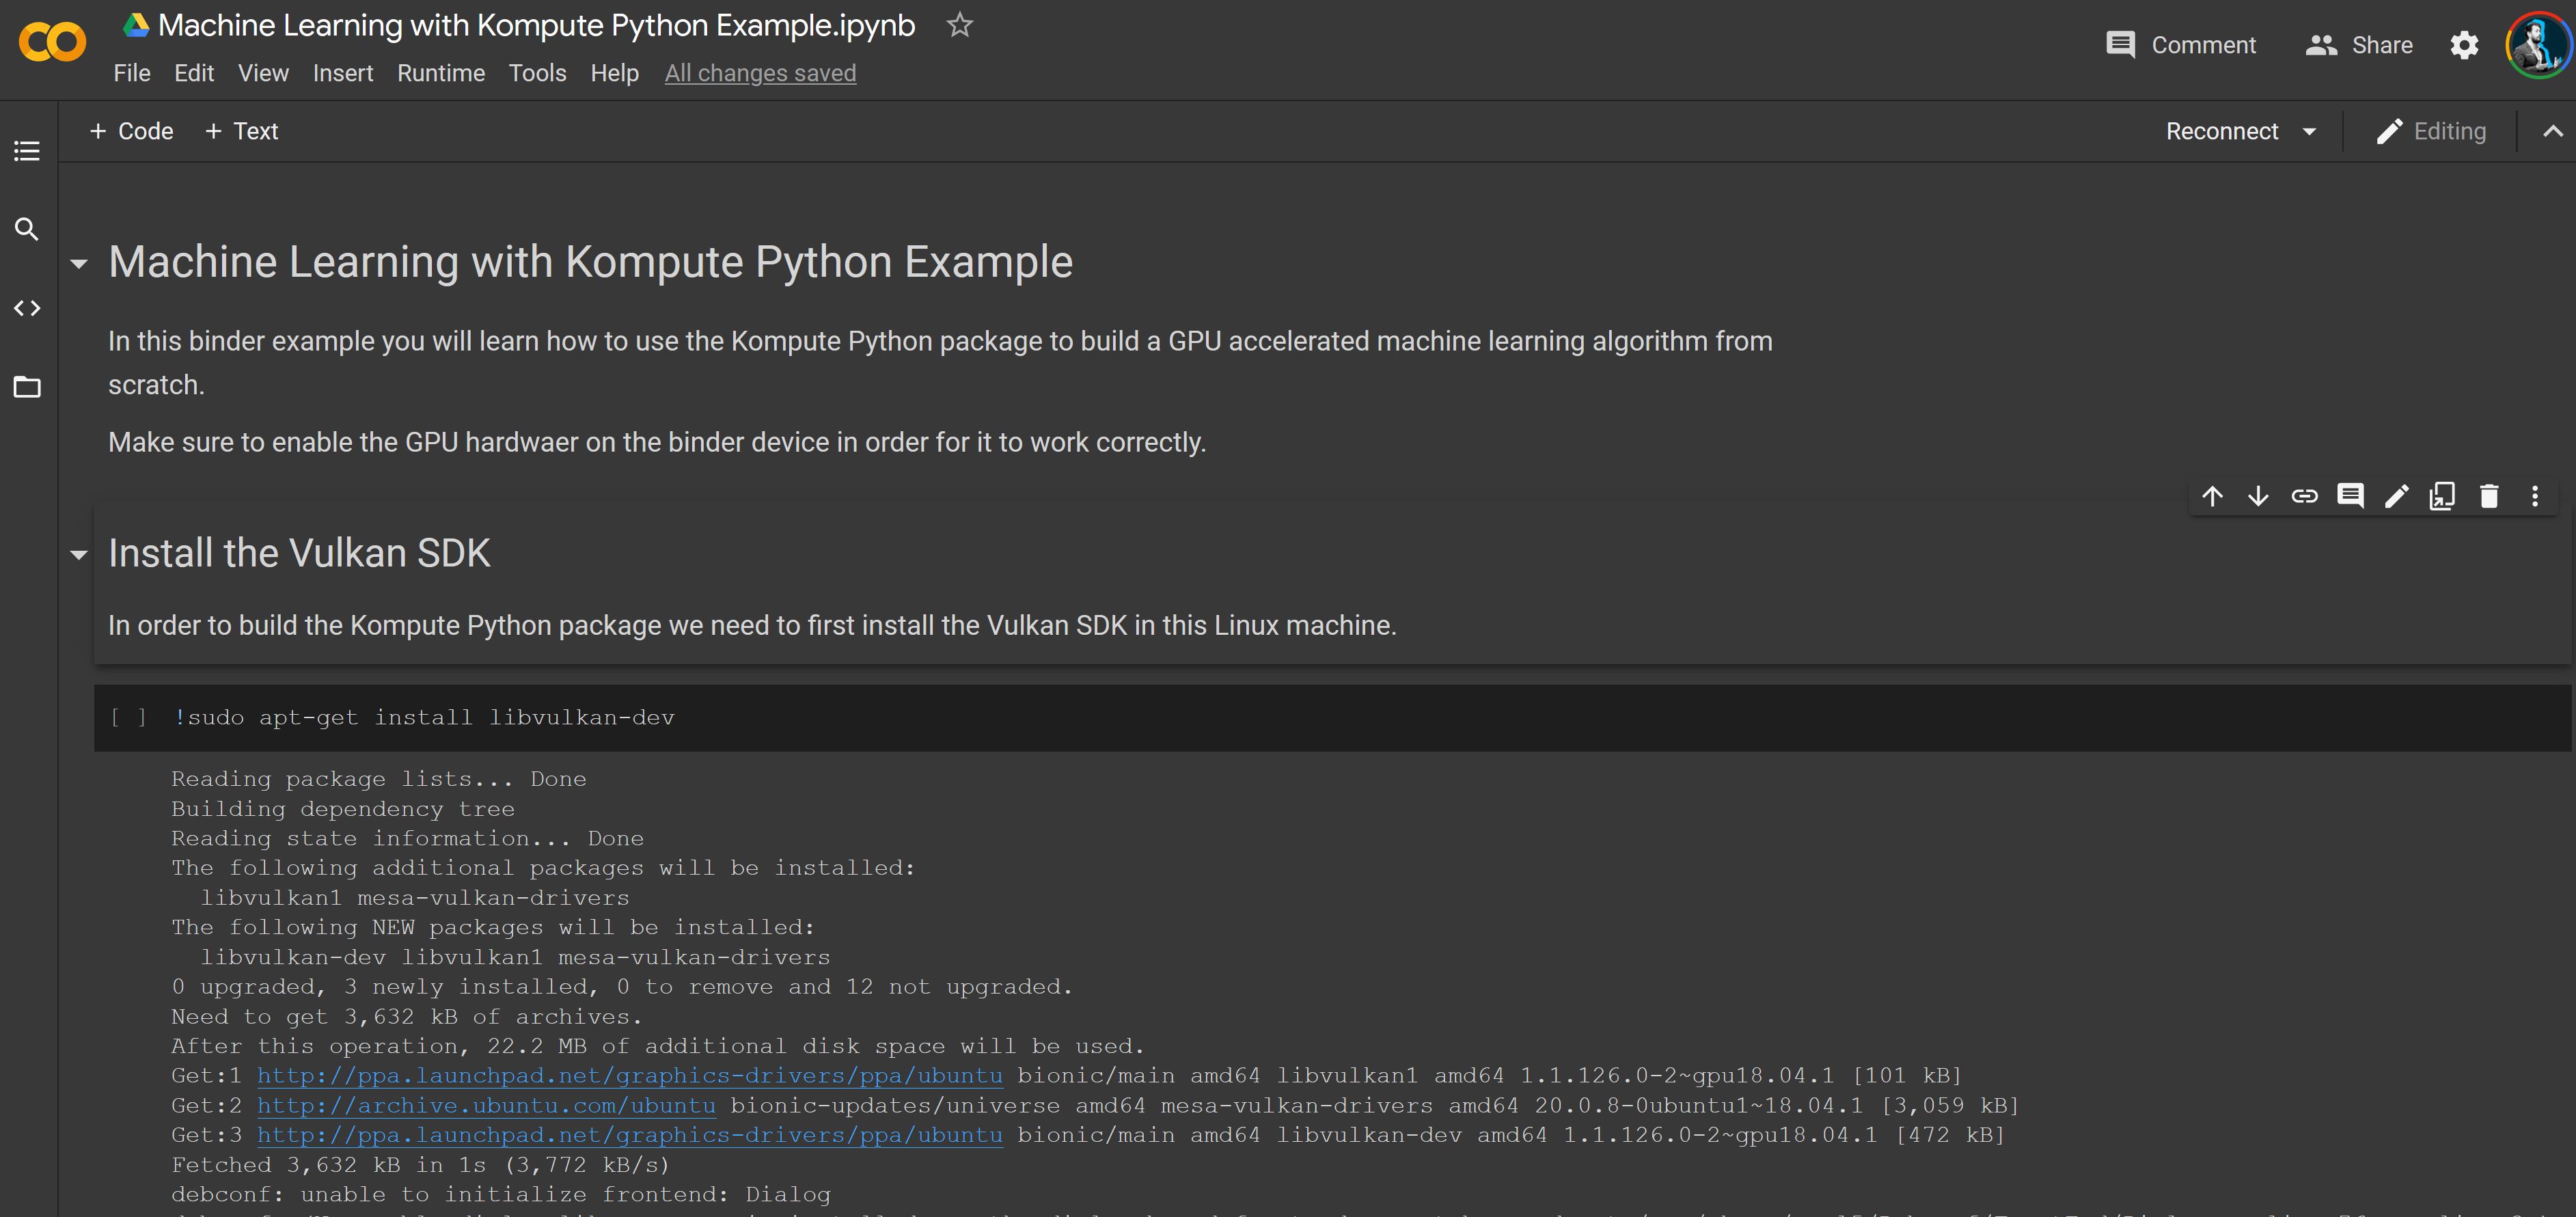
You are able to try out the interactive Colab Notebooks which allow you to use a free GPU. The available examples are the Python and C++ examples below:
Try the interactive C++ Colab from Blog Post |
Try the interactive Python Colab from Blog Post |
|
|
You can also check out the two following talks presented at the FOSDEM 2021 conference.
Both videos have timestamps which will allow you to skip to the most relevant section for you - the intro & motivations for both is almost the same so you can skip to the more specific content.
Watch the video for C++ Enthusiasts |
Watch the video for Python & Machine Learning Enthusiasts |
|
|
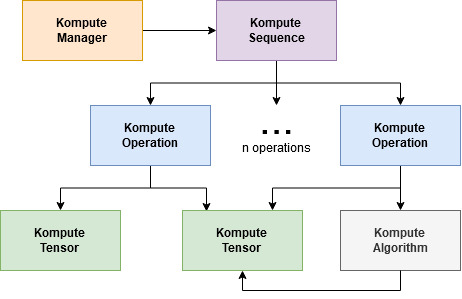
Architectural Overview
The core architecture of Kompute includes the following:
- Kompute Manager - Base orchestrator which creates and manages device and child components
- Kompute Sequence - Container of operations that can be sent to GPU as batch
- Kompute Operation (Base) - Base class from which all operations inherit
- Kompute Tensor - Tensor structured data used in GPU operations
- Kompute Algorithm - Abstraction for (shader) logic executed in the GPU
To see a full breakdown you can read further in the C++ Class Reference.
| Full Architecture | Simplified Kompute Components |
|---|---|

(very tiny, check the full reference diagram in docs for details) 
|
|
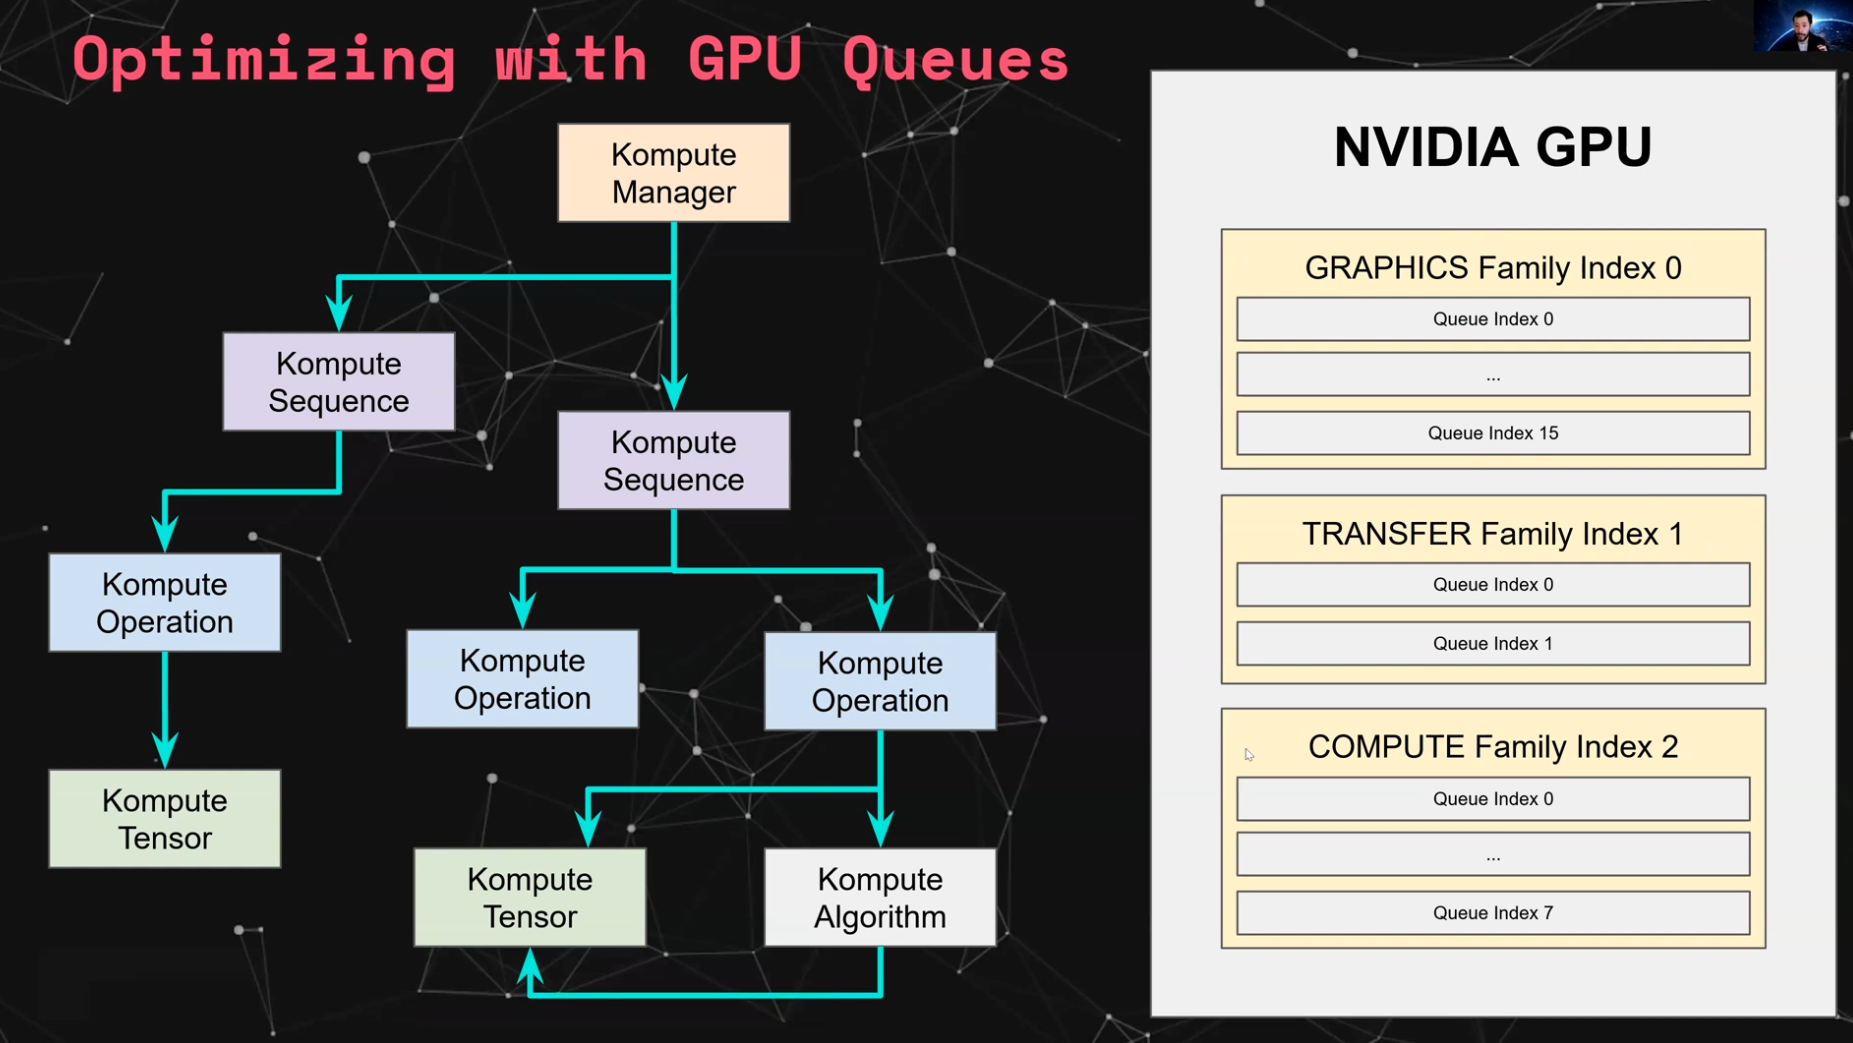
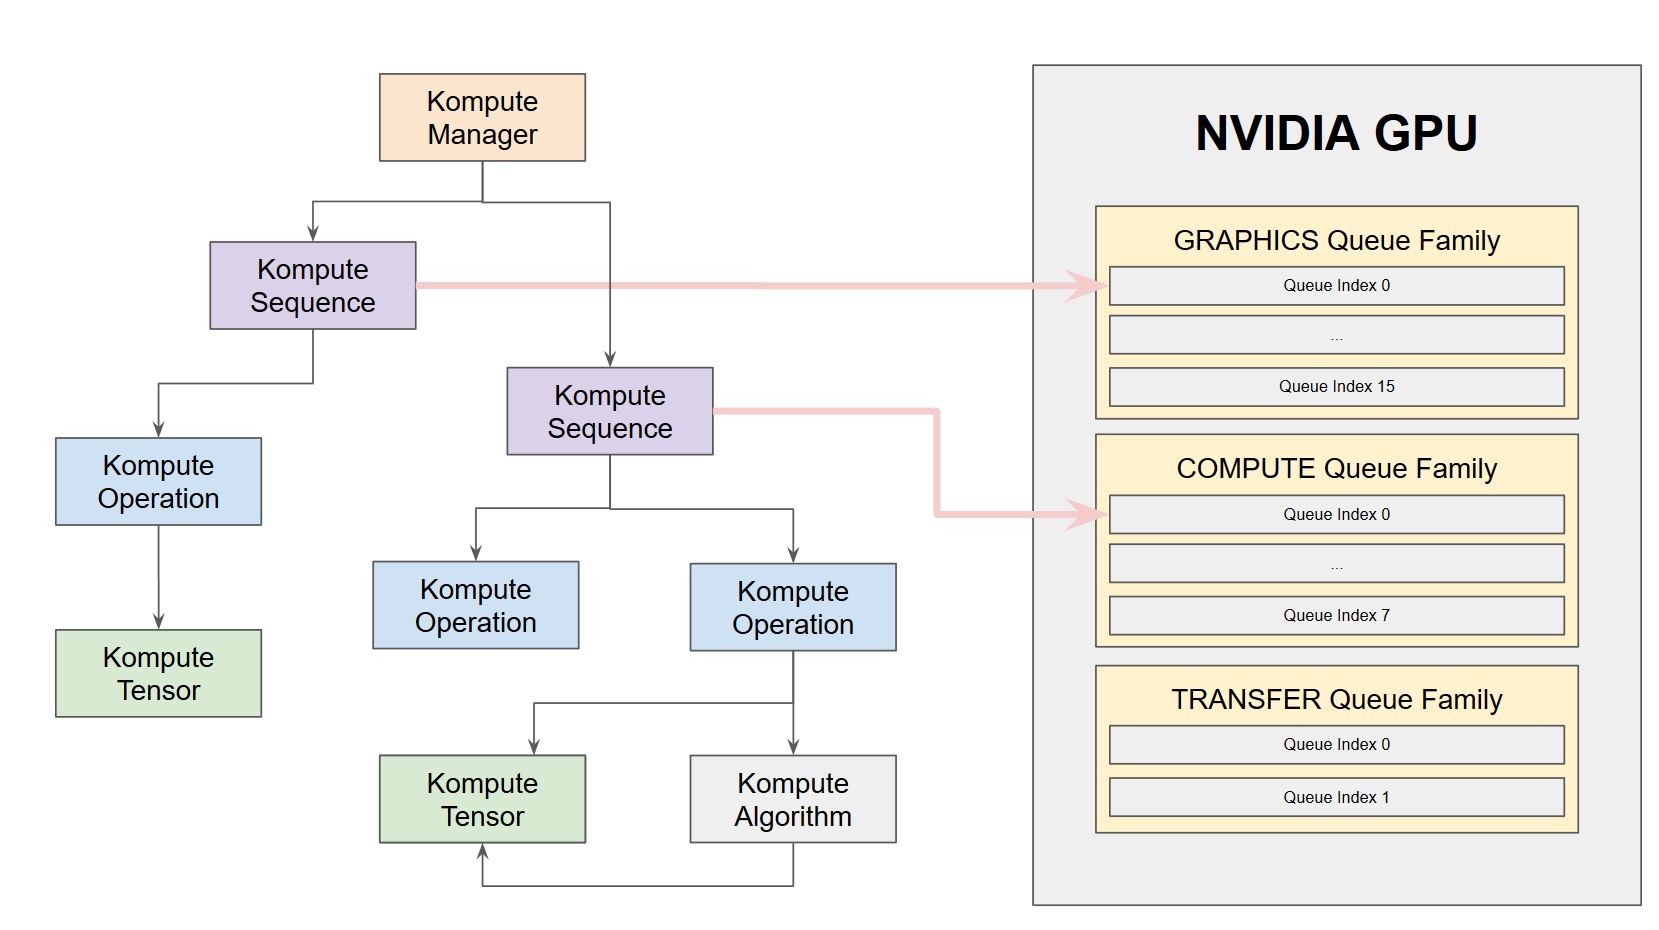
Asynchronous and Parallel Operations
Kompute provides flexibility to run operations in an asynrchonous way through vk::Fences. Furthermore, Kompute enables for explicit allocation of queues, which allow for parallel execution of operations across queue families.
The image below provides an intuition on how Kompute Sequences can be allocated to different queues to enable parallel execution based on hardware. You can see the hands on example, as well as the detailed documentation page describing how it would work using an NVIDIA 1650 as an example.
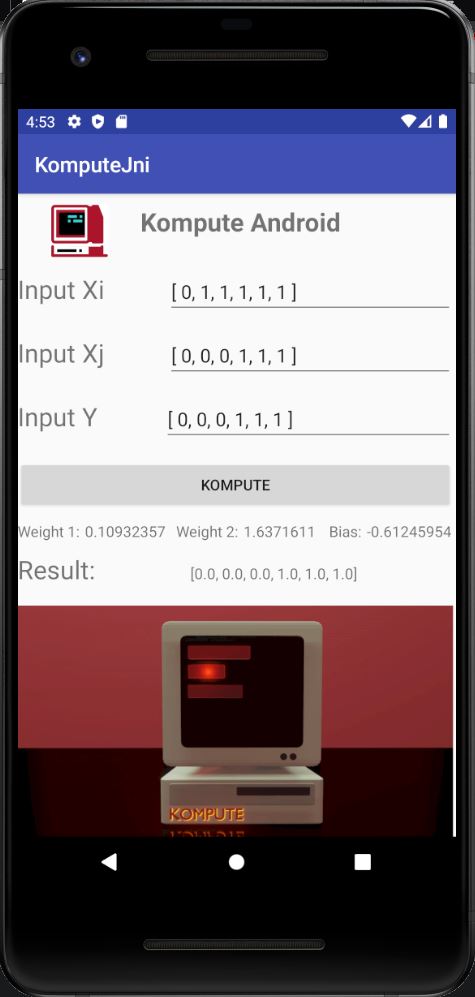
Mobile Enabled
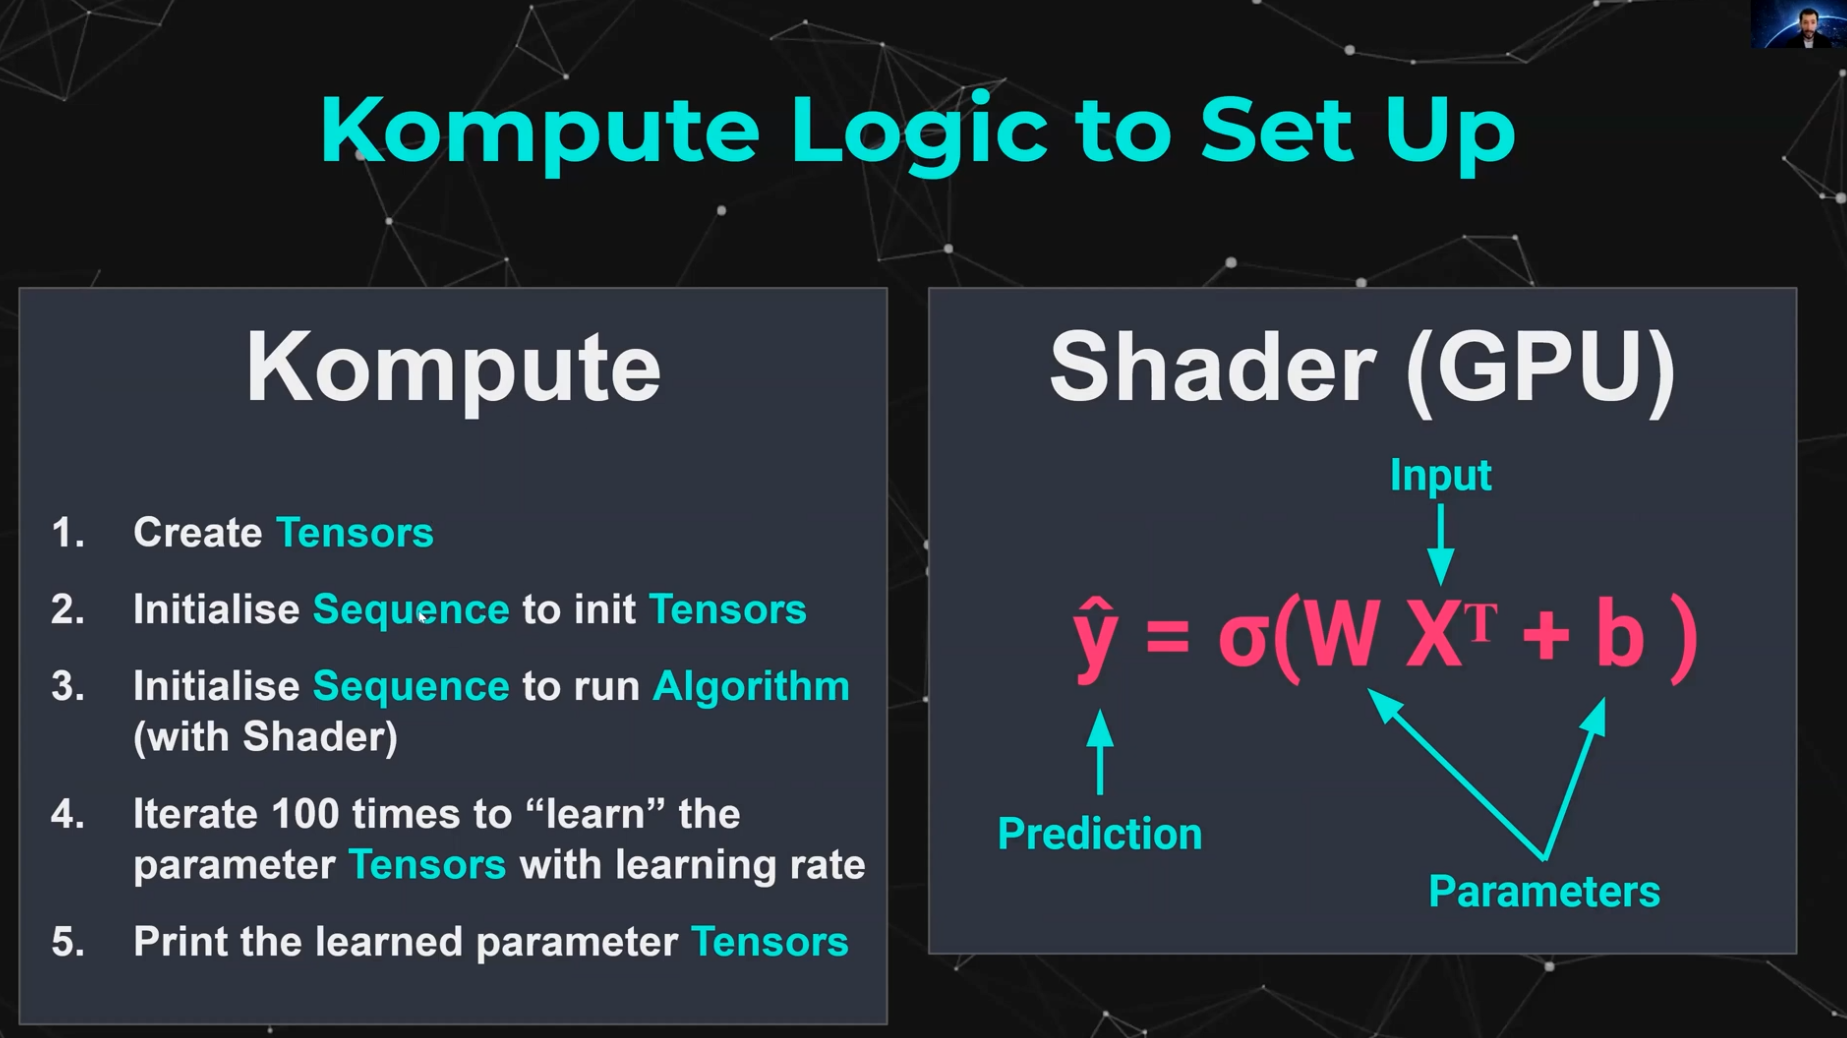
Kompute has been optimized to work in mobile environments. The build system enables for dynamic loading of the Vulkan shared library for Android environments, together with a working Android NDK wrapper for the CPP headers.
|
For a full deep dive you can read the blog post "Supercharging your Mobile Apps with On-Device GPU Accelerated Machine Learning". You can also access the end-to-end example code in the repository, which can be run using android studio. 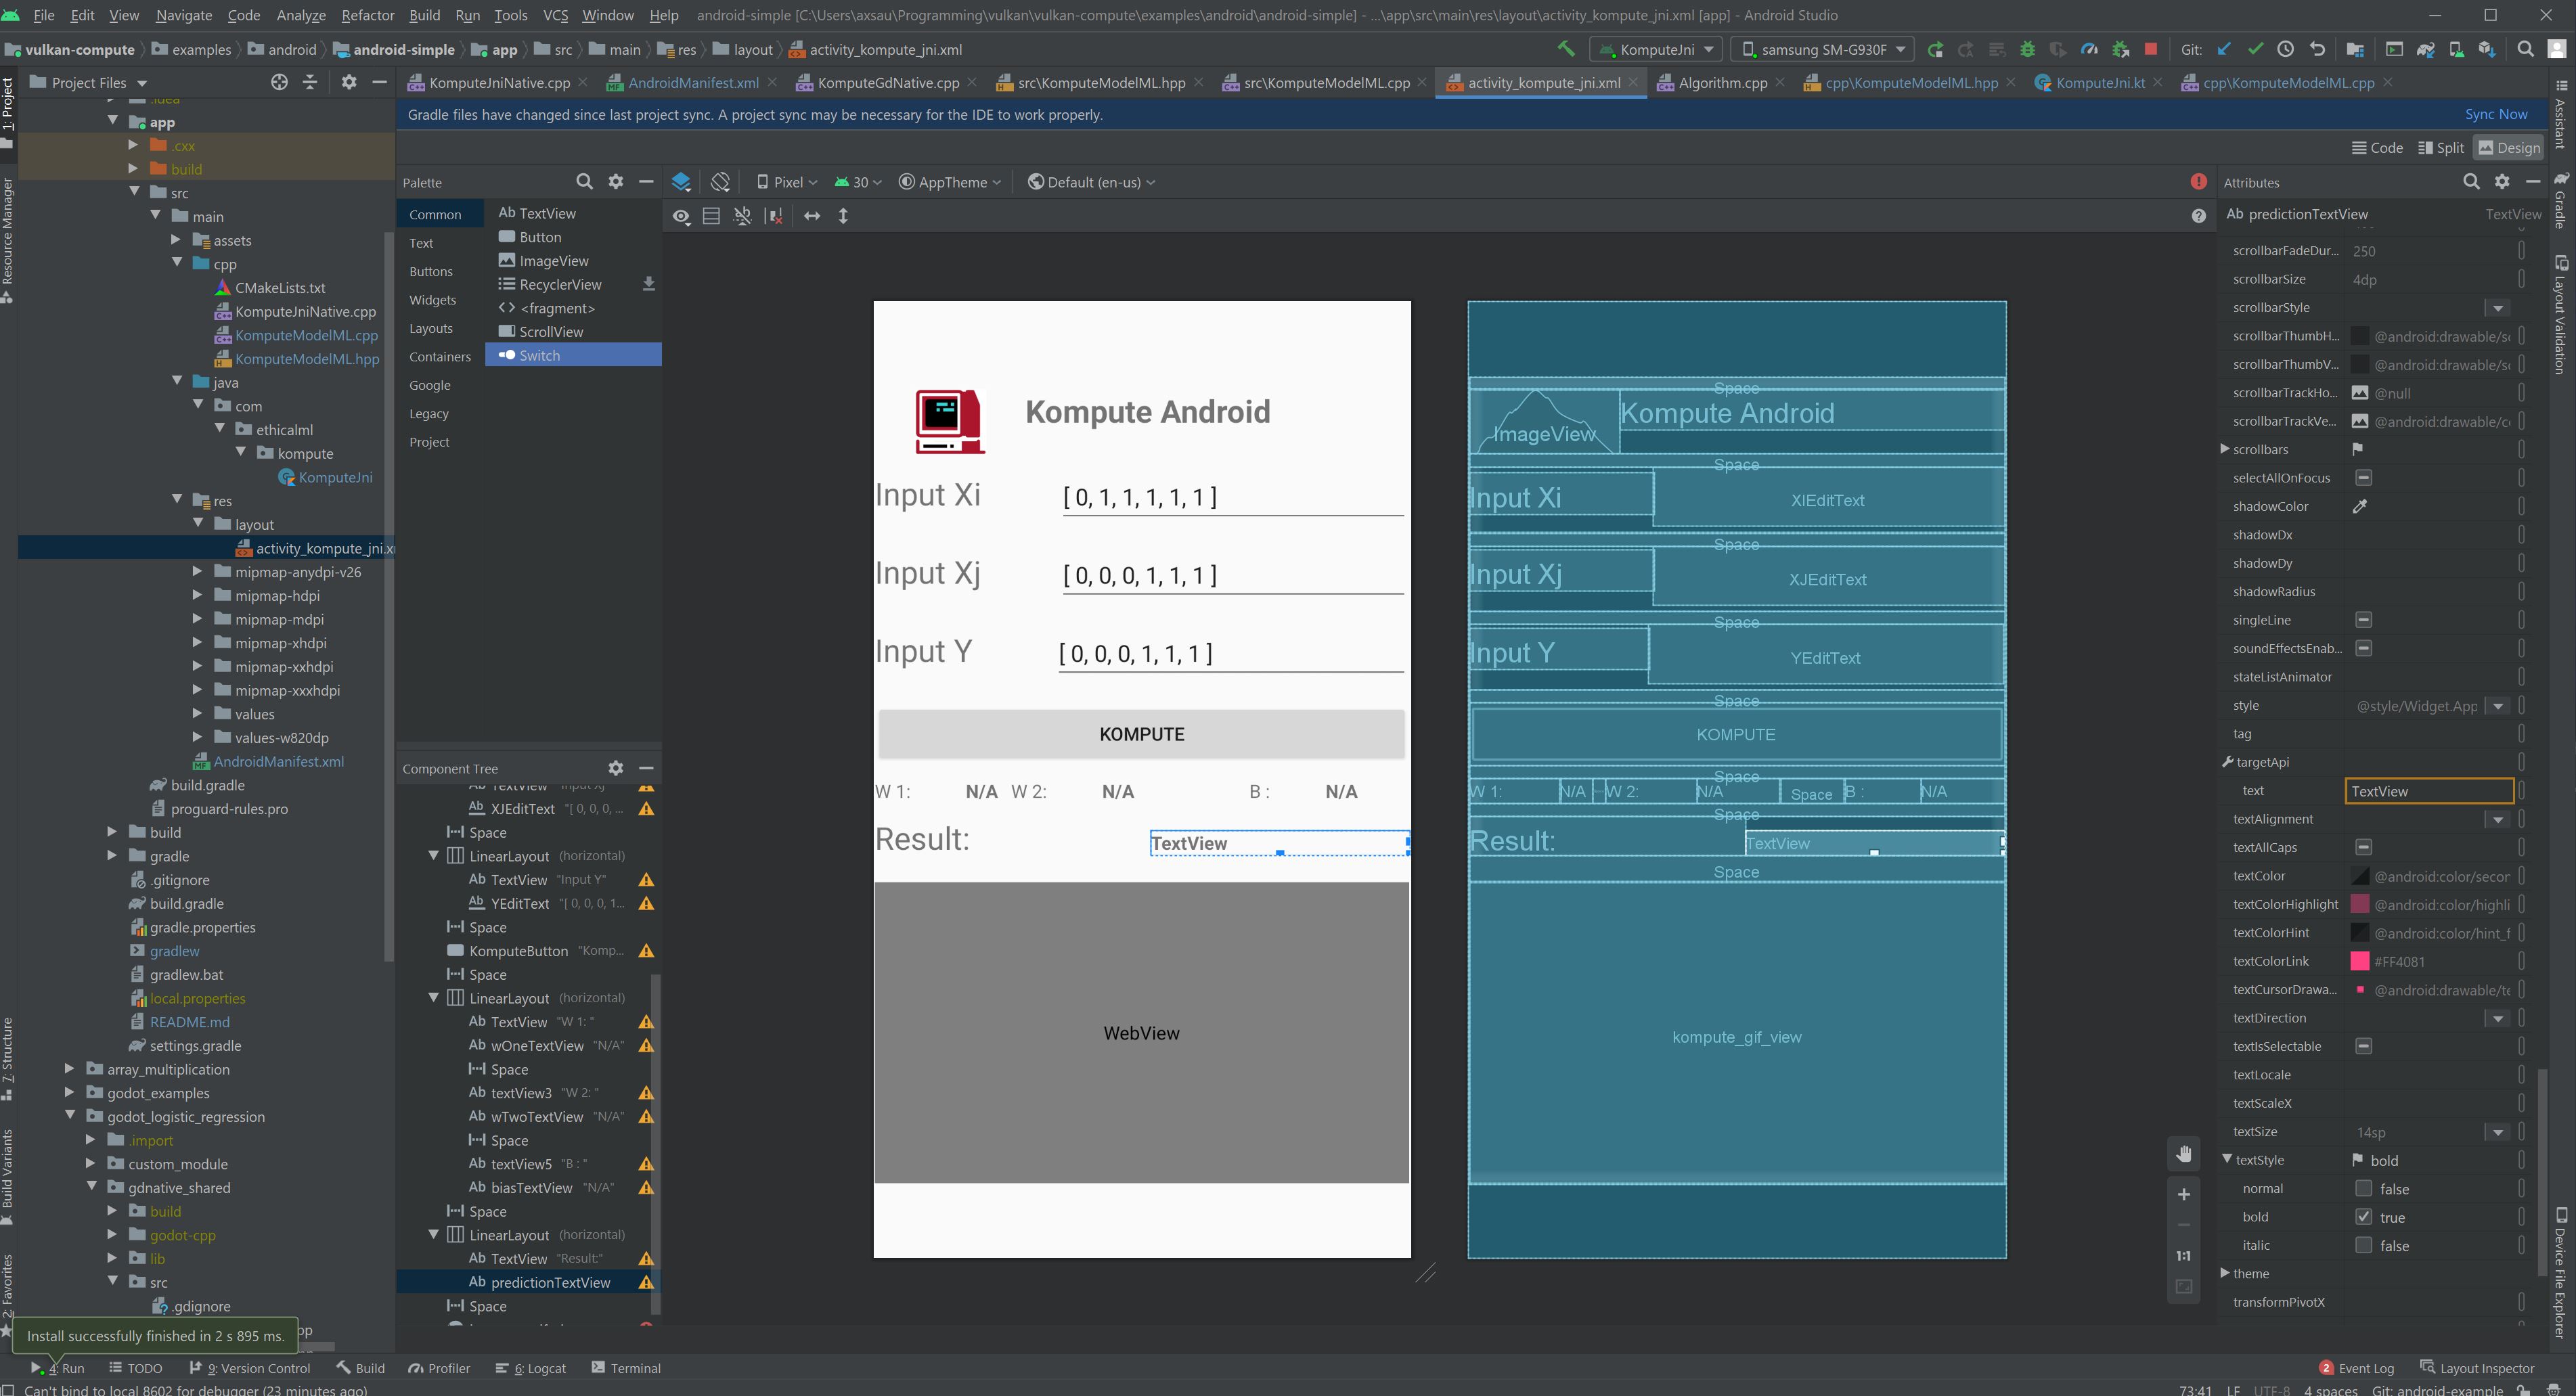
|
|
More examples
Simple examples
- Simple multiplication example
- Record batch commands with a Kompute Sequence
- Run Asynchronous Operations
- Run Parallel Operations Across Multiple GPU Queues
- Create your custom Kompute Operations
- Implementing logistic regression from scratch
End-to-end examples
- Machine Learning Logistic Regression Implementation
- Parallelizing GPU-intensive Workloads via Multi-Queue Operations
- Android NDK Mobile Kompute ML Application
- Game Development Kompute ML in Godot Engine
Python Package
Besides the C++ core SDK you can also use the Python package of Kompute, which exposes the same core functionality, and supports interoperability with Python objects like Lists, Numpy Arrays, etc.
The only dependencies are Python 3.5+ and Cmake 3.4.1+. You can install Kompute from the Python pypi package using the following command.
pip install kp
You can also install from master branch using:
pip install git+git://github.com/KomputeProject/kompute.git@master
For further details you can read the Python Package documentation or the Python Class Reference documentation.
C++ Build Overview
The build system provided uses cmake, which allows for cross platform builds.
The top level Makefile provides a set of optimized configurations for development as well as the docker image build, but you can start a build with the following command:
cmake -Bbuild
You also are able to add Kompute in your repo with add_subdirectory - the Android example CMakeLists.txt file shows how this would be done.
For a more advanced overview of the build configuration check out the Build System Deep Dive documentation.
Kompute Development
We appreciate PRs and Issues. If you want to contribute try checking the "Good first issue" tag, but even using Kompute and reporting issues is a great contribution!
Contributing
Dev Dependencies
- Testing
- GTest
- Documentation
- Doxygen (with Dot)
- Sphynx
Development
- Follows Mozilla C++ Style Guide https://www-archive.mozilla.org/hacking/mozilla-style-guide.html
- Uses post-commit hook to run the linter, you can set it up so it runs the linter before commit
- All dependencies are defined in vcpkg.json
- Uses cmake as build system, and provides a top level makefile with recommended command
- Uses xxd (or xxd.exe windows 64bit port) to convert shader spirv to header files
- Uses doxygen and sphinx for documentation and autodocs
- Uses vcpkg for finding the dependencies, it's the recommended set up to retrieve the libraries
If you want to run with debug layers you can add them with the KOMPUTE_ENV_DEBUG_LAYERS parameter as:
export KOMPUTE_ENV_DEBUG_LAYERS="VK_LAYER_LUNARG_api_dump"
Updating documentation
To update the documentation you will need to:
- Run the gendoxygen target in the build system
- Run the gensphynx target in the build-system
- Push to github pages with
make push_docs_to_ghpages
Running tests
Running the unit tests has been significantly simplified for contributors.
The tests run on CPU, and can be triggered using the ACT command line interface (https://github.com/nektos/act) - once you install the command line (And start the Docker daemon) you just have to type:
$ act

[Python Tests/python-tests] 🚀  Start image=axsauze/kompute-builder:0.2
[C++ Tests/cpp-tests      ] 🚀  Start image=axsauze/kompute-builder:0.2
[C++ Tests/cpp-tests      ]   🐳  docker run image=axsauze/kompute-builder:0.2 entrypoint=["/usr/bin/tail" "-f" "/dev/null"] cmd=[]
[Python Tests/python-tests]   🐳  docker run image=axsauze/kompute-builder:0.2 entrypoint=["/usr/bin/tail" "-f" "/dev/null"] cmd=[]
...
The repository contains unit tests for the C++ and Python code, and can be found under the test/ and python/test folder.
The tests are currently run through the CI using Github Actions. It uses the images found in docker-builders/.
In order to minimise hardware requirements the tests can run without a GPU, directly in the CPU using Swiftshader.
For more information on how the CI and tests are setup, you can go to the CI, Docker and Tests Section in the documentation.
Motivations
This project started after seeing that a lot of new and renowned ML & DL projects like Pytorch, Tensorflow, Alibaba DNN, Tencent NCNN - among others - have either integrated or are looking to integrate the Vulkan SDK to add mobile (and cross-vendor) GPU support.
The Vulkan SDK offers a great low level interface that enables for highly specialized optimizations - however it comes at a cost of highly verbose code which requires 500-2000 lines of code to even begin writing application code. This has resulted in each of these projects having to implement the same baseline to abstract the non-compute related features of the Vulkan SDK. This large amount of non-standardised boiler-plate can result in limited knowledge transfer, higher chance of unique framework implementation bugs being introduced, etc.
We are currently developing Kompute not to hide the Vulkan SDK interface (as it's incredibly well designed) but to augment it with a direct focus on the Vulkan SDK's GPU computing capabilities. This article provides a high level overview of the motivations of Kompute, together with a set of hands on examples that introduce both GPU computing as well as the core Kompute architecture.
Release history Release notifications | RSS feed


Download files
Download the file for your platform. If you're not sure which to choose, learn more about installing packages.
Source Distribution
File details
Details for the file kp-0.9.0.tar.gz.
File metadata
- Download URL: kp-0.9.0.tar.gz
- Upload date:
- Size: 106.4 kB
- Tags: Source
- Uploaded using Trusted Publishing? No
- Uploaded via: twine/4.0.2 CPython/3.8.18
File hashes
| Algorithm | Hash digest | |
|---|---|---|
| SHA256 |
98e583dc6e9731ff6d7a3e3317817e4d93f7b2945929619e29a56325db279949
|
|
| MD5 |
31438eb126fe2909a2fe91ccb088587a
|
|
| BLAKE2b-256 |
1bd534b557d8ce330fade0aa2e934d6a6871b02bbc6ef674abb153b4c1d0cdd0
|


