A bot that posts aerial imagery pictures of municipalities
Verified details
These details have been verified by PyPIProject links
GitHub Statistics
Maintainers

Project description
Munibot

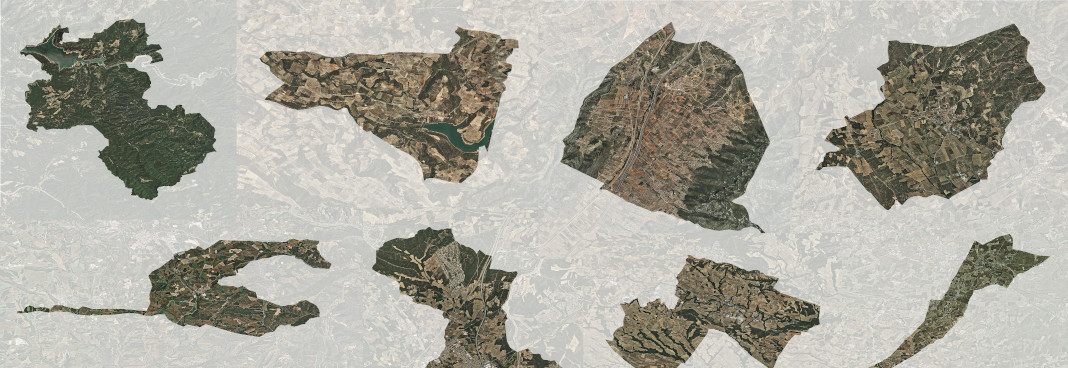
Munibot is a friendly Mastodon bot that posts aerial or satellite imagery of administrative regions (tipically municipalities).
It is written in a modular way so it's easy to customize to different data sources, via the implementation of profiles.
It currently powers the following Mastodon accounts:
-
@munibot_es: All municipalities in Spain, shown in random order, with base aerial ortophotograhy from PNOA IGN.
-
@munibot_cat: All municipalities in Catalonia, shown in random order, with base aerial ortophotograhy from ICGC.
-
@communebot: All communes in France, shown in random order, with base aerial ortophotograhy from IGN.
Here's how a sample post looks like:

Table of Contents
Usage
Installation
Munibot is available on PyPI and can be installed with pip. It is strongly recommended to install it in a virtual environment:
python3 -m venv munibot
source munibot/bin/activate

pip install munibot
Or alternatively, using pipx:
pipx install munibot
Munibot uses Rasterio and Fiona, which require GDAL. The wheels installed by pip on Linux (and macOS, although I have not tested it) include binaries for GDAL that cover munibot's need so it doesn't need to be installed separately. On other operating systems you might need to install GDAL.
Configuration
Munibot uses an ini file for configuration. You can download the sample ini file included in this repository running:
curl https://raw.githubusercontent.com/amercader/munibot/main/munibot.sample.ini -o munibot.ini
or:
wget https://raw.githubusercontent.com/amercader/munibot/main/munibot.sample.ini -O munibot.ini
Running it
Once munibot is installed, you should be able to run
munibot --help
Munibot assumes that the configuration ini file is located in the same folder the command is run on (and named "munibot.ini"). If that's not the case, you can pass the location of the configuration file with the --config or -c arguments:
munibot -c /path/to/munibot.ini
If at least a profile is available and all the necessary authorization tokens are available in the ini file (see Mastodon setup) just run the following to post a new image:
munibot post <profile-name>
If you only want to create the image without posting it use the create command:
munibot create <profile-name>
Deploying it
You don't need much to run munibot, just a system capable of running Python >= 3.6. Once installed, you probably want to schedule the sending of posts at regular intervals. An easy way available on Linux and macOS is cron. Here's an example configuration that you can adapt to your preferred interval and local paths (it assumes munibot was installed in a virtualenv in /home/user/munibot):
# Post an image every 8 hours (~3 times a day)
0 */8 * * * /home/user/munibot/bin/munibot --c /home/user/munibot/munibot.ini post cat >> /home/user/out/cat/munibot_cat.log 2>&1
You can adjust the log level in the munibot ini configuration file.
Writing your own profile
Munibot is designed to be easy to customize to different data sources in order to power different bot accounts. This is done via profile classes. Profiles implement a few mandatory and optional properties and methods that provide the different inputs necessary to generate the posts. Munibot takes care of the common functionality like generating the final image and sending the post.
To see the actual methods that your profile should implement check the BaseProfile class in munibot/profiles/base.py. Here's a quick overview of what you should provide:
- The geometry of the boundary of a particular administrative unit (given an id). This can come from any place that can end up providing a GeoJSON-like Python dict: an actual GeoJSON file, PostGIS database or a WFS service.
- The base image (aerial photography or satellite imagery) covering the extent of the administrative unit (given the extent). WMS services work really well for this as they allow to retrieve images of arbitrary extent and size.
- The text that should go along with the image in the post. Generally the name of the unit, plus some higher level unit for reference.
- A method that defines the id of the next unit that should be posted.
- Optionally, the latitude and longitude that should be added to the post.
Once you've implemented your profile class you can register using the munibot_profiles entry point in your package setup.py file:
"munibot_profiles": [
	"<profile_id>=<your_package>.profiles.:<YourProfileClass>",
]
You can check the examples included in this repository, in the munibot/profiles directory.
Mastodon setup
Each bot runs on its own dedicated account:
- Create an account in your server of choice. Set up
mastodon_account_nameandmastodon_api_base_urlaccordingly in the ini file. The latter should be the mastodon server host (e.g. "mastodon.social"). - Go to Settings > Development and click "New application"
- Add the bot name, and select the
profile,write:statusesandwrite:mediascopes. Submit to create - Click on the just created app, the "Your access token" value is the value you need to use for
mastodon_access_tokenin the ini file.
Development installation
Clone the repo and install the requirements:
git clone https://github.com/amercader/munibot.git
pip install -r requirements.txt
pip install -r dev-requirements.txt
To run the tests:
pytest
With coverage:
pytest -v --cov=munibot --cov-report term-missing
License
Project details
Verified details
These details have been verified by PyPIProject links
GitHub Statistics
Maintainers


Download files
Download the file for your platform. If you're not sure which to choose, learn more about installing packages.
Source Distribution
Built Distribution
Filter files by name, interpreter, ABI, and platform.
If you're not sure about the file name format, learn more about wheel file names.
Copy a direct link to the current filters
File details
Details for the file munibot-0.0.7.tar.gz.
File metadata
- Download URL: munibot-0.0.7.tar.gz
- Upload date:
- Size: 19.5 kB
- Tags: Source
- Uploaded using Trusted Publishing? Yes
- Uploaded via: twine/6.1.0 CPython/3.13.7
File hashes
| Algorithm | Hash digest | |
|---|---|---|
| SHA256 |
53d4cf3bfa80b415e0bbb4faae0dcfb4ce554fd227d5ae41c8ba7ccb82817b70
|
|
| MD5 |
7d9657e196303ef4a5ba55e32f72a2f5
|
|
| BLAKE2b-256 |
a82fa1e9d91f6bf3208a30215a717567cc4c3e8283f32ae14bb6ea9b527d81f9
|
Provenance
The following attestation bundles were made for munibot-0.0.7.tar.gz:
Publisher:
publish-pypi.yml on amercader/munibot
-
Statement:
-
Statement type:
https://in-toto.io/Statement/v1 -
Predicate type:
https://docs.pypi.org/attestations/publish/v1 -
Subject name:
munibot-0.0.7.tar.gz -
Subject digest:
53d4cf3bfa80b415e0bbb4faae0dcfb4ce554fd227d5ae41c8ba7ccb82817b70 - Sigstore transparency entry: 713512327
- Sigstore integration time:
-
Permalink:
amercader/munibot@63858a8dbd16967c478ac024ee7010f790ffb0ea -
Branch / Tag:
refs/tags/0.0.7 - Owner: https://github.com/amercader
-
Access:
public
-
Token Issuer:
https://token.actions.githubusercontent.com -
Runner Environment:
github-hosted -
Publication workflow:
publish-pypi.yml@63858a8dbd16967c478ac024ee7010f790ffb0ea -
Trigger Event:
push
-
Statement type:
File details
Details for the file munibot-0.0.7-py3-none-any.whl.
File metadata
- Download URL: munibot-0.0.7-py3-none-any.whl
- Upload date:
- Size: 23.0 kB
- Tags: Python 3
- Uploaded using Trusted Publishing? Yes
- Uploaded via: twine/6.1.0 CPython/3.13.7
File hashes
| Algorithm | Hash digest | |
|---|---|---|
| SHA256 |
1cf811fbca83f90bb9f8156affd973b359aac0c6c83b1bf9b7ec247dcad2d0ce
|
|
| MD5 |
34731b6556c13275a322c8a0b930cbdb
|
|
| BLAKE2b-256 |
fa866cc133b85f90137f29438a93a50584b69b33c93cfbaf205ebaff8da58bfb
|
Provenance
The following attestation bundles were made for munibot-0.0.7-py3-none-any.whl:
Publisher:
publish-pypi.yml on amercader/munibot
-
Statement:
-
Statement type:
https://in-toto.io/Statement/v1 -
Predicate type:
https://docs.pypi.org/attestations/publish/v1 -
Subject name:
munibot-0.0.7-py3-none-any.whl -
Subject digest:
1cf811fbca83f90bb9f8156affd973b359aac0c6c83b1bf9b7ec247dcad2d0ce - Sigstore transparency entry: 713512334
- Sigstore integration time:
-
Permalink:
amercader/munibot@63858a8dbd16967c478ac024ee7010f790ffb0ea -
Branch / Tag:
refs/tags/0.0.7 - Owner: https://github.com/amercader
-
Access:
public
-
Token Issuer:
https://token.actions.githubusercontent.com -
Runner Environment:
github-hosted -
Publication workflow:
publish-pypi.yml@63858a8dbd16967c478ac024ee7010f790ffb0ea -
Trigger Event:
push
-
Statement type:


