napari + DeepLabCut annotation tool

Project description
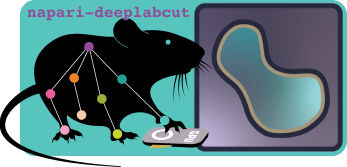
napari-deeplabcut - Keypoint annotation tool for pose estimation
📚 Plugin Documentation | 🛠️ DeepLabCut Installation | 🌎 DeepLabCut Home Page |


A napari plugin for keypoint annotation and label refinement, also used within DeepLabCut.
Installation
If you installed DeepLabCut[gui], this plugin is already included.
You can also install napari-deeplabcut as a standalone keypoint annotation plugin without using the full DeepLabCut GUI.
Standard install
Using pip (e.g. in a conda environment):
pip install napari-deeplabcut
Using uv:
uv venv -p 3.12 # create a new virtual environment with Python 3.12
source .venv/bin/activate # activate the virtual environment. Use the relevant command for your OS/shell if different.
uv pip install napari-deeplabcut
[!NOTE] A conda environment or uv venv is not strictly required. Please use your preferred package manager!
Latest development version
Using pip:
pip install git+https://github.com/DeepLabCut/napari-deeplabcut.git
Usage
Main documentation
Please see the official plugin documentation for detailed usage instructions.
Standalone usage
Start napari:
napari
Then activate the plugin in:
Plugins → napari-deeplabcut: Keypoint controls
Accepted files such as config.yaml, image folders, videos, and .h5 annotation files can be loaded either by dragging them onto the canvas or through the File menu.
[!TIP] The widget opens automatically when drag-and-dropping a compatible labeled-data folder.
Recommended way to get started
The easiest way to start labeling from scratch is:
- Open (or drag-and-drop) an image-only folder from your computer, or within a DeepLabCut project's
labeled-datadirectory
- This means that only the images are loaded, without any existing annotations
- Open (or drag-and-drop) the
config.yamlfrom your project
This creates:
- an Image layer with the images (or video frames), and
- an empty Points layer populated with the keypoint metadata from the config.
You may then start annotating in the points layer that was created.
[!NOTE] If you load a folder from outside a DeepLabCut project and try to save a Points layer, you will be prompted to provide the config.yaml file used by the project. You may then move the labeled data folder into your project directory for downstream use.
Tools and shortcuts
2/3: switch between labeling and selection mode when a Points layer is active4: enable pan & zoomM: cycle through sequential, quick, and cycle annotation modesE: toggle edge coloringF: toggle between individual and body-part coloring modesV: toggle visibility of the selected layerBackspace: delete selected point(s)Ctrl+C/Ctrl+V: copy and paste selected points- Double-click the current frame number to jump to a specific frame
[!TIP] Press the "View shortcuts" button in the dock widget for a reference.
Additional dock controls include:
- Warn on overwrite: enable or disable confirmation prompts when saving would overwrite existing annotations
- Show trails: display keypoint trails over time in the main viewer
- Show trajectories: open a trajectory plot in a separate dock widget
- Show color scheme: display the active/configured color mapping reference
- Video tools: extract the current frame and store crop coordinates for videos
Saving layers
Use:
File → Save Selected Layer(s)...
or the shortcut:
Ctrl+S
Keypoint save behavior
Keypoint annotations are automatically saved into the corresponding dataset folder as:
CollectedData_<ScorerName>.h5
For convenience, the companion .csv file is written in the same folder.
Important notes
- DeepLabCut uses the H5 file as the authoritative annotation file.
- Before saving, make sure the Points layer you want to save is selected.
- The plugin will not save if several Points layers are selected at the same time, to avoid ambiguity.
- Saving a
machinelabels...layer does not write back to the machine labels file. Instead, refined annotations are written into the appropriateCollectedData...file. - If saving would overwrite existing annotations, the plugin will prompt for confirmation.
- While labeling, confirmation can be disabled by unchecking the "Warn on overwrite" option in the dock widget.
- Several plugin functions implicitly expect
config.yamlto be present two folders up from the savedCollectedData...file, so make sure to keep the config in the project directory structure for best results. Fallback behaviors are present but may not cover all edge cases.- If you save a Points layer without a config file present in the expected location, you will be prompted to provide the path to the config file that matches the dataset you are working on. The plugin will then save the points and metadata into the correct folder based on the config path provided. Afterwards, it is recommended to move the dataset folder into the correct location within the project directory structure for best compatibility with other DeepLabCut functions. Please edit the
config.yamlfile if needed to update the paths to the videos and image folders.
- If you save a Points layer without a config file present in the expected location, you will be prompted to provide the path to the config file that matches the dataset you are working on. The plugin will then save the points and metadata into the correct folder based on the config path provided. Afterwards, it is recommended to move the dataset folder into the correct location within the project directory structure for best compatibility with other DeepLabCut functions. Please edit the
Video support
Videos can be opened directly in the GUI.
When a video is loaded, the plugin enables a small video action panel that can be used to:
- Extract the current frame into the dataset
- Optionally export existing machine labels for that frame
- Define and save crop coordinates to the DLC
config.yaml
Keypoints in video-based workflows can be edited and saved in the same way as ordinary image-folder workflows.
Workflow (outside of DLC GUI)
Suggested workflows depend on what is already present in the dataset folder.
Please note this describes the workflow when napari is launched as a standalone application, outside of the DeepLabCut GUI.
1) Labeling from scratch
Use this when the image folder does not yet contain a CollectedData_<ScorerName>.h5 file.
- Open a folder of extracted images
- Open the corresponding DeepLabCut
config.yaml - Select the created Points layer
- Start labeling
- Save the points layer with
Ctrl+S
After saving, the folder should now contain:
CollectedData_<ScorerName>.h5
CollectedData_<ScorerName>.csv
2) Resuming labeling
Use this when the folder already contains a CollectedData_<ScorerName>.h5 file.
Open (or drag-and-drop) the folder in napari. The existing keypoint metadata and annotations will be loaded from the H5 file, so loading config.yaml is not needed nor recommended.
However, loading the config is still useful if:
- The project’s bodyparts changed
- You would like to refresh the configured color scheme from the project config
3) Refining machine labels
Use this when the folder contains a machine predictions file such as:
machinelabels-iter<...>.h5
Open the folder in napari.
If both a CollectedData... file and a machinelabels... file are present:
- Edit the
machinelabelslayer to refine predictions - Optionally use edge coloring (
E) to highlight low-confidence labels - Save the selected
machinelabelslayer to merge refinements intoCollectedData
If the folder contains only machinelabels... and no CollectedData..., refined annotations will still be saved into a new CollectedData... target.
Workflow flowchart
%%{init: {"flowchart": {"htmlLabels": false}} }%%
graph TD
  id1[What stage of labeling?]
  id2[deeplabcut.label_frames]
  id3[deeplabcut.refine_labels]
  id4[Add labels to, or modify in,
 `CollectedData...` layer and save that layer]
  id5[Modify labels in `machinelabels` layer and save
 which will create or update `CollectedData...`]
  id6[Have you refined some labels from the most recent iteration and saved already?]
  id7["All extracted frames are already saved in `CollectedData...`.
1. Hide or remove all `machinelabels` layers.
2. Continue working in `CollectedData`."]
  id8["1. Keep only the most recent `machinelabels` layer.
2. Select it and press `E` to show edges.
3. Refine labels in `machinelabels`.
4. Save to merge into `CollectedData`.
- If you revisit the dataset later, you can continue working in `CollectedData`."]

  id1 -->|I need to manually label new frames
 or fix existing labels|id2
  id1 -->|I need to refine outlier frames
 from analyzed videos|id3
  id2 --> id4
  id3 -->|I only have a `machinelabels...` file|id5
  id3 -->|I have both `machinelabels` and `CollectedData` files|id6
  id6 -->|yes|id7
  id6 -->|no, I just extracted outliers|id8
Labeling multiple image folders
Only one dataset folder should be worked on at a time.
After finishing a folder:
- Save the relevant Points layer
- Remove the current layers from the viewer
- Open the next folder
This keeps plugin operation and saving unambiguous.
Defining crop coordinates
To store crop coordinates in a DLC project:
- Open the video from the project’s
videosfolder - Enable cropping in the video tools
- Draw a rectangle in the newly created crop layer (the tool is selected by default)
- Click Store crop coordinates after checking the coordinates in the widget.
The crop coordinates are then written back to the project configuration.
Contributing
Contributions are welcome.
Tests can be run locally with tox. Please note we use pre-commit hooks to run linters and formatters on changed files, so make sure to install the pre-commit dependencies:
pip install pre-commit
pre-commit install
Development install
Clone the repository and install it in editable mode.
Using pip:
pip install -e .
If you need development dependencies as well, use the project’s dev extra:
pip install -e .[dev] # includes pre-commit
License
Distributed under the terms of the LGPL-3.0.
Issues
If you encounter any problems, please file an issue with a detailed description and, if possible, a minimal reproducible example.
Acknowledgements
This napari plugin was originally generated with Cookiecutter using @napari's cookiecutter-napari-plugin template.
We thank the Chan Zuckerberg Initiative (CZI) for funding the initial development of this work!
Release history Release notifications | RSS feed


Download files
Download the file for your platform. If you're not sure which to choose, learn more about installing packages.
Source Distribution
Built Distribution
Filter files by name, interpreter, ABI, and platform.
If you're not sure about the file name format, learn more about wheel file names.
Copy a direct link to the current filters
File details
Details for the file napari_deeplabcut-0.3.1.2.tar.gz.
File metadata
- Download URL: napari_deeplabcut-0.3.1.2.tar.gz
- Upload date:
- Size: 2.0 MB
- Tags: Source
- Uploaded using Trusted Publishing? No
- Uploaded via: twine/6.2.0 CPython/3.14.6
File hashes
| Algorithm | Hash digest | |
|---|---|---|
| SHA256 |
ed8c66f649798f667db337affa2263e68dfb6cbea92dc262e971f9aa9789f858
|
|
| MD5 |
c570d3ea081408f31b158a1eabfef56c
|
|
| BLAKE2b-256 |
6694d55dad95dd805037b5bab63a5d912ae040b3f78974338958aee49cb1a1c6
|
File details
Details for the file napari_deeplabcut-0.3.1.2-py3-none-any.whl.
File metadata
- Download URL: napari_deeplabcut-0.3.1.2-py3-none-any.whl
- Upload date:
- Size: 1.2 MB
- Tags: Python 3
- Uploaded using Trusted Publishing? No
- Uploaded via: twine/6.2.0 CPython/3.14.6
File hashes
| Algorithm | Hash digest | |
|---|---|---|
| SHA256 |
688ffe76674ab2e5b4ad48fae8fc197c875e8ab7db9d9cdd13535d60e21cfb93
|
|
| MD5 |
f38fc866f07bb1d9b2ea15d55c3b2d6d
|
|
| BLAKE2b-256 |
cd53dbbbe2f2f83a42e2c85f9ebc519237f195cfcb7ca42fb3af0c03abb8f8bc
|


