A GUI interface for training and prediction using the nucleAIzer nuclei detection method.


Project description
napari_nucleaizer


GUI for the nucleaAIzer method in Napari.
Overview
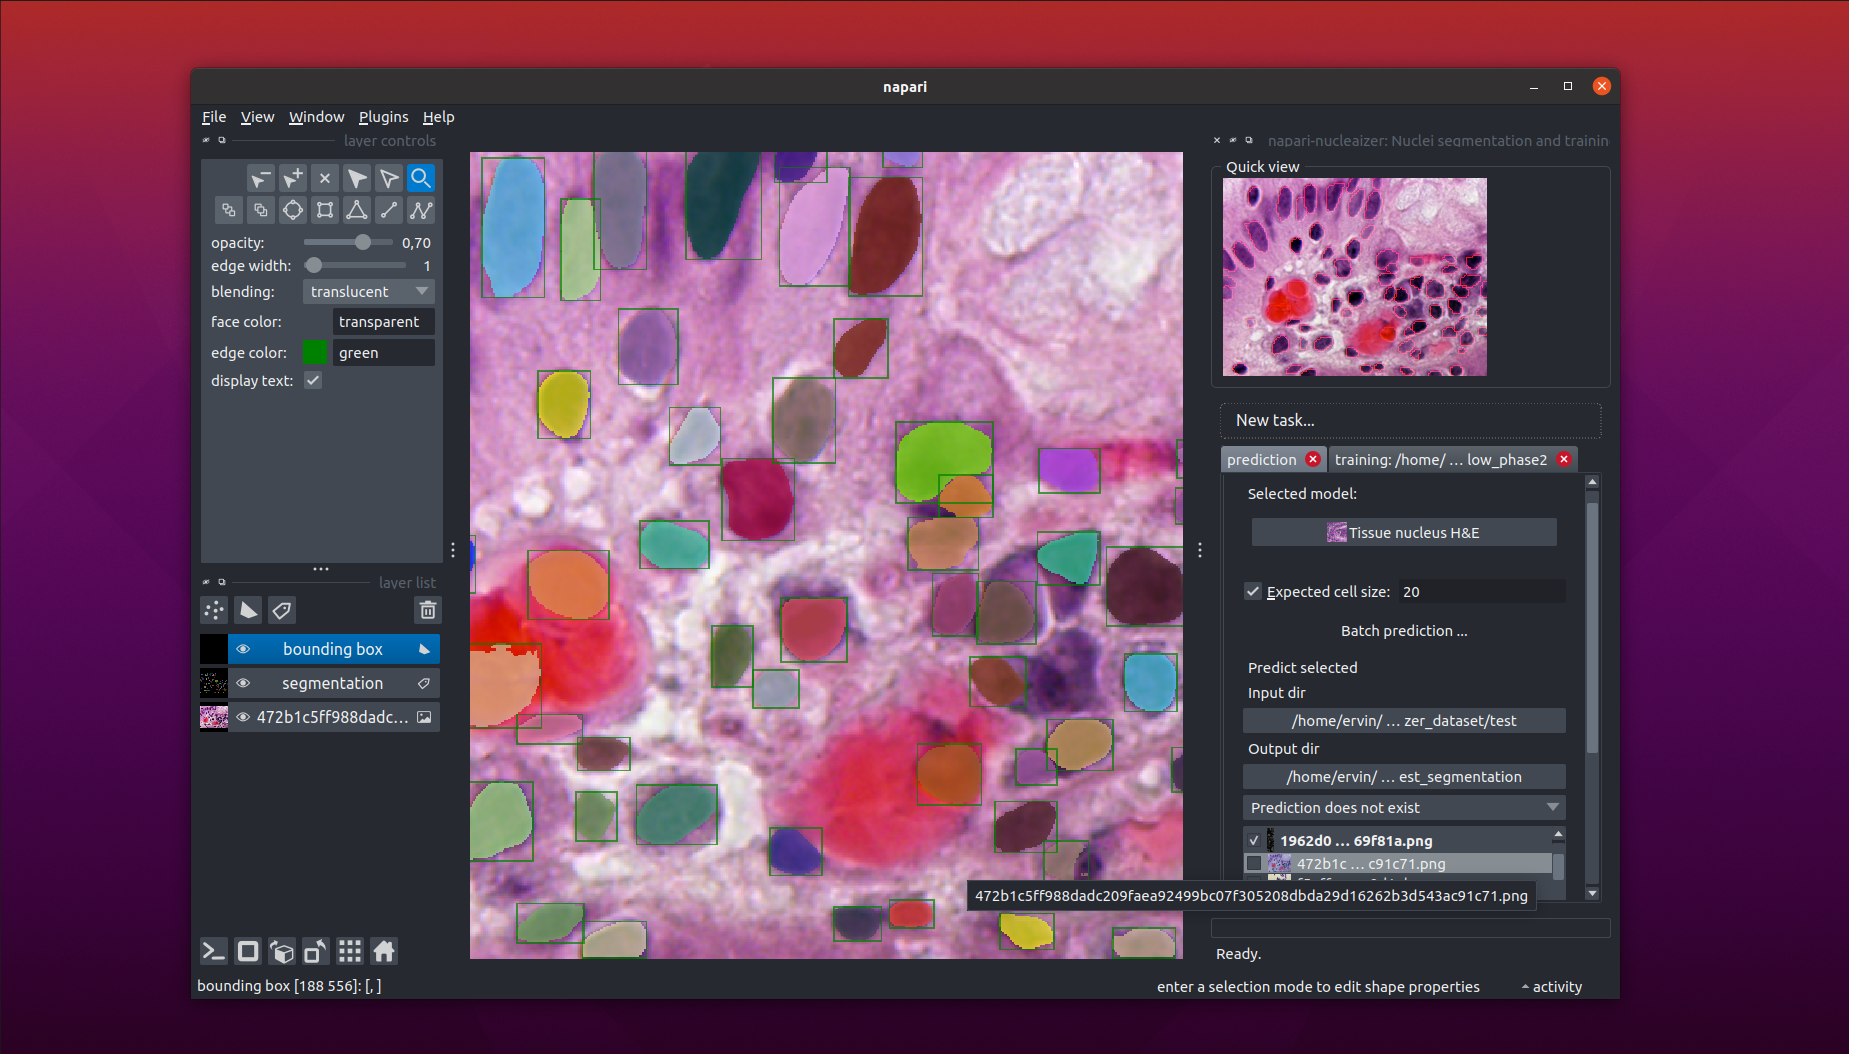
This is a napari plugin to execute the nucleaizer nuclei segmentation algorithm.
Main functionalities
Using this plugin will be able to
- Load your image into Napar, then outline the nuclei.
- Specify an image folder containing lots of images and an output folder, and automatically segment all of the images in the input folder.
- If you are not satisfied with the results, you can train your own model:
- You can use our pretrained models and fine tune them on your data.
- You can skip the nucleaizer pipeline and train only on your data.
Supported image types
We have several pretrained models for the following image modelities:
- fluorescent microscopy images
- IHC stained images
- brightfield microscopy images,
among others. For the detailed descriptions of our models, see: https://zenodo.org/record/6800341.
How it works?
For the description of the algorithm, see our paper: "Hollandi et al.: nucleAIzer: A Parameter-free Deep Learning Framework for Nucleus Segmentation Using Image Style Transfer, Cell Systems, 2020. https://doi.org/10.1016/j.cels.2020.04.003"
The original code (https://github.com/spreka/biomagdsb) is partially transformed into a python package (nucleaizer_backend) to actually perform the operations. See the project page of the backend at: https://github.com/etasnadi/nucleaizer_backend.
If you wish to use the web interface, check: http://nucleaizer.org.

Install
-
Create an environment (recommended).
-
Install napari:
pip install "napari[pyqt5]". Other methods: https://napari.org/tutorials/fundamentals/installation.html -
Install the plugin into napari:
-
User mode from PyPI: start Napari (command line:
napari) and select he Install/Uninstall Plugins... under the Plugins menu. In the popup, filter fornapari-nucleaizer. -
Developer mode: clone this project and use
pythhon3 -m pip install -e <path>to install the project locally into the same evnrionment as napari. It has the advantage that you will have the latest version.
-
Run
- Start Napari by calling
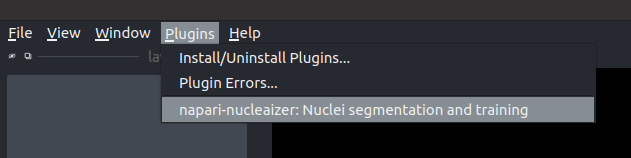
naparifrom the command line. - Then, activate the plugin in the
Pluginsmenu. If you successfully installed the plugin, you have to see something like this:
Further help
See the documentation (work in progress).
Issues
Use the github issue tracker if you experinece unexpected behaviour.
Contact
You can contact me in e-mail where MY-INSTITUTE is brc.hu.
Release history Release notifications | RSS feed


Download files
Download the file for your platform. If you're not sure which to choose, learn more about installing packages.
Source Distributions
Built Distribution
Filter files by name, interpreter, ABI, and platform.
If you're not sure about the file name format, learn more about wheel file names.
Copy a direct link to the current filters
File details
Details for the file napari_nucleaizer-0.2.5-py3-none-any.whl.
File metadata
- Download URL: napari_nucleaizer-0.2.5-py3-none-any.whl
- Upload date:
- Size: 24.3 kB
- Tags: Python 3
- Uploaded using Trusted Publishing? No
- Uploaded via: twine/4.0.2 CPython/3.8.10
File hashes
| Algorithm | Hash digest | |
|---|---|---|
| SHA256 |
0a82a0d64544d97bc97f236431adb2322a5ff6b19cb15b8a79e5d54d03136019
|
|
| MD5 |
fefaf533523ec658ec85bf8b05b9c58a
|
|
| BLAKE2b-256 |
6b5d92d359621c15121f65d56c5722c5e9b7788a5a38eb5ac9462c1f2573104c
|


