Python task scheduler with a user-friendly web UI
Project description
Plombery
Python task scheduler with a user-friendly web UI
Official website »
GitHub
·
Report Bug
About The Project
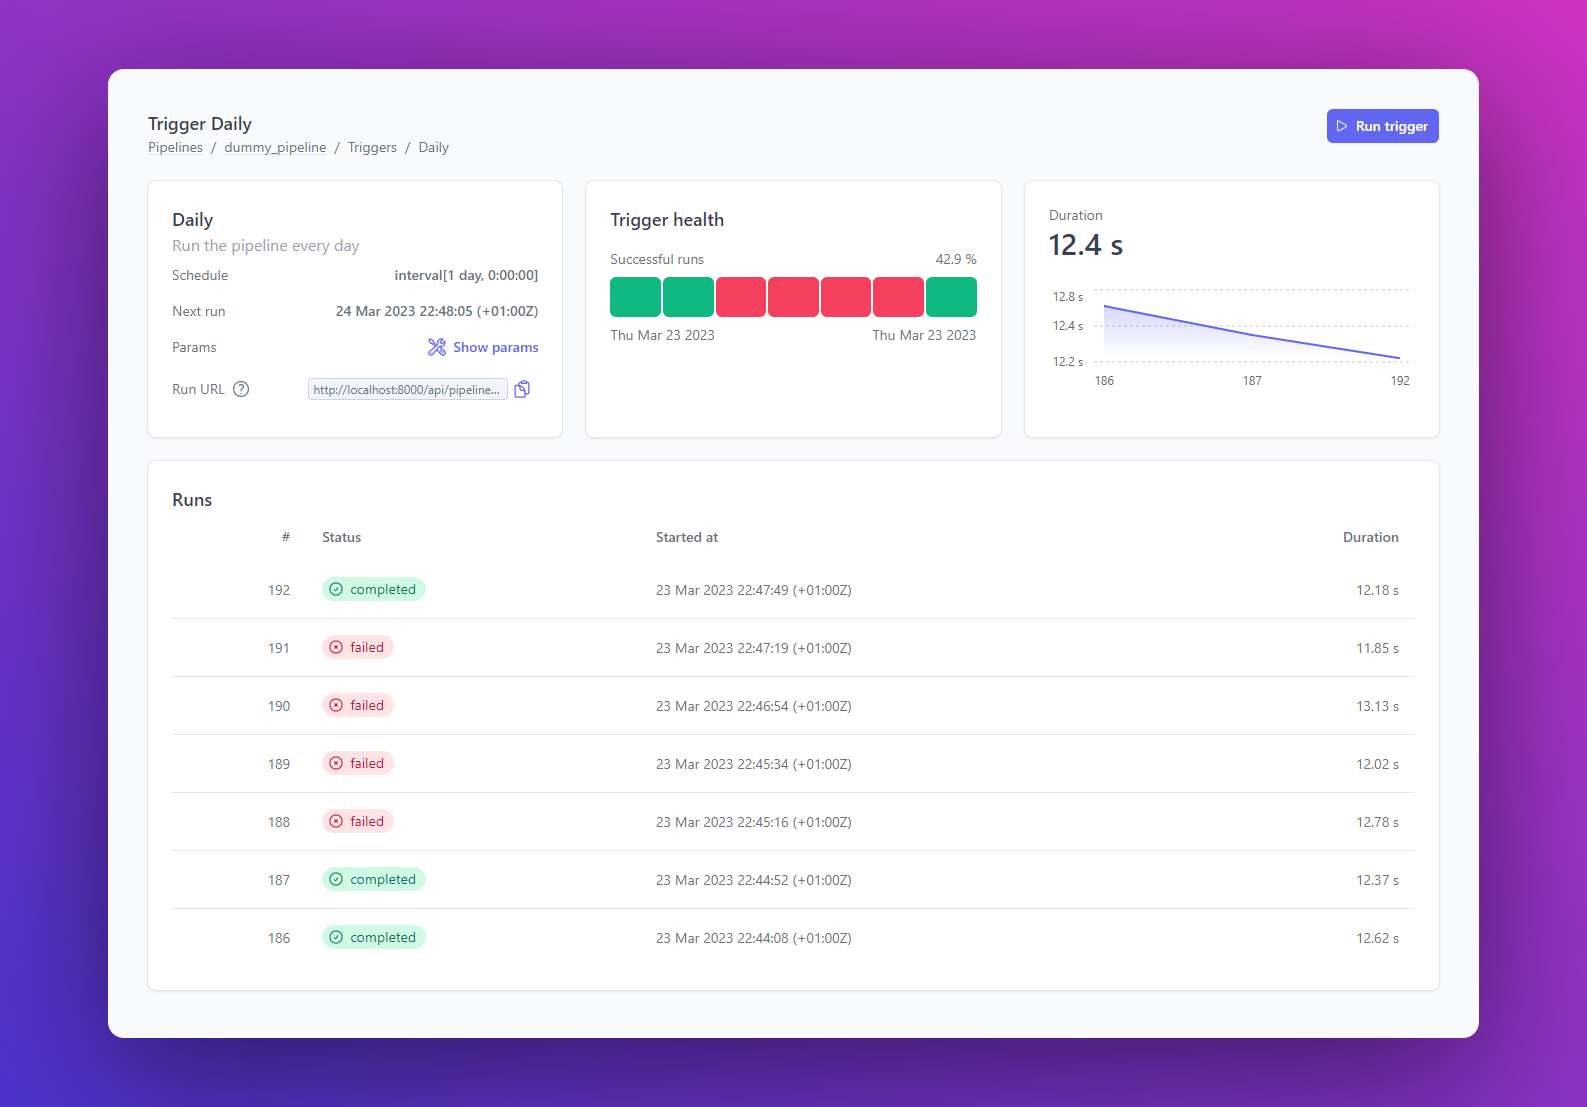
Plombery is a simple task scheduler for Python with a web UI and a REST API, if you need to run and monitor recurring python scripts then it's the right tool for you!

This project is at its beginning, so it can be shaped and improved with your feedback and help! If you like it, star it 🌟! If you want a feature or find a bug, open an issue.
Features
- ⏰ Task scheduling based on APScheduler (supports Interval, Cron and Date triggers)
- 💻 Built-in Web interface, no HTML/JS/CSS coding required
- 👩💻🐍 Pipelines and tasks are defined in pure Python
- 🎛️ Pipelines can be parametrized via Pydantic
- 👉 Pipelines can be run manually from the web UI
- 🔐 Secured via OAuth2
- 🔍 Debug each run exploring logs and output data
- 📩 Monitor the pipelines and get alerted if something goes wrong
- 💣 Use the REST API for advanced integrations
When you shouldn't use it:
- you need a lot of scalability and you want to run on a distributed system
- you want a no-code tool or you don't want to use Python
Built With
🚀 Getting Started
Check the 👉 official website to get started with Plombery.
🎮 Try on GitHub Codespaces
Try Plombery with some demo pipelines on GitHub Codespaces:

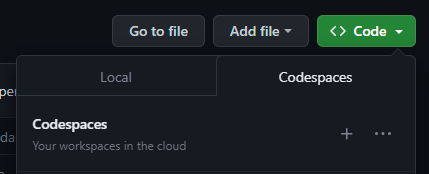
Codespaces are development environments that run in the cloud so you can run a project without cloning it, installing deps etc, here's an how to:
- Go to the the lucafaggianelli/plombery GitHub page
- Click on the green Code button on the top right
- Choose the Codespaces tab
- Click on create new codespace from main or reuse an existing one
- A new page will open at
github.dev, wait for the environment build - Once your codespace is ready you'll see an interface similar to VSCode
- Some commands will be run in the terminal to build the frontend etc., wait for their completion
- If everything went well, Plombery home page will be open in a new browser tab
- Changes in the Python code will be immediately reflected in the web page, like if you were developing on your laptop
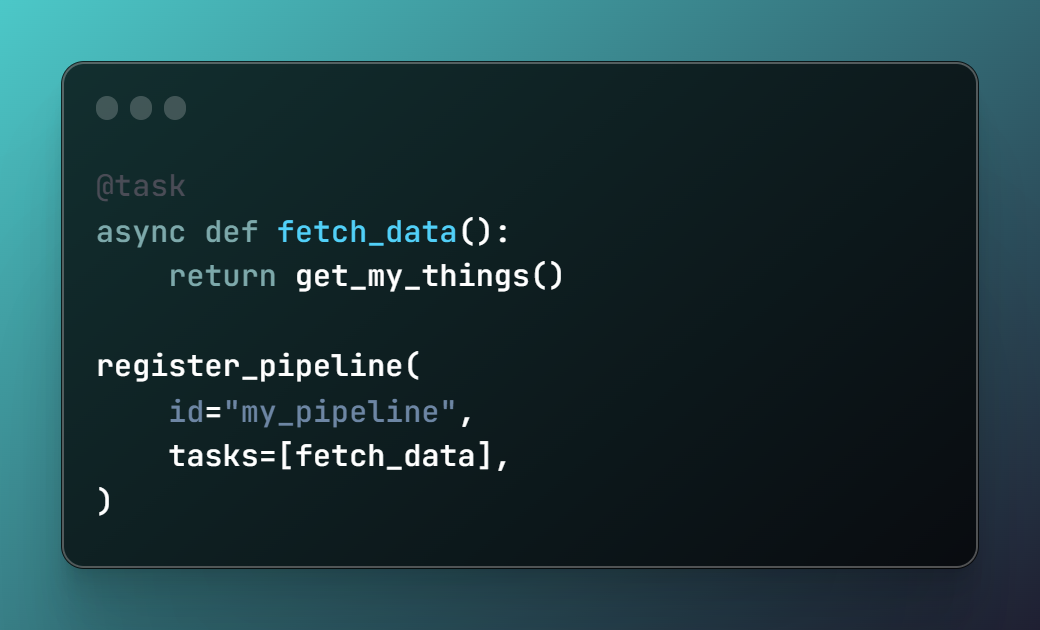
🧐 Show me the code
This is how it looks a minimalist pipeline:

🛣 Roadmap
See the open issues for a full list of proposed features (and known issues).
👩💻 Contributing
Contributions are what make the open source community such an amazing place to learn, inspire, and create. Any contributions you make are greatly appreciated.
If you have a suggestion that would make this better, please fork the repo and create a pull request. You can also simply open an issue with the tag "enhancement". Don't forget to give the project a star! Thanks again!
- Fork the Project
- Create your Feature Branch (
git checkout -b feature/AmazingFeature) - Commit your Changes (
git commit -m 'Add some AmazingFeature') - Push to the Branch (
git push origin feature/AmazingFeature) - Open a Pull Request
Development
Clone a fork of this repo and start your dev environment.
Create a python virtual environment:
python -m venv .venv
# on Mac/Linux
source .venv/bin/activate
# on Win
.venv/Script/activate
and install the dependencies:
pip install -r requirements.txt
pip install -r requirements-dev.txt
for development purposes, it's useful to run the example application:
cd examples/

# Create a venv for the example app
python -m venv .venv
source .venv/bin/activate
pip install -r requirements

./run.sh
# or ./run.ps1 on windows
The React frontend is in the frontend/ folder, enter the folder
and install the dependencies:
cd frontend/
# The project uses yarn as dependency manager, if you don't have
# it, you must install it.
# This command will install the deps:
yarn
run the development server:
yarn dev
Documentation
The documentation website is based on MkDocs Material, the source code is in the
docs/ folder and the config is in the mkdocs.yml file.
To run a local dev server, run:
mkdocs serve
Testing
Tests are based on pytest, to run the entire suite just run:
pytest
To run tests coverage, run:
coverage run -m pytest
coverage report -m
License
Distributed under the MIT License. See LICENSE.txt for more information.
Contact
Project Link: https://github.com/lucafaggianelli/plombery
Acknowledgments
Plombery is built on top of amazing techs:
Star History

Project details
Release history Release notifications | RSS feed
Download files
Download the file for your platform. If you're not sure which to choose, learn more about installing packages.
Source Distribution
Built Distribution
File details
Details for the file plombery_multidb-0.4.1.tar.gz.
File metadata
- Download URL: plombery_multidb-0.4.1.tar.gz
- Upload date:
- Size: 885.9 kB
- Tags: Source
- Uploaded using Trusted Publishing? Yes
- Uploaded via: twine/5.1.0 CPython/3.12.4
File hashes
| Algorithm | Hash digest | |
|---|---|---|
| SHA256 | 31cb73e0040d72c90fce8ad2d29e33b2dea5a6992c4a6ed730b1067c4dc70198 |
|
| MD5 | 822bba066284b178398092c6db4c8d91 |
|
| BLAKE2b-256 | db4475e4863c92e3f88a4fa4a268bb6b278fd9fc1cef5ba828be1718c93630b3 |
File details
Details for the file plombery_multidb-0.4.1-py3-none-any.whl.
File metadata
- Download URL: plombery_multidb-0.4.1-py3-none-any.whl
- Upload date:
- Size: 893.6 kB
- Tags: Python 3
- Uploaded using Trusted Publishing? Yes
- Uploaded via: twine/5.1.0 CPython/3.12.4
File hashes
| Algorithm | Hash digest | |
|---|---|---|
| SHA256 | c57ae860da72d30629dfc1bddb2039b4f8ba15e7a2de18a995965fd994f23878 |
|
| MD5 | d0b995db78bf52a5e7038a5693e23e7b |
|
| BLAKE2b-256 | 77334a4e9e9d4f4d3b4c34547ff37115fc5e1c0f3e754c6305459641a7b0e9ad |


