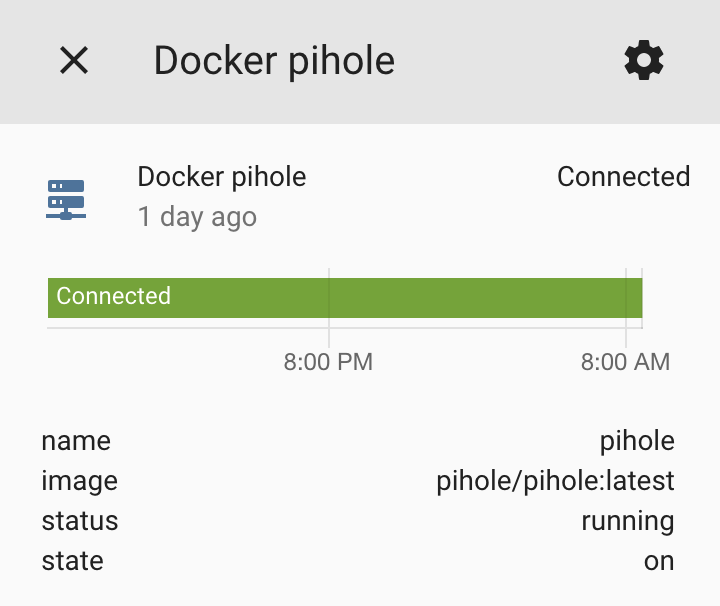
Send your systemctl stats and and events to mqtt and discovery them in home assistant.
Project description
systemctl2mqtt - Deliver systemctl status information over MQTT
This program uses journalctl and systemctl to watch for changes in your services, and top for metrics about those services, and delivers current status to MQTT. It will also publish Home Assistant MQTT Discovery messages so that (binary) sensors automatically show up in Home Assistant.
Installation and Deployment
It is available as python package on pypi/systemctl2mqtt.
Pypi package
pip install systemctl2mqtt
systemctl2mqtt --name MySystemName --events -vvvvv
Usage
from systemctl2mqtt import systemctl2Mqtt, DEFAULT_CONFIG

cfg = Systemctl2MqttConfig({
  **DEFAULT_CONFIG,
  "host": "mosquitto",
  "enable_events": True
})

try:
  systemctl2mqtt = Systemctl2Mqtt(cfg)
  systemctl2mqtt.loop_busy()

except Exception as ex:
  # Do something
Default Configuration
You can use environment variables to control the behavior.
| Config | Default | Description |
|--------|--------------|---------|-------------|
| log_level | INFO | Set to DEBUG,INFO,WARN,ERROR,CRITICAL to enable different levels of verbosity. |
| systemctl2mqtt_hostname | systemctl2mqtt Hostname | The hostname of your host, if you want to overwrite it. |
| homeassistant_prefix | homeassistant | The prefix for Home Assistant discovery. Must be the same as discovery_prefix in your Home Assistant configuration. |
| mqtt_client_id | mqtt2discord | The client id to send to the MQTT broker. |
| mqtt_host | localhost | The MQTT broker to connect to. |
| mqtt_port | 1883 | The port on the broker to connect to. |
| mqtt_user | The user to send to the MQTT broker. Leave unset to disable authentication. |
| mqtt_password | The password to send to the MQTT broker. Leave unset to disable authentication. |
| mqtt_timeout | 30 | The timeout for the MQTT connection. |
| mqtt_topic_prefix | systemctl | The MQTT topic prefix. With the default data will be published to systemctl/<hostname>. |
| mqtt_qos | 1 | The MQTT QOS level |
| service_whitelist | | Define a whitelist for services to consider, if empty, everything is monitored. The entries are either match as literal strings or as regex. |
| service_blacklist | | Define a blacklist for services to consider, takes priority over whitelist. The entries are either match as literal strings or as regex. |
| destroyed_service_ttl | 86400 | How long, in seconds, before destroyed services are removed from Home Assistant. Services won't be removed if the service is restarted before the TTL expires. |
| stats_record_seconds | 30 | The number of seconds to record state and make an average |
| enable_events | 0 | 1 Or 0 for processing events |
| enable_stats | 0 | 1 Or 0 for processing statistics |
Consuming The Data
Data is published to the topic systemctl/<hostname>/events using JSON serialization. It will arrive whenever a change happens and its type can be inspected in type_definitions.py or the documentation.
Data is also published to the topic systemctl/<hostname>/stats using JSON serialization. It will arrive every STATS_RECORD_SECONDS seconds or so can be inspected in type_definitions.py or the documentation.
Home Assistant
Once systemctl2mqtt is collecting data and publishing it to MQTT, it's rather trivial to use the data in Home Assistant.
A few assumptions:
- Home Assistant is already configured to use a MQTT broker. Setting up MQTT and HA is beyond the scope of this documentation. However, there are a lot of great tutorials on YouTube. An external broker (or as add-on) like Mosquitto will need to be installed and the HA MQTT integration configured.
- The HA MQTT integration is configured to use
homeassistantas the MQTT autodiscovery prefix. This is the default for the integration and also the default forlinux2mqtt. If you have changed this from the default, use the--prefixparameter to specify the correct one. - You're not using TLS to connect to the MQTT broker. Currently
linux2mqttonly works with unencrypted connections. Username / password authentication can be specified with the--usernameand--passwordparameters, but TLS encryption is not yet supported.
After you start the service (binary) sensors should show up in Home Assistant immediately. Look for sensors that start with (binary_)sensor.systemctl. Metadata about the container will be available as attributes for events, which you can then expose using template sensors if you wish.
Documentation
Using mkdocs, the documentation and reference is generated and available on github pages.
Dev
Setup the dev environment using VSCode, it is highly recommended.
python -m venv .venv
source .venv/bin/activate
pip install -r requirements_dev.txt
Install pre-commit
pre-commit install

# Run the commit hooks manually
pre-commit run --all-files
Following VSCode integrations may be helpful:
Credits
This is inspired from my other repo docker2mqtt.
CHANGELOG
1.0.0
- Initial version.
Project details
Release history Release notifications | RSS feed
Download files
Download the file for your platform. If you're not sure which to choose, learn more about installing packages.
Source Distribution
Built Distribution
Hashes for systemctl2mqtt-1.0.0rc0-py3-none-any.whl
| Algorithm | Hash digest | |
|---|---|---|
| SHA256 | f8aeccb4ad69c43f34eccc36c559f360e6cd6011c9d89d79c7df6030007a6943 |
|
| MD5 | 22043232462907c789c2b7f8e01f6c6b |
|
| BLAKE2b-256 | a7bae372bd55d3081f599c406ba9480141ffb0e183e040b4fb022d516b301dcf |


