A framework to help you build model much more easily.

Project description
ModelZoo
A Scaffold to help you build Deep-learning Model much more easily, implemented with TensorFlow 2.0.
Installation
You can install this package easily with pip:
pip3 install model-zoo
Usage
Let's implement a linear-regression model quickly.
Here we use boston_housing dataset as example.
Define a linear model in models folder, named model.py and import its Class from __init__.py:
from model_zoo import Model
import tensorflow as tf

class HousePricePredictionModel(Model):

    def inputs(self):
        return tf.keras.Input(shape=(13))

    def outputs(self, inputs):
        return tf.keras.layers.Dense(1)(inputs)
Then define a trainer like this, named train.py:
from model_zoo import flags, datasets, preprocess
from model_zoo.trainer import BaseTrainer

flags.define('epochs', 100)
flags.define('model_class_name', 'HousePricePredictionModel')
flags.define('checkpoint_name', 'model.ckpt')

class Trainer(BaseTrainer):
    def data(self):
        (x_train, y_train), (x_eval, y_eval) = datasets.boston_housing.load_data()
        x_train, x_eval = preprocess.standardize(x_train, x_eval)
        train_data, eval_data = (x_train, y_train), (x_eval, y_eval)
        return train_data, eval_data

if __name__ == '__main__':
    Trainer().run()
Now, we've finished this model!
Next we can run this model using this cmd:
python3 train.py
Outputs like this:
Epoch 1/100
 1/13 [=>............................] - ETA: 0s - loss: 816.1798
13/13 [==============================] - 0s 4ms/step - loss: 457.9925 - val_loss: 343.2489

Epoch 2/100
 1/13 [=>............................] - ETA: 0s - loss: 361.5632
13/13 [==============================] - 0s 3ms/step - loss: 274.7090 - val_loss: 206.7015
Epoch 00002: saving model to checkpoints/model-2.ckpt

Epoch 3/100
 1/13 [=>............................] - ETA: 0s - loss: 163.5308
13/13 [==============================] - 0s 3ms/step - loss: 172.4033 - val_loss: 128.0830

Epoch 4/100
 1/13 [=>............................] - ETA: 0s - loss: 115.4743
13/13 [==============================] - 0s 3ms/step - loss: 112.6434 - val_loss: 85.0848
Epoch 00004: saving model to checkpoints/model-4.ckpt

Epoch 5/100
 1/13 [=>............................] - ETA: 0s - loss: 149.8252
13/13 [==============================] - 0s 3ms/step - loss: 77.0281 - val_loss: 57.9716
....

Epoch 42/100
 7/13 [===============>..............] - ETA: 0s - loss: 20.5911
13/13 [==============================] - 0s 8ms/step - loss: 22.4666 - val_loss: 23.7161
Epoch 00042: saving model to checkpoints/model-42.ckpt
It runs only 42 epochs and stopped early, because the framework auto enabled early stop mechanism and there are no more good evaluation results for 20 epochs.
When finished, we can find two folders generated named checkpoints and events.
Go to events and run TensorBoard:
cd events
tensorboard --logdir=.
TensorBoard like this:
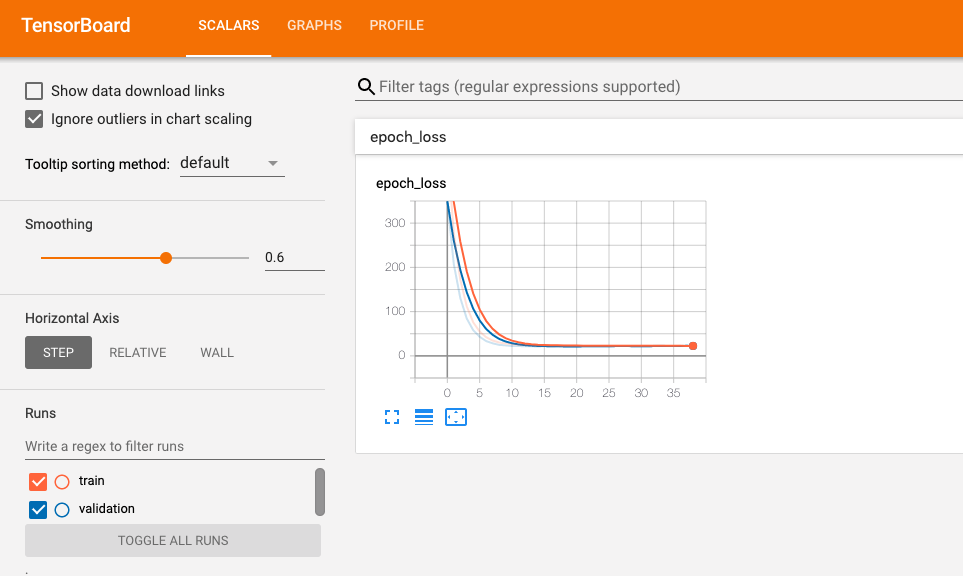
There are training and validation loss in the graph.
And also we can find checkpoints in checkpoints dir.
It saved the best model named model.ckpt according to eval score, and it also saved checkpoints every 2 epochs.
Next we can predict using existing checkpoints, define infer.py like this:
from model_zoo import flags, datasets, preprocess
from model_zoo.inferer import BaseInferer

flags.define('checkpoint_name', 'model-best.ckpt')

class Inferer(BaseInferer):
    def data(self):
        (x_train, y_train), (x_test, y_test) = datasets.boston_housing.load_data()
        _, x_test = preprocess.standardize(x_train, x_test)
        return x_test

if __name__ == '__main__':
    result = Inferer().run()
    print(result)
Now we've restored the specified model model-best.ckpt and prepared test data, outputs like this:
[[ 9.637125 ]
 [21.368305 ]
 [20.898445 ]
 [33.832504 ]
 [25.756516 ]
 [21.264557 ]
 [29.069794 ]
 [24.968184 ]
 ...
 [36.027283 ]
 [39.06852  ]
 [25.728745 ]
 [41.62165  ]
 [34.340042 ]
 [24.821484 ]]
OK, we've finished restoring and predicting. Just so convenient. Here is the code.
More
If you want to find more models, just see ModelZoo.
Release history Release notifications | RSS feed

Download files
Download the file for your platform. If you're not sure which to choose, learn more about installing packages.
Source Distribution
Built Distribution
Filter files by name, interpreter, ABI, and platform.
If you're not sure about the file name format, learn more about wheel file names.
Copy a direct link to the current filters
File details
Details for the file torchmodel-0.0.1.tar.gz.
File metadata
- Download URL: torchmodel-0.0.1.tar.gz
- Upload date:
- Size: 17.5 kB
- Tags: Source
- Uploaded using Trusted Publishing? No
- Uploaded via: twine/2.0.0 pkginfo/1.5.0.1 requests/2.22.0 setuptools/41.6.0 requests-toolbelt/0.9.1 tqdm/4.32.1 CPython/3.7.5
File hashes
| Algorithm | Hash digest | |
|---|---|---|
| SHA256 |
bcfdcda9af577e9c807593ba5af1416fc3d05014ca4ae79e9f2fe49a7a2b7780
|
|
| MD5 |
27df9bdf77c105f3d83cf5faa1d1755e
|
|
| BLAKE2b-256 |
f39e80ac7f0567a94db26b8216dfa239c67943d0badaac417ad57f5d2c9033a8
|
File details
Details for the file torchmodel-0.0.1-py2.py3-none-any.whl.
File metadata
- Download URL: torchmodel-0.0.1-py2.py3-none-any.whl
- Upload date:
- Size: 20.5 kB
- Tags: Python 2, Python 3
- Uploaded using Trusted Publishing? No
- Uploaded via: twine/2.0.0 pkginfo/1.5.0.1 requests/2.22.0 setuptools/41.6.0 requests-toolbelt/0.9.1 tqdm/4.32.1 CPython/3.7.5
File hashes
| Algorithm | Hash digest | |
|---|---|---|
| SHA256 |
cbb11c1b9892587a7f310ff11b079e25b2c130d87c97438a1da9000473bcf7a6
|
|
| MD5 |
3a0974cec16ce8ded7b059b8635d4359
|
|
| BLAKE2b-256 |
07ddd3c5d9a8663111576228e4608077576ea17fd8fe7b1bcc8700042b242bc0
|


