ML container made simple
Project description
Tungstenkit: ML container made simple
Introduction | Installation | Getting Started | Documentation
Tungstenkit is ML containerization tool with a focus on developer productivity and versatility.
The key features are:
- Requires only a few lines of Python code
- Build once, use everywhere:
- Framework-agnostic and lightweight
- Batched prediction
- Pydantic input/output definitions with convenient file handling
- Clustering with distributed machines (coming soon)
Take the tour
Requires only a few lines of python code
Building a Tungsten model is easy. All you have to do is write a simple tungsten_model.py like:
from typing import List
import torch
from tungstenkit import BaseIO, Image, define_model


class Input(BaseIO):
    prompt: str


class Output(BaseIO):
    image: Image


@define_model(
    input=Input,
    output=Output,
    gpu=True,
    python_packages=["torch", "torchvision"],
    batch_size=4,
    gpu_mem_gb=24,
)
class TextToImageModel:
    def setup(self):
        weights = torch.load("./weights.pth")
        self.model = load_torch_model(weights)

    def predict(self, inputs: List[Input]) -> List[Output]:
        input_tensor = preprocess(inputs)
        output_tensor = self.model(input_tensor)
        outputs = postprocess(output_tensor)
        return outputs
Start a build process:
$ tungsten build . -n text-to-image

✅ Successfully built tungsten model: 'text-to-image:e3a5de56' (also tagged as 'text-to-image:latest')
Check the built image:
$ tungsten models

Repository        Tag       Create Time          Docker Image ID
----------------  --------  -------------------  ---------------
text-to-image     latest    2023-04-26 05:23:58  830eb82f0fcd
text-to-image     e3a5de56  2023-04-26 05:23:58  830eb82f0fcd
Build once, use everywhere
REST API server
Start a server:
$ tungsten serve text-to-image -p 3000

INFO:     Uvicorn running on http://0.0.0.0:3000 (Press CTRL+C to quit)
Send a prediction request with a JSON payload:
$ curl -X 'POST' 'http://localhost:3000/predict' \
  -H 'accept: application/json' \
  -H 'Content-Type: application/json' \
  -d '[{"prompt": "a professional photograph of an astronaut riding a horse"}]'

{
    "outputs": [{"image": "data:image/png;base64,..."}]
}
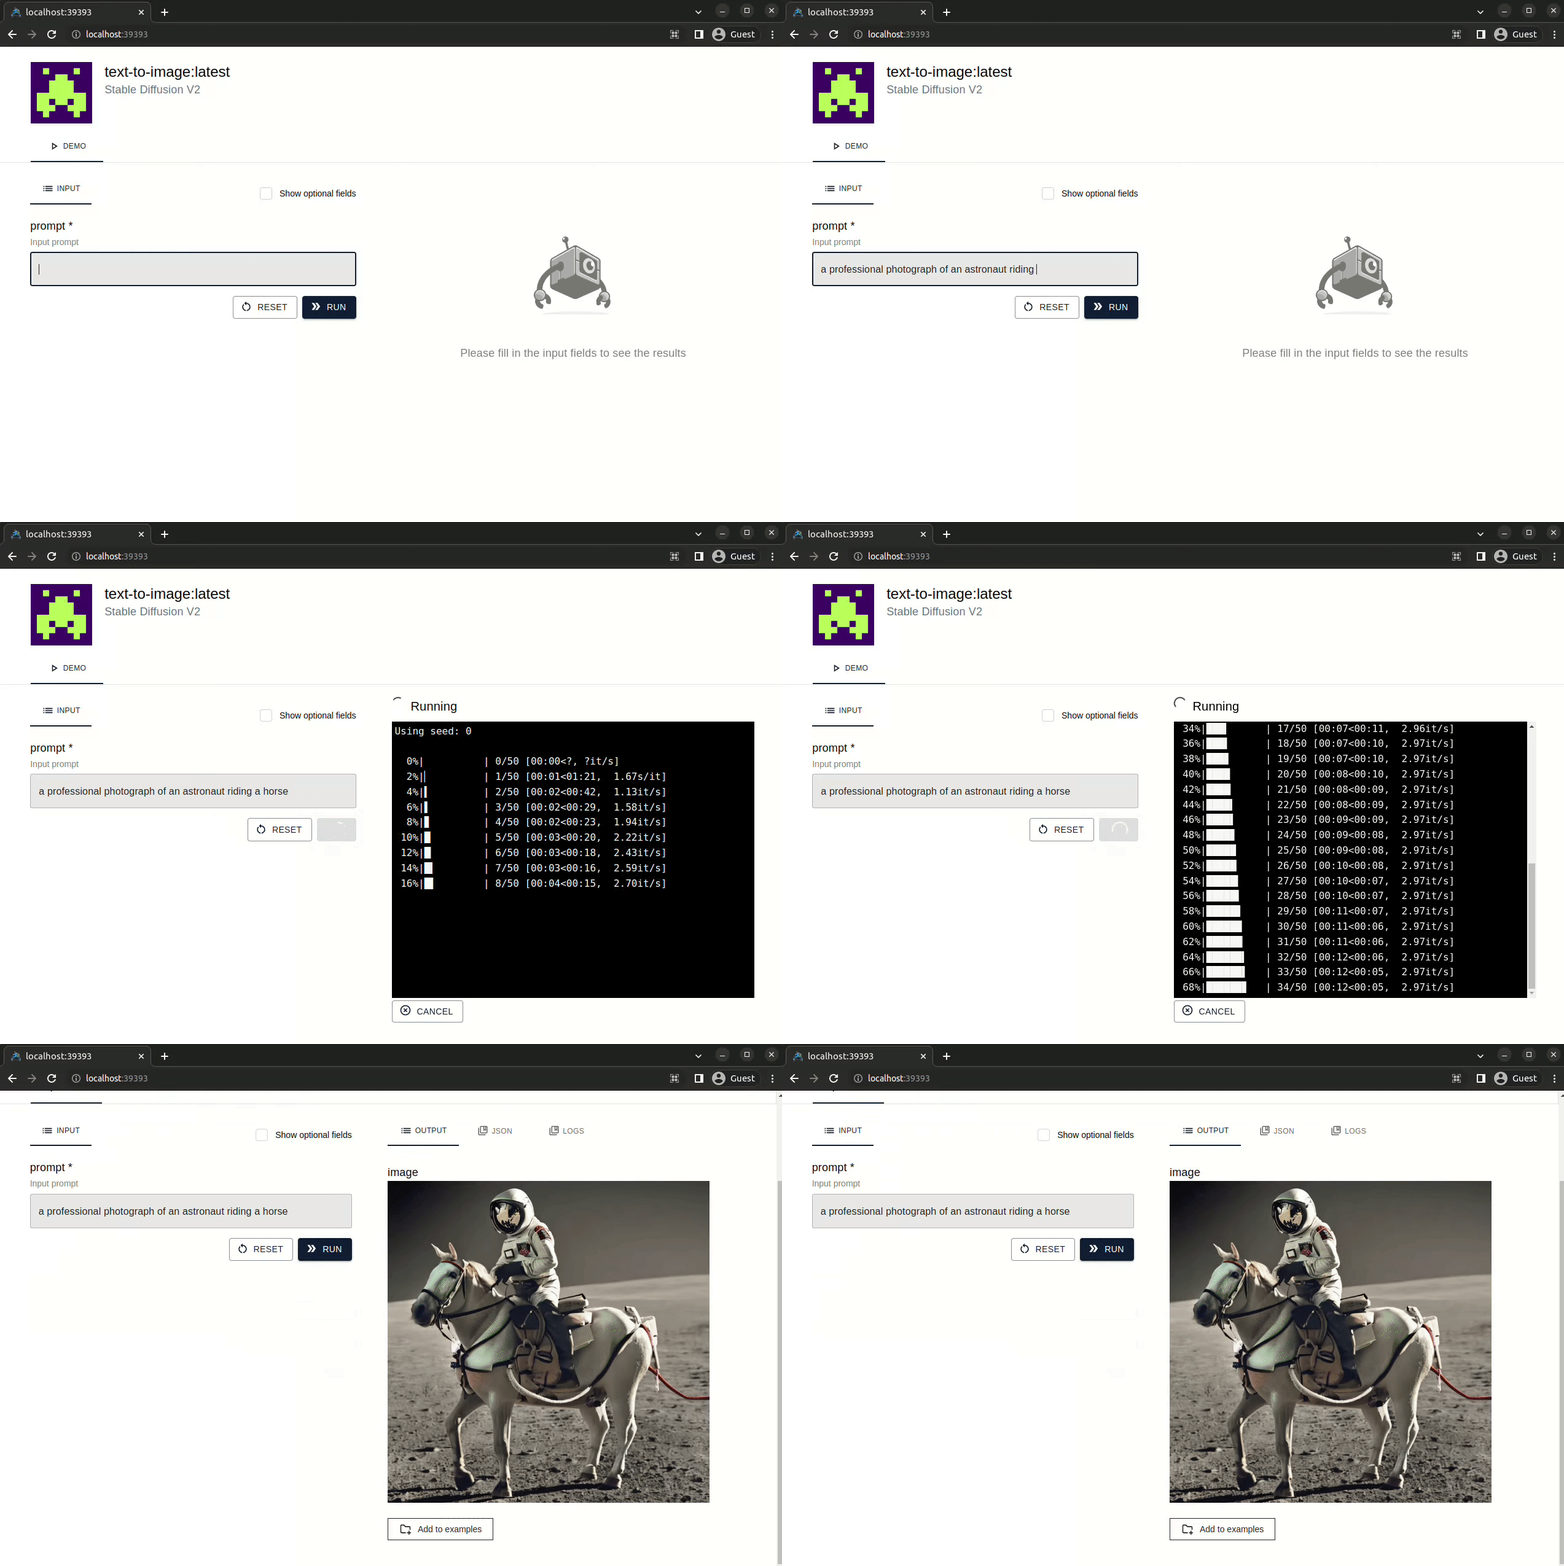
GUI application
If you need a more user-friendly way to make predictions, start a GUI app with the following command:
$ tungsten demo text-to-image -p 8080

INFO:     Uvicorn running on http://localhost:8080 (Press CTRL+C to quit)
CLI application
Run a prediction in a terminal:
$ tungsten predict text-to-image \
   -i prompt="a professional photograph of an astronaut riding a horse"

{
  "image": "./output.png"
}
Python function
If you want to run a model in your Python application, use the Python API:
>>> from tungstenkit import models
>>> model = models.get("text-to-image")
>>> model.predict(
    {"prompt": "a professional photograph of an astronaut riding a horse"}
)
{"image": PosixPath("./output.png")}
Framework-agnostic and lightweight
Tungstenkit doesn't restrict you to use specific ML libraries. Just use any library you want, and declare dependencies:
# The latest cpu-only build of Tensorflow will be included
@define_model(input=Input, output=Output, gpu=False, python_packages=["tensorflow"])
class Model:
    def predict(self, inputs):
        """Run a batch prediction"""
        # ...ops using tensorflow...
        return outputs
Batched prediction
Tungstenkit supports both server-side and client-side batching.
-
Server-side batching
A server groups inputs across multiple requests and processes them together. You can configure the max batch size:
@define_model(input=Input, output=Output, gpu=True, batch_size=32)
The max batch size can be changed when running a server:
$ docker run -p 3000:3000 --gpus all model:latest --batch-size 64
-
Client-side batching
Also, you can reduce traffic volume by putting multiple inputs in a single prediction request:$ curl -X 'POST' 'http://localhost:3000/predict' \ -H 'accept: application/json' \ -H 'Content-Type: application/json' \ -d '[{"field": "input1"}, {"field": "input2"}, {"field": "input3"}]' { "outputs": [ {"field": "output1"}, {"field": "output2"}, {"field": "output3"} ] }
Pydantic input/output definitions with convenient file handling
Let's look at the example below:
from tungstenkit import BaseIO, Image, define_model


class Input(BaseIO):
    image: Image


class Output(BaseIO):
    image: Image


@define_model(input=Input, output=Output)
class StyleTransferModel:
    ...
As you see, input/output types are defined as subclasses of the BaseIO class. The BaseIO class is a simple wrapper of the BaseModel class of Pydantic, and Tungstenkit validates JSON requests utilizing functionalities Pydantic provides.
Also, you can see that the Image class is used. Tungstenkit provides four file classes for easing file handling - Image, Audio, Video, and Binary. They have useful methods for writing a model's predict method:
class StyleTransferModel:
    def predict(self, inputs: List[Input]) -> List[Output]:
        # Preprocessing
        input_pil_images = [inp.image.to_pil_image() for inp in inputs]
        # Inference
        output_pil_images = do_inference(input_pil_images)
        # Postprocessing
        output_images = [Image.from_pil_image(pil_image) for pil_image in output_pil_images]
        outputs = [Output(image=image) for image in output_images]
        return outputs
Prerequisites
- Python 3.7+
- Docker
- (Optional) For using GPUs,
- Linux: nvidia-container-runtime
- Windows: Docker Desktop WSL 2 backend
Installation
pip install tungstenkit
Documentation
Project details
Release history Release notifications | RSS feed
Download files
Download the file for your platform. If you're not sure which to choose, learn more about installing packages.
Source Distribution
Built Distribution
File details
Details for the file tungstenkit-0.1.1a1.tar.gz.
File metadata
- Download URL: tungstenkit-0.1.1a1.tar.gz
- Upload date:
- Size: 988.1 kB
- Tags: Source
- Uploaded using Trusted Publishing? No
- Uploaded via: poetry/1.4.2 CPython/3.10.6 Linux/5.19.0-46-generic
File hashes
| Algorithm | Hash digest | |
|---|---|---|
| SHA256 | 195a023aedbce4c6d0471e414b9c876bd6a42a596d8921752bf7e9c39e548ea4 |
|
| MD5 | f9ea52b7b3184a22df89b3cfe665865f |
|
| BLAKE2b-256 | 76502eda4b2f957c53f7b1a2e9a2ae9ebd994f1c2cf5bb265978f7351e9a2f95 |
File details
Details for the file tungstenkit-0.1.1a1-py3-none-any.whl.
File metadata
- Download URL: tungstenkit-0.1.1a1-py3-none-any.whl
- Upload date:
- Size: 1.0 MB
- Tags: Python 3
- Uploaded using Trusted Publishing? No
- Uploaded via: poetry/1.4.2 CPython/3.10.6 Linux/5.19.0-46-generic
File hashes
| Algorithm | Hash digest | |
|---|---|---|
| SHA256 | f9aca96f34768f3c48e90a95d26041139223f86ddd105caba5ebbea737282311 |
|
| MD5 | 48729d8d5520fc972f5c3487bd20d6f7 |
|
| BLAKE2b-256 | 769d5003b37c2b1e947e4b198cafaab4a994c3085be1e30f35f8451cc1a3725e |


