
🗲 spawn Cloud instances on libvirt!🗲



You want to spawn local VM quickly.. Like... really quickly. You want them to be as generic as possible. Actually you would like to reuse some existing cloud images!
This is the right tool for you.
Virt-Lightning exposes a CLI inspired by the Cloud and Vagrant. It can also prepare the Ansible inventory file.
This is handy to quickly validate a new Ansible playbook, or a role on a large number of environments.
example: less than 30 seconds to spawn an instance ⚡
In a nutshell:
echo "- distro: centos-7" > virt-lightning.yaml
vl up
vl ansible_inventory > inventory
ansible all -m ping -i inventory
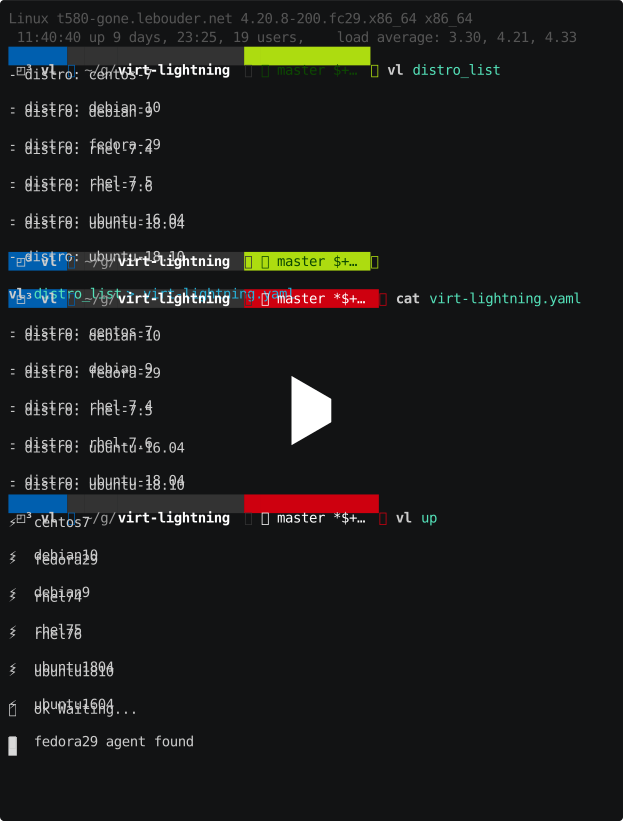
example: or 75 seconds for 10 nodes lab ⚡
During this recording, we:
- use the list of distributions to generate a virt-lightning.yaml file.
- we then create an environment based on this file
- once the environment is ready, we generate an Ansible inventory file
- and we use it to call Ansible's ping module on all the host.
Requirements
- Python 3.8 or greater
- The Python3 binding for libvirt, the package is probably called
python3-libvirtorlibvirt-pythonaccording to pip. - Libvirt must be running, most of the time you just need to run:
sudo systemctl start --now libvirtd - Finally, be sure your user can access the system libvirt daemon, e.g with:
virsh -c qemu:///system
Optional
- You make also want to install
python3-urwidif you want to get the fancy list of VMs. This dependency is optional.
Installation (Fedora/RHEL)
sudo dnf install uv python3-libvirt libvirt-devel gcc python3-devel
uvx virt-lightning
Installation (Fedora Atomic, e.g Silverblue)
Virt-Lightning won't work from toolbox or a container.
rpm-ostree install genisoimage libvirt libvirt-client libvirt-daemon-kvm python3-libvirt
systemctl reboot
(...)
sudo systemctl enable --now libvirtd
sudo systemctl enable --now virtqemud.socket
sudo systemctl enable --now virtnetworkd.socket
sudo systemctl enable --now virtstoraged.socket

# You can also layer pipx
python3 -m venv venv --system-site-packages
./venv/bin/pip install virt-lightning
./venv/bin/vl
Installation (Debian/Ubuntu)
sudo apt install uv python3-venv pkg-config gcc libvirt-dev python3-dev
uvx install virt-lightning
Post Installation
virt-lightning will be installed in ~/.local/bin/. Add it in your $PATH if
it's not already the case. For instance you can use:
echo "export PATH=$PATH:~/.local/bin/" >> ~/.bashrc
source ~/.bashrc
List Remote Images
Before you start your first VM, you need to list the images. To do so,
you just use the vl remote_images command:
$ vl remote_images
Fetch some images
Before you start your first VM, you need to fetch the images. To do so,
you just use the vl pull command:
$ vl pull fedora-32
You can also pull an image from Internet, as soon as it's a .qcow2 or a .qcow2.xz (compress with xz):
$ vl pull freebsd-16-current --url https://download.freebsd.org/snapshots/VM-IMAGES/16.0-CURRENT/amd64/Latest/FreeBSD-16.0-CURRENT-amd64-BASIC-CLOUDINIT-ufs.qcow2.xz
Actions
vl is an alias for virt-lightning, you can use both. In the rest of the document
we use the shortest version.
vl images
List the distro images that can be used. Its output is compatible with vl up. You can initialize a new configuration with: vl images > virt-lightning.yaml.
vl up
virt-lightning will read the virt-lightning.yaml file from the current directory and prepare the associated VM.
vl down
Destroy all the VMs managed by Virt-Lightning.
vl start
Start a specific VM, without reading the virt-lightning.yaml file.
vl stop
Stop just one VM.
vl status
List the VMs, their IP and if they are reachable.
vl ansible_inventory
Export an inventory in the Ansible format.
Note: Created VMs use various Python versions, which can cause compatibility issues with the Ansible version on the control node (host). In case of errors related to Python version compatibility, please consult the Ansible nchangelog for details on supported Python versions.
In can you need a different Python version for a given image (ansible_python_interpreter), you can define it in a YAML file aside of the qcow2 image. E.g:
$ ls -l /var/lib/virt-lightning/pool/upstream/netbsd-10.0.qcow2
-rw-r--r--. 1 qemu qemu 242483200 Nov  5 18:50 /var/lib/virt-lightning/pool/upstream/netbsd-10.0.qcow2
$ cat /var/lib/virt-lightning/pool/upstream/netbsd-10.0.yaml
python_interpreter: /usr/pkg/bin/python3.12
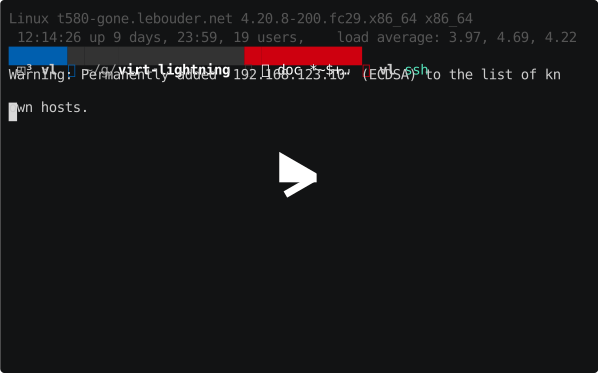
vl ssh
Show up a menu to select a host and open a ssh connection.
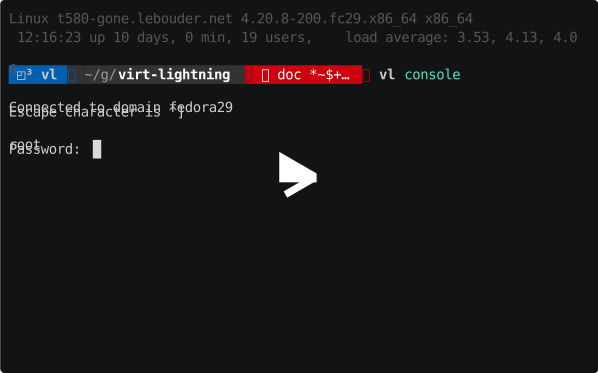
vl console
Like vl ssh but with the serial console of the VM.
vl viewer
Like vl console but with the SPICE console of the VM. Requires virt-viewer.
vl pull
Download a VM image. Use the vl remote_images to get a list of available images. You can also update the custom configuration to add a private image hub.
Configuration
Global configuration
If ~/.config/virt-lightning/config.ini exists, Virt-Lightning will read
its configuration there.
[main]
network_name = virt-lightning
root_password = root
storage_pool = virt-lightning
network_auto_clean_up = True
ssh_key_file = ~/.ssh/id_rsa.pub
network_name: if you want to use an alternative libvirt network
root_password: the root password
storage_pool: if you want to use an alternative libvirt storage pool
network_auto_clean_up: if you want to automatically remove a network when running virt-lightning down
ssh_key_file: if you want to use an alternative public key
private_hub: if you need to set additional url from where images should be retrieved, update the configuration file ~/.config/virt-lightning/config.ini adding the following
[main]
private_hub=url1,url2
custom_image_list: if you wish to use a custom image list, update the configuration file ~/.config/virt-lightning/config.ini adding the following
[main]
custom_image_url=<url>/images.json
take a look at images.json for a reference
VM configuration keys
A VM can be tuned at two different places with the following keys:
distro: the name of the base distro image to use, it's the only mandatory parameter.name: the VM namememory: the amount of memory to dedicate to the VMvcpus: the number of vcpu to dedicate to the VMroot_password: the root password in clear textssh_key_file: the path of the public key for connecting to the VM. If the value, Virt-Lightning will pick the first key matching~/.ssh/id_*.pub.groups: this list of groups will be used if you generate an Ansible inventory.disks: a list of disks to create and attach to the VM. The first one is used as the root disk. Default to[{"size": 15}]sizethe size of the disk in GB. Default is1.
networks: a list of network to attach to the VM. The default is: one virtio interface attached tovirt-lightningnetwork.network: the name of the libvirt network. Default is the keynetwork_namefrom the configuration (virt-lightningby default). The key cannot be used withbridge. A host variable is added to in the Ansible inventory, with the network name with suffix "_ipv4" as key and the IPv4 as value, e.g. "private_ipv4".ipv4: a static IPv4. Default is a dynamic IPv4 address.nic_model: the libvirt driver to use. Default isvirtiomac: an optional static MAC address, e.g: '52:54:00:71:b1:b6'bridge: optional, the name of a bridge to connect to. This key replace thenetworkkey.virtualport_type: The type of the virtualport, currently, this can be used withbridge.
Example: a virt-lightning.yaml file:
- name: esxi-vcenter
  distro: esxi-6.7
  memory: 12000
  root_disk_size: 30
  vcpus: 2
  root_password: '!234AaAa56'
  groups: ['all_esxi']
- name: esxi1
  distro: esxi-6.7
  memory: 4096
  vcpus: 1
  root_password: '!234AaAa56'
  groups: ['all_esxi', 'esxi_lab']
- name: esxi2
  distro: esxi-6.7
  memory: 4096
  vcpus: 1
  root_password: '!234AaAa56'
  groups: ['all_esxi', 'esxi_lab']
- name: centos-7
  distro: centos-7
  networks:
    - network: default
      ipv4: 192.168.122.50
  bootcmd:
    - yum update -y
Example: connect to an OpenvSwitch bridge
- name: controller
  distro: fedora-35
  - bridge: my-ovs-bridge-name
    virtualport_type: openvswitch
Example: To getting DHCP working with a bridge connection
- name: vlvm-fedora-40
  distro: fedora-40
  networks:
    - network: virt-lightning
      nic_model: virtio
    - bridge: br0
      nic_model: virtio
Example: Addressing multiple interfaces
- name: example
  distro: fedora-40
  networks:
    - network: default
      ipv4: 192.168.122.50
    - network: management
      ipv4: 192.168.123.50
The variable management_ipv4 holds the IP address and netmask.
- hosts: all
  tasks:
    - name: Default address
      debug: msg="{{ ansible_host }}"
      # "msg": "192.168.122.50"
    - name: Management address
      debug: msg="{{ management_ipv4 }}"
      # "msg": "192.168.123.50/24"
    - name: Management address
      debug: msg="{{ management_ipv4 | ansible.utils.ipaddr('address') }}"
      # "msg": "192.168.123.50"
    - name: Management address
      debug: msg="{{ management_ipv4 | ansible.utils.ipaddr('netmask') }}"
      # "msg": "255.255.255.0"
You can also associate some parameters to the distro image itself
cat /var/lib/virt-lightning/pool/upstream/esxi-6.7.yaml
username: root
python_interpreter: /bin/python
memory: 4096
networks:
  - network: virt-lightning
    nic_model: virtio
  - network: default
    nic_model: e1000
Example: working with snapshots
User can create a snapshot of VM to restore it later. Default configuration of virt-lightning supports snapshots both
for running and powering off VMs. qcow2 disk format used allows diskspace-wise incremental snapshotting, keeping only
updated storage blocks. virsh tool supports it by CLI, virt-manager provides a neat GUI supporting most of
the features
# create first snapshot of running machine
virsh snapshot-create-as --domain vm_name --name snapshot_1
# create second snapshot
virsh snapshot-create-as --domain vm_name --name snapshot_2
# validate that both of them were saved
virsh snapshot-list vm_name
# and revert to the first one
virsh snapshot-revert vm_name --snapshotname snapshot_1
Development
install libvirt-dev package:
Debian/Ubuntu:
apt install python3-venv pkg-config gcc libvirt-dev python3-dev
Fedora/RHEL:
dnf install python3-devel gcc libvirt-devel
You can run a development copy in a virtual env:
uv run virt-lightning
Add a new image or refresh the list
You just need to adjust the virt-lightning.org/refresh.py script and call it with:
uv run virt-lightning.org/refresh.py
1 maintainer

Metadata
1 maintainer
Release files for virt-lightning 2.5.0
For a detailed explanation of source distributions (sdists) and built distributions (wheels), please see the package formats documentation.
Source distribution (sdist)
| File | Size | Uploaded | Provenance | |
|---|---|---|---|---|
| virt_lightning-2.5.0.tar.gz | 81.6 kB | With provenance | Details |
Built distribution (wheel)
| File | Interpreter | ABI | Platform | Reset |
|---|---|---|---|---|
| virt_lightning-2.5.0-py3-none-any.whl | Python 3 | none | any | Details |
Total release size: 114.2 kB
Release files / virt_lightning-2.5.0.tar.gz
| Download URL | virt_lightning-2.5.0.tar.gz |
|---|---|
| Size | 81.6 kB |
| Tags | Source |
|
SHA-256 checksum How to use checksums |
9595ceeeb1ffabb8ae61f633540c45b8cd948c4c581ca31786cbe3f434fafdde
|
|
BLAKE2b-256 checksum How to use checksums |
890e84c39ef32dbb5f3bab581684a2791c4bef2b8cce6350c024d49664e18f30
|
| Upload date | |
|
Uploaded using Trusted Publishing? What is trusted publishing? |
Yes |
| Uploaded via |
twine/6.1.0 CPython/3.13.7
|
Provenance
Provenance describes where a file came from. On PyPI, provenance is shared via attestations, which provide a verifiable record of the build or publishing details. View details, limitations and caveats.


PyPI Publish Attestation
PyPI verified that this artifact, at this checksum, originated from the publisher listed below.
Signed by GitHub Actions, verified by PyPI on Jan 10, 2026.
Transparency logRelease files / virt_lightning-2.5.0-py3-none-any.whl
| Download URL | virt_lightning-2.5.0-py3-none-any.whl |
|---|---|
| Size | 32.7 kB |
| Tags | Python 3 |
|
SHA-256 checksum How to use checksums |
8ab4050d0966cc78c4c68e8302cdb26a747c714a4fe0145e060f04900931f53c
|
|
BLAKE2b-256 checksum How to use checksums |
edcc0b409c976cc38e5097ac8a6b3e9ea6332f7a13f572aefc917b80284eba9e
|
| Upload date | |
|
Uploaded using Trusted Publishing? What is trusted publishing? |
Yes |
| Uploaded via |
twine/6.1.0 CPython/3.13.7
|
Provenance
Provenance describes where a file came from. On PyPI, provenance is shared via attestations, which provide a verifiable record of the build or publishing details. View details, limitations and caveats.
PyPI Publish Attestation
PyPI verified that this artifact, at this checksum, originated from the publisher listed below.
Signed by GitHub Actions, verified by PyPI on Jan 10, 2026.
Transparency logSecurity for virt-lightning 2.5.0
Provenance
Provenance describes where a file came from. On PyPI, provenance is shared via attestations, which provide a verifiable record of the build or publishing details. View details, limitations and caveats.
Full provenance
All 2 files in this release have been uploaded with provenance metadata.
Attestation for virt_lightning-2.5.0.tar.gz
PyPI Publish Attestation
PyPI verified that this artifact, at this checksum, originated from the publisher listed below.
Signed by GitHub Actions, verified by PyPI on Jan 10, 2026.
Transparency logA note on package security
PyPI is a repository for distributing packages, not a service for auditing them. While third-party security researchers and our staff do their best to detect and remove malicious packages, PyPI cannot guarantee the quality, security or suitability of any given package.














