





AutoMonkey

Python Automation using Mouse and Keyboard, for the masses
Installation
- From pypi:
pip install AutoMonkey
- From github:
pip install git+https://github.com/MihailCosmin/AutoMonkey
Dependencies
Automonkey is based on:
Other dependencies:
- PyScreeze
- pyperclip
- clipboard
- keyboard
- screeninfo
- pywin32
- pillow
- opencv-python
- numpy
- pytesseract
- pywinauto (Windows only, for the control actions)
Usage
Main function to be used is "chain"
This will allow you to "chain" together most of the other functions of automonkey.
Which in turn will enable you to create sequences of mouse and/or keyboard actions in order to automate any given task.
A step can have this structure:
dict(
    <action> = <target>,  # action can be any of the automonkey functions, target on which the action will be performed
    wait = 1,  # wait is an optional parameter, which will wait for the given amount of seconds before executing the next step
    skip = False,  # if True, will skip this step
    confidence = 0.9, # confidence is an optional parameter, Used only for actions on images. Confidence on locating the image.
    v_offset = 0,  # v_offset is an optional parameter, Used only for actions on images. Vertical offset from the center of the image.
    h_offset = 0,  # h_offset is an optional parameter, Used only for actions on images. Horizontal offset from the center of the image.
    offset = 0, # offset is an optional parameter, Used only for actions on images. Offset from the center of the image.
    monitor = 0,  # monitor is an optional parameter, Used only for actions on images. Monitor on which to search for the image.
)

or

{
    "<action>": "<target>",  # action can be any of the automonkey functions, target on which the action will be performed
    "wait": 1,  # wait is an optional parameter, which will wait for the given amount of seconds before executing the next step
    "skip": False,  # if True, will skip this step
    "confidence": 0.9, # confidence is an optional parameter, Used only for actions on images. Confidence on locating the image.
    "v_offset": 0,  # v_offset is an optional parameter, Used only for actions on images. Vertical offset from the center of the image.
    "h_offset": 0,  # h_offset is an optional parameter, Used only for actions on images. Horizontal offset from the center of the image.
    "offset": 0, # offset is an optional parameter, Used only for actions on images. Offset from the center of the image.
    "monitor": 0,  # monitor is an optional parameter, Used only for actions on images. Monitor on which to search for the image.
}
-
You can connect multiple mouse actions together by using the "chain" function. Just by doing this you can generally automate most of the tasks you would do on a daily basis.
There are 2 main ways to click, either by giving the coordinates of the position where to click or by giving the filename of the image you want to click on
1.1. Clicking by coordinates
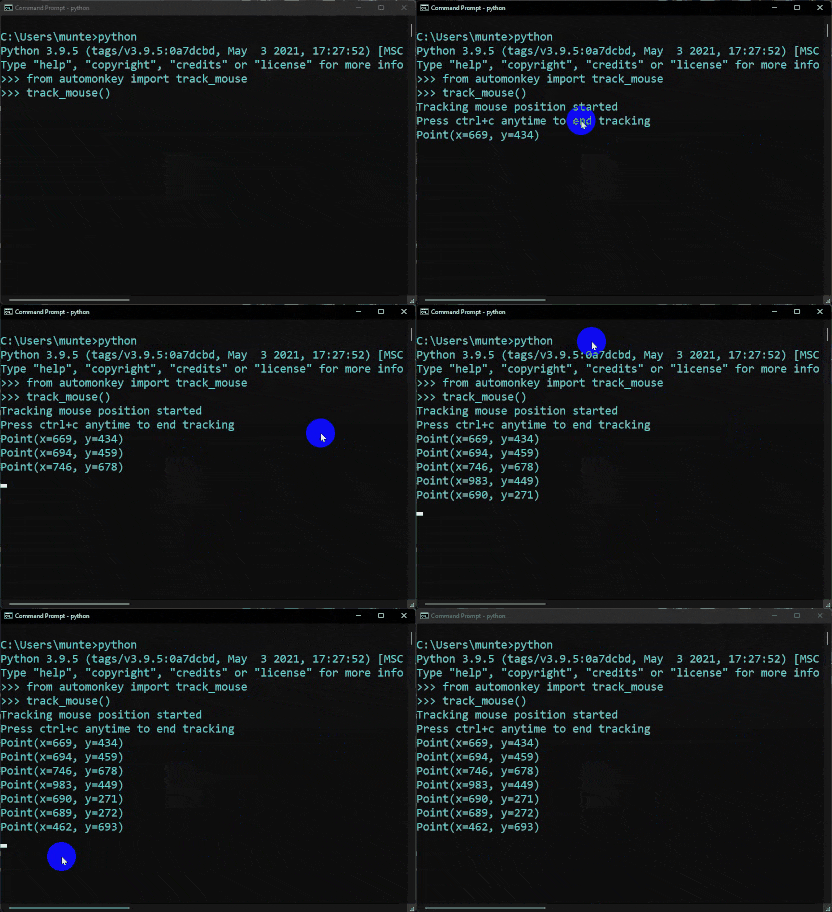
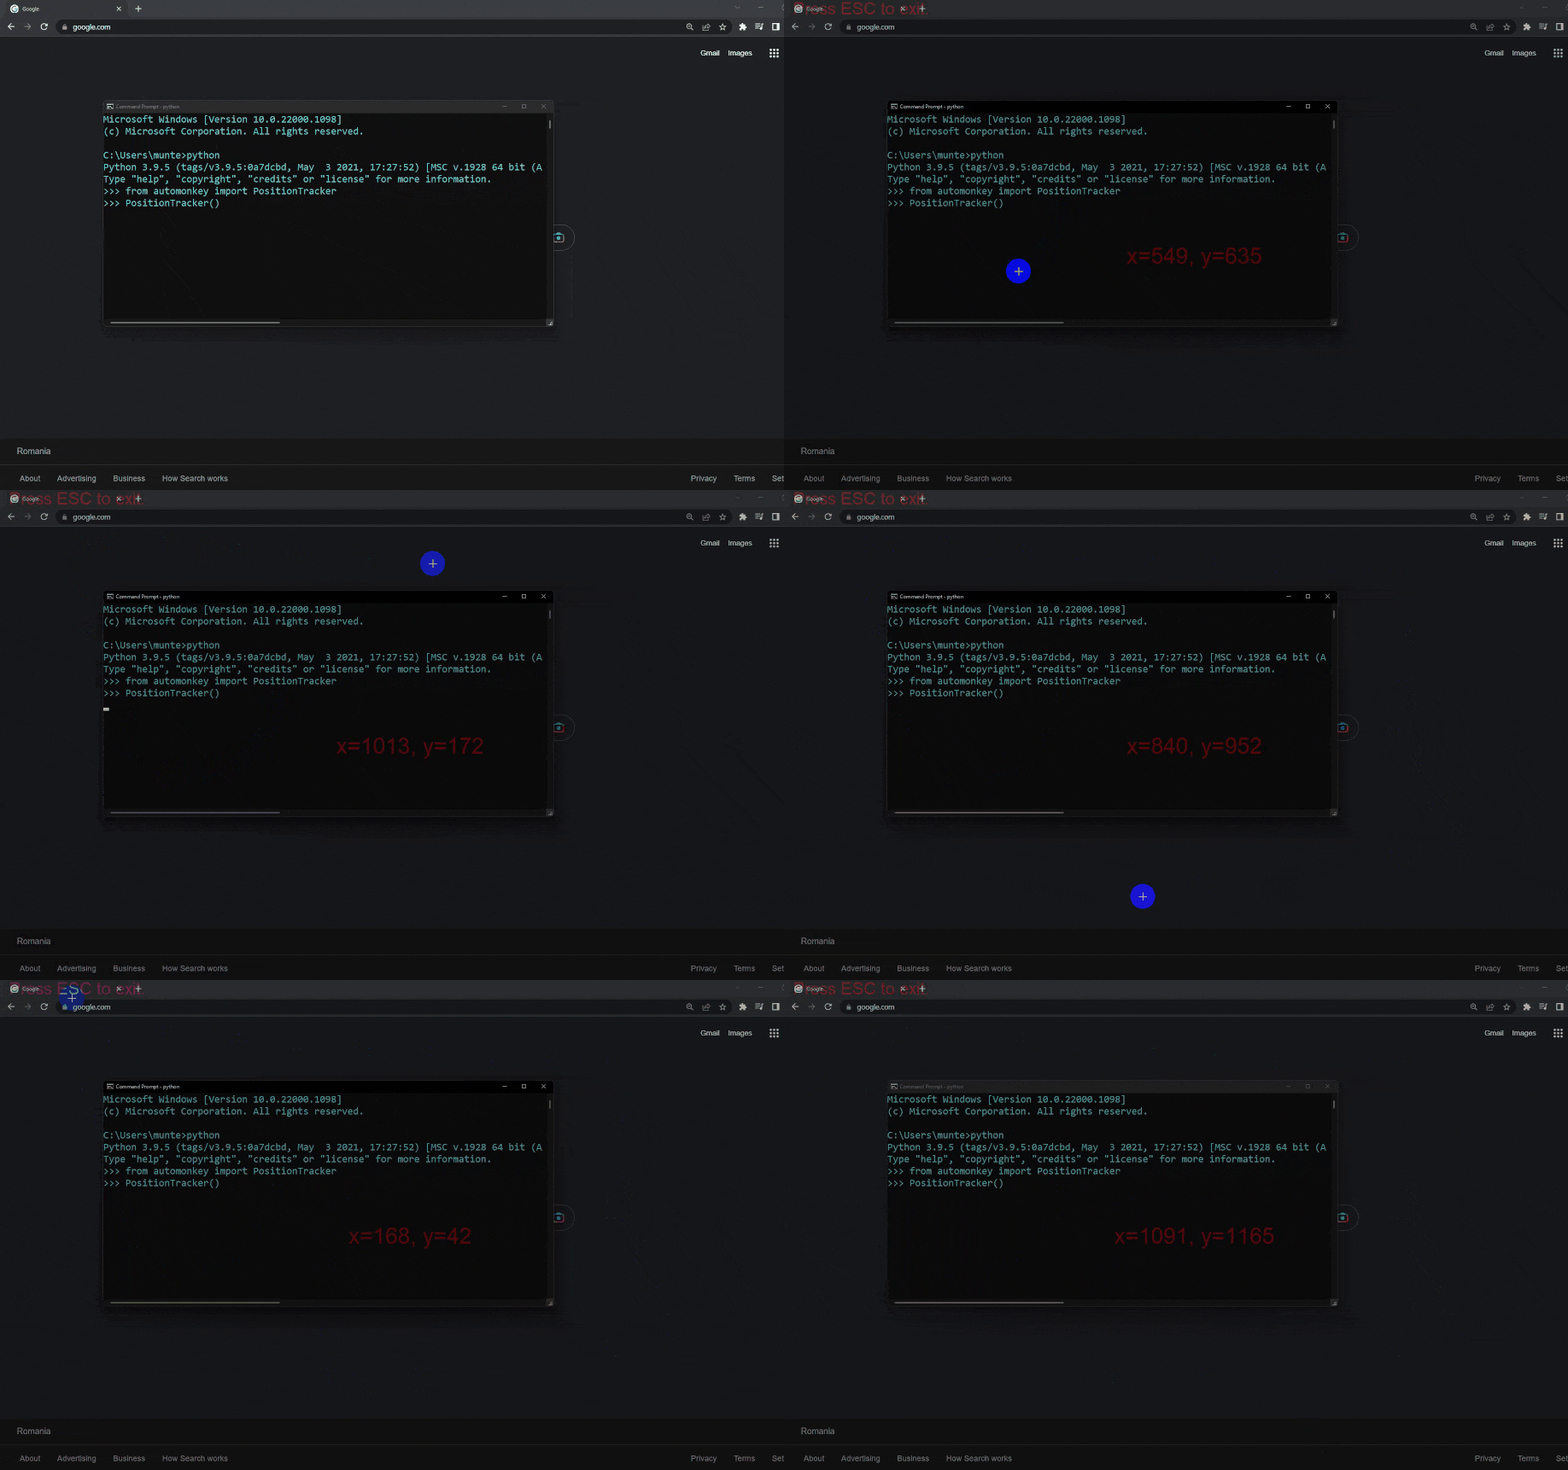
1.1.1. In order to find the coordinates of a position on the screen you can use the "track_mouse" function or the PositionTracker class
    from automonkey import track_mouse
    track_mouse()
    from automonkey import PositionTracker
    tracker = PositionTracker()
    tracker.start()
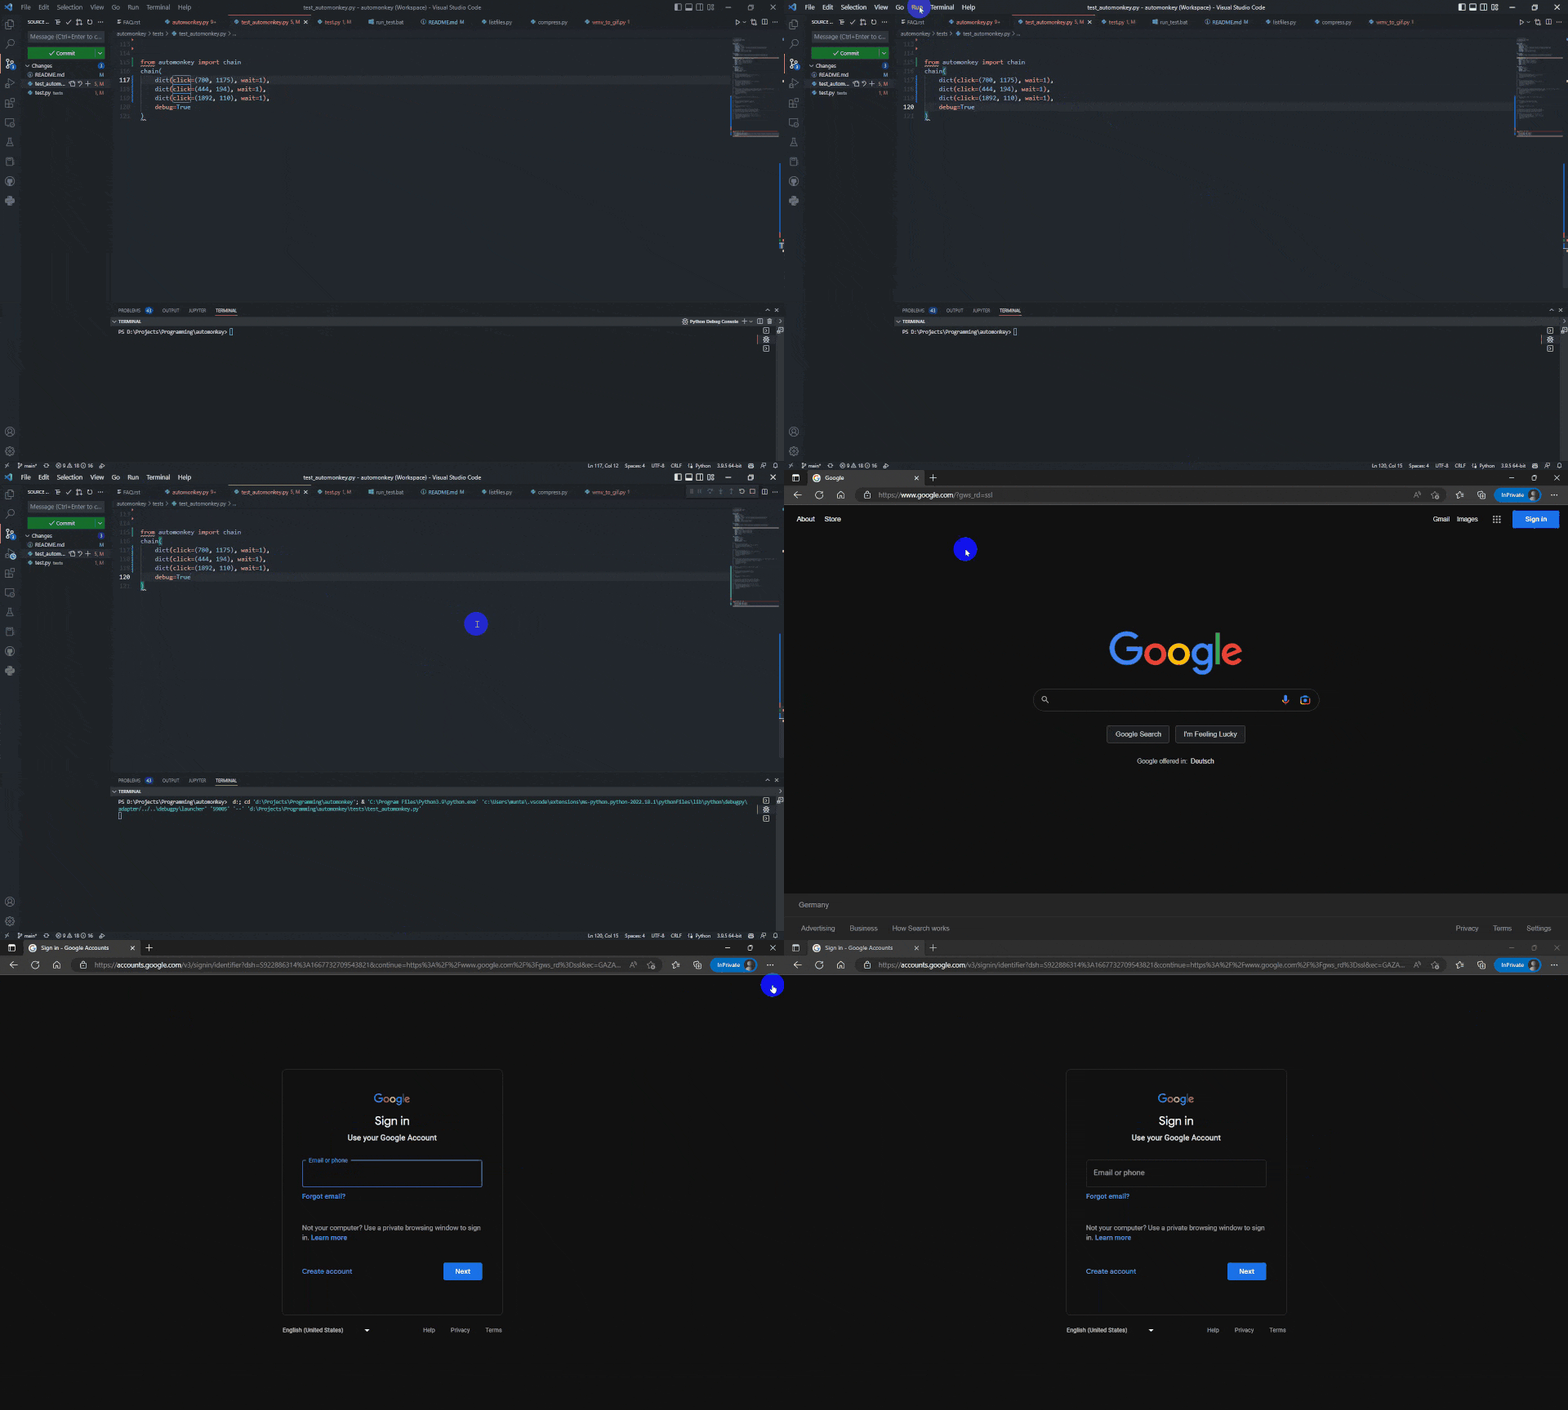
1.2.1. Now that you have the coordinates of the position you want to click on, you can use the "chain" function to click on it
    from automonkey import chain
    chain(
        dict(click=(780, 1175), wait=1),
        dict(click=(444, 194), wait=1),
        dict(click=(1892, 110), wait=1),
        debug=True
    )
1.2. Clicking by image
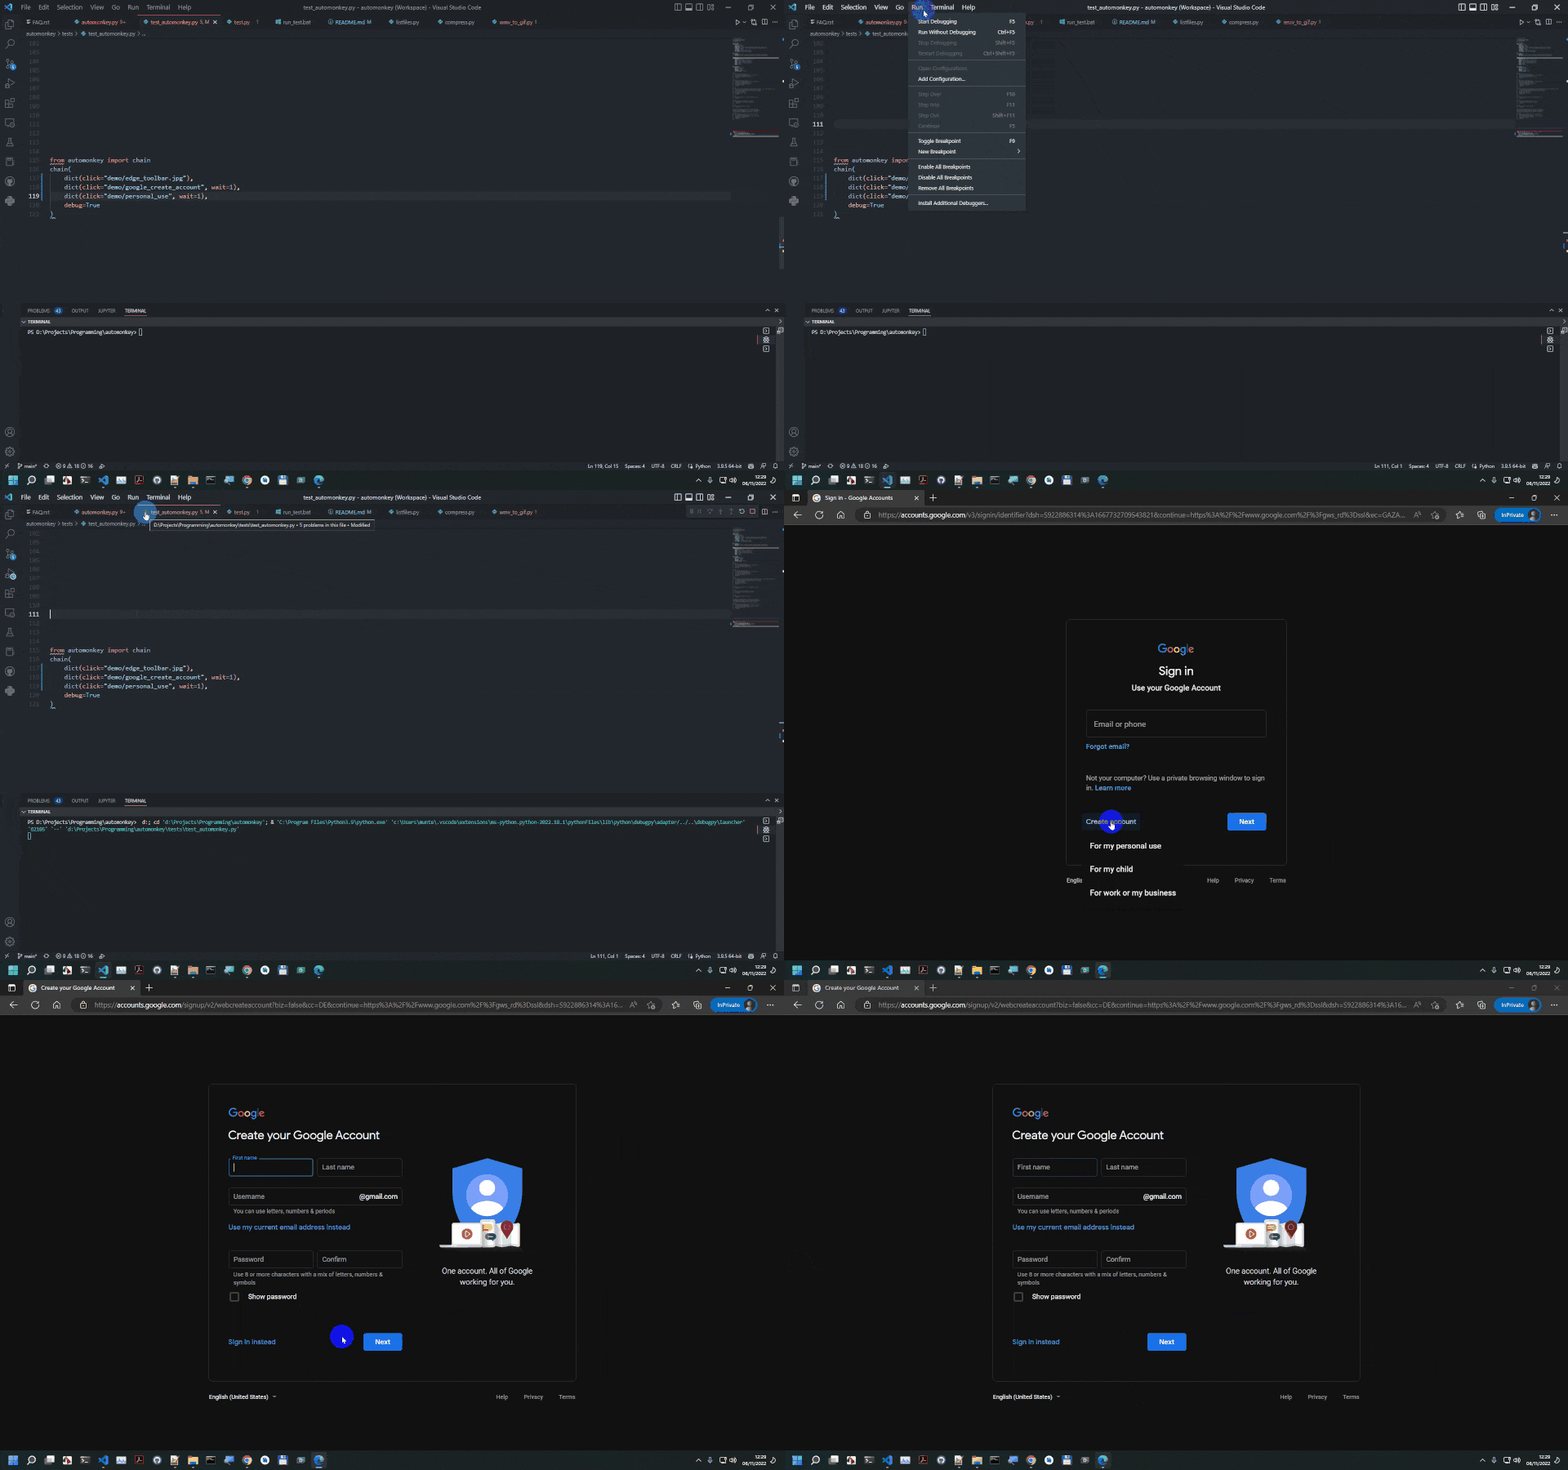
1.2.1. To click on an image you first need to make a screenshot of the area you want to click on and save it somewhere on your computer. For this you can use any screenshot tool you want, or you could use monkeyshot: https://github.com/MihailCosmin/monkeyshot For example you can make a screenshot of the Edge icon from your toolbar, then we can click on it by using the "chain" function.
1.2.2. Now that we have the image we want to click on, we can use the "chain" function to click on it
    chain(
        dict(click="demo/edge_toolbar.jpg"),
        dict(click="demo/google_create_account", wait=1),
        dict(click="demo/personal_use", wait=1),
        debug=True
    )
1.3. All mouse actions:
* click * rightclick * leftclick * doubleclick * tripleclick * scrollup * scrolldown * scrollleft * scrollright -
You can also connect multiple keyboard actions together by using the "chain" function.
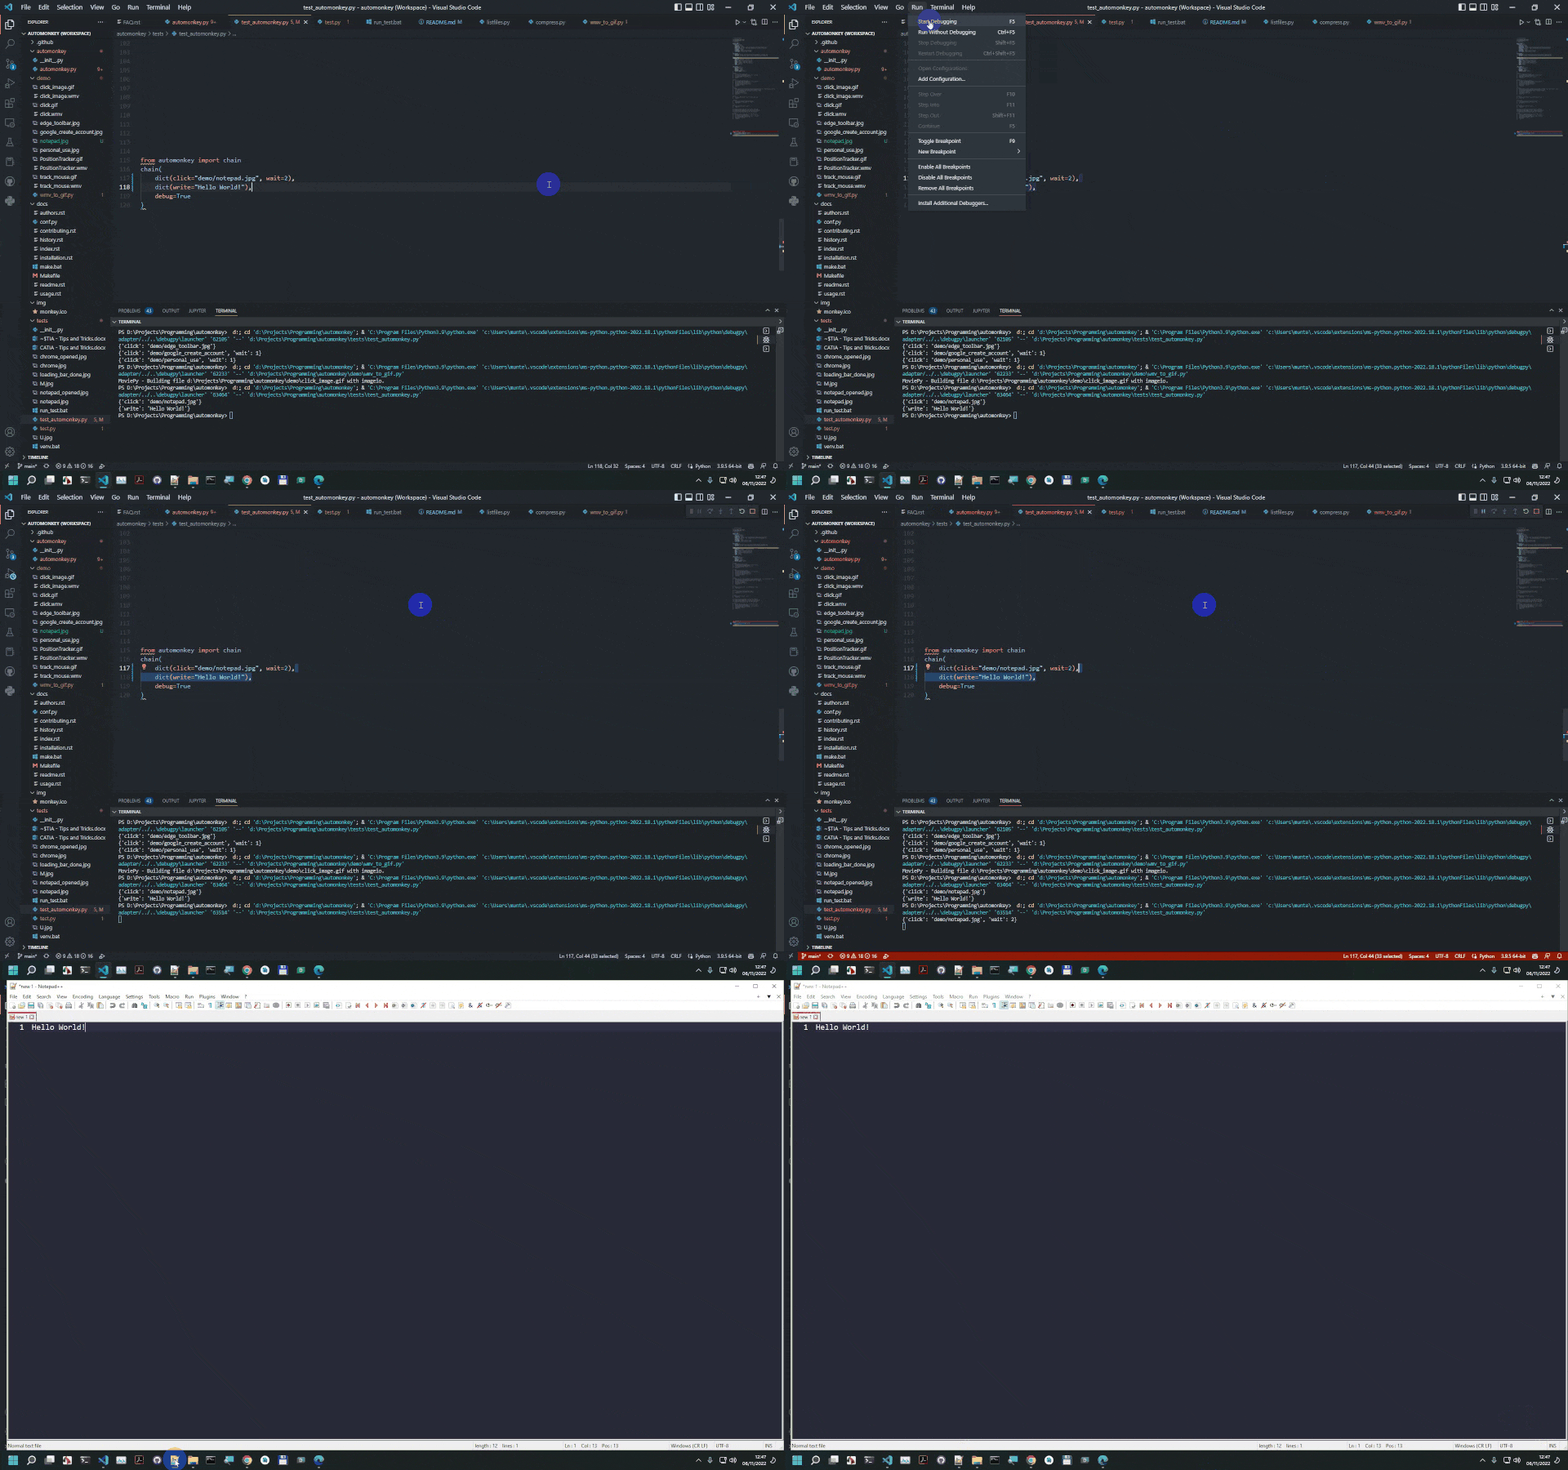
2.1. Write text - This doesn't work well with non-english character. For this you can use the "pastetext" function.
    chain(
        dict(click="demo/notepad.jpg"),
        dict(write="Hello World!"),
        debug=True
    )
2.2. Paste text - This works well with non-english characters
    chain(
        dict(click="demo/notepad.jpg"),
        dict(pastetext="Straße"),
        debug=True
    )
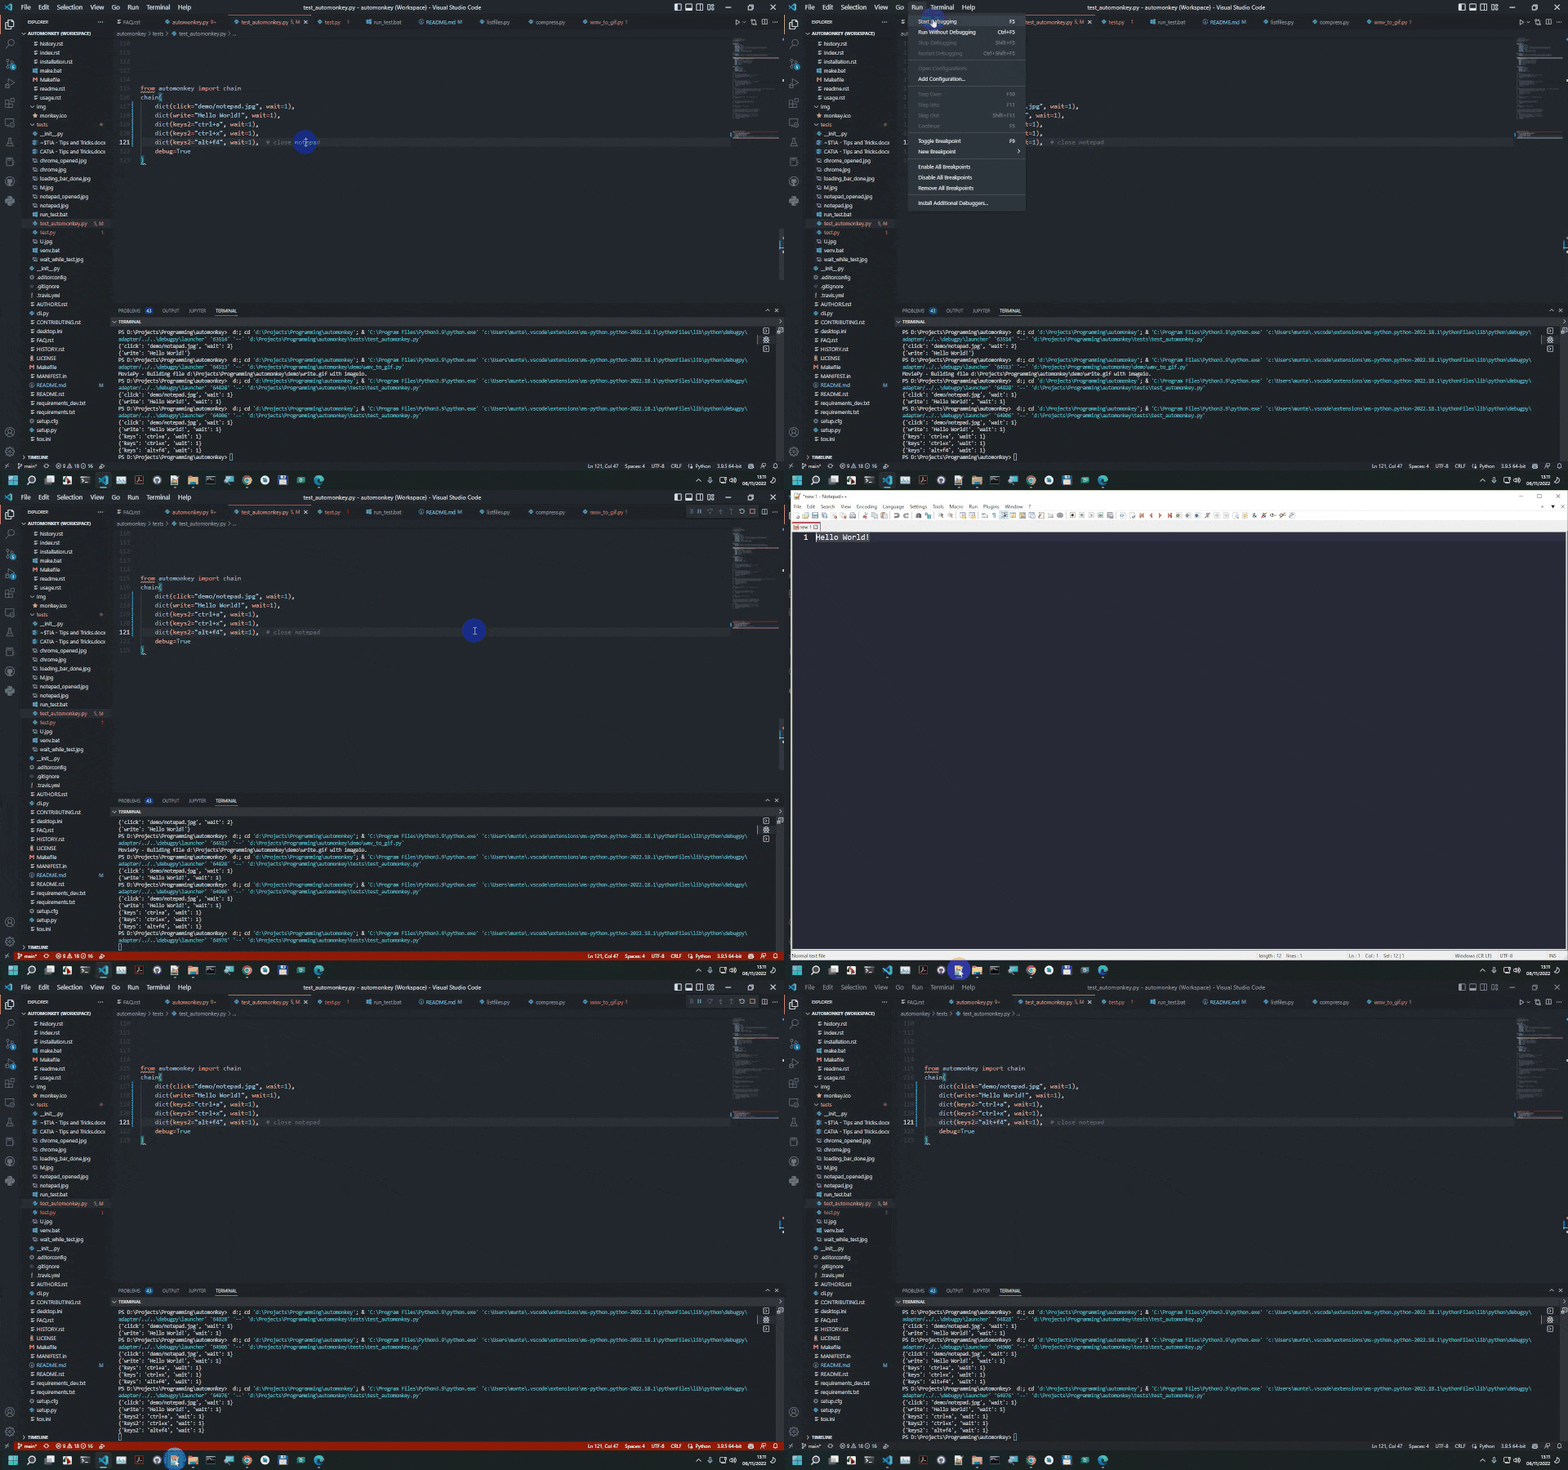
2.3. Key combinations
    chain(
        dict(click="demo/notepad.jpg", wait=1),
        dict(write="Hello World!", wait=1),
        dict(keys2="ctrl+a", wait=1),
        dict(keys2="ctrl+x", wait=1),
        dict(keys2="alt+f4", wait=1),  # close notepad
        debug=True
    )
2.4. All key actions:
* write * pastetext * keys * keys2 - best option overall for key combinations * keys3 * keys4 * copy * paste -
Wait actions:
3.1. Wait until an image appears on the screen This can used when you are waiting for a window to finish loading completely and you don't know exactly how long that would take.
    chain(
        dict(click="demo/notepad.jpg"),
        dict(waituntil="demo/notepad_opened.jpg", wait=1),
        dict(write="Hello World!", wait=1),
        debug=True
    )
3.2. Wait while an image is on the screen
-
App (window) actions:
4.1. Open an app
    chain(
        dict(open_app="notepad++.exe", wait=1),
        dict(waituntil="demo/notepad_opened.jpg", wait=1),
        dict(write="Hello World!", wait=1),
        debug=True
    )
4.2. Close an app
    chain(
        dict(open_app="notepad++.exe", wait=1),
        dict(write="Hello World!", wait=1),
        dict(close="Notepad", wait=1),
        debug=True
    )
4.3. Minimize an app
    chain(
        dict(open_app="notepad++.exe", wait=1),
        dict(write="Hello World!", wait=1),
        dict(minimize="Notepad", wait=1),
        debug=True
    )
4.4. Maximize an app
    chain(
        dict(open_app="notepad++.exe", wait=1),
        dict(write="Hello World!", wait=1),
        dict(maximize="Notepad", wait=1),
        debug=True
    )
4.5. Restore an app
    chain(
        dict(open_app="notepad++.exe", wait=1),
        dict(write="Hello World!", wait=1),
        dict(minimize="Notepad", wait=1),
        dict(restore="Notepad", wait=1),
        debug=True
    )
4.6. All app actions:
* open_app * close * startfile * focus * minimize * maximize * restore * msoffice_replace * copy_from * copy_from_to -
Image actions
5.1 count_img. With this function you can count how many times one image appears on the screen.
    chain(
        dict(count_img="demo/M.jpg", wait=1),  # The result will be copied to the clipboard
        dict(open_app="notepad++.exe", wait=1),
        dict(paste="", wait=1),  # with paste we can paste the text from the clipboard
        debug=True
    )
5.2. get_text_from_region
    chain(
        dict(get_text_from_region=((136, 121), (189, 140)), wait=1),  # The text will be copied to the clipboard
        dict(open_app="notepad++.exe", wait=1),
        dict(paste="", wait=1),  # with paste we can paste the text from the clipboard
        debug=True
    )
-
Control actions (Windows: pywinauto; Linux: AT-SPI; macOS: not implemented yet)
These find buttons, text boxes and menus through the OS accessibility tree instead of coordinates or images, so they keep working when the resolution, theme or window position changes. Same function names and arguments on both OSes - a
chainscript using them needs no changes to run on either one; only thebackendargument's value differs ("uia"/"win32"on Windows,"atspi"on Linux).Every function takes the window title (regex, matched anywhere in the title, like focus/close) and a control:
- a "best match" name:
"Save","SaveButton","Edit" - or a dict of search criteria:
{"title": "Save", "control_type": "Button"},{"auto_id": "num7Button"}
6.1 Windows (pywinauto)
Optional for all:
backend="uia"(default, modern apps) or"win32"(older apps),timeout=10seconds.In chain the target is a tuple of arguments or a dict of keyword arguments:
    from automonkey import chain, list_controls

    list_controls("Calculator")  # prints the controls and the names you can use

    chain(
        dict(open_app="calc", wait=1),
        dict(wait_control="Calculator"),
        dict(click_control=("Calculator", {"auto_id": "num7Button"})),
        dict(click_control=("Calculator", {"auto_id": "plusButton"})),
        dict(click_control=("Calculator", {"auto_id": "num5Button"})),
        dict(click_control=dict(window="Calculator", control={"auto_id": "equalButton"}, invoke=True)),
        dict(get_control_text=("Calculator", {"auto_id": "CalculatorResults"})),  # copied to the clipboard
    )

    chain(
        dict(open_app="notepad", wait=1),
        dict(type_in_control=dict(window=" - Notepad$", control={"control_type": "Document"}, text="Hello (world)!")),
        dict(select_menu=(" - Notepad$", "Edit->Select all")),
    )
Available functions:
- start_app - start an application with pywinauto
- click_control, double_click_control, right_click_control -
invoke=Truepresses it without moving the mouse - type_in_control - types the text as it is;
literal=Falsefor pywinauto key syntax ({ENTER},^a);pause=0.05if a slow app loses characters - set_control_text, get_control_text
- select_menu - path separated by
->, e.g."File->Save As..." - select_item - item of a combo box / list
- check_control, uncheck_control
- wait_control, control_exists
- list_controls
- get_window, get_control - return the pywinauto objects for anything else
6.2 Linux (AT-SPI)
Setup (distro packages, not pip - PyGObject needs system build dependencies pip can't guarantee): on Debian/Ubuntu/Raspberry Pi OS,
    sudo apt-get install python3-gi gir1.2-atspi-2.0 at-spi2-core
    gsettings set org.gnome.desktop.interface toolkit-accessibility true
The
toolkit-accessibilitykey only affects apps started after it's enabled - restart anything already running. Apps must also not haveNO_AT_BRIDGE=1set in their environment, which silently disables AT-SPI registration.Not every app exposes an accessibility tree: GTK, GNOME and LibreOffice apps and Firefox work out of the box; Qt apps need
QT_LINUX_ACCESSIBILITY_ALWAYS_ON=1in their environment before they start; Chrome/Electron apps need the--force-renderer-accessibilityflag; self-drawn/custom-rendered UIs (games, canvas-based apps) can't expose one at all.control_typemaps to an AT-SPI role, not quite the same names pywinauto uses on Windows - confirmed against real GTK widgets, not just the spec (a push button's role isBUTTON, notPUSH_BUTTON, for instance):control_type AT-SPI role(s) ButtonBUTTON,PUSH_BUTTON,TOGGLE_BUTTONCheckBoxCHECK_BOXRadioButtonRADIO_BUTTONComboBoxCOMBO_BOXEditTEXT,ENTRY,PASSWORD_TEXT(also a plain GTK text editor's main area - see note below)DocumentDOCUMENT_TEXT,DOCUMENT_FRAME,DOCUMENT_WEB, ... (LibreOffice/WebKit-style content)StaticLABELMenuItemMENU_ITEM,CHECK_MENU_ITEM,RADIO_MENU_ITEM,TEAROFF_MENU_ITEMMenuMENU,POPUP_MENUMenuBarMENU_BARListLIST,LIST_BOXListItemLIST_ITEMTab/TabControlPAGE_TAB/PAGE_TAB_LISTWindow/DialogFRAME/DIALOGauto_idmatches the AT-SPI accessible-id or an"id"attribute if the app sets one (most GTK apps don't), falling back to the accessible name otherwise.Known Wayland limits: AT-SPI tree reading and actions (
invoke=True,check_control,select_menu, ...) work the same as on X11/Xwayland. What doesn't: mouse clicks (click_control(invoke=False)) and keyboard injection (type_in_control) only reach apps running under Xwayland - a native-Wayland client never receives them at all, no matter what has focus (confirmed directly: the identical app forced through Xwayland viaGDK_BACKEND=x11works, the native-Wayland instance silently doesn't). Raising/ activating a window doesn't work either.click_control(invoke=False)detects a Wayland session and falls back toinvoke=Truewith a warning;type_in_controlhas no such fallback - useinvoke=True-based actions where possible, or run the target app under Xwayland (GDK_BACKEND=x11for GTK apps) if it must be driven by mouse/ keyboard injection on Wayland.from automonkey import chain, list_controls list_controls("Calculator") # prints the controls and the names you can use chain( # a short wait after each click matters here: Atspi.Action.do_action() returns # once the D-Bus call completes, not once the app has processed the resulting # GTK signal - clicking straight through with no pause silently drops presses # (confirmed directly while building this). dict(start_app="gnome-calculator", wait=1), dict(wait_control="Calculator"), dict(click_control=dict(window="Calculator", control={"title": "7", "control_type": "Button"}, invoke=True), wait=0.3), dict(click_control=dict(window="Calculator", control={"title": "+", "control_type": "Button"}, invoke=True), wait=0.3), dict(click_control=dict(window="Calculator", control={"title": "5", "control_type": "Button"}, invoke=True), wait=0.3), dict(click_control=dict(window="Calculator", control={"title": "=", "control_type": "Button"}, invoke=True), wait=0.3), dict(get_control_text=("Calculator", {"control_type": "Edit"})), # copied to the clipboard ) chain( # control_type "Edit" (AT-SPI role "text"), not "Document": gnome-text-editor's # main area is a plain GtkSourceView widget, same as most GTK text editors - # "Document*" roles are for LibreOffice/WebKit-style content, confirmed against # a GtkSourceView-based app while building this. dict(start_app="gnome-text-editor", wait=1), dict(type_in_control=dict(window="Text Editor", control={"control_type": "Edit"}, text="Hello (world)!")), dict(get_control_text=("Text Editor", {"control_type": "Edit"})), # copied to the clipboard )
select_menuisn't shown against gnome-text-editor above: it's a modern GNOME app with no traditional File/Edit menu bar at all (confirmed - zero AT-SPI menu-role nodes anywhere in its tree), not an AT-SPI limitation. It works the same way as on Windows against any app that does have one, e.g.select_menu("Mousepad", "File->Save As...").Same available functions as the Windows list above (
backend="atspi", the default on Linux, instead of"uia"/"win32");get_window/get_controlreturnAtspi.Accessibleobjects instead of pywinauto wrappers for anything not covered here.See
pywinauto_for_linux.mdin the repo for the full implementation notes (role mapping, best-match lookup, the AT-SPI-bus-down detection, known gotchas found while building this) if you need to go beyond what's documented above. - a "best match" name:

Frequently Asked Questions:
-
I made an image but it doesn't click on it.
A: Make sure you have not changed resolution of your screen or the theme (dark/light) of the window.
-
Keys combination using "keys" function doesn't work.
A: Try other keys functions. Preferably "keys2". Other options "keys3", "keys4".
1 maintainer

Metadata
1 maintainer
Release files for AutoMonkey 0.4.1
For a detailed explanation of source distributions (sdists) and built distributions (wheels), please see the package formats documentation.
Source distribution (sdist)
| File | Size | Uploaded | |
|---|---|---|---|
| automonkey-0.4.1.tar.gz | 74.5 kB | Details |
Built distribution (wheel)
| File | Interpreter | ABI | Platform | Reset |
|---|---|---|---|---|
| automonkey-0.4.1-py3-none-any.whl | Python 3 | none | any | Details |
Total release size: 134.8 kB
Release files / automonkey-0.4.1.tar.gz
| Download URL | automonkey-0.4.1.tar.gz |
|---|---|
| Size | 74.5 kB |
| Tags | Source |
|
SHA-256 checksum How to use checksums |
e28239664b77aa4d80316e69d2a3cc908bc3a66a85eae19b2d5d1879b27ae284
|
|
BLAKE2b-256 checksum How to use checksums |
5a564975867d0d2a936308bd3b753c77ddf29a58fd768a9ecaf7bd8bb68260b8
|
| Upload date | |
|
Uploaded using Trusted Publishing? What is trusted publishing? |
Yes |
| Uploaded via |
twine/7.0.0 CPython/3.13.14
|
Provenance
Provenance describes where a file came from. On PyPI, provenance is shared via attestations, which provide a verifiable record of the build or publishing details. View details, limitations and caveats.


PyPI Publish Attestation
PyPI verified that this artifact, at this checksum, originated from the publisher listed below.
Signed by GitHub Actions, verified by PyPI on Oct 16, 2026.
Transparency logRelease files / automonkey-0.4.1-py3-none-any.whl
| Download URL | automonkey-0.4.1-py3-none-any.whl |
|---|---|
| Size | 60.3 kB |
| Tags | Python 3 |
|
SHA-256 checksum How to use checksums |
3db55ec4e26b97b9118433255cad06a0b92899b0c8f8b87367e217551d47126e
|
|
BLAKE2b-256 checksum How to use checksums |
89a2d87173abee1d711ed336a2711b1d5ed92479ac0e68f6a65d39e4659d7f75
|
| Upload date | |
|
Uploaded using Trusted Publishing? What is trusted publishing? |
Yes |
| Uploaded via |
twine/7.0.0 CPython/3.13.14
|
Provenance
Provenance describes where a file came from. On PyPI, provenance is shared via attestations, which provide a verifiable record of the build or publishing details. View details, limitations and caveats.
PyPI Publish Attestation
PyPI verified that this artifact, at this checksum, originated from the publisher listed below.
Signed by GitHub Actions, verified by PyPI on Oct 16, 2026.
Transparency log













