
Python 3 SDK for Baikal
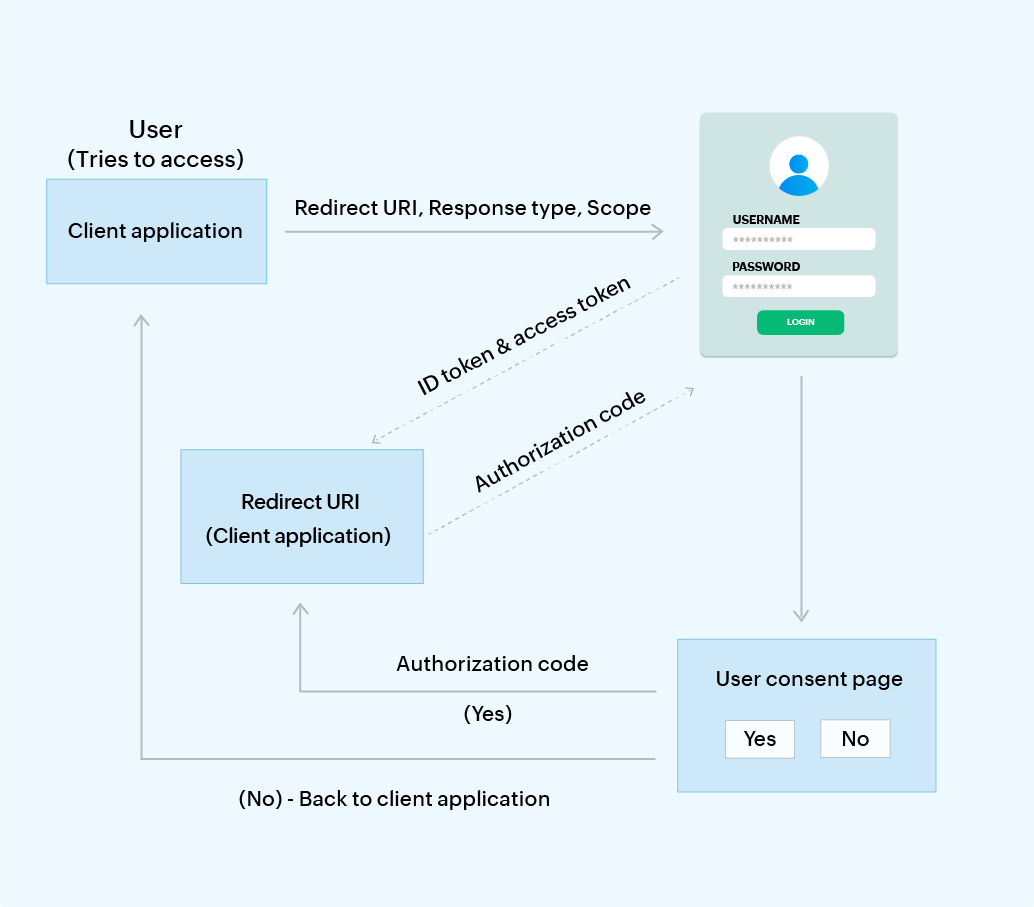
SDK to easilly generate tokens for an application in the 4th platform. It can be used asynchronously for aiohttp or asyncio frameworks.
NOTE: Starting from v0.1.3, the license has changed to Apache 2.0
Installation
You can install easily with pip:
pip install baikal-sdk
Usage
Create a client
from clients.baikal_client import OpenIDClient

oidc_client = OpenIDClient(
    authserver_endpoint='https://auth.xxx.baikalplatform.com', # authserver endpoint
    client_id='your_oauth_client_id',
    client_secret='your_oauth_client_secret',
    # For using grantUser method (jwt-bearer grant type)
    client_keys=[{ 'key': 'stringWithTheKey', format: 'pem' }],  # optional
    issuer='http://yourserver.com/',  # your jwt issuer id
    private_certs_path='/path/to/certs/directory'  # directory to read certificates/private keys.
)
If you want to use in an asynchronous environment:
from clients.aio.baikal_client import OpenIDClient

oidc_client = OpenIDClient(
    authserver_endpoint='https://auth.xxx.baikalplatform.com', # authserver endpoint
    client_id='your_oauth_client_id',
    client_secret='your_oauth_client_secret',
    # For using grantUser method (jwt-bearer grant type)
    client_keys=[{ 'key': 'stringWithTheKey', format: 'pem' }],  # optional
    issuer='http://yourserver.com/',  # your jwt issuer id
    private_certs_path='/path/to/certs/directory'  # directory to read certificates/private keys.
)
the asynchronous client will use aiohttp client to perform requests to authserver and will handle the asynchronous session internally. See aiohttp_example.py for a real example.
Get an access_token for a user using jwt-bearer
access_token = oidc_client.grant_user(
  'userSUB',
  ['list', 'of', 'scopes'],
  ['list', 'of', 'purposes'],
  authorization_id='46921050-e97c-418b-928c-4158256be92c', # optional
  identifier={'id': 'my-phone-number', 'type': 'phone_number'}, # optional
  full_authserver_response=False # optional (get full response, including expires_in, scopes ...)
)
to use it asynchronously (e.g. with aiohttp):
access_token = await oidc_client.async_grant_user(
  'userSUB',
  ['list', 'of', 'scopes'],
  ['list', 'of', 'purposes'],
  authorization_id='46921050-e97c-418b-928c-4158256be92c', # optional
  identifier={'id': 'my-phone-number', 'type': 'phone_number'} # optional
)
Get a client_credentials access_token
access_token = oidc_client.grant_client(
  scopes=['list', 'of', 'scopes'] #optional
  purposes=['list', 'of', 'purposes'] #optional
)
The methods can be called asynchronously using await:
access_token = await oidc_client.async_grant_client(...)
Introspect access_token
payload = oidc_client.introspect(access_token)
assert 'scope-sep-string' in payload['scope']
The upper methods can be called in an asynchronous environment using await:
access_token = await oidc_client.async_introspect(...)
Expose your public keys in a server route to use with a jwt-bearer
If you have configured your issuer in the authserver to read from an endpoint, you should expose your public keys in an accessible route.
oid_client.get_jwk_set()
This will output the public part of your keys to be directly exposed in JWK format (required by authserver and any OIDC server).
Basic workflow to obtain an Access Token:
STEP 1:
An instance of OpenIDClient is created with specific configuration parameters: the OIDC server's URL, Client ID, and Secret
from clients.baikal_client import OpenIDClient

# Configura la instancia de OpenIDClient con la URL del servidor de autorización, el Client ID y el Secret.
oidc_client = OpenIDClient('https://example.test', 'client', 'secret')

# Llama al método grant_client para obtener un AccessToken.
try:
    access_token = oidc_client.grant_client()
    print("AccessToken obtenido:", access_token)
except Exception as e:
    print("Error al obtener AccessToken:", str(e))
STEP 2:
This step defines the grant_client method, which is called in Step 1 to obtain an access token.
It creates a body dictionary with a grant_type of 'client_credentials', indicating the type of grant being used to obtain the token.
def grant_client(self, scopes=None, purposes=None, headers={}, timeout=DEFAULT_REQUEST_TIMEOUT,
                     full_authserver_response=False):
        body = {
            'grant_type': 'client_credentials'
        }
        if scopes:
            body['scope'] = ' '.join(scopes)
        if purposes:
            body['purpose'] = ' '.join(purposes)
        return self._call_token_endpoint(body, headers, timeout, full_authserver_response=full_authserver_response)
STEP 3:
This step defines the _call_token_endpoint method, which is called by the grant_client method.
It uses the requests library to make a POST request to the OIDC token endpoint with the provided parameters.
If the request is successful, it parses the JSON response and returns either the full response or just the access token, depending on the full_authserver_response.
def _call_token_endpoint(self, body, headers, timeout, full_authserver_response=False):
        r = requests.post(self.authserver_config.token_endpoint, body, auth=self._authserver_auth,
                          verify=self.verify_certs, headers=headers, timeout=timeout)
        if r.status_code == requests.codes.unauthorized:
            raise AuthserverError("The credentials client_id/client_secret are invalid.")
        elif r.status_code != requests.codes.ok:
            raise AuthserverError("Error from token endpoint of Authserver: " + self._parse_error(r))

        body = r.json()
        return body if full_authserver_response else body['access_token']
Configuration
The OpenIDClient configuration will be read from environment if ommited
export BAIKAL_AUTHSERVER_ENDPOINT='https://auth.xxx.baikalplatform.com' export BAIKAL_CLIENT_ID='your_oauth_client_id'
export BAIKAL_CLIENT_SECRET='your_oauth_client_secret' export BAIKAL_ISSUER='http://yourserver.com/' export
BAIKAL_PRIVATE_CERTS_PATH='/path/to/certs/directory'
Supported certs format are (should match the file extension):
- json: JSON stringified JWK
- private: DER encoded 'raw' private key
- pkcs8: DER encoded (unencrypted!) PKCS8 private key
- public: DER encoded SPKI public key (alternate to 'spki')
- spki: DER encoded SPKI public key
- pkix: DER encoded PKIX X.509 certificate
- x509: DER encoded PKIX X.509 certificate
- pem: PEM encoded of PKCS8 / SPKI / PKIX
Grant public methods accept a request config as the last argument, to allow specifying headers and timeout per-request (in seconds):
access_token = oid_client.grant_client(
    scopes=["scope1"],
    headers={
        'X-Correlator': '1234-5678-9012-3456-7890'
    },
    timeout=30
)
If you are using the library against a Telefónica Kernel development environment, you can accept self-signed certs setting this environment variable:
export BAIKAL_VERIFY_CERTS=False # Accept self signed certs for authserver communication (not used in token validation)
Configure asynchronous connections
- AIOHTTP_SESSION_SIZE: max # of requests per session. By default 200.
- AIOHTTP_SESSION_DNS_CACHE: TTL of dns sessions. By default 20.
- AIOHTTP_SESSION_LIMIT: Total number of opened connections. By default 500.
Generate private keys
It's not needed to have private keys generated from a secured authority. For oauth2 verify you can use self-generated keys. Here it's included some tips.
If you want to generate different keys (in JWK format) for development purpose you can use https://mkjwk.org/.
Generate a RSA private key (with SHA 256 hash, RS256) (using openssl)
openssl genrsa -des3 -out private-rsa-protected.pem 2048
This will produce a private rsa key of 2048 bits protected with a password, in order to remove the password and use directly the private key in the library you can run this:
openssl rsa -in private-rsa-protected.pem -out private-rsa.pem
# rm private-rsa-protected.pem
Another option (single line) is to use this command:
openssl genpkey -out rsakey.pem -algorithm RSA -pkeyopt rsa_keygen_bits:2048
The private-rsa.pem can be used with the library to generate assertions and to expose the public key part as stated before. Just place the pem in your directory and point the sdk private_certs_path to it. The public key is automatically generated in JWK as you can check in the expose your public keys section.
It's not recommended to use rsa keys bigger than 2048 (e.g 4096) as the computational cost is not worth. It's better to have a keys rotation policy every given time (e.g. a week). It's also not recommended to use keys of 1024 length as it can be cracked.
LICENSE
Copyright 2023 Telefónica
Licensed under the Apache License, Version 2.0 (the "License"); you may not use this file except in compliance with the License. You may obtain a copy of the License at
http://www.apache.org/licenses/LICENSE-2.0
Unless required by applicable law or agreed to in writing, software distributed under the License is distributed on an "AS IS" BASIS, WITHOUT WARRANTIES OR CONDITIONS OF ANY KIND, either express or implied. See the License for the specific language governing permissions and limitations under the License.
3 maintainers


Metadata
3 maintainers
Release files for baikal-sdk 1.2.5
For a detailed explanation of source distributions (sdists) and built distributions (wheels), please see the package formats documentation.
Source distribution (sdist)
| File | Size | Uploaded | |
|---|---|---|---|
| baikal-sdk-1.2.5.tar.gz | 19.0 kB | Details |
Release files / baikal-sdk-1.2.5.tar.gz
| Download URL | baikal-sdk-1.2.5.tar.gz |
|---|---|
| Size | 19.0 kB |
| Tags | Source |
|
SHA-256 checksum How to use checksums |
531c5d70a9a3f5342e964dd77ba8327f68a8d8dd3e638316721244cfc91241c0
|
|
BLAKE2b-256 checksum How to use checksums |
d72cee5aaa8675c7135f018fe607c691c9b560aae83f0d6cce29b68ce5c6e099
|
| Upload date | |
|
Uploaded using Trusted Publishing? What is trusted publishing? |
No |
| Uploaded via |
twine/6.1.0 CPython/3.10.14
|














