Recognize faces from Python or from the command line

Project description
Face Recognition


Features
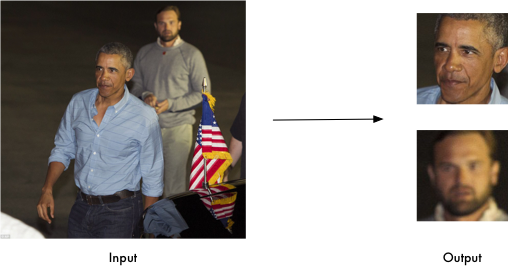
Find faces in pictures
Find all the faces that appear in a picture:
import face_recognition
image = face_recognition.load_image_file("your_file.jpg")
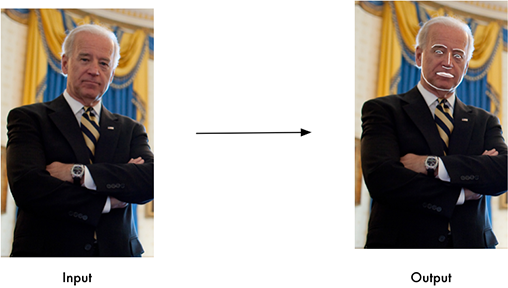
face_locations = face_recognition.face_locations(image)Find and manipulate facial features in pictures
Get the locations and outlines of each person’s eyes, nose, mouth and chin.
import face_recognition
image = face_recognition.load_image_file("your_file.jpg")
face_landmarks_list = face_recognition.face_landmarks(image)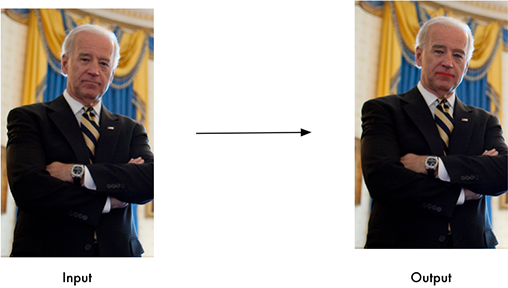
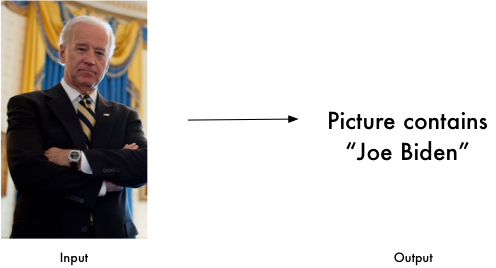
Identify faces in pictures
Recognize who appears in each photo.
import face_recognition
known_image = face_recognition.load_image_file("biden.jpg")
unknown_image = face_recognition.load_image_file("unknown.jpg")

biden_encoding = face_recognition.face_encodings(known_image)[0]
unknown_encoding = face_recognition.face_encodings(unknown_image)[0]

results = face_recognition.compare_faces([biden_encoding], unknown_encoding)
You can even use this library with other Python libraries to do real-time face recognition:
See this example for the code.
Installation
Requirements
Python 3.3+ or Python 2.7
macOS or Linux (Windows not officially supported, but might work)
Installing on Mac or Linux
First, make sure you have dlib already installed with Python bindings:
Then, install this module from pypi using pip3 (or pip2 for Python 2):
pip3 install face_recognitionInstalling on Raspberry Pi 2+
Installing on Windows
While Windows isn’t officially supported, helpful users have posted instructions on how to install this library:
Installing a pre-configured Virtual Machine image
Download the pre-configured VM image (for VMware Player or VirtualBox).
Usage
Command-Line Interface
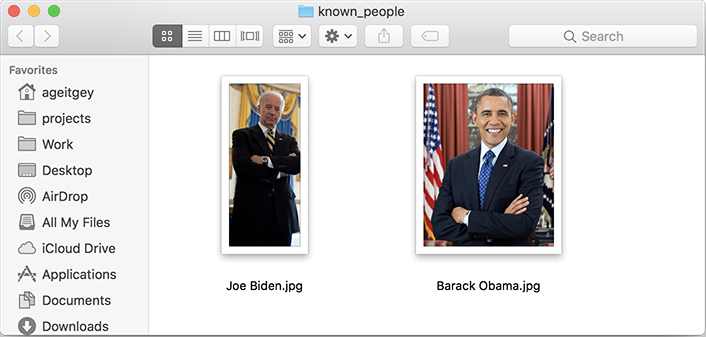
Next, you need a second folder with the files you want to identify:
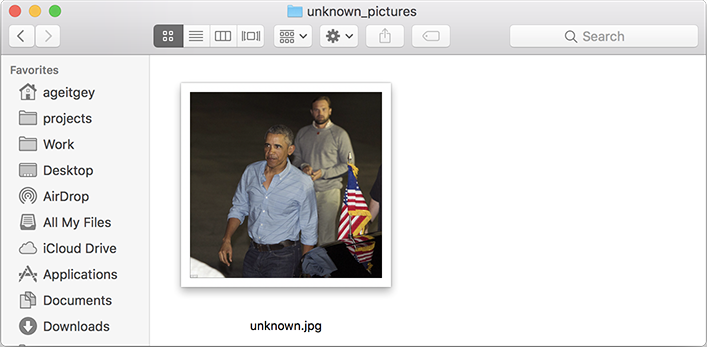
$ face_recognition ./pictures_of_people_i_know/ ./unknown_pictures/

/unknown_pictures/unknown.jpg,Barack Obama
/face_recognition_test/unknown_pictures/unknown.jpg,unknown_personAdjusting Tolerance / Sensitivity
$ face_recognition --tolerance 0.54 ./pictures_of_people_i_know/ ./unknown_pictures/

/unknown_pictures/unknown.jpg,Barack Obama
/face_recognition_test/unknown_pictures/unknown.jpg,unknown_person$ face_recognition --show-distance true ./pictures_of_people_i_know/ ./unknown_pictures/
/unknown_pictures/unknown.jpg,Barack Obama,0.378542298956785
/face_recognition_test/unknown_pictures/unknown.jpg,unknown_person,NoneMore Examples
$ face_recognition ./pictures_of_people_i_know/ ./unknown_pictures/ | cut -d ',' -f2

Barack Obama
unknown_person
Speeding up Face Recognition
If you are using Python 3.4 or newer, pass in a --cpus <number_of_cpu_cores_to_use> parameter:
$ face_recognition --cpus 4 ./pictures_of_people_i_know/ ./unknown_pictures/You can also pass in --cpus -1 to use all CPU cores in your system.
Python Module
API Docs: https://face-recognition.readthedocs.io.
Automatically find all the faces in an image
import face_recognition

image = face_recognition.load_image_file("my_picture.jpg")
face_locations = face_recognition.face_locations(image)

# face_locations is now an array listing the co-ordinates of each face!You can also opt-in to a somewhat more accurate deep-learning-based face detection model.
import face_recognition

image = face_recognition.load_image_file("my_picture.jpg")
face_locations = face_recognition.face_locations(image, model="cnn")

# face_locations is now an array listing the co-ordinates of each face!Automatically locate the facial features of a person in an image
import face_recognition

image = face_recognition.load_image_file("my_picture.jpg")
face_landmarks_list = face_recognition.face_landmarks(image)

# face_landmarks_list is now an array with the locations of each facial feature in each face.
# face_landmarks_list[0]['left_eye'] would be the location and outline of the first person's left eye.Recognize faces in images and identify who they are
import face_recognition

picture_of_me = face_recognition.load_image_file("me.jpg")
my_face_encoding = face_recognition.face_encodings(picture_of_me)[0]

# my_face_encoding now contains a universal 'encoding' of my facial features that can be compared to any other picture of a face!

unknown_picture = face_recognition.load_image_file("unknown.jpg")
unknown_face_encoding = face_recognition.face_encodings(unknown_picture)[0]

# Now we can see the two face encodings are of the same person with `compare_faces`!

results = face_recognition.compare_faces([my_face_encoding], unknown_face_encoding)

if results[0] == True:
    print("It's a picture of me!")
else:
print("It's not a picture of me!")Python Code Examples
All the examples are available here.
Face Detection
Facial Features
Facial Recognition
Find and recognize unknown faces in a photograph based on photographs of known people
Compare faces by numeric face distance instead of only True/False matches
Recognize faces in live video using your webcam - Faster Version (Requires OpenCV to be installed)
Recognize faces in a video file and write out new video file (Requires OpenCV to be installed)
Run a web service to recognize faces via HTTP (Requires Flask to be installed)
Recognize faces with a K-nearest neighbors classifier
How Face Recognition Works
Caveats
The face recognition model is trained on adults and does not work very well on children. It tends to mix up children quite easy using the default comparison threshold of 0.6.
Deployment to Cloud Hosts (Heroku, AWS, etc)
Common Issues
Issue: Illegal instruction (core dumped) when using face_recognition or running examples.
Issue: RuntimeError: Unsupported image type, must be 8bit gray or RGB image. when running the webcam examples.
Solution: Your webcam probably isn’t set up correctly with OpenCV. Look here for more.
Issue: MemoryError when running pip2 install face_recognition
Issue: AttributeError: 'module' object has no attribute 'face_recognition_model_v1'
Solution: The version of dlib you have installed is too old. You need version 19.7 or newer. Upgrade dlib.
Issue: Attribute Error: 'Module' object has no attribute 'cnn_face_detection_model_v1'
Solution: The version of dlib you have installed is too old. You need version 19.7 or newer. Upgrade dlib.
Issue: TypeError: imread() got an unexpected keyword argument 'mode'
Solution: The version of scipy you have installed is too old. You need version 0.17 or newer. Upgrade scipy.
Thanks
Many, many thanks to Davis King (@nulhom) for creating dlib and for providing the trained facial feature detection and face encoding models used in this library. For more information on the ResNet that powers the face encodings, check out his blog post.
Thanks to everyone who works on all the awesome Python data science libraries like numpy, scipy, scikit-image, pillow, etc, etc that makes this kind of stuff so easy and fun in Python.
Thanks to Cookiecutter and the audreyr/cookiecutter-pypackage project template for making Python project packaging way more tolerable.
History
1.2.3 (2018-08-21)
You can now pass model=”small” to face_landmarks() to use the 5-point face model instead of the 68-point model.
Now officially supporting Python 3.7
New example of using this library in a Jupyter Notebook
1.2.2 (2018-04-02)
Added the face_detection CLI command
Removed dependencies on scipy to make installation easier
Cleaned up KNN example and fixed a bug with drawing fonts to label detected faces in the demo
1.2.1 (2018-02-01)
Fixed version numbering inside of module code.
1.2.0 (2018-02-01)
Fixed a bug where batch size parameter didn’t work correctly when doing batch face detections on GPU.
Updated OpenCV examples to do proper BGR -> RGB conversion
Updated webcam examples to avoid common mistakes and reduce support questions
Added a KNN classification example
Added an example of automatically blurring faces in images or videos
Updated Dockerfile example to use dlib v19.9 which removes the boost dependency.
1.1.0 (2017-09-23)
Will use dlib’s 5-point face pose estimator when possible for speed (instead of 68-point face pose esimator)
dlib v19.7 is now the minimum required version
face_recognition_models v0.3.0 is now the minimum required version
1.0.0 (2017-08-29)
Added support for dlib’s CNN face detection model via model=”cnn” parameter on face detecion call
Added support for GPU batched face detections using dlib’s CNN face detector model
Added find_faces_in_picture_cnn.py to examples
Added find_faces_in_batches.py to examples
Added face_rec_from_video_file.py to examples
dlib v19.5 is now the minimum required version
face_recognition_models v0.2.0 is now the minimum required version
0.2.2 (2017-07-07)
Added –show-distance to cli
Fixed a bug where –tolerance was ignored in cli if testing a single image
Added benchmark.py to examples
0.2.1 (2017-07-03)
Added –tolerance to cli
0.2.0 (2017-06-03)
The CLI can now take advantage of multiple CPUs. Just pass in the -cpus X parameter where X is the number of CPUs to use.
Added face_distance.py example
Improved CLI tests to actually test the CLI functionality
Updated facerec_on_raspberry_pi.py to capture in rgb (not bgr) format.
0.1.14 (2017-04-22)
Fixed a ValueError crash when using the CLI on Python 2.7
0.1.13 (2017-04-20)
Raspberry Pi support.
0.1.12 (2017-04-13)
Fixed: Face landmarks wasn’t returning all chin points.
0.1.11 (2017-03-30)
Fixed a minor bug in the command-line interface.
0.1.10 (2017-03-21)
Minor pref improvements with face comparisons.
Test updates.
0.1.9 (2017-03-16)
Fix minimum scipy version required.
0.1.8 (2017-03-16)
Fix missing Pillow dependency.
0.1.7 (2017-03-13)
First working release.
Release history Release notifications | RSS feed


Download files
Download the file for your platform. If you're not sure which to choose, learn more about installing packages.
Source Distribution
Built Distribution
Filter files by name, interpreter, ABI, and platform.
If you're not sure about the file name format, learn more about wheel file names.
Copy a direct link to the current filters
File details
Details for the file face_recognition-1.3.0.tar.gz.
File metadata
- Download URL: face_recognition-1.3.0.tar.gz
- Upload date:
- Size: 3.2 MB
- Tags: Source
- Uploaded using Trusted Publishing? No
- Uploaded via: twine/2.0.0 pkginfo/1.5.0.1 requests/2.22.0 setuptools/40.8.0 requests-toolbelt/0.9.1 tqdm/4.25.0 CPython/3.7.4
File hashes
| Algorithm | Hash digest | |
|---|---|---|
| SHA256 |
5e5efdd1686aa566af0d3cc1313b131e4b197657a8ffd03669e6d3fad92705ec
|
|
| MD5 |
4e54f245f8fe4751a9f0ef5301a7cd40
|
|
| BLAKE2b-256 |
6c4975dda409b94841f01cbbc34114c9b67ec618265084e4d12d37ab838f4fd3
|
File details
Details for the file face_recognition-1.3.0-py2.py3-none-any.whl.
File metadata
- Download URL: face_recognition-1.3.0-py2.py3-none-any.whl
- Upload date:
- Size: 15.5 kB
- Tags: Python 2, Python 3
- Uploaded using Trusted Publishing? No
- Uploaded via: twine/2.0.0 pkginfo/1.5.0.1 requests/2.22.0 setuptools/40.8.0 requests-toolbelt/0.9.1 tqdm/4.25.0 CPython/3.7.4
File hashes
| Algorithm | Hash digest | |
|---|---|---|
| SHA256 |
c543e91c8cfbf24d19db04e511ebbddcb23894bcee510133729ee78e9f4b5e83
|
|
| MD5 |
09b05a63345b4c9860bd83a84c48ea1d
|
|
| BLAKE2b-256 |
1e95f6c9330f54ab07bfa032bf3715c12455a381083125d8880c43cbe76bb3d0
|


