Tools to log updates from Shelly HT devices
Project description
Shellyhtcollector2
Gather incoming temperature and humidity updates from a small swarm of Shellyht devices.
Intro
Shelly HT devices can be configured to send their measurements to a configurable server. The server is called using a simple HTTP GET request that by default uses an URL like
http://mymachine:8083/sensorlog?hum=24&temp=42.38&id=shellyht-1234FA
where the part http://mymachine:8083/sensorlog is something you configure in the sensor itself.
htcollector is a solution that intercepts these requests and logs the data in a database.
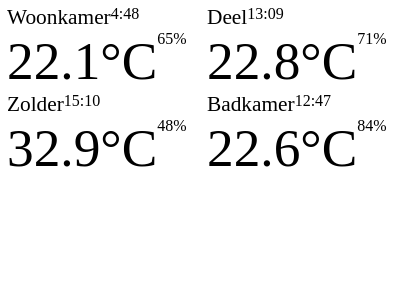
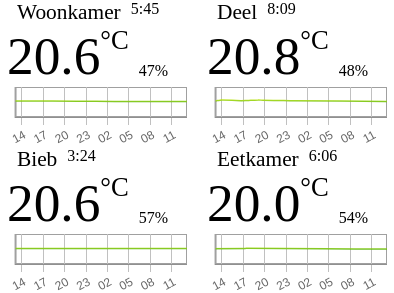
It also provides means to associate meaningful labels with the station-ids and generate html,
json or a png image with the latest measurements.
Installation
'htcollector` is a Python package that can be used to implement your own server that intercepts messages from Shelly HT devices or you can use the default server implementation that is part of the package.
If you are already working with Docker things are even simpler as we provide the two necessary as part of this project.
Easy installation using Docker
htcollector is provided as an easy to use Docker solution too:
You can simply download just a file with environment variables and a docker compose file and start
that up with docker compose (watch the long curl lines!):
mkdir htcollector-docker
cd htcollector-docker
mkdir docker
cd docker
curl https://raw.githubusercontent.com/varkenvarken/shellyhtcollector2/master/docker/.env > .env
curl https://raw.githubusercontent.com/varkenvarken/shellyhtcollector2/master/docker/docker-compose.yml > docker-compose.yml
docker compose -f docker-compose.yml up -d
This will download two images and start them as two containers: one running a MariaDB server and one running the htcollector.
By default the htcollector is configured to listen on port 8083 for incoming measurements from the devices, but this can be changed of course (or you can change the configuration of your Shelly HT devices).
When measurements start getting logged, you can go to the same webserver to get an html page with the last measurements:
http://mymachine:8083/html
An even nicer looking example is available on
http://mymachine:8083/all
These pages refer to two additional urls: static/css/stylesheet.css and static/js/layout.js)
You can associate a meaningful label with any station, for example:
http://mymachine:8083/name?id=shellyht-1234FA&name=Kitchen
There is no form provided (yet) to make this simpler, you'll have to tweak the url by hand.
!!! note
Tested with Docker version 20.10.12, build 20.10.12-0ubuntu2~20.04.1 / Docker Compose version v2.6.0
Installation as a library
You can of course build your own solution on top of the htcollector module but that takes a few steps. Installing the htcollector package from Pypi is simple enough but it also depends on the MariaDB connector.
Install mariadb connector for Python
The mariadb python module is not pure Python and depends on libmariadb, so setup is less straight forward than you would hope:
wget https://downloads.mariadb.com/MariaDB/mariadb_repo_setup
echo "d4e4635eeb79b0e96483bd70703209c63da55a236eadd7397f769ee434d92ca8  mariadb_repo_setup"     | sha256sum -c -
chmod +x mariadb_repo_setup
sudo ./mariadb_repo_setup    --mariadb-server-version="mariadb-10.6"
sudo apt install libmariadb3 libmariadb-dev
sudo python3 -m pip install mariadb
Here we have chosen to install it for everyone, but if you used a virtual environment your could do away with the sudos
Install the package
Install it directly from PyPi
pip install htcollector
or alternatively, download it from GitHub
git clone https://github.com/varkenvarken/shellyhtcollector2.git
cd shellyhtcollector2
python setup.py install
!!! note It might be a good idea to do this inside a virtual environment!
Running the server
Assuming you have MariaDB running on the same machine with a database (schema) shellyht,
and that the user defined in the environment variable DBUSER has enough privileges to create a tables,
the following command will create the necessary tables if not yet present and start listening on port 1883 for incoming connections:
nohup python3 -m shellyhtcollector&
Additional configuration
The reporting tools assume that a table StationidToName exists that contains a mapping between StationId and Name.
A mapping for a stationid can be added or updated with the mapping tool, for example:
cd shellyhtcollector; python3 tools/mapping.py "shellyht-6A566F" "dining room"
Or, since you have the server running now, simply execute a http get
http GET "http://localhost:1883/name?id=shellyht-6A566F&name=dining room"
Generating reports
An html file with the last recorded measurements can be generated with:
cd shellyhtcollector; python3 tools/last.py --html > index.html
Both commands assume that you have set two environment variables
- DBUSER
- DBPASSWORD
API documentation
Available on the GitHub pages of this repo
Architecture overview
flowchart LR
    s1[shellyht] --> w[webserver] <--> d[database]
    s2[shellyht] --> w[webserver]
    s3[shellyht] --> w[webserver]
    s4[shellyht] --> w[webserver]
Implementation details
A ShellyHT can be configured to log temperature and humidity changes to a certain host:port using HTTP.
The path of a typical GET request will look for example like:
/sensorlog?hum=54&temp=23.4&id=shellyht-6A566F
!!! note
The Webserver will *only* accept GET request that have that exact format!
The '/sensorlog' part needs to be configured in the Shelly HT device
Project details
Release history Release notifications | RSS feed
Download files
Download the file for your platform. If you're not sure which to choose, learn more about installing packages.


