Liquichain API client for Python

Project description
Liquichain API client for Python
Accepting Licoin, Paypal, online payments without fixed monthly costs or any punishing registration procedures. Just use the Liquichain API to receive payments directly on your website or easily refund transactions to your customers.


Requirements
To use the Liquichain API client, the following things are required:
- Get yourself a free Liquichain account. No sign up costs.
- Create a new Website profile to generate API keys and setup your webhook.
- Now you're ready to use the Liquichain API client in test mode.
- Follow a few steps to enable payment methods in live mode, and let us handle the rest.
- Python >= 3.6
- Up-to-date OpenSSL (or other SSL/TLS toolkit)
- Liquichain API client for Python has a dependency on Requests and Requests-OAuthlib
Installation
By far the easiest way to install the Liquichain API client is to install it with pip. The command below will install the latest released version of the client.
$ pip install liquichain-api-python
You may also git checkout or download all the files, and include the Liquichain API client manually.
Create and activate a Python >= 3.6 virtual environment (inside a git checkout or downloaded archive).
$ cd liquichain-api-python
$ python -m venv .venv
$ source .venv/bin/activate
Install the additional requirements for the examples, then install the Liquichain API client itself.
$ pip install flask
$ pip install -e .
Run the examples.
export LIQUICHAIN_API_KEY=test_YourApiKey
$ python examples/app.py
How to receive payments
To successfully receive a payment, these steps should be implemented:
-
Use the Liquichain API client to create a payment with the requested amount, tocken symbol (LIC for licoin), description and optionally, a payment method. It is important to specify a unique redirect URL where the customer is supposed to return to after the payment is completed.
-
Immediately after the payment is completed, our platform will send an asynchronous request to the configured webhook to allow the payment details to be retrieved, so you know when exactly to start processing the customer's order.
-
The customer returns, and should be satisfied to see that the order was paid and is now being processed.
Find our full documentation online on docs.liquichain.io.
Getting started
Importing the Liquichain API Client
from liquichain.api.client import Client
Initializing the Liquichain API client, and setting your API key
liquichain_client = Client()
liquichain_client.set_api_key('test_dHar4XY7LxsDOtmnkVtjNVWXLSlXsM')
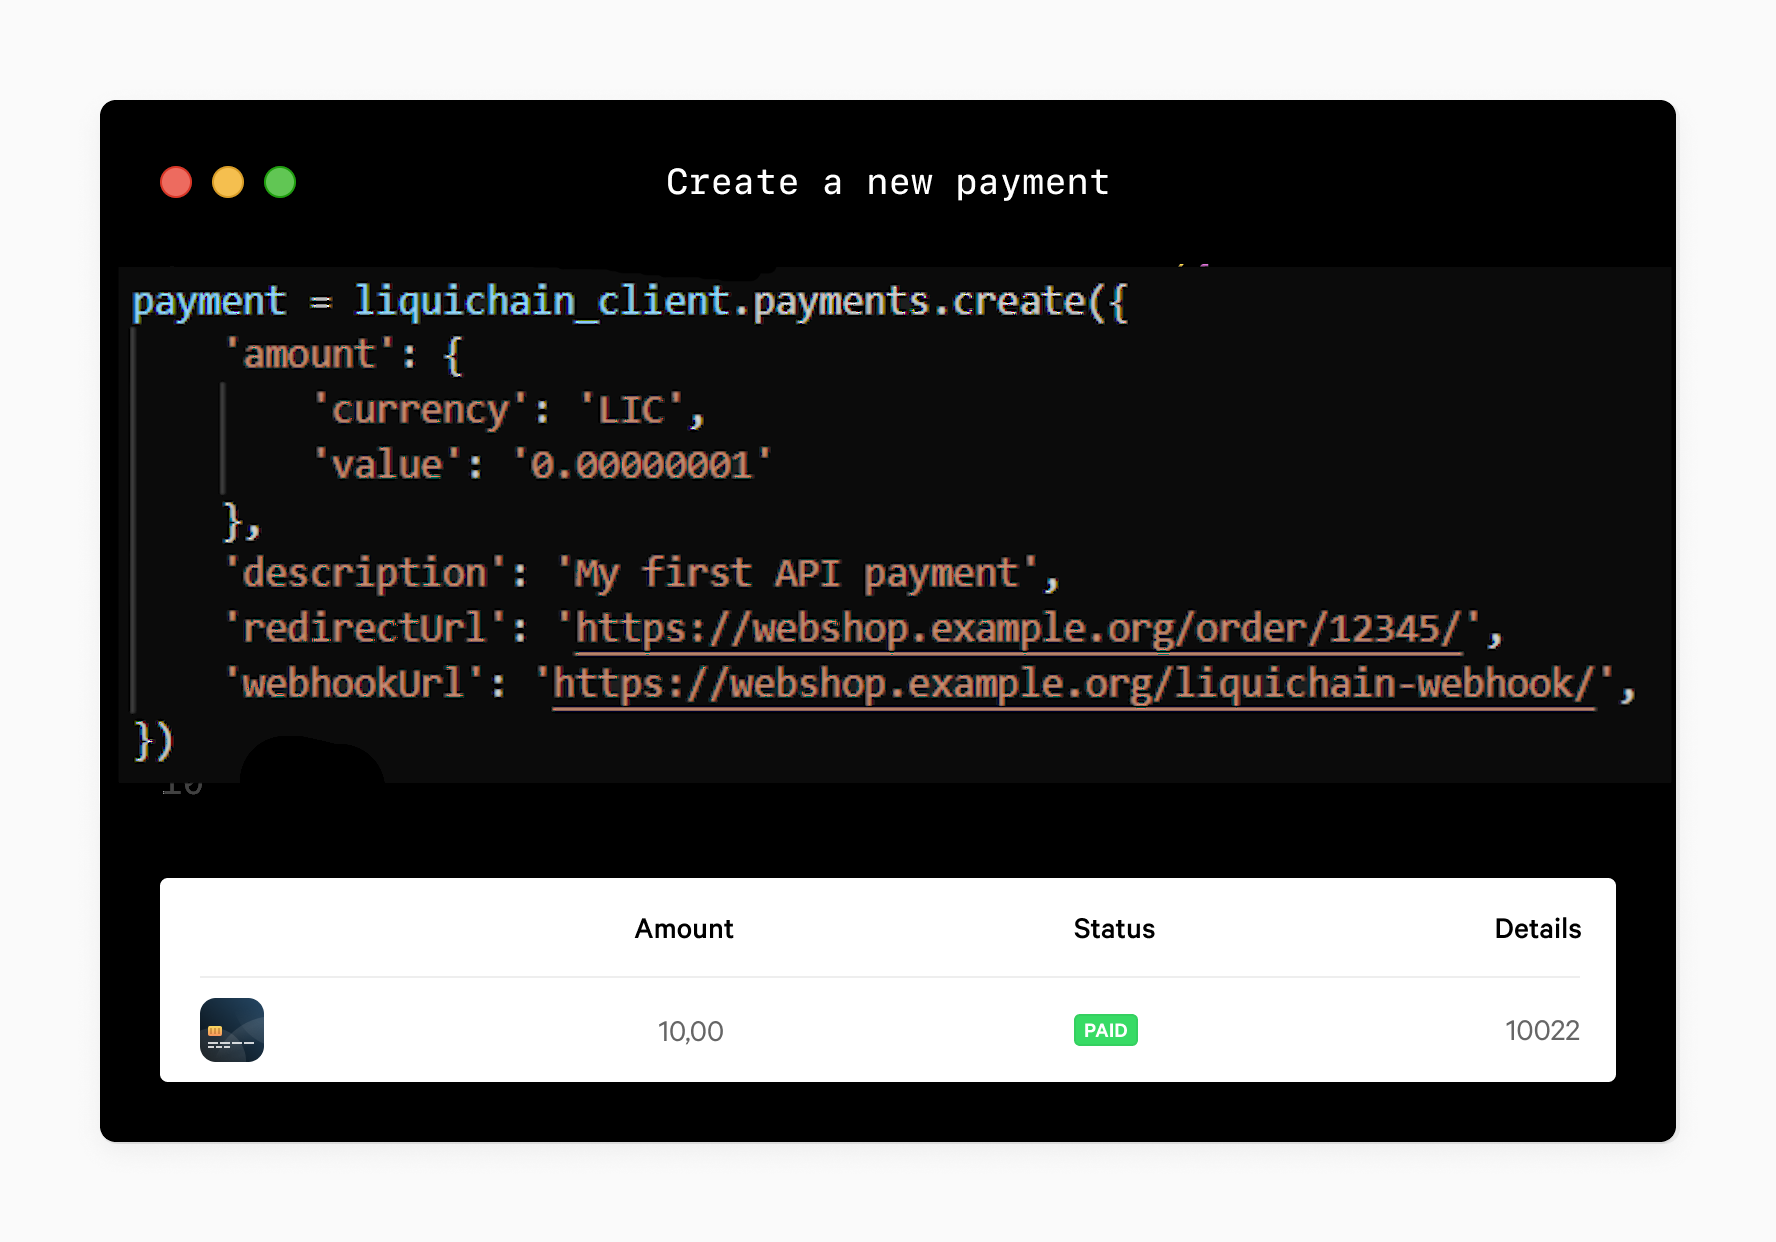
Creating a new payment.
payment = liquichain_client.payments.create({
    'amount': {
        'currency': 'LIC',
        'value': '0.00000001'
    },
    'description': 'My first API payment',
    'redirectUrl': 'https://webshop.example.org/order/12345/',
    'webhookUrl': 'https://webshop.example.org/liquichain-webhook/',
})
After creation, the payment id is available in the payment.id property. You should store this id with your order.
After storing the payment id you can send the customer to the checkout using the payment.checkout_url.
For a payment create example, see Example 1 - New Payment.
In general, request body parameters for an API endpoint should be added to a dictionary and provided as the first argument (or data keyword argument). Query string parameters can be provided as keyword arguments.
Retrieving payments
We can use the payment.id to retrieve a payment and check if the payment isPaid.
payment = liquichain_client.payments.get(payment.id)

if payment.is_paid():
    print('Payment received.')
Or retrieve a collection of payments.
payments = liquichain_client.payments.list()
For an extensive example of listing payments with the details and status, see Example 5 - Payments History.
Payment webhook
When the status of a payment changes the webhookUrl we specified in the creation of the payment will be called.
There we can use the id from our POST parameters to check te status and act upon that, see Example 2 - Webhook verification.
Multicurrency (paying with tokens)
Payments using liquichain tokens is now supported. A full list of available tokens can be found in our documentation.
payment = liquichain_client.payments.create({
    'amount': {
        'currency': 'TOK',
        'value': '10.00'
    },
    'description': 'Order #12345',
    'redirectUrl': 'https://webshop.example.org/order/12345/',
    'webhookUrl': 'https://webshop.example.org/liquichain-webhook/',
})
After the customer completes the payment, the payment.settlement_amount will contain the amount + currency that will be settled on your account.
Refunding payments
The API also supports refunding payments. Note that there is no confirmation and that all refunds are immediate and definitive. Refunds are only supported for Licoin. Other types of payments cannot be refunded through our API at the moment.
payment = liquichain_client.payments.get(payment.id)

# Refund € 2 of this payment
refund = liquichain_client.refunds.on(payment).create({
    'amount': {
        'currency': 'LCN',
        'value': '0.0000000001'
    }
})
For a working example, see Example 11 - Refund payment.
Oauth2
At https://docs.liquichain.io/oauth/getting-started the oauth process is explained. Please read this first.
Oauth authentication process redirects back to your application. Therefore you should expose your local web server (the examples) as public urls. A webservice like ngrok.com can help you with that. Make sure to set REDIRECT_URI accordingly.
Run the oauth2 examples:
FLASK_APP=examples/oauth/app.py \
CLIENT_ID=your_client_id \
CLIENT_SECRET=your_client_secret \
REDIRECT_URI=https://your_domain.tld/callback \
flask run
The Authorize endpoint is the endpoint on the Liquichain web site where the merchant logs in, and grants authorization to your client application. E.g. when the merchant clicks on the Connect with Liquichain button, you should redirect the merchant to the Authorize endpoint.
The resource owner can then grant the authorization to your client application for the scopes you have requested.
Liquichain will then redirect the resource owner back to the redirect_uri you have specified. The redirect_uri will be appended with a code parameter, which will contain the auth token. At the redirect_uri, you should extract that token, and use it to request a regular oauth token.
Initializing via oauth2
You should implement the get_token and set_token methods yourself. They should retrieve and store the oauth token that is sent from Liquichain somewhere in your application (f.i. in the database).
The token data is a python dict.
These are example methods, you should use a storage method that fits your application.
def get_token():
    """
    :return: token (dict) or None
    """
    if os.path.exists('token.json'):
        with open('token.json', 'r') as file:
            return json.loads(file.read())


def set_token(token):
    """
    :param token: token (dict)
    :return: None
    """
    with open('token.json', 'w') as file:
        file.write(json.dumps(token))


liquichain_client = Client()
is_authorized, authorization_url = liquichain_client.setup_oauth(
    client_id,
    client_secret,
    redirect_uri,
    scope,
    get_token(),
    set_token,
)
# When "is_authorized" is False, you need to redirect the user to the authorization_url.

# After the user confirmed she is redirected back to your redirect_uri.
# The view on this uri should call setup_oauth_authorization_response(), with authorization_response as parameter.
# This is the full callback URL (string)

liquichain.setup_oauth_authorization_response(authorization_response)

# The token will be stored via your `set_token` method for future use. Expired tokens will be refreshed by the client automatically.

# Now You can query the API:

liquichain.organizations.get('me')
API documentation
If you wish to learn more about our API, please visit the Liquichain Developer Portal. API Documentation is available in English.
Want to help us make our API client even better?
Want to help us make our API client even better? We take pull requests.
License
BSD (Berkeley Software Distribution) License. Copyright (c) 2014-2020, Mollie B.V. whose original source code comes from
Support
Contact: liquichain.io
Release history Release notifications | RSS feed

Download files
Download the file for your platform. If you're not sure which to choose, learn more about installing packages.
Source Distribution
Built Distribution
Filter files by name, interpreter, ABI, and platform.
If you're not sure about the file name format, learn more about wheel file names.
Copy a direct link to the current filters
File details
Details for the file liquichain-api-python-0.1.1.tar.gz.
File metadata
- Download URL: liquichain-api-python-0.1.1.tar.gz
- Upload date:
- Size: 27.6 kB
- Tags: Source
- Uploaded using Trusted Publishing? No
- Uploaded via: twine/3.4.2 importlib_metadata/4.6.4 pkginfo/1.7.1 requests/2.22.0 requests-toolbelt/0.9.1 tqdm/4.62.1 CPython/3.8.10
File hashes
| Algorithm | Hash digest | |
|---|---|---|
| SHA256 |
95803ab3b4b9e081f981038f77f4e66fe5678b71a3ad61e0c3fe20c36997f2c8
|
|
| MD5 |
b739eb737ea287a1f199b05c9137ec60
|
|
| BLAKE2b-256 |
020c6097aee704818df6f8a64b71e25cc05cb4ec00a0326d7f4f074cefa698f0
|
File details
Details for the file liquichain_api_python-0.1.1-py3-none-any.whl.
File metadata
- Download URL: liquichain_api_python-0.1.1-py3-none-any.whl
- Upload date:
- Size: 43.9 kB
- Tags: Python 3
- Uploaded using Trusted Publishing? No
- Uploaded via: twine/3.4.2 importlib_metadata/4.6.4 pkginfo/1.7.1 requests/2.22.0 requests-toolbelt/0.9.1 tqdm/4.62.1 CPython/3.8.10
File hashes
| Algorithm | Hash digest | |
|---|---|---|
| SHA256 |
9a1505140add1b0d3bf4a93c18cafd3013f8b7c28a482982178b730fb0265523
|
|
| MD5 |
958cfa3a74f4cfd635f3daff75d22b09
|
|
| BLAKE2b-256 |
61b79280f9e86beb4503699c5710c09889be855ae7c85c2c859c1d46975ae834
|


