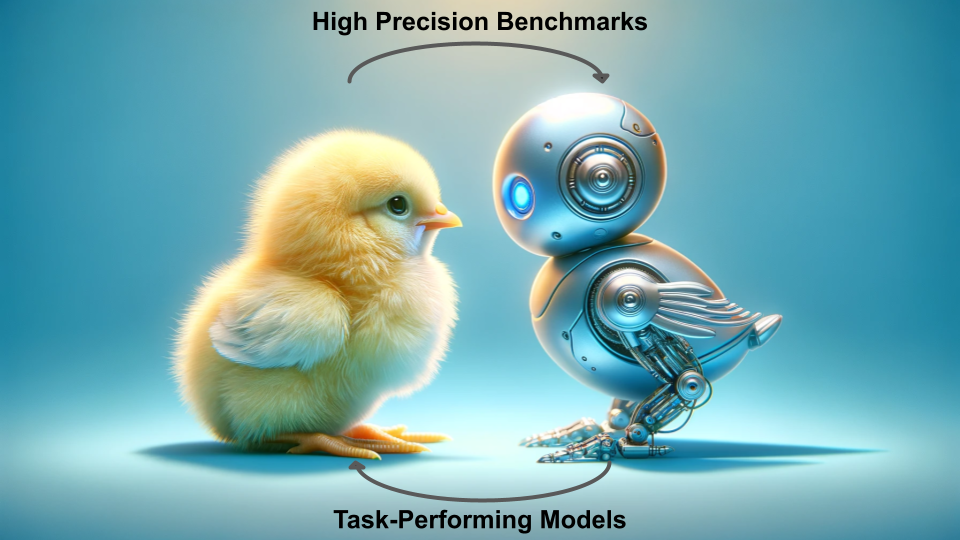
A testbed for comparing the learning abilities of newborn animals and autonomous artificial agents.
Project description

Newborn Embodied Turing Test
Benchmarking Virtual Agents in Controlled-Rearing Conditions


The Newborn Embodied Turing Test (NETT) is a cutting-edge toolkit designed to simulate virtual agents in controlled-rearing conditions. This innovative platform enables researchers to create, simulate, and analyze virtual agents, facilitating direct comparisons with real chicks as documented by the Building a Mind Lab. Our comprehensive suite includes all necessary components for the simulation and analysis of embodied models, closely replicating laboratory conditions.
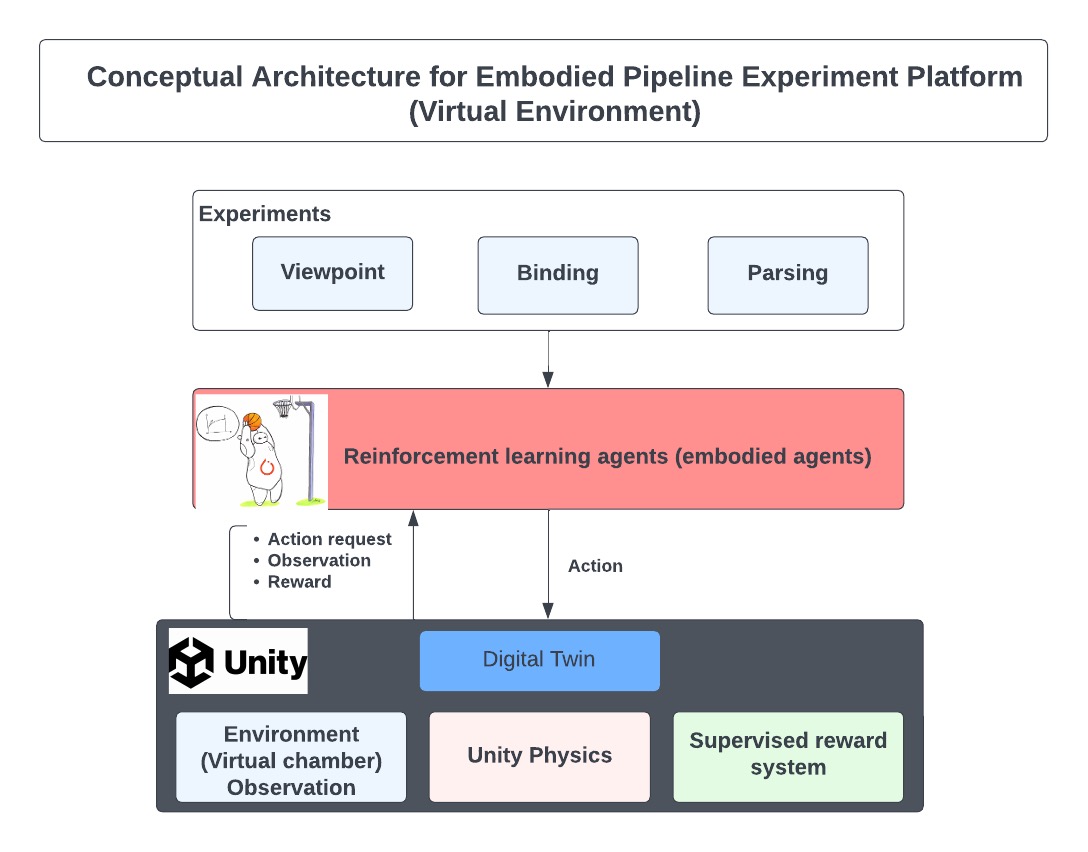
Below is a visual representation of our experimental setup, showcasing the infrastructure for the three primary experiments discussed in this documentation.

How to Use this Repository
The NETT toolkit comprises three key components:
- Virtual Environment: A dynamic environment that serves as the habitat for virtual agents.
- Experimental Simulation Programs: Tools to initiate and conduct experiments within the virtual world.
- Data Visualization Programs: Utilities for analyzing and visualizing experiment outcomes.
Directory Structure
The directory structure of the code is as follows:
├── docs                       # Documentation and guides
├── notebooks
│   ├── Getting Started.ipynb  # Introduction and setup notebook
├── src/nett
│   ├── analysis               # Analysis scripts
│   ├── body                   # Agent body configurations
│   ├── brain                  # Neural network models and learning algorithms
│   ├── environment            # Simulation environments
│   ├── utils                  # Utility functions
│   ├── nett.py                # Main library script
│   └── __init__.py            # Package initialization
├── tests                      # Unit tests
├── mkdocs.yml                 # MkDocs configuration
├── pyproject.toml             # Project metadata
└── README.md                  # This README file
Getting Started
To begin benchmarking your first embodied agent with NETT, please be aware:
Important: The mlagents==1.0.0 dependency is incompatible with Apple Silicon (M1, M2, etc.) chips. Please utilize an alternate device to execute this codebase.
Installation
-
Virtual Environment Setup (Highly Recommended)
Create and activate a virtual environment to avoid dependency conflicts.
conda create -y -n nett_env python=3.10.12
conda activate nett_env
See here for detailed instructions.
-
Install Prerequistes
Install the needed versions of
setuptoolsandpip:pip install setuptools==65.5.0 pip==21 wheel==0.38.4
NOTE: This is a result of incompatibilities with the subdependency
gym==0.21. More information about this issue can be found here -
Toolkit Installation
Install the toolkit using
pip.pip install nett-benchmarks
NOTE:: Installation outside a virtual environment may fail due to conflicting dependencies. Ensure compatibility, especially with
gym==0.21andnumpy<=1.21.2.
Running a NETT
-
Download or Create the Unity Executable
Obtain a pre-made Unity executable from here. The executable is required to run the virtual environment.
-
Import NETT Components
Start by importing the NETT framework components -
Brain,Body, andEnvironment, alongside the mainNETTclass.from nett import Brain, Body, Environment from nett import NETT
-
Component Configuration:
-
Brain
Configure the learning aspects, including the policy network (e.g. "CnnPolicy"), learning algorithm (e.g. "PPO"), the reward function, and the encoder.
brain = Brain(policy="CnnPolicy", algorithm="PPO")
To get a list of all available policies, algorithms, and encoders, the
Brainclass contains the methodslist_policies(),list_algorithms(), andlist_encoders()respectively. -
Body
Set up the agent's physical interface with the environment. It's possible to apply gym.Wrappers for data preprocessing.
body = Body(type="basic", dvs=False, wrappers=None)
Here, we do not pass any wrappers, letting information from the environment reach the brain "as is". Alternative body types (e.g.
two-eyed,rag-doll) are planned in future updates. -
Environment
Create the simulation environment using the path to your Unity executable (see Step 1).
environment = Environment(config="identityandview", executable_path="path/to/executable.x86_64")
To get a list of all available configurations, run
Environment.list_configs().
-
Run the Benchmarking
Integrate all components into a NETT instance to facilitate experiment execution.
benchmarks = NETT(brain=brain, body=body, environment=environment)
The
NETTinstance has a.run()method that initiates the benchmarking process. The method accepts parameters such as the number of brains, training/testing episodes, and the output directory.job_sheet = benchmarks.run(output_dir="path/to/run/output/directory/", num_brains=5, trains_eps=10, test_eps=5)
The
runfunction is asynchronous, returning the list of jobs that may or may not be complete. If you wish to display the Unity environments running, set thebatch_modeparameter toFalse. -
Check Status:
To see the status of the benchmark processes, use the .status() method:
benchmarks.status(job_sheet)
Running Standard Analysis
After running the experiments, the pipeline will generate a collection of datafiles in the defined output directory.
-
Install R and dependencies
To run the analyses performed in previous experiments,this toolkit provides a set of analysis scripts. Prior to running them, you will need R and the packages
tidyverse,argparse, andscalesinstalled. To install these packages, run the following command in R:install.packages(c("tidyverse", "argparse", "scales"))
Alternatively, if you are having difficulty installing R on your system, you can install these using conda.
conda install -y r r-tidyverse r-argparse r-scales
-
Run the Analysis
To run the analysis, use the
analyzemethod of theNETTclass. This method will generate a set of plots and tables based on the datafiles in the output directory.benchmarks.analyze(run_dir="path/to/run/output/directory/", output_dir="path/to/analysis/output/directory/")
Documentation
For a link to the full documentation, please visit here.
Experiment Configuration
More information related to details on the experiment can be found on following pages.
Project details
Release history Release notifications | RSS feed
Download files
Download the file for your platform. If you're not sure which to choose, learn more about installing packages.
Source Distribution
Built Distribution
Hashes for nett_benchmarks-0.3.1-py3-none-any.whl
| Algorithm | Hash digest | |
|---|---|---|
| SHA256 | 84f5fb229caff92b6e69ca9a521e2014d86b1b5ceb528d8b61c0a5ab23a4b380 |
|
| MD5 | 564785f426c44c3f2c1f9fe5f5e92b89 |
|
| BLAKE2b-256 | 7424c8d5a30a0011919ad5b31a11af997f92c5db23c1dd7044bdb56789dfec47 |


