A Semi-Automatic DB-ORM Tool Template That Allows You To Make Your Migration Operations Very Fast With SQLAlchemy

Project description
SQLAlchemy-DB-ORM-Template
Project Description
SQLAlchemy DB ORM Template provides a ready-made structure for Database Migration operations using SQLAlchemy.
The number of databases can be scaled as much as you want. It is a semi-automated ORM Tool Template that allows managing all databases connected to a project from a single environment.
Project Architecture
|--BlueWhale
|    |--AppStart
|    |    |--AppStart.py
|    |--Initializer
|    |    |--Initializer.py
|    |--MigrationFolderOS
|    |    |--MigrationFolderOS.py
|--Entity
|    |--DbConfig
|    |    |--DbConfig.py
|    |--ModelBase
|    |    |--ModelBase.py
|    |--Packages
|    |    |--EntityModels.py
|    |--Table
|    |    |--AuthenticationLogs.py
|    |    |--Authentications.py
|    |    |--Users.py
|--PyModules
|    |--Requirements.txt
|--Utils
|    |--GeneralLists.py
|--App.py
|--Manage.py
|--__init__.py
Installation
-
Open a terminal so that it focuses on the place where you want to download the application.
-
To Download the project
pip install SQLAlchemy-DB-ORM-Template -t /path-to-directory
execute this command in the terminal. However, replace /path-to-directory with .(dot) if you want it to create the application in the directory you are in.
pip install SQLAlchemy-DB-ORM-Template -t .
If you want it to extract into a folder where we are, type the name of the folder.
pip install SQLAlchemy-DB-ORM-Template -t SQLAlchemyDBORM
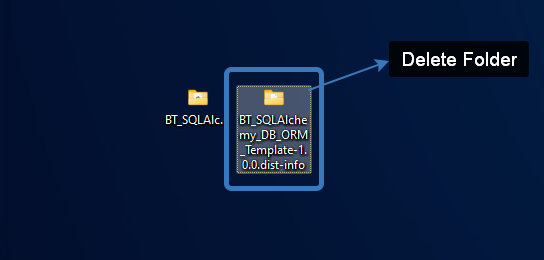
- You can delete the SQLAlchemy-DB-ORM-Template.dist.info folder that comes with the template.
- You can customise the name of the Template project folder for your project.

For Example;

Configure the Project
-
Focus on the project folder in the terminal.
-
Install virtualenv Package
pip install virtualenv
- Create Virtual Environment
python -m venv VirtualEnv
You can give any name you want instead of VirtualEnv name. Just continue with the name you give to the sections that will be referred to as VirtualEnv from here on.
- VirtualEnv Activate
VirtualEnv/Scripts/activate
- Create Requirements File
Create Requirement.txt file in the project root directory.
Add the following package information into the file.
Flask==1.1.4
Flask-SQLAlchemy==2.5.1
Flask-Script==2.0.6
Flask-Migrate==2
PyMySQL==1.0.2
markupsafe==2.0.1
sqlalchemy==1.4.39
pip install -r .\Requirements.txt
Configure the Database Information
- Determine the Databases and Migration Folders to be Used
Open Utils/GeneralList.py
# Add the databases you will migrate to this array as String

dataBases = ['LocalDB', 'DevDB', 'TestDB',  'ProdDB']

# Add the Migrations Folders of the Databases you will migrate to this array as String

migrationFolderList = ["migrationsLocal", "migrationsDev", "migrationsTest", "migrationsProd"]
Update the dataBases list with the DB names you created.
Please specify with which name you want the migrations folders of the databases you provide to be kept.
However, you must use the prefix migrations when writing these names.
migrationsExampleDB, migrationsHelloDB etc.
These are mapped to the databases you provide in the dataBases list respectively.
- Database Bilgilerini Güncelle
Update Database Information
Open Entity/DbConfig/DbConfig.py
self.__host = ''
self.__userName = ''
self.__password = ""
Find the above section in the init function and enter your database information.
For Example;
self.__host = '156.177.208.78'
self.__userName = 'testuser'
self.__password = "testpassword"
- Where are my Tables?
There are 3 Table Classes ready for you.
Entity/Table
Authentications.py AuthenticationLogs.py Users.py
You can delete tables if you want.
You can create the tables you want to create in your database as separate files in the Entity/Table folder as in these sample classes.
You can also create all classes in a single file. Not recommended.
For example: Let's create a table called Categories.
Create the Entity/Table/Categories.py file.
Update the table information in the file as you wish.
# region Import Lib

from Entity.ModelBase.ModelBase import *

# endregion

# region Categories Table

class Categories(BaseModel, db.Model):

    __tablename__ = "Categories"

    Id = db.Column(db.Integer, primary_key=True, autoincrement=True)
    CategoyName = db.Column(db.String(60))
    Description = db.Column(db.String(100))
    CreatedBy = db.Column(db.String(300))
    CreatedAt = db.Column(db.String(30))
    ChangedBy = db.Column(db.String(300))
    ChangedAt = db.Column(db.String(30))
    Revision = db.Column(db.Integer)
    DeleteFlag = db.Column(db.Integer)

    def __init__(self, CategoyName, Description, CreatedBy, CreatedAt, ChangedBy, ChangedAt, Revision, DeleteFlag):

        self.CategoyName = CategoyName
        self.Description = Description
        self.CreatedBy = CreatedBy
        self.CreatedAt = CreatedAt
        self.ChangedBy = ChangedBy
        self.ChangedAt = ChangedAt
        self.Revision = Revision
        self.DeleteFlag = DeleteFlag

# endregion
In order for this table to be created in the migration process
Import it into Entity/Packages/EntityModels.py file.
# region Table Folder

from Entity.Table.Authentications import *
from Entity.Table.AuthenticationLogs import *
from Entity.Table.Users import *

# Added New Table

from Entity.Table.Categories import *

# endregion
Do the same for all the tables you add.
Our preparations are over.
Run the Project
When you run the project for the first time, you should perform migration operations for all tables one by one and ensure that databases are created.
Repeat the following steps for each database.
- db init
Execute the following command in the terminal
python Manage.py db init
After this process, it will ask you for which database you will perform init operation.
Enter the index of the database you want to connect to:
You can operate on the database you want starting from 0 according to the order you give in the dataBases List.
I will give the 0 entry and ask it to operate on LocalDB.
- db migrate
python Manage.py db migrate
Again, it will ask you which database you will process for, continue by pressing 0 again.
- db upgrate
python Manage.py db upgrade
Again, it will ask you which database you will process for, continue by pressing 0 again.
At the end of these operations, you will see that the tables existing in your database at index 0 are formed.
Repeat these steps for other databases in this order.
Adding and Migrating New Tables
If you want to add new tables after the first migration, you can add new tables according to the table insertion section.
To see this addition in the database.
In order in the terminal
python Manage.py db migrate
python Manage.py db upgrade
Each time it will ask you in which database you want to make the related changes. Give this information.
That's all.
SQLAlchemy-DB-ORM-Template is a BrainyTech Product.
Developer : Murat Bilginer
**********************************
SQLAlchemy-DB-ORM-Template -- Türkçe --
Project Açıklaması
BT SQLAlchemy DB ORM Template, SQLAlchemy kullanarak Database Migration işlemleri için hazır bir yapı sunar.
Veritabanı sayısı istediğiniz kadar ölçeklendirilebilir. Bir projeye bağlı tüm veritabanlarının tek bir ortamdan yönetilmesini sağlayan yarı otomatik bir ORM Tool Template'idir.
Project Klasör Mimarisi
|--BlueWhale
|    |--AppStart
|    |    |--AppStart.py
|    |--Initializer
|    |    |--Initializer.py
|    |--MigrationFolderOS
|    |    |--MigrationFolderOS.py
|--Entity
|    |--DbConfig
|    |    |--DbConfig.py
|    |--ModelBase
|    |    |--ModelBase.py
|    |--Packages
|    |    |--EntityModels.py
|    |--Table
|    |    |--AuthenticationLogs.py
|    |    |--Authentications.py
|    |    |--Users.py
|--PyModules
|    |--Requirements.txt
|--Utils
|    |--GeneralLists.py
|--App.py
|--Manage.py
|--__init__.py
Projeyi İndirmek
-
Uygulamayı indirmek istediğiniz yere odaklanacak şekilde bir terminal açın.
-
Projeyi indirmek için
pip install SQLAlchemy-DB-ORM-Template -t /path-to-directory
terminalde bu komutu yürütelim. /path-to-directory yerine bulunduğunuz dizine uygulamayı oluşturmasını istiyorsanız .(nokta) koyunuz.
pip install SQLAlchemy-DB-ORM-Template -t .
Bulunduğumuz yerde bir klasör içine çıkarmasını isterseniz klasörün adını yazınız.
pip install SQLAlchemy-DB-ORM-Template -t SQLAlchemyDBORM
- Template ile beraber gelen SQLAlchemy-DB-ORM-Template.dist.info klasörünü silebilirsiniz.
- Template proje klasörünün ismini projenize özel isimledirebilirsiniz.
Örneğin;
Projeyi Yapılandırma
-
Terminal proje klasörüne odaklan.
-
virtualenv Paketi'ni Kur
pip install virtualenv
- Virtual Environment Kur
python -m venv VirtualEnv
VirtualEnv ismi yerine istediğiniz ismi verebilirsiniz. Sadece buradan sonra VirtualEnv olarak bahsedilecek bölümleri kendi verdiğiniz isimle devam ediniz.
- VirtualEnv Activate
VirtualEnv/Scripts/activate
- Requirements Dosyasını Oluştur
Proje kök dizininde Requirement.txt dosyasını oluşturunuz.
Dosya içine aşağaki paket bilgilerini ekleyiniz.
Flask==1.1.4
Flask-SQLAlchemy==2.5.1
Flask-Script==2.0.6
Flask-Migrate==2
PyMySQL==1.0.2
markupsafe==2.0.1
sqlalchemy==1.4.39
pip install -r .\Requirements.txt
DB Info Yapılandırma
- Kullanılacak Databaseleri ve Migration Klasörlerini Belirle
Utils klasöründe GeneralLists.py dosyasını açınız.
# Add the databases you will migrate to this array as String

dataBases = ['LocalDB', 'DevDB', 'TestDB',  'ProdDB']

# Add the Migrations Folders of the Databases you will migrate to this array as String

migrationFolderList = ["migrationsLocal", "migrationsDev", "migrationsTest", "migrationsProd"]
dataBases listini oluşturduğunuz DB isimleri ile güncelleyiniz.
Verdiğiniz databaselerin migrations klasörleri hangi isimle tutulmasını istiyorsanız bunu belirtiniz.
Ancak bu isimleri yazarken migrations ön ekini kullanmanız zorunludur.
migrationsExampleDB, migrationsHelloDB gibi.
Bunlar sırasıyla dataBases listesinde verdiğiniz databaseler ile eşlenir.
- Database Bilgilerini Güncelle
Entity/DbConfig.py dosyasını açınız.
self.__host = ''
self.__userName = ''
self.__password = ""
init fonksiyonu içinde yukardaki kısımı bulup database bilgilerinizi giriniz.
Örneğin;
self.__host = '156.177.208.78'
self.__userName = 'testuser'
self.__password = "testpassword"
- Tablolarım Nerede?
Sizin için hazır olarak 3 tane Tablo Class'ı verilmiştir.
Entity/Table yolunda
Authentications.py AuthenticationLogs.py Users.py
tablolar oluşturmaya hazır verilmiştir.
İsterseniz tabloları silebilirsiniz.
Database'inizde yaratmak istediğiniz tabloları bu örnek class'larda olduğu gibi Entity/Table klasörü içinde ayrı dosyalar olarak oluşturabilirsiniz.
Tüm class'ları tek bir dosya içinde de yaratababilirsiniz. Tavsiye edilmez.
Örneğin: Categories isminde bir tablo oluşturalım.
Entity/Table/Categories.py dosyasını yaratınız.
Dosya içini tablo bilgilerini istediğiniz gibi güncelleyiniz.
# region Import Lib

from Entity.ModelBase.ModelBase import *

# endregion

# region Categories Table

class Categories(BaseModel, db.Model):

    __tablename__ = "Categories"

    Id = db.Column(db.Integer, primary_key=True, autoincrement=True)
    CategoyName = db.Column(db.String(60))
    Description = db.Column(db.String(100))
    CreatedBy = db.Column(db.String(300))
    CreatedAt = db.Column(db.String(30))
    ChangedBy = db.Column(db.String(300))
    ChangedAt = db.Column(db.String(30))
    Revision = db.Column(db.Integer)
    DeleteFlag = db.Column(db.Integer)

    def __init__(self, CategoyName, Description, CreatedBy, CreatedAt, ChangedBy, ChangedAt, Revision, DeleteFlag):

        self.CategoyName = CategoyName
        self.Description = Description
        self.CreatedBy = CreatedBy
        self.CreatedAt = CreatedAt
        self.ChangedBy = ChangedBy
        self.ChangedAt = ChangedAt
        self.Revision = Revision
        self.DeleteFlag = DeleteFlag

# endregion
Bu tablonun migration işleminde oluşabilmesi için dosyayı
Entity/Packages/EntityModels.py dosyası içine import ediniz.
# region Table Folder

from Entity.Table.Authentications import *
from Entity.Table.AuthenticationLogs import *
from Entity.Table.Users import *

# Eklediğim Tablo

from Entity.Table.Categories import *

# endregion
Tüm eklediğiniz tablolar için aynısını yapınız.
Hazırlıklarımız bitti.
Projeyi Çalıştırmak
Projeyi ilk defa çalıştırdığınızda tüm tablolar için tek tek migration işlemlerini sırasıyla yapıp database'lerin oluşmasını sağlamalısınız.
Birazdan göstereceğim adımları her database için tekrarlayınız.
- db init
Terminalde aşağıdaki komutu yürütünüz
python Manage.py db init
Bu işlem sonrasında size hangi database için init işlemi yapacağınızı soracak
Enter the index of the database you want to connect to:
dataBases Listinde verdiğiniz sıraya göre 0'dan başlayarak istediğiniz database üzerinde işlem yapabilirsiniz.
0 girdisini verip LocalDB üzerinde işlem yapmasını isteyeceğim.
- db migrate
Terminalde aşağıdaki komutu yürütünüz
python Manage.py db migrate yine size hangi database için işlem yapacağınızı soracak yine 0'a basarak devam ediniz.
- db upgrate
Terminalde aşağıdaki komutu yürütünüz
python Manage.py db upgrade yine size hangi database için işlem yapacağınızı soracak yine 0'a basarak devam ediniz.
Bu işlemler sonunda 0 index'inde bulunan Database'inizde var olan tabloların oluştuğunu göreceksiniz.
Bu adımları bu sırada diğer databaseler için tekrarlayınız.
Yeni Tablolar Eklemek
İlk migration işlemlerinden sonra yeni tablolar eklemek istediğiniz de tablo ekleme bölümüne göre yeni tablolar ekleyebilirsiniz.
Bu ekleme işlemini database'de görmek için.
Sırayla terminalde
python Manage.py db migrate
python Manage.py db upgrade
işlemlerini gerçekleştiriniz.
Size her defasında ilgili değişikliklerin hangi database'de yapılmak istendiğini soracak. Bu bilgiyi veriniz.
Hepsi bu kadardı.
SQLAlchemy-DB-ORM-Template, Brainy Tech Ürünüdür
Developer : Murat Bilginer
Release history Release notifications | RSS feed

Download files
Download the file for your platform. If you're not sure which to choose, learn more about installing packages.
Source Distribution
Built Distribution
Filter files by name, interpreter, ABI, and platform.
If you're not sure about the file name format, learn more about wheel file names.
Copy a direct link to the current filters
File details
Details for the file SQLAlchemy-DB-ORM-Template-1.1.0.tar.gz.
File metadata
- Download URL: SQLAlchemy-DB-ORM-Template-1.1.0.tar.gz
- Upload date:
- Size: 14.4 kB
- Tags: Source
- Uploaded using Trusted Publishing? No
- Uploaded via: twine/4.0.2 CPython/3.9.13
File hashes
| Algorithm | Hash digest | |
|---|---|---|
| SHA256 |
51018d1c8fe49847b1a58450f4c459810e4cd97df658c5a2f2e6063e5a68a584
|
|
| MD5 |
4c8fea5440c71a6f056f83387599ddeb
|
|
| BLAKE2b-256 |
cf20ca3b50b317254f52e1b696517ede7a8f47622d5e4a876179f3f025f080ed
|
File details
Details for the file SQLAlchemy_DB_ORM_Template-1.1.0-py3-none-any.whl.
File metadata
- Download URL: SQLAlchemy_DB_ORM_Template-1.1.0-py3-none-any.whl
- Upload date:
- Size: 13.4 kB
- Tags: Python 3
- Uploaded using Trusted Publishing? No
- Uploaded via: twine/4.0.2 CPython/3.9.13
File hashes
| Algorithm | Hash digest | |
|---|---|---|
| SHA256 |
76907b3c36ec3cda3e7de0fe45bdcd38dabe29b10beea68cb5094f848bca6678
|
|
| MD5 |
72da2ec2f33e172a635ae4093d9426bd
|
|
| BLAKE2b-256 |
a849986073954082143b193a9ba40e3539e2423348b31bbc5c8cdb7853b80786
|


