
StudiOCR
StudiOCR is an application to index notes and make them searchable by using OCR.
- Select JPEG or PNG files to create a document
- Search through a document to see if it has any matching text
- Any matching text will be highlighted with a colored box based on confidence level
Installation Instructions
Prerequisites
- You must have Qt, Tesseract OCR, and Poppler installed.
- Ubuntu or Debian
sudo apt install qt5-default tesseract-ocr poppler-utils
- Arch or Manjaro
sudo pacman -S qt5-base tesseract poppler
Install through PyPi
- Optionally, create a fresh venv for installing the package in
python3 -m venv venv_StudiOCRsource venv_StudiOCR/bin/activate- To deactivate the venv run
deactivate
- To deactivate the venv run
pip install StudiOCR- Once installed, run
StudiOCRto launch the application
Install from Source
- Optionally, create a fresh venv for installing the package dependencies in
python3 -m venv venv_StudiOCRsource venv_StudiOCR/bin/activate- To deactivate the venv, run
deactivate
- To deactivate the venv, run
git clone https://github.com/BSpwr/StudiOCRcd StudiOCRpip install -r requirements.txt- Once installed, cd into the source directory
cd StudiOCRand runpython3 main.pyto launch the application
Usage
Main Window
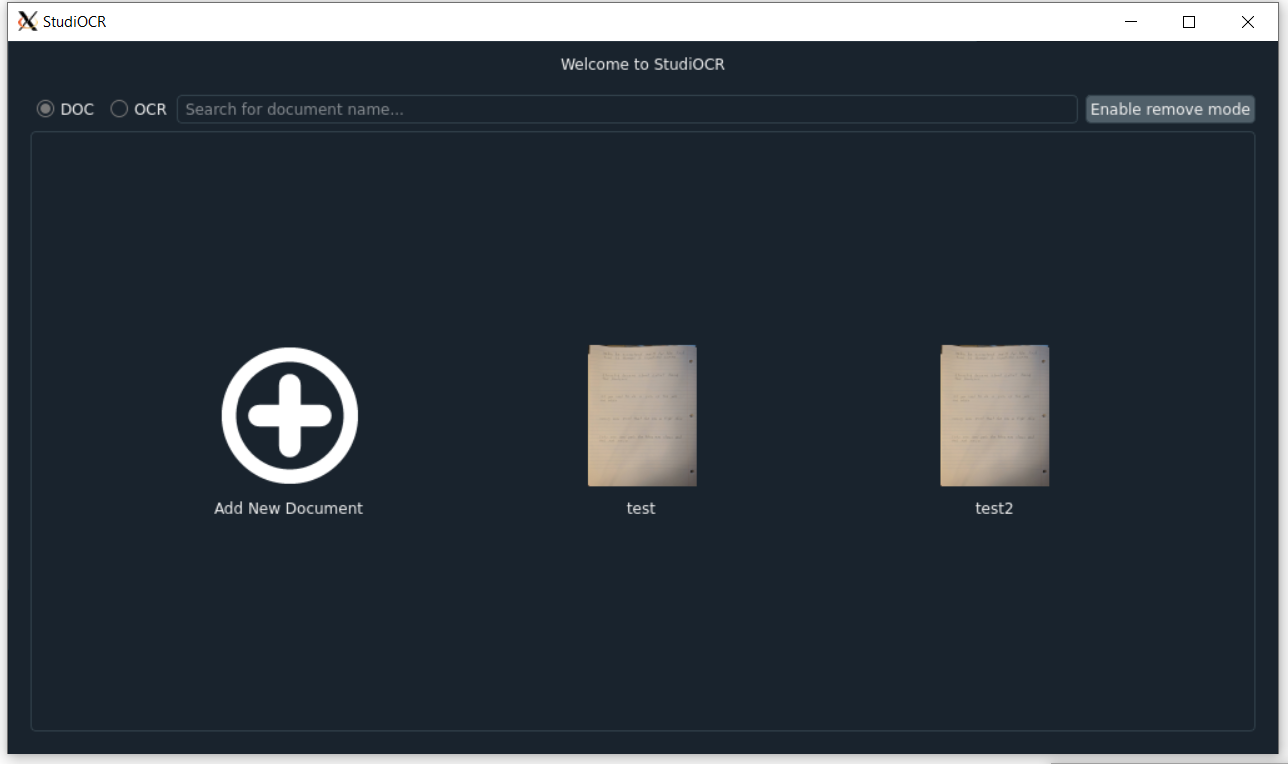
- Click the Add New Document button to open the add new document window interface
- Click on a document thumbnail (which is generated from the first page) to open the document window interface
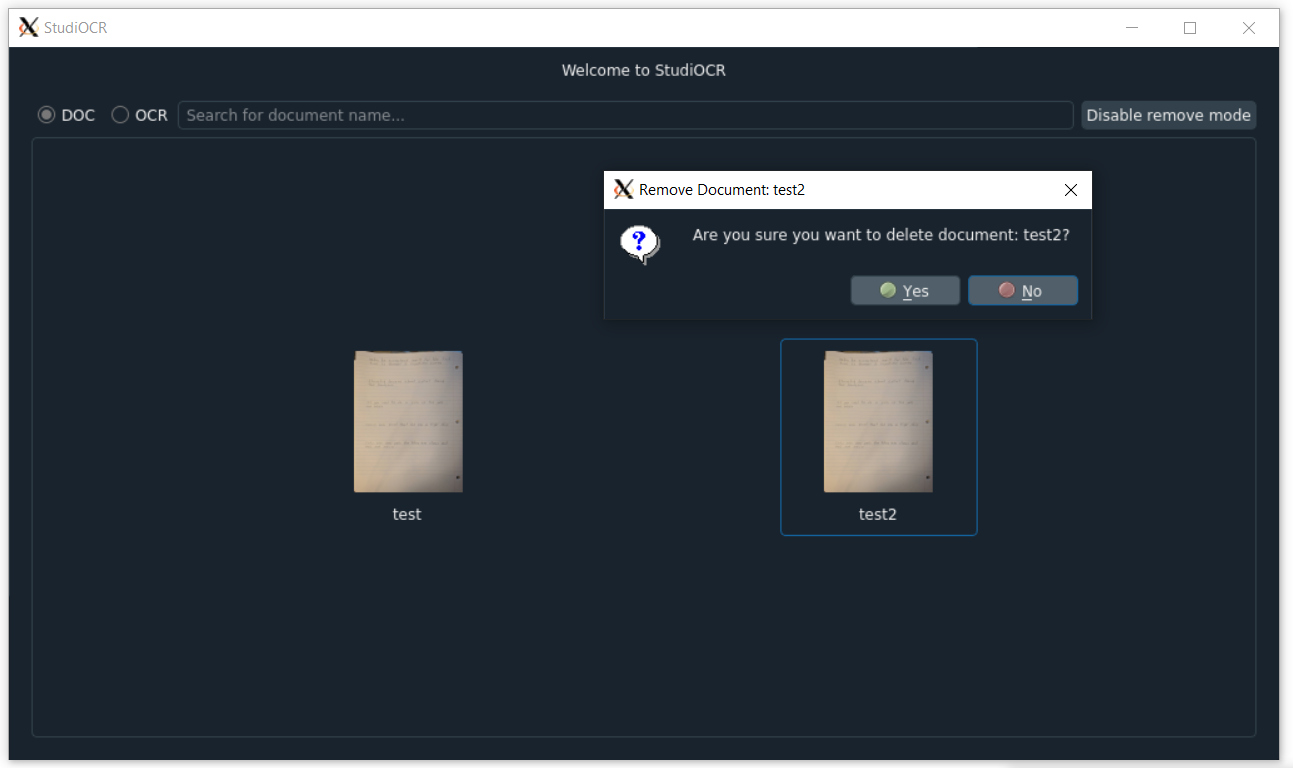
- Toggle remove mode to remove existing documents
- Search for a document based on document name by typing in the search bar with the DOC bullet selected
- Search for a document based on matching OCR text by typing in the search bar with the OCR bullet selected
Add New Document Window
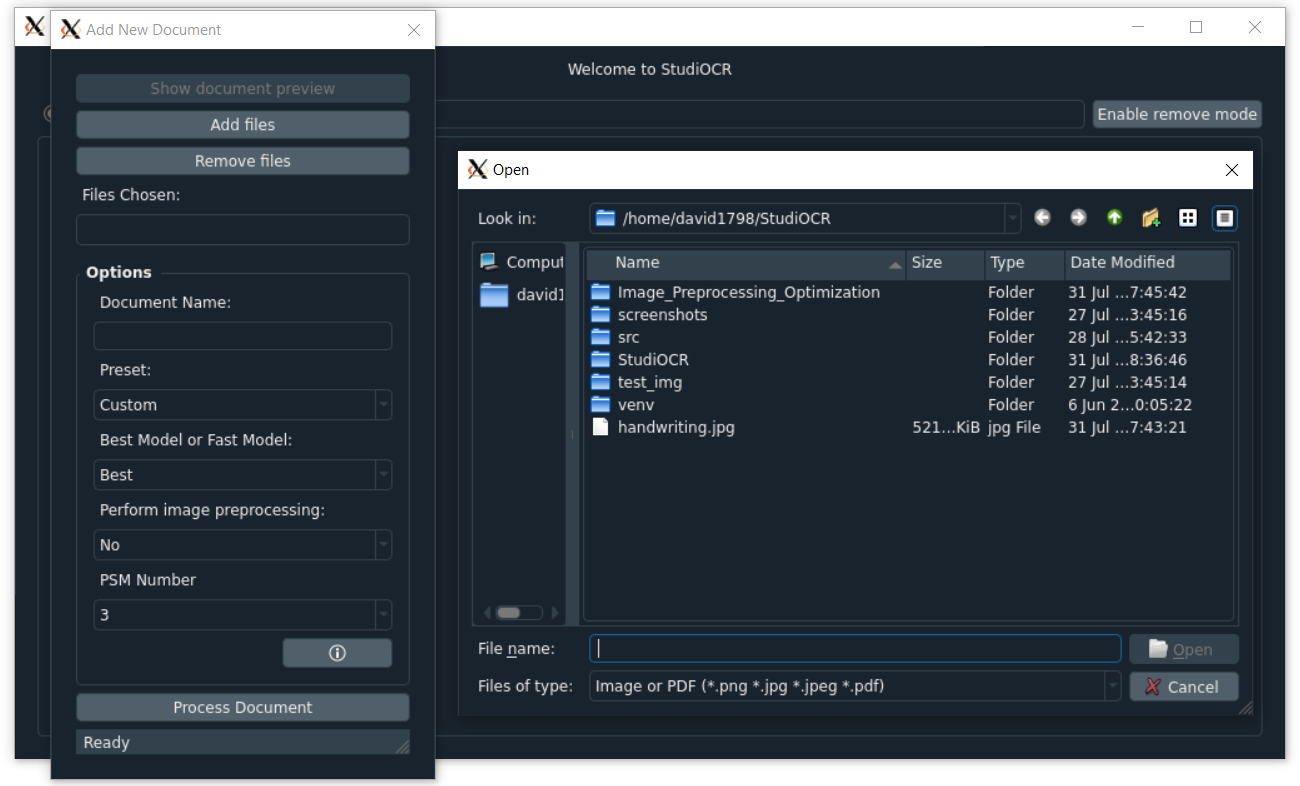
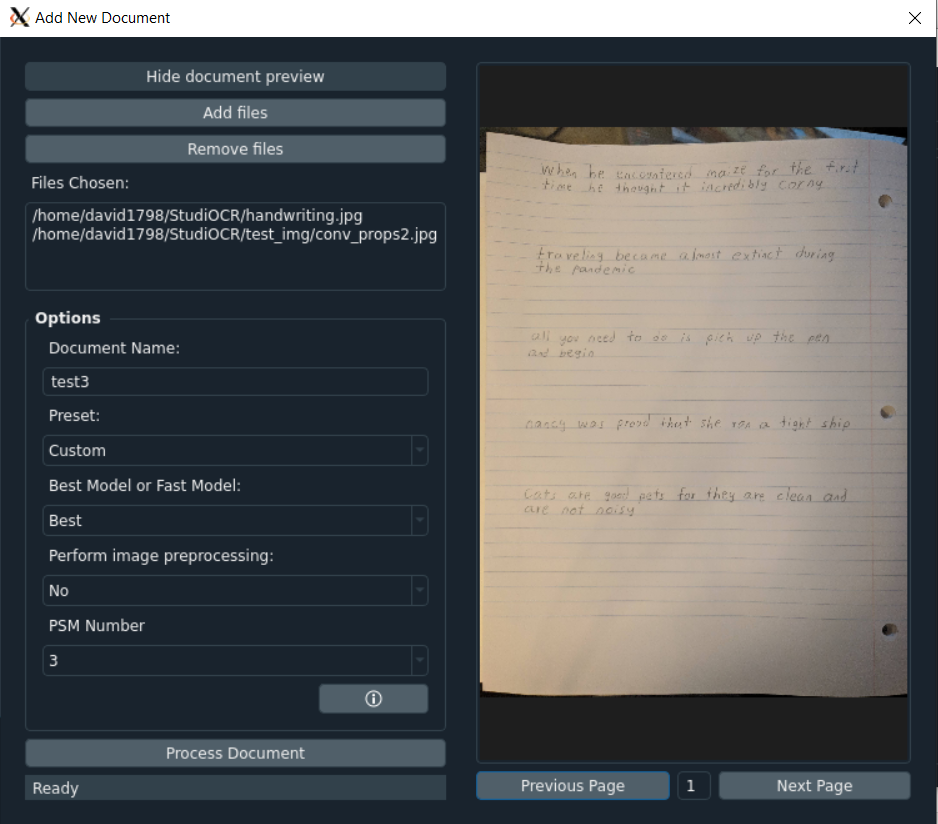
- Add/Remove *.png, *.jpg, *.jpeg, or *.pdf files to be processed by OCR into a document in the database
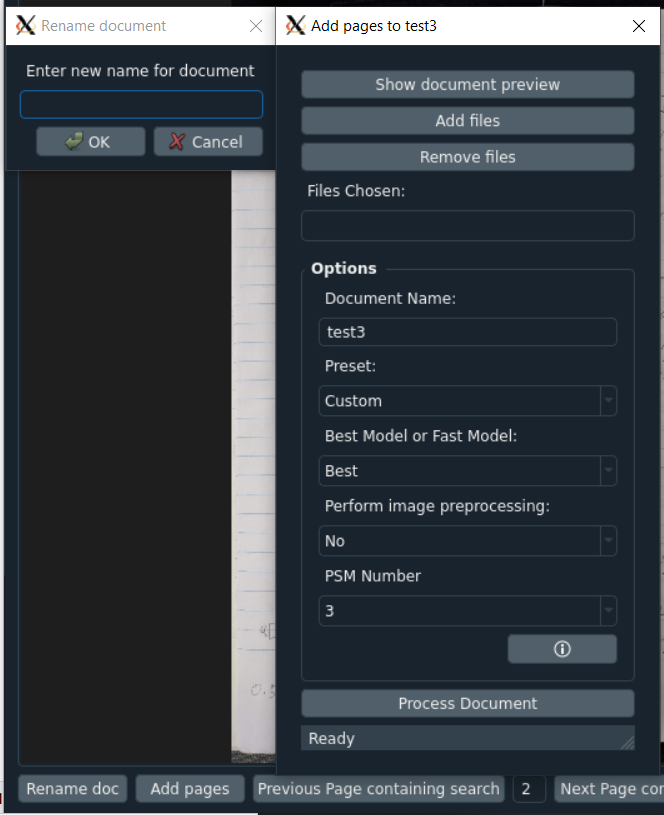
- Input the document name
- Click show document preview to preview the document with all images as pages on the side
- Change the preset for image analysis optimization between: Custom, Screenshot, Printed Text (PDF), Written Paragraph, or Written Page
- Underneath the Process Document button is a status bar for processing any PDFs selected into images
- Click on the info icon to display a window explaining document options
- Select the processing model you wish to use: Best (for accuracy) or Fast (for speed)
- Select whether you wish to do image preprocessing (convert to grayscale and increase text contrast)
- PSM Number:
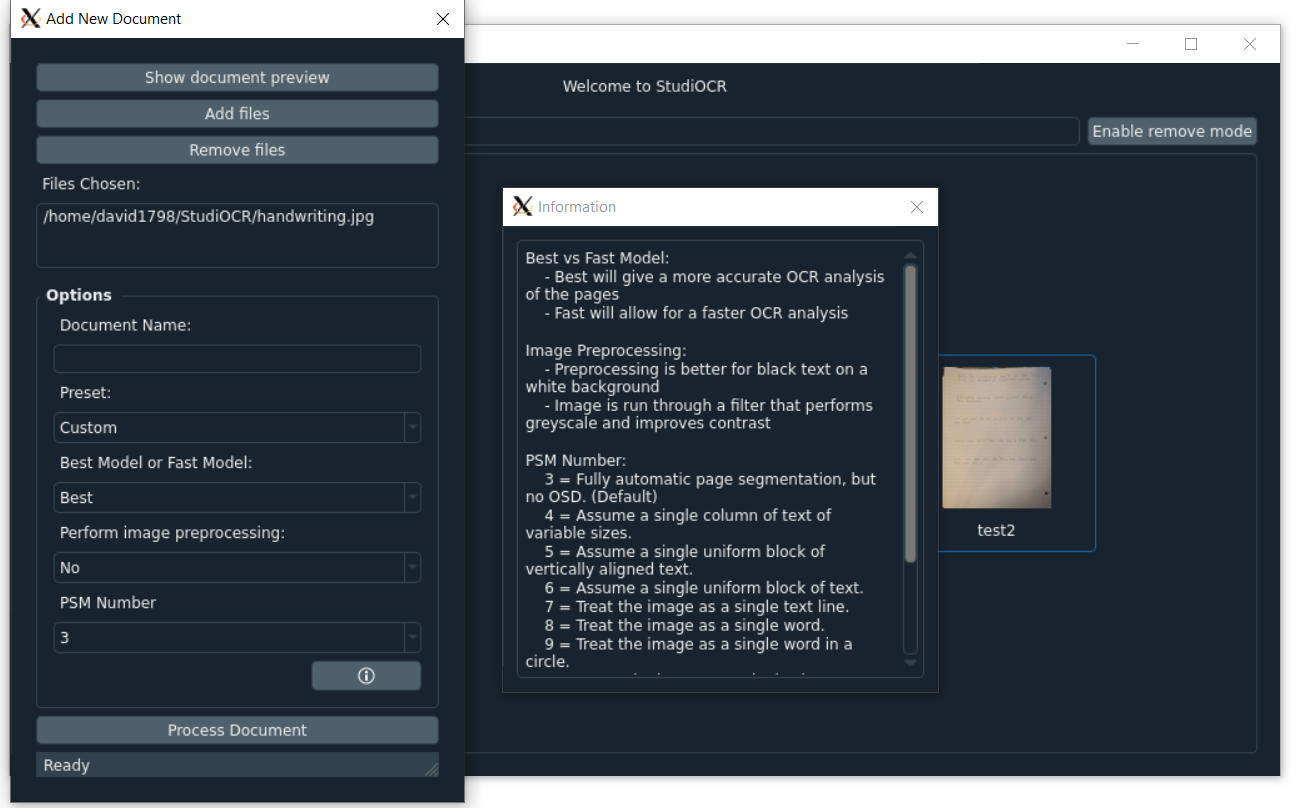
| PSM Number | Value |
|---|---|
| 3 | Fully automatic page segmentation, but no OSD. (Default) |
| 4 | Assume a single column of text of variable sizes. |
| 5 | Assume a single uniform block of vertically aligned text. |
| 6 | Assume a single uniform block of text. |
| 7 | Treat the image as a single text line. |
| 8 | Treat the image as a single word. |
| 9 | Treat the image as a single word in a circle. |
| 10 | Treat the image as a single character. |
| 11 | Sparse text. Find as much text as possible in no particular order. |
| 12 | Sparse text with OSD. |
| 13 | Raw line. Treat the image as a single text line, bypassing hacks that are Tesseract-specific. |
Document Window
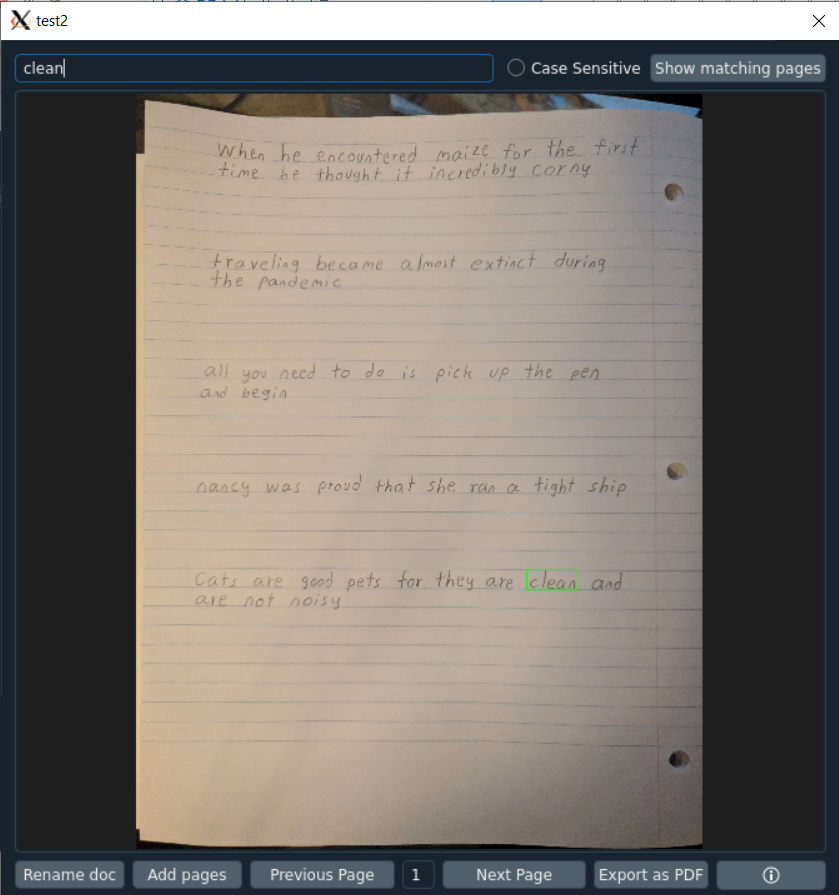
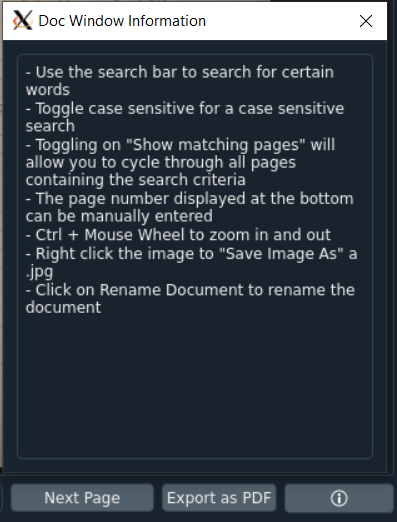
- Enter text in the search bar to search for matching text in the document
- Click the Next/Previous Page buttons to cycle through the pages in the document
- The current page number is shown at the bottom of the window and can be manually entered
- Toggle show matching pages to only display pages with matching text and to cycle through them
- Hold Ctrl and scroll up/down to zoom in and out. Users can also pan around the image. This applies to any images being displayed.
- Toggle Case Sensitive to do a case sensitive search
- Right click the image and click Save Image As to save the image as a JPEG
- Click the Export as PDF button to export the document as a pdf
- Click the Rename doc button to rename the document
- Click the Add pages button to add more pages to the current document
- Box Color:
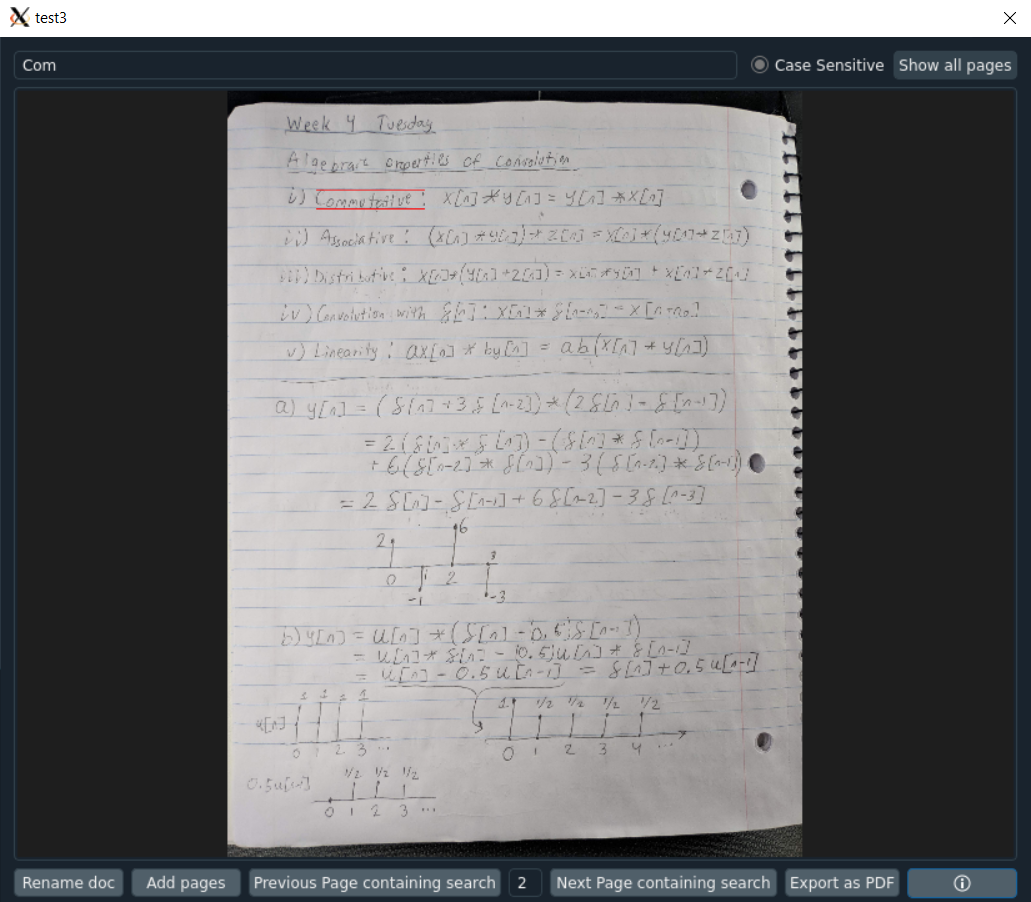
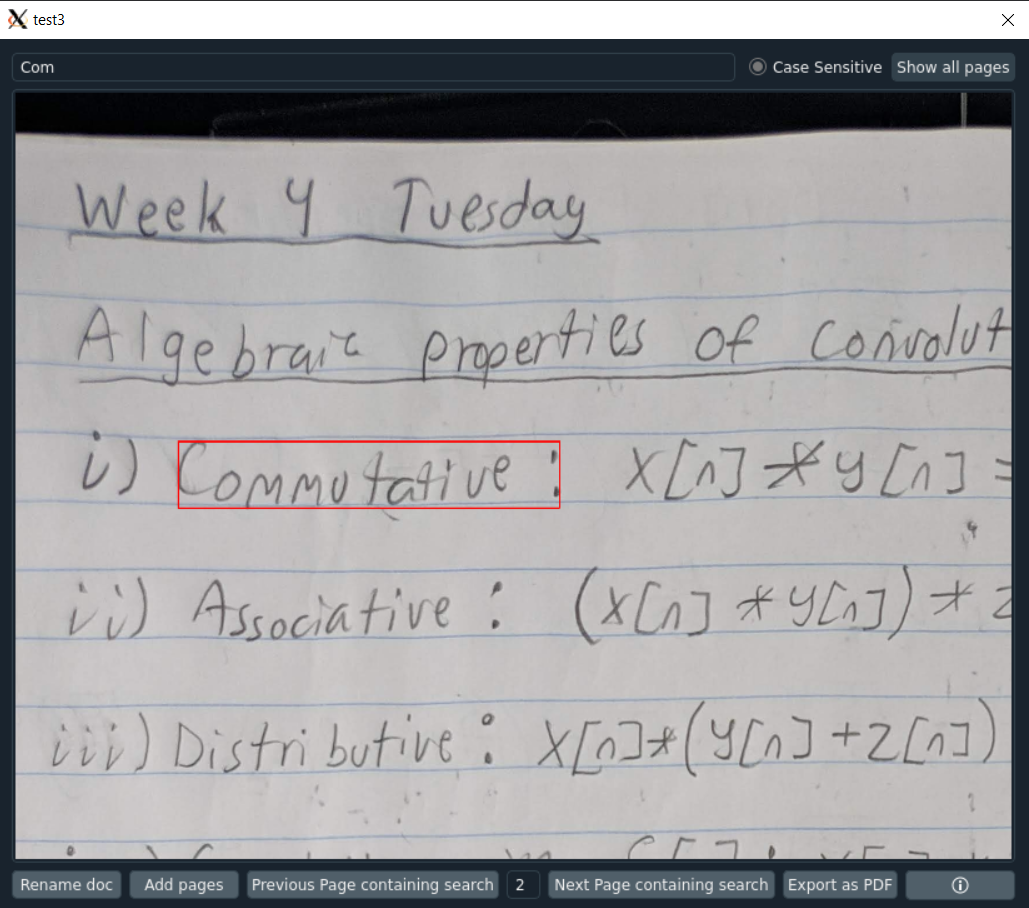
| Box Color | Confidence Value |
|---|---|
| Green | Greater than or equal to 80 |
| Blue | Less than 80 and greater than or equal to 40 |
| Red | Less than 40 |
- Click on the info icon to display a window explaining document features
1 maintainer

Release files for StudiOCR 0.2.0
For a detailed explanation of source distributions (sdists) and built distributions (wheels), please see the package formats documentation.
Source distribution (sdist)
| File | Size | Uploaded | |
|---|---|---|---|
| StudiOCR-0.2.0.tar.gz | 22.8 MB | Details |
Release files / StudiOCR-0.2.0.tar.gz
| Download URL | StudiOCR-0.2.0.tar.gz |
|---|---|
| Size | 22.8 MB |
| Tags | Source |
|
SHA-256 checksum How to use checksums |
a3758ef04705859a76a76fda62a7a00b187024e069dcb040de8fadf915b08fdd
|
|
BLAKE2b-256 checksum How to use checksums |
8b8f29012b74be0558cdbeb08185bc8446f7bf60c75a4c37f88b8c183210d7a1
|
| Upload date | |
|
Uploaded using Trusted Publishing? What is trusted publishing? |
No |
| Uploaded via |
twine/3.2.0 pkginfo/1.5.0.1 requests/2.24.0 setuptools/41.2.0 requests-toolbelt/0.9.1 tqdm/4.48.0 CPython/3.8.3
|














