
A fully free, customizable rich text editor for Django — built on Lexical and React

Project description
101editor
A fully free, pip-installable rich text editor for Django — built on Lexical (Meta's editor framework) and React. No paid tier, no vendor lock-in, 100% MIT licensed.
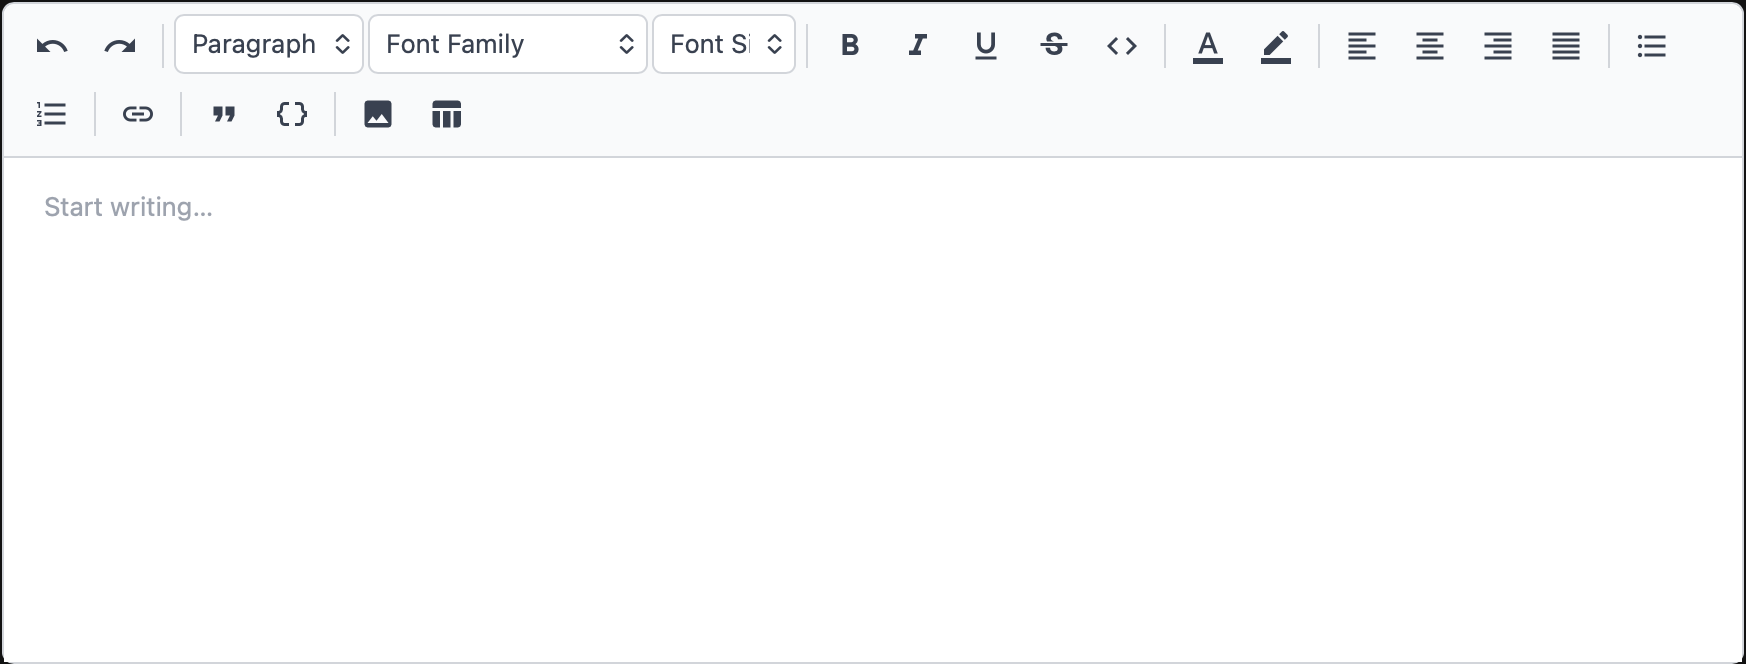
Documentation is available in English, O'zbek and Русский below.
English Documentation
Features
- Toolbar modes —
minimal(default) orfull, or a custom list of items - Formatting — Bold, Italic, Underline, Strikethrough, Inline Code
- Font — Family, Size (10–64)
- Colors — Text color and highlight color (per character / selection)
- Alignment — Left, Center, Right, Justify
- Headings — H1–H6 + Paragraph
- Lists — Ordered and unordered (toggle on/off)
- Blockquote
- Code block — Syntax highlighting for 30+ languages; triple-Enter exits
- Link — Insert, edit, open, remove via floating popover
- Image — Upload, resize (W), align (left / center / right), delete with confirmation
- Table — 9×9 hover grid picker, right-click context menu (add/remove rows & columns)
- i18n —
en/ru/uz— placeholder, tooltips, heading labels, modals - Django Admin — Works automatically with no extra configuration
- HTML storage — Content saved as HTML; portable if you ever switch editors
Requirements
| Requirement | Version |
|---|---|
| Python | 3.10+ |
| Django | 3.2+ |
| Browser | Any modern browser |
Installation
Step 1 — Install the package
pip install 101editor
Step 2 — Add to INSTALLED_APPS
Open your Django project's settings.py and add editor101 to the list:
INSTALLED_APPS = [
    # ... your other apps ...
    'editor101',
]
Step 3 — Add URL for image upload
Open your project's main urls.py and include the editor's URL:
from django.urls import path, include

urlpatterns = [
    # ... your other urls ...
    path('editor101/', include('editor101.urls')),
]
This registers one endpoint: POST /editor101/upload/ — used when the user uploads an image inside the editor.
Step 4 — Run migrations (none needed)
editor101 has no database models. No migration is required.
Step 5 — Configure (optional)
Add an EDITOR101 dictionary to settings.py to override defaults:
EDITOR101 = {
    # "minimal" shows: undo/redo, heading, font, bold/italic/underline/strikethrough,
    # inline-code, text color, highlight, alignment, bullet list, ordered list, link.
    # "full" adds: blockquote, code block, image upload, table.
    # You can also pass a list of specific item names (see Item Names below).
    "toolbar": "minimal",      # default: "minimal"

    # Interface language for placeholders, tooltips, heading labels, modal text.
    # Supported: "en" (English), "ru" (Russian), "uz" (Uzbek)
    "language": "en",          # default: "en"

    # Where uploaded images are saved (relative to MEDIA_ROOT).
    "upload_path": "editor101/uploads/",  # default

    # Maximum allowed image file size in megabytes.
    "max_image_size_mb": 10,   # default

    # Allowed image MIME types.
    "allowed_image_types": [
        "image/jpeg",
        "image/png",
        "image/gif",
        "image/webp",
    ],
}
Make sure MEDIA_ROOT and MEDIA_URL are set in settings.py:
import os
MEDIA_ROOT = os.path.join(BASE_DIR, 'media')
MEDIA_URL = '/media/'
And in development, add this to your main urls.py:
from django.conf import settings
from django.conf.urls.static import static

urlpatterns = [
    # ...
] + static(settings.MEDIA_URL, document_root=settings.MEDIA_ROOT)
Usage in Models
from django.db import models
from editor101.fields import RichTextField

class Post(models.Model):
    title = models.CharField(max_length=200)
    content = RichTextField()

    def __str__(self):
        return self.title
RichTextField is a standard Django TextField under the hood. Django Admin picks it up automatically — the rich editor appears in place of the default textarea with no extra code.
Usage in Forms
from django import forms
from editor101.widgets import RichTextWidget
from .models import Post

class PostForm(forms.ModelForm):
    class Meta:
        model = Post
        fields = ['title', 'content']
        widgets = {
            'content': RichTextWidget(),
        }
Or on a plain form field:
from django import forms
from editor101.widgets import RichTextWidget

class ArticleForm(forms.Form):
    body = forms.CharField(widget=RichTextWidget())
Displaying Saved Content
The editor saves HTML. To display it safely in a template, use Django's safe filter:
{% load editor101_tags %}

<!-- Renders with correct typography, table, code block styles -->
<div class="editor101-content">
    {{ post.content|safe }}
</div>
Add the editor101-content CSS class to the wrapper so the bundled stylesheet applies proper typography, table borders, code block colours, etc.
To load the stylesheet on a non-admin page, add this to your template's <head>:
{% load static %}
<link rel="stylesheet" href="{% static 'editor101/editor.css' %}">
Toolbar Item Names
When "toolbar" is a list, use these exact string identifiers:
| Item | Description |
|---|---|
"undo" |
Undo |
"redo" |
Redo |
"|" |
Visual separator line |
"heading" |
Heading dropdown (H1–H6 + Paragraph) |
"font-family" |
Font family dropdown |
"font-size" |
Font size dropdown |
"bold" |
Bold |
"italic" |
Italic |
"underline" |
Underline |
"strikethrough" |
Strikethrough |
"code" |
Inline code |
"text-color" |
Text colour picker |
"bg-color" |
Highlight colour picker |
"align-left" |
Align left |
"align-center" |
Align center |
"align-right" |
Align right |
"align-justify" |
Justify |
"bullet-list" |
Unordered list |
"ordered-list" |
Ordered list |
"link" |
Link insert/edit |
"blockquote" |
Blockquote |
"code-block" |
Code block with language picker |
"image" |
Image upload |
"table" |
Table grid picker |
Example — custom toolbar:
EDITOR101 = {
    "toolbar": ["bold", "italic", "underline", "|", "link", "image"],
}
Per-field Toolbar Override
You can pass a different toolbar per field:
from editor101.widgets import RichTextWidget

class PostForm(forms.ModelForm):
    class Meta:
        model = Post
        fields = ['title', 'content', 'summary']
        widgets = {
            'content': RichTextWidget(toolbar='full'),
            'summary': RichTextWidget(toolbar='minimal'),
        }
Editor Features Reference
Code Block
- Click the
{}button or select a language from the dropdown to enter a code block. - Press Enter three times in a row to exit the code block and continue writing in a normal paragraph.
Image
- Click the image icon to open a file picker.
- After inserting, click the image to open the floating toolbar:
- Align left / center / right
- Set width in pixels → click ✓ to apply
- 🗑 Delete → shows a confirmation modal
Table
- Click the table icon → hover the 9×9 grid → click to insert an N×M table.
- Right-click inside any table cell → context menu: Insert row above/below, Insert column left/right, Delete row, Delete column.
Link
- Select text, then click the link icon → type a URL and press ✓.
- Click an existing link → floating popover with Open / Edit / Remove.
Development Setup
If you want to modify the editor's source (React/TypeScript):
# Clone / open the project
cd "custom text editor"

# Install Python package in editable mode
pip install -e ".[dev]"

# Install JS dependencies
cd editor-src
npm install

# Start Vite dev server (hot-reload) — for editor development only
npm run dev

# In a separate terminal — run the Django demo project
cd ../demo
python manage.py migrate
python manage.py createsuperuser
python manage.py runserver
# Open http://127.0.0.1:8000/admin/
After making changes to the React source, build the production bundle:
cd editor-src
npm run build
# Outputs editor.bundle.js and editor.css into editor101/static/editor101/
Publishing to PyPI
pip install build twine

# Build wheel + sdist
python -m build

# Verify the package metadata
twine check dist/*

# Upload (you will be asked for username/__token__ and your API key)
twine upload dist/*
O'zbek tilidagi hujjatlar
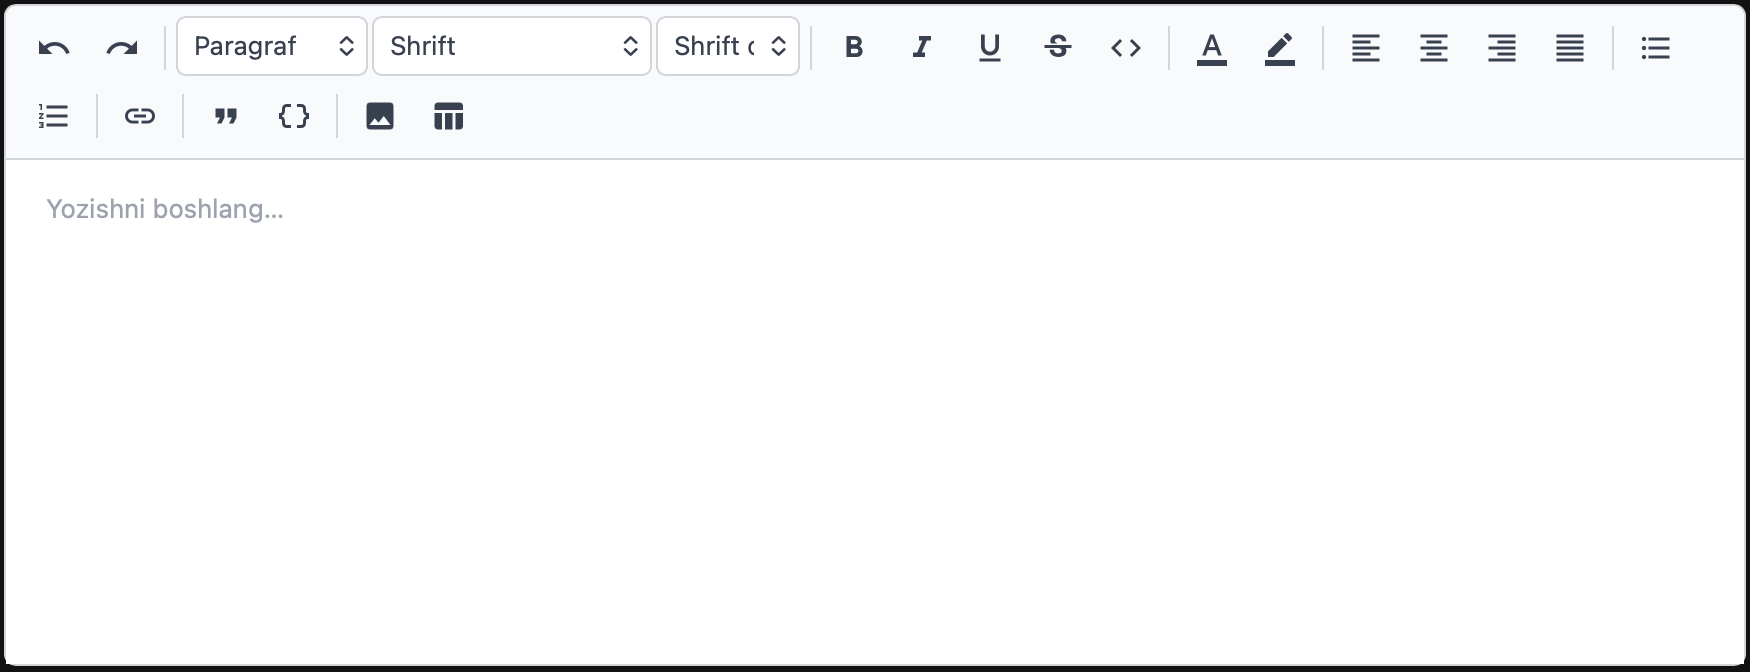
Xususiyatlar
- Toolbar rejimlari —
minimal(standart) yokifull, yoki maxsus elementlar ro'yxati - Formatlash — Qalin, Kursiv, Tagiga chizilgan, Ustiga chizilgan, Inline kod
- Shrift — Oilasi, O'lchami (10–64)
- Ranglar — Matn rangi va ajratib ko'rsatish rangi (belgi / tanlov bo'yicha)
- Hizalash — Chap, Markazda, O'ng, Kengligi bo'yicha
- Sarlavhalar — H1–H6 + Paragraf
- Ro'yxatlar — Tartibli va tartibsiz (yoqish/o'chirish)
- Iqtibos
- Kod bloki — 30+ til uchun sintaksis ajratish; uch marta Enter bosish kod blokidan chiqadi
- Havola — Qo'shish, tahrirlash, ochish, o'chirish (suzuvchi panelda)
- Rasm — Yuklash, o'lchamini o'zgartirish (Kengligi), hizalash, tasdiqlash bilan o'chirish
- Jadval — 9×9 katakcha tanlash paneli, o'ng tugma menyusi (qator va ustun qo'shish/o'chirish)
- Ko'p tillilik —
en/ru/uz - Django Admin — Qo'shimcha sozlashsiz avtomatik ishlaydi
- HTML saqlash — Kontent HTML sifatida saqlanadi; muharrir o'zgartirilsa ham ko'chiriladigan
Talablar
| Talab | Versiya |
|---|---|
| Python | 3.10+ |
| Django | 3.2+ |
| Brauzer | Istalgan zamonaviy brauzer |
O'rnatish
1-qadam — Paketni o'rnatish
Terminalda quyidagi buyruqni bajaring:
pip install 101editor
Bu buyruq PyPI'dan paketni yuklab o'rnatadi. pip avtomatik barcha bog'liqliklarni o'rnatadi.
2-qadam — INSTALLED_APPS ga qo'shish
Django loyihangizning settings.py faylini oching va editor101 ni ro'yxatga qo'shing:
INSTALLED_APPS = [
    # ... boshqa ilovalaringiz ...
    'editor101',
]
Bu qadam Django'ga editor101 ilovasini topa olishi, statik fayllar va URL larni yuklashi uchun zarur.
3-qadam — Rasm yuklash URL ini qo'shish
Loyihangizning asosiy urls.py faylini oching:
from django.urls import path, include

urlpatterns = [
    # ... boshqa URL laringiz ...
    path('editor101/', include('editor101.urls')),
]
Bu POST /editor101/upload/ manzilini ro'yxatdan o'tkazadi — muharrir ichida rasm yuklanganida ishlatiladi.
4-qadam — Migratsiya (shart emas)
editor101 da ma'lumotlar bazasi modellari yo'q. Migratsiya shart emas.
5-qadam — Sozlash (ixtiyoriy)
settings.py ga EDITOR101 lug'atini qo'shing:
EDITOR101 = {
    # Toolbar rejimi:
    # "minimal" — asosiy vositalar (qaytarish, sarlavha, shrift, formatlash,
    #             ranglar, hizalash, ro'yxatlar, havola)
    # "full" — barcha vositalar (minimal + iqtibos, kod bloki, rasm, jadval)
    # Yoki maxsus elementlar ro'yxatini bering (quyidagi jadvalga qarang)
    "toolbar": "minimal",

    # Interfeys tili: "en" (inglizcha), "ru" (ruscha), "uz" (o'zbekcha)
    "language": "uz",

    # Yuklangan rasmlar saqlanadigan joy (MEDIA_ROOT ga nisbatan)
    "upload_path": "editor101/uploads/",

    # Rasm fayli maksimal hajmi (megabaytda)
    "max_image_size_mb": 10,

    # Ruxsat etilgan rasm turlari
    "allowed_image_types": [
        "image/jpeg",
        "image/png",
        "image/gif",
        "image/webp",
    ],
}
settings.py da MEDIA_ROOT va MEDIA_URL ni belgilang:
import os
MEDIA_ROOT = os.path.join(BASE_DIR, 'media')
MEDIA_URL = '/media/'
Ishlab chiqish jarayonida asosiy urls.py ga qo'shing:
from django.conf import settings
from django.conf.urls.static import static

urlpatterns = [
    # ...
] + static(settings.MEDIA_URL, document_root=settings.MEDIA_ROOT)
Modellarda ishlatish
from django.db import models
from editor101.fields import RichTextField

class Post(models.Model):
    title = models.CharField(max_length=200)
    content = RichTextField()

    def __str__(self):
        return self.title
RichTextField ostida oddiy Django TextField dir. Django Admin uni avtomatik aniqlaydi — qo'shimcha kod shart emas.
Formlarda ishlatish
from django import forms
from editor101.widgets import RichTextWidget
from .models import Post

class PostForm(forms.ModelForm):
    class Meta:
        model = Post
        fields = ['title', 'content']
        widgets = {
            'content': RichTextWidget(),
        }
Oddiy form maydoni uchun:
from django import forms
from editor101.widgets import RichTextWidget

class ArticleForm(forms.Form):
    body = forms.CharField(widget=RichTextWidget())
Saqlangan kontentni ko'rsatish
Muharrir HTML saqlaydi. Shablonda xavfsiz ko'rsatish uchun Django'ning safe filtri ishlatiladi:
<div class="editor101-content">
    {{ post.content|safe }}
</div>
editor101-content CSS klassini qo'shish kerak — bu to'g'ri tipografiya, jadval chegaralari, kod bloki ranglari va boshqa uslublarni qo'llaydi.
Admin bo'lmagan sahifada uslublar faylini ulash:
{% load static %}
<link rel="stylesheet" href="{% static 'editor101/editor.css' %}">
Toolbar elementlari
"toolbar" ro'yxat sifatida berilganda, quyidagi nomlardan foydalaning:
| Element | Tavsif |
|---|---|
"undo" |
Bekor qilish |
"redo" |
Qayta bajarish |
"|" |
Ajratuvchi chiziq |
"heading" |
Sarlavha (H1–H6 + Paragraf) |
"font-family" |
Shrift oilasi |
"font-size" |
Shrift o'lchami |
"bold" |
Qalin |
"italic" |
Kursiv |
"underline" |
Tagiga chizilgan |
"strikethrough" |
Ustiga chizilgan |
"code" |
Inline kod |
"text-color" |
Matn rangi |
"bg-color" |
Ajratish rangi |
"align-left" |
Chapga hizalash |
"align-center" |
Markazga hizalash |
"align-right" |
O'ngga hizalash |
"align-justify" |
Kengligi bo'yicha |
"bullet-list" |
Tartibsiz ro'yxat |
"ordered-list" |
Tartibli ro'yxat |
"link" |
Havola |
"blockquote" |
Iqtibos |
"code-block" |
Kod bloki |
"image" |
Rasm yuklash |
"table" |
Jadval |
Misol — maxsus toolbar:
EDITOR101 = {
    "toolbar": ["bold", "italic", "|", "link", "image"],
}
Muharrir xususiyatlari
Kod bloki
{}tugmasini bosing yoki tilni tanlang.- Kod blokidan chiqish uchun ketma-ket uch marta Enter bosing.
Rasm
- Rasm ikonasini bosib fayl tanlang.
- Rasmni bosing — suzuvchi panel paydo bo'ladi:
- Chapga / markazga / o'ngga hizalash
- Kengligi (piksel) → ✓ bosib qo'llang
- 🗑 O'chirish → tasdiqlash modali paydo bo'ladi
Jadval
- Jadval ikonasini bosing → 9×9 panjara ustida sichqonchani suring → bosib N×M jadval qo'shing.
- Jadval katakchasini o'ng tugma bilan bosing → menyu: qator/ustun qo'shish, o'chirish.
Havola
- Matnni tanlang, havola ikonasini bosing → URL yozing → ✓ bosing.
- Mavjud havolani bosing → suzuvchi panel: ochish, tahrirlash, o'chirish.
Ishlab chiqish muhitini sozlash
# Python paketini tahrirlash rejimida o'rnatish
pip install -e ".[dev]"

# JS bog'liqliklarini o'rnatish
cd editor-src
npm install

# Vite dev serverni ishga tushirish (muharrir ishlab chiqish uchun)
npm run dev

# Alohida terminalda Django demo loyihasini ishga tushirish
cd ../demo
python manage.py migrate
python manage.py createsuperuser
python manage.py runserver
# http://127.0.0.1:8000/admin/ ni oching
O'zgartirishlardan keyin ishlab chiqarish bundlini yarating:
cd editor-src
npm run build
PyPI ga yuklash
pip install build twine

# Wheel va sdist yaratish
python -m build

# Paket meta-ma'lumotlarini tekshirish
twine check dist/*

# Yuklash (username/__token__ va API kalitingiz so'raladi)
twine upload dist/*
Документация на русском языке
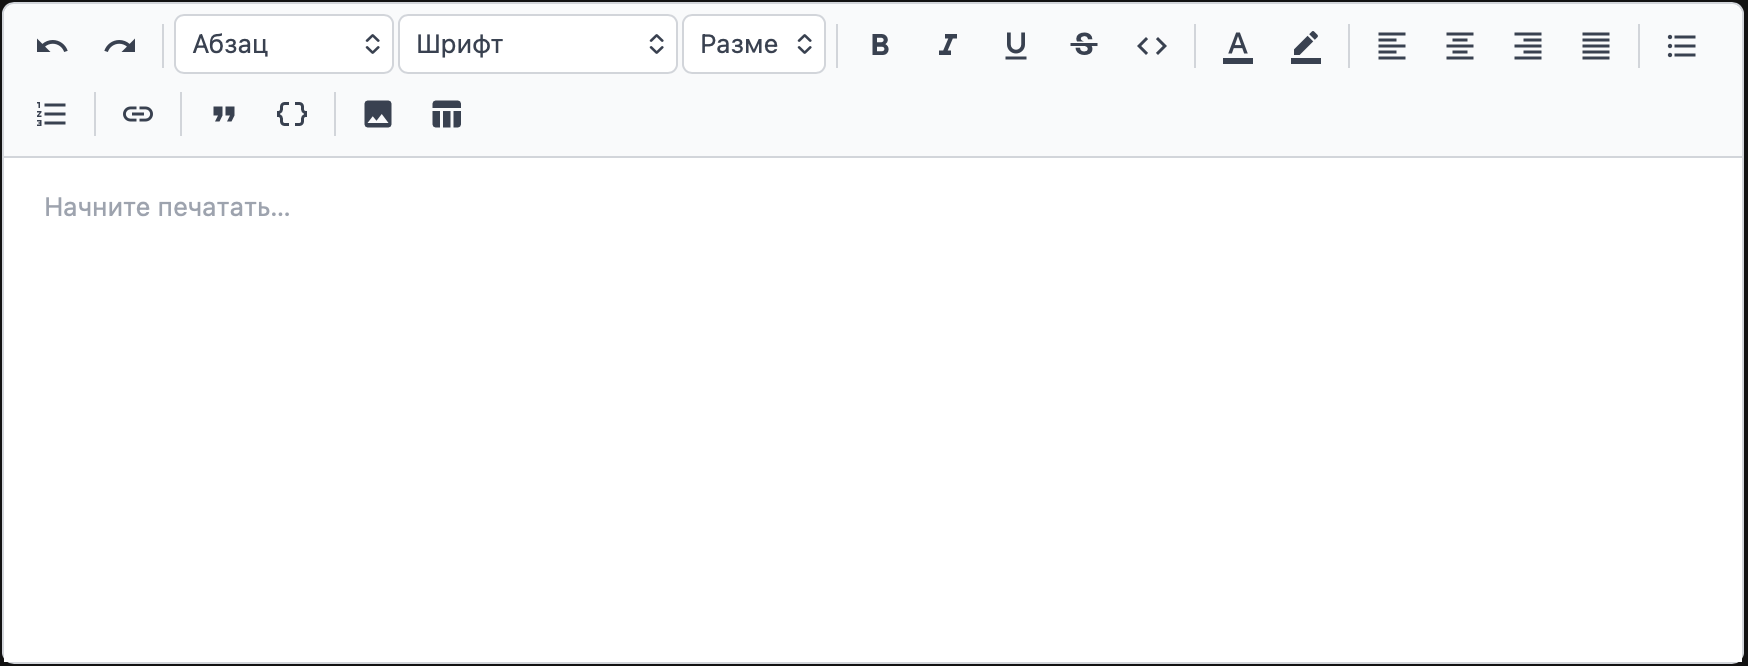
Возможности
- Режимы панели инструментов —
minimal(по умолчанию) илиfull, или произвольный список элементов - Форматирование — Жирный, Курсив, Подчёркнутый, Зачёркнутый, Встроенный код
- Шрифт — Семейство, Размер (10–64)
- Цвета — Цвет текста и выделение цветом (для символа / выделения)
- Выравнивание — По левому краю, по центру, по правому краю, по ширине
- Заголовки — H1–H6 + Абзац
- Списки — Нумерованные и маркированные (включение/отключение)
- Цитата
- Блок кода — Подсветка синтаксиса для 30+ языков; тройной Enter выходит из блока
- Ссылка — Вставка, редактирование, открытие, удаление через всплывающую панель
- Изображение — Загрузка, изменение ширины, выравнивание, удаление с подтверждением
- Таблица — Сетка 9×9 для выбора размера, контекстное меню правой кнопкой
- Локализация —
en/ru/uz - Django Admin — Работает автоматически без дополнительной настройки
- Хранение HTML — Контент сохраняется как HTML; переносимо при смене редактора
Требования
| Требование | Версия |
|---|---|
| Python | 3.10+ |
| Django | 3.2+ |
| Браузер | Любой современный браузер |
Установка
Шаг 1 — Установка пакета
Выполните в терминале:
pip install 101editor
Команда загрузит пакет с PyPI и автоматически установит все зависимости.
Шаг 2 — Добавление в INSTALLED_APPS
Откройте settings.py вашего Django-проекта и добавьте editor101 в список:
INSTALLED_APPS = [
    # ... другие приложения ...
    'editor101',
]
Это необходимо для того, чтобы Django мог найти приложение, загрузить статические файлы и URL-маршруты.
Шаг 3 — Добавление URL для загрузки изображений
Откройте главный urls.py проекта:
from django.urls import path, include

urlpatterns = [
    # ... другие URL ...
    path('editor101/', include('editor101.urls')),
]
Это регистрирует один маршрут: POST /editor101/upload/ — используется при загрузке изображений внутри редактора.
Шаг 4 — Миграции (не требуются)
В editor101 нет моделей базы данных. Миграции не нужны.
Шаг 5 — Настройка (опционально)
Добавьте словарь EDITOR101 в settings.py:
EDITOR101 = {
    # Режим панели инструментов:
    # "minimal" — основные инструменты (отмена/повтор, заголовок, шрифт,
    #             жирный/курсив/подчёркнутый/зачёркнутый, встроенный код,
    #             цвет текста, выделение, выравнивание, списки, ссылка)
    # "full" — все инструменты (minimal + цитата, блок кода, изображение, таблица)
    # Или передайте список конкретных элементов (см. таблицу ниже)
    "toolbar": "minimal",

    # Язык интерфейса: "en" (английский), "ru" (русский), "uz" (узбекский)
    "language": "ru",

    # Папка для сохранения загруженных изображений (относительно MEDIA_ROOT)
    "upload_path": "editor101/uploads/",

    # Максимальный размер файла изображения в мегабайтах
    "max_image_size_mb": 10,

    # Допустимые MIME-типы изображений
    "allowed_image_types": [
        "image/jpeg",
        "image/png",
        "image/gif",
        "image/webp",
    ],
}
Убедитесь, что в settings.py заданы MEDIA_ROOT и MEDIA_URL:
import os
MEDIA_ROOT = os.path.join(BASE_DIR, 'media')
MEDIA_URL = '/media/'
В режиме разработки добавьте в главный urls.py:
from django.conf import settings
from django.conf.urls.static import static

urlpatterns = [
    # ...
] + static(settings.MEDIA_URL, document_root=settings.MEDIA_ROOT)
Использование в моделях
from django.db import models
from editor101.fields import RichTextField

class Post(models.Model):
    title = models.CharField(max_length=200)
    content = RichTextField()

    def __str__(self):
        return self.title
RichTextField — это обычный TextField Django под капотом. Django Admin распознаёт его автоматически и показывает богатый редактор вместо обычного текстового поля.
Использование в формах
from django import forms
from editor101.widgets import RichTextWidget
from .models import Post

class PostForm(forms.ModelForm):
    class Meta:
        model = Post
        fields = ['title', 'content']
        widgets = {
            'content': RichTextWidget(),
        }
Или для обычного поля формы:
from django import forms
from editor101.widgets import RichTextWidget

class ArticleForm(forms.Form):
    body = forms.CharField(widget=RichTextWidget())
Отображение сохранённого контента
Редактор сохраняет HTML. Для безопасного отображения в шаблоне используйте фильтр safe:
<div class="editor101-content">
    {{ post.content|safe }}
</div>
Класс editor101-content на обёртке нужен для применения правильной типографии, границ таблиц, цветов блока кода и других стилей из подключённого CSS.
Для подключения стилей на странице, не являющейся частью Admin:
{% load static %}
<link rel="stylesheet" href="{% static 'editor101/editor.css' %}">
Элементы панели инструментов
Когда "toolbar" является списком, используйте следующие идентификаторы:
| Элемент | Описание |
|---|---|
"undo" |
Отменить |
"redo" |
Повторить |
"|" |
Разделитель |
"heading" |
Заголовок (H1–H6 + Абзац) |
"font-family" |
Семейство шрифтов |
"font-size" |
Размер шрифта |
"bold" |
Жирный |
"italic" |
Курсив |
"underline" |
Подчёркнутый |
"strikethrough" |
Зачёркнутый |
"code" |
Встроенный код |
"text-color" |
Цвет текста |
"bg-color" |
Цвет выделения |
"align-left" |
По левому краю |
"align-center" |
По центру |
"align-right" |
По правому краю |
"align-justify" |
По ширине |
"bullet-list" |
Маркированный список |
"ordered-list" |
Нумерованный список |
"link" |
Ссылка |
"blockquote" |
Цитата |
"code-block" |
Блок кода |
"image" |
Загрузка изображения |
"table" |
Таблица |
Пример — произвольная панель инструментов:
EDITOR101 = {
    "toolbar": ["bold", "italic", "|", "link", "image"],
}
Справочник по функциям редактора
Блок кода
- Нажмите кнопку
{}или выберите язык в выпадающем списке. - Чтобы выйти из блока кода, нажмите Enter три раза подряд.
Изображение
- Нажмите значок изображения, чтобы открыть диалог выбора файла.
- После вставки нажмите на изображение — появится плавающая панель:
- Выровнять по левому краю / по центру / по правому краю
- Задать ширину в пикселях → нажмите ✓ для применения
- 🗑 Удалить → появится модальное окно с подтверждением
Таблица
- Нажмите значок таблицы → наведите курсор на сетку 9×9 → нажмите для вставки таблицы N×M.
- Правый клик внутри ячейки таблицы → контекстное меню: вставить строку выше/ниже, вставить столбец слева/справа, удалить строку, удалить столбец.
Ссылка
- Выделите текст, нажмите значок ссылки → введите URL → нажмите ✓.
- Нажмите на существующую ссылку → всплывающая панель: открыть, изменить, удалить.
Настройка среды разработки
# Установить Python-пакет в режиме редактирования
pip install -e ".[dev]"

# Установить JS-зависимости
cd editor-src
npm install

# Запустить Vite dev-сервер (горячая перезагрузка) — для разработки редактора
npm run dev

# В отдельном терминале — запустить демо Django-проект
cd ../demo
python manage.py migrate
python manage.py createsuperuser
python manage.py runserver
# Откройте http://127.0.0.1:8000/admin/
После внесения изменений в исходный код React соберите продакшн-бандл:
cd editor-src
npm run build
# Выводит editor.bundle.js и editor.css в editor101/static/editor101/
Публикация на PyPI
pip install build twine

# Сборка wheel и sdist
python -m build

# Проверка метаданных пакета
twine check dist/*

# Загрузка (будет запрошен username/__token__ и ваш API-ключ)
twine upload dist/*
Лицензия
MIT — свободно использовать в личных и коммерческих проектах.
Release history Release notifications | RSS feed


Download files
Download the file for your platform. If you're not sure which to choose, learn more about installing packages.
Source Distribution
Built Distribution
Filter files by name, interpreter, ABI, and platform.
If you're not sure about the file name format, learn more about wheel file names.
Copy a direct link to the current filters
File details
Details for the file 101editor-0.1.1.tar.gz.
File metadata
- Download URL: 101editor-0.1.1.tar.gz
- Upload date:
- Size: 176.1 kB
- Tags: Source
- Uploaded using Trusted Publishing? No
- Uploaded via: twine/6.2.0 CPython/3.14.0
File hashes
| Algorithm | Hash digest | |
|---|---|---|
| SHA256 |
b21d470e0588fb25ae404917f53c1e4a2c0e957e12a2e98a4ebe0b54579284c4
|
|
| MD5 |
ca01687eeebed43d815330afeb18670f
|
|
| BLAKE2b-256 |
80a27c89e2a116294d55619b312b88b20080e97ca9190ac608fa317eb2e16eab
|
File details
Details for the file 101editor-0.1.1-py3-none-any.whl.
File metadata
- Download URL: 101editor-0.1.1-py3-none-any.whl
- Upload date:
- Size: 168.9 kB
- Tags: Python 3
- Uploaded using Trusted Publishing? No
- Uploaded via: twine/6.2.0 CPython/3.14.0
File hashes
| Algorithm | Hash digest | |
|---|---|---|
| SHA256 |
ca1277709e05bc6ce0c7cb5c7f850b9e6a5f459f4ad5fc2f3096d8fcb96cb056
|
|
| MD5 |
b37af5b1a8fb9477d4f600c67fe8f400
|
|
| BLAKE2b-256 |
571522fd508239b94336a67062aae85f151b8fd23897652e62cc66cab53647b8
|






