
A high-performance, GPU-accelerated Bayer matrix dithering library and CLI for images, GIFs, and videos.

Project description
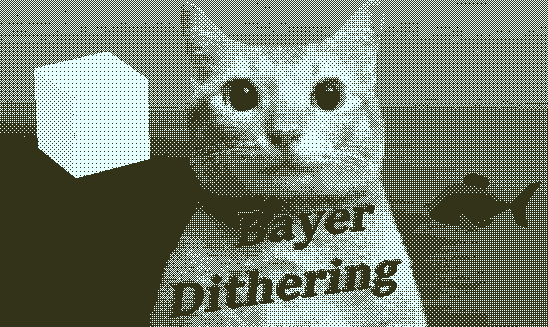
Bayer Dithering



A high-performance, GPU-accelerated Python library and Command-Line Interface (CLI) that applies Bayer matrix dithering to images, GIFs, and videos.
It offers a variety of customizable options such as matrix size, custom color filters, sharpness, contrast, and downscaling, powered by parallel processing for blazing-fast media generation.
Documentation and Showcase
The complete documentation, API reference, and visual gallery are available online:
Read the Official Documentation
Features
- Hardware Acceleration: Choose between CPU or GPU (
taichibackend) for massive performance gains, especially on videos. - Universal Media Support: Seamlessly process PNG, JPG, GIF, and MP4 files with automatic format detection.
- Global CLI: Install once and use the
dithercommand from anywhere in your terminal. - Customizable Filters: Apply beautiful retro color palettes easily.
- Pre-Processing Pipeline: Built-in options for downscaling, contrast adjustment, and sharpening before the dithering effect is applied.
Prerequisites
- Python: Version
>= 3.13(Support for3.14is currently pendingtaichibackend C-API compiled wheels, but the CPU pipeline works universally). - Hardware: A dedicated GPU is highly recommended for video and GIF processing, though a CPU fallback is natively provided.
Installation
Option 1: Install via PyPI (Recommended)
The easiest way to install the library and the global CLI is directly from the Python Package Index:
pip install BayerDithering
To enable GPU Hardware Acceleration (Recommended for Videos), install the package with the optional taichi backend dependency:
pip install "BayerDithering[gpu]"
Option 2: Build from Source
-
Clone the repository:
git clone https://github.com/madmattp/Bayer-Dithering.git
cd BayerDithering
-
Install the package and its dependencies:
pip install -e .
(This will install the required libraries and link the
dithercommand to your system).
Usage
Once installed, you can use the dither command directly in your terminal.
Command Line Options
-
-i, --input: (Required) Specifies the input file (image, gif, or video). -
-a, --arch: Processing hardware. Options:cpu,gpu(default:cpu). Note: Ifgpuis requested but the optional backend is not installed, the CLI will automatically fallback tocpuprocessing safely. -
-m, --matrix: Selects the Bayer matrix size. Options:2x2,4x4,8x8(default:4x4). -
-o, --output: Specifies the output file path. If not provided, a default name will be automatically generated. -
-f, --filter: Applies a custom color filter to the output image (e.g.,Matrix,Orange,Vapor). -
-s, --sharpness: Adjusts the sharpness (default: 1.6). -
-c, --contrast: Adjusts the contrast (default: 1.5). -
-d, --downscale: Downscales the image by a factor before dithering (default: 2). -
-u, --upscale: Upscales the image back to its original size after dithering (default: True). Set-u falseto disable. -
-q, --quiet: Runs the script in quiet mode, suppressing terminal output.
Recommended Settings
For more visually pleasing retro results, it is recommended to use the following settings:
-
Contrast: 1.5
-
Sharpness: 1.6
-
Downscaling: >= 2
Examples
1. Dithering an Image
dither -i media/cat.jpg -d 6


2. Dithering a Video with a Color Filter (GPU Accelerated)
dither -i media/huh.mp4 -a gpu -m 4x4 -c 1.5 -s 1.6 -f Cyan -u False -d 4
Python API Usage
You can also import BayerDithering directly into your own Python scripts to build custom graphics pipelines or integrate the effect into other applications.
1. Basic Image Processing (NumPy / OpenCV)
If you already have an image loaded as a NumPy array, you can process it directly:
import cv2
from BayerDithering import BayerDither, CPUProcessor, DitherConfig, matrices

# Create the pipeline configuration
config = DitherConfig(
    b_matrix=matrices["4x4"],
    contrast=1.5,
    sharpness=1.6,
    downscale_factor=2,
    upscale=True,
    filter=None  # Pass a tuple of RGB colors or None for grayscale
)

# Initialize the processor (CPU or GPUProcessor) and the ditherer
processor = CPUProcessor(config)
ditherer = BayerDither(processor=processor, verbose=True)

# Apply dithering to a NumPy array (BGR image from OpenCV)
image = cv2.imread("media/cat.jpg")
dithered_image = ditherer.apply(image)

# Save the result
cv2.imwrite("media/cat_dithered.png", dithered_image)
2. High-Performance Video Processing (GPU Accelerated)
For processing videos, pass a cv2.VideoCapture object directly into the apply method. The pipeline leverages the taichi backend for parallel GPU frame processing and returns a ProcessedVideo context manager:
import cv2
from BayerDithering import BayerDither, GPUProcessor, DitherConfig, matrices
from BayerDithering.utils import ProcessedVideo

config = DitherConfig(
    b_matrix=matrices["8x8"],
    contrast=1.3,
    sharpness=1.5,
    downscale_factor=2
)

# Use GPUProcessor for hardware acceleration
processor = GPUProcessor(config)
ditherer = BayerDither(processor=processor)

# Open the video stream using OpenCV
video_capture = cv2.VideoCapture("media/huh.mp4")

# Pass the video capture object to the ditherer.
# The router will automatically return a ProcessedVideo context.
# Always use 'with' to ensure secure handling and cleanup of temporary files.
with ditherer.apply(video_capture) as result:
    result.save_with_audio(original_video_path="media/huh.mp4", path="media/huh_dithered.mp4")

# Remember to release the video hardware resource
video_capture.release()
3. Animated GIF Processing
GIF processing relies on multi-frame arrays or lists of images. The apply method processes the frame sequence and returns a ProcessedGIF context manager to gracefully handle saving the output stream:
import imageio as iio
from BayerDithering import BayerDither, CPUProcessor, DitherConfig, matrices
from BayerDithering.utils import ProcessedGIF

config = DitherConfig(
    b_matrix=matrices["4x4"],
    contrast=1.6,
    sharpness=1.4,
    downscale_factor=3,
    upscale=True
)

# Initialize using CPU or GPU (both support GIF frame-by-frame processing)
processor = CPUProcessor(config)
ditherer = BayerDither(processor=processor)

# Load the GIF frames as a single multi-frame NumPy array using imageio
with iio.get_reader("media/cat-shocked.gif") as gif_frames:

  # Pass the frame sequence object to the ditherer.
  # The router will return a ProcessedGIF instance
  with ditherer.apply(gif_frames) as result:
    result.save(dest_path="media/cat_shocked_dithered.gif")
4. Loading Custom Filters Programmatically
If you want to use the color palettes defined in your filters.toml dynamically inside a Python script:
from BayerDithering.utils import load_filters
from BayerDithering import DitherConfig, matrices

# Load all filters as a dictionary
filters = load_filters()

# Extract the RGB data for a specific palette (e.g., 'Cyan')
cyan_palette = filters.get("Cyan")

config = DitherConfig(
    b_matrix=matrices["4x4"],
    filter=cyan_palette  # Pass the loaded palette data to the configuration
)
Contributions
Feel free to open issues or contribute via pull requests. Contributions are welcome!
Release history Release notifications | RSS feed


Download files
Download the file for your platform. If you're not sure which to choose, learn more about installing packages.
Source Distribution
Built Distribution
Filter files by name, interpreter, ABI, and platform.
If you're not sure about the file name format, learn more about wheel file names.
Copy a direct link to the current filters
File details
Details for the file bayerdithering-0.3.2.tar.gz.
File metadata
- Download URL: bayerdithering-0.3.2.tar.gz
- Upload date:
- Size: 18.7 kB
- Tags: Source
- Uploaded using Trusted Publishing? No
- Uploaded via: twine/6.2.0 CPython/3.13.13
File hashes
| Algorithm | Hash digest | |
|---|---|---|
| SHA256 |
01e9b6bc15a5084142e6aa7ed752cfe92ae41fa2b1971afbd8b1fa10c194aaa9
|
|
| MD5 |
609c8728658620ed214b3c1f9bed7a76
|
|
| BLAKE2b-256 |
3a0b8b22716833769e7edfe85816bb1a83ea565329cb235df12c9ddf9fb6ac3e
|
File details
Details for the file bayerdithering-0.3.2-py3-none-any.whl.
File metadata
- Download URL: bayerdithering-0.3.2-py3-none-any.whl
- Upload date:
- Size: 21.8 kB
- Tags: Python 3
- Uploaded using Trusted Publishing? No
- Uploaded via: twine/6.2.0 CPython/3.13.13
File hashes
| Algorithm | Hash digest | |
|---|---|---|
| SHA256 |
1d4e30980f7b2417affb560ea216403726c81ae6f7ec583eac7871b0c609649d
|
|
| MD5 |
a92f43e69883238dffb426b981169a13
|
|
| BLAKE2b-256 |
09143d845c65f983d711e92bdee665c88fdaa4679d5815ea19d3574fdc7c6c9d
|






