An application that can parse spreadsheets in order to calculate and plot a user's monthly savings rate over time.
Project description
MMM Savings Rate
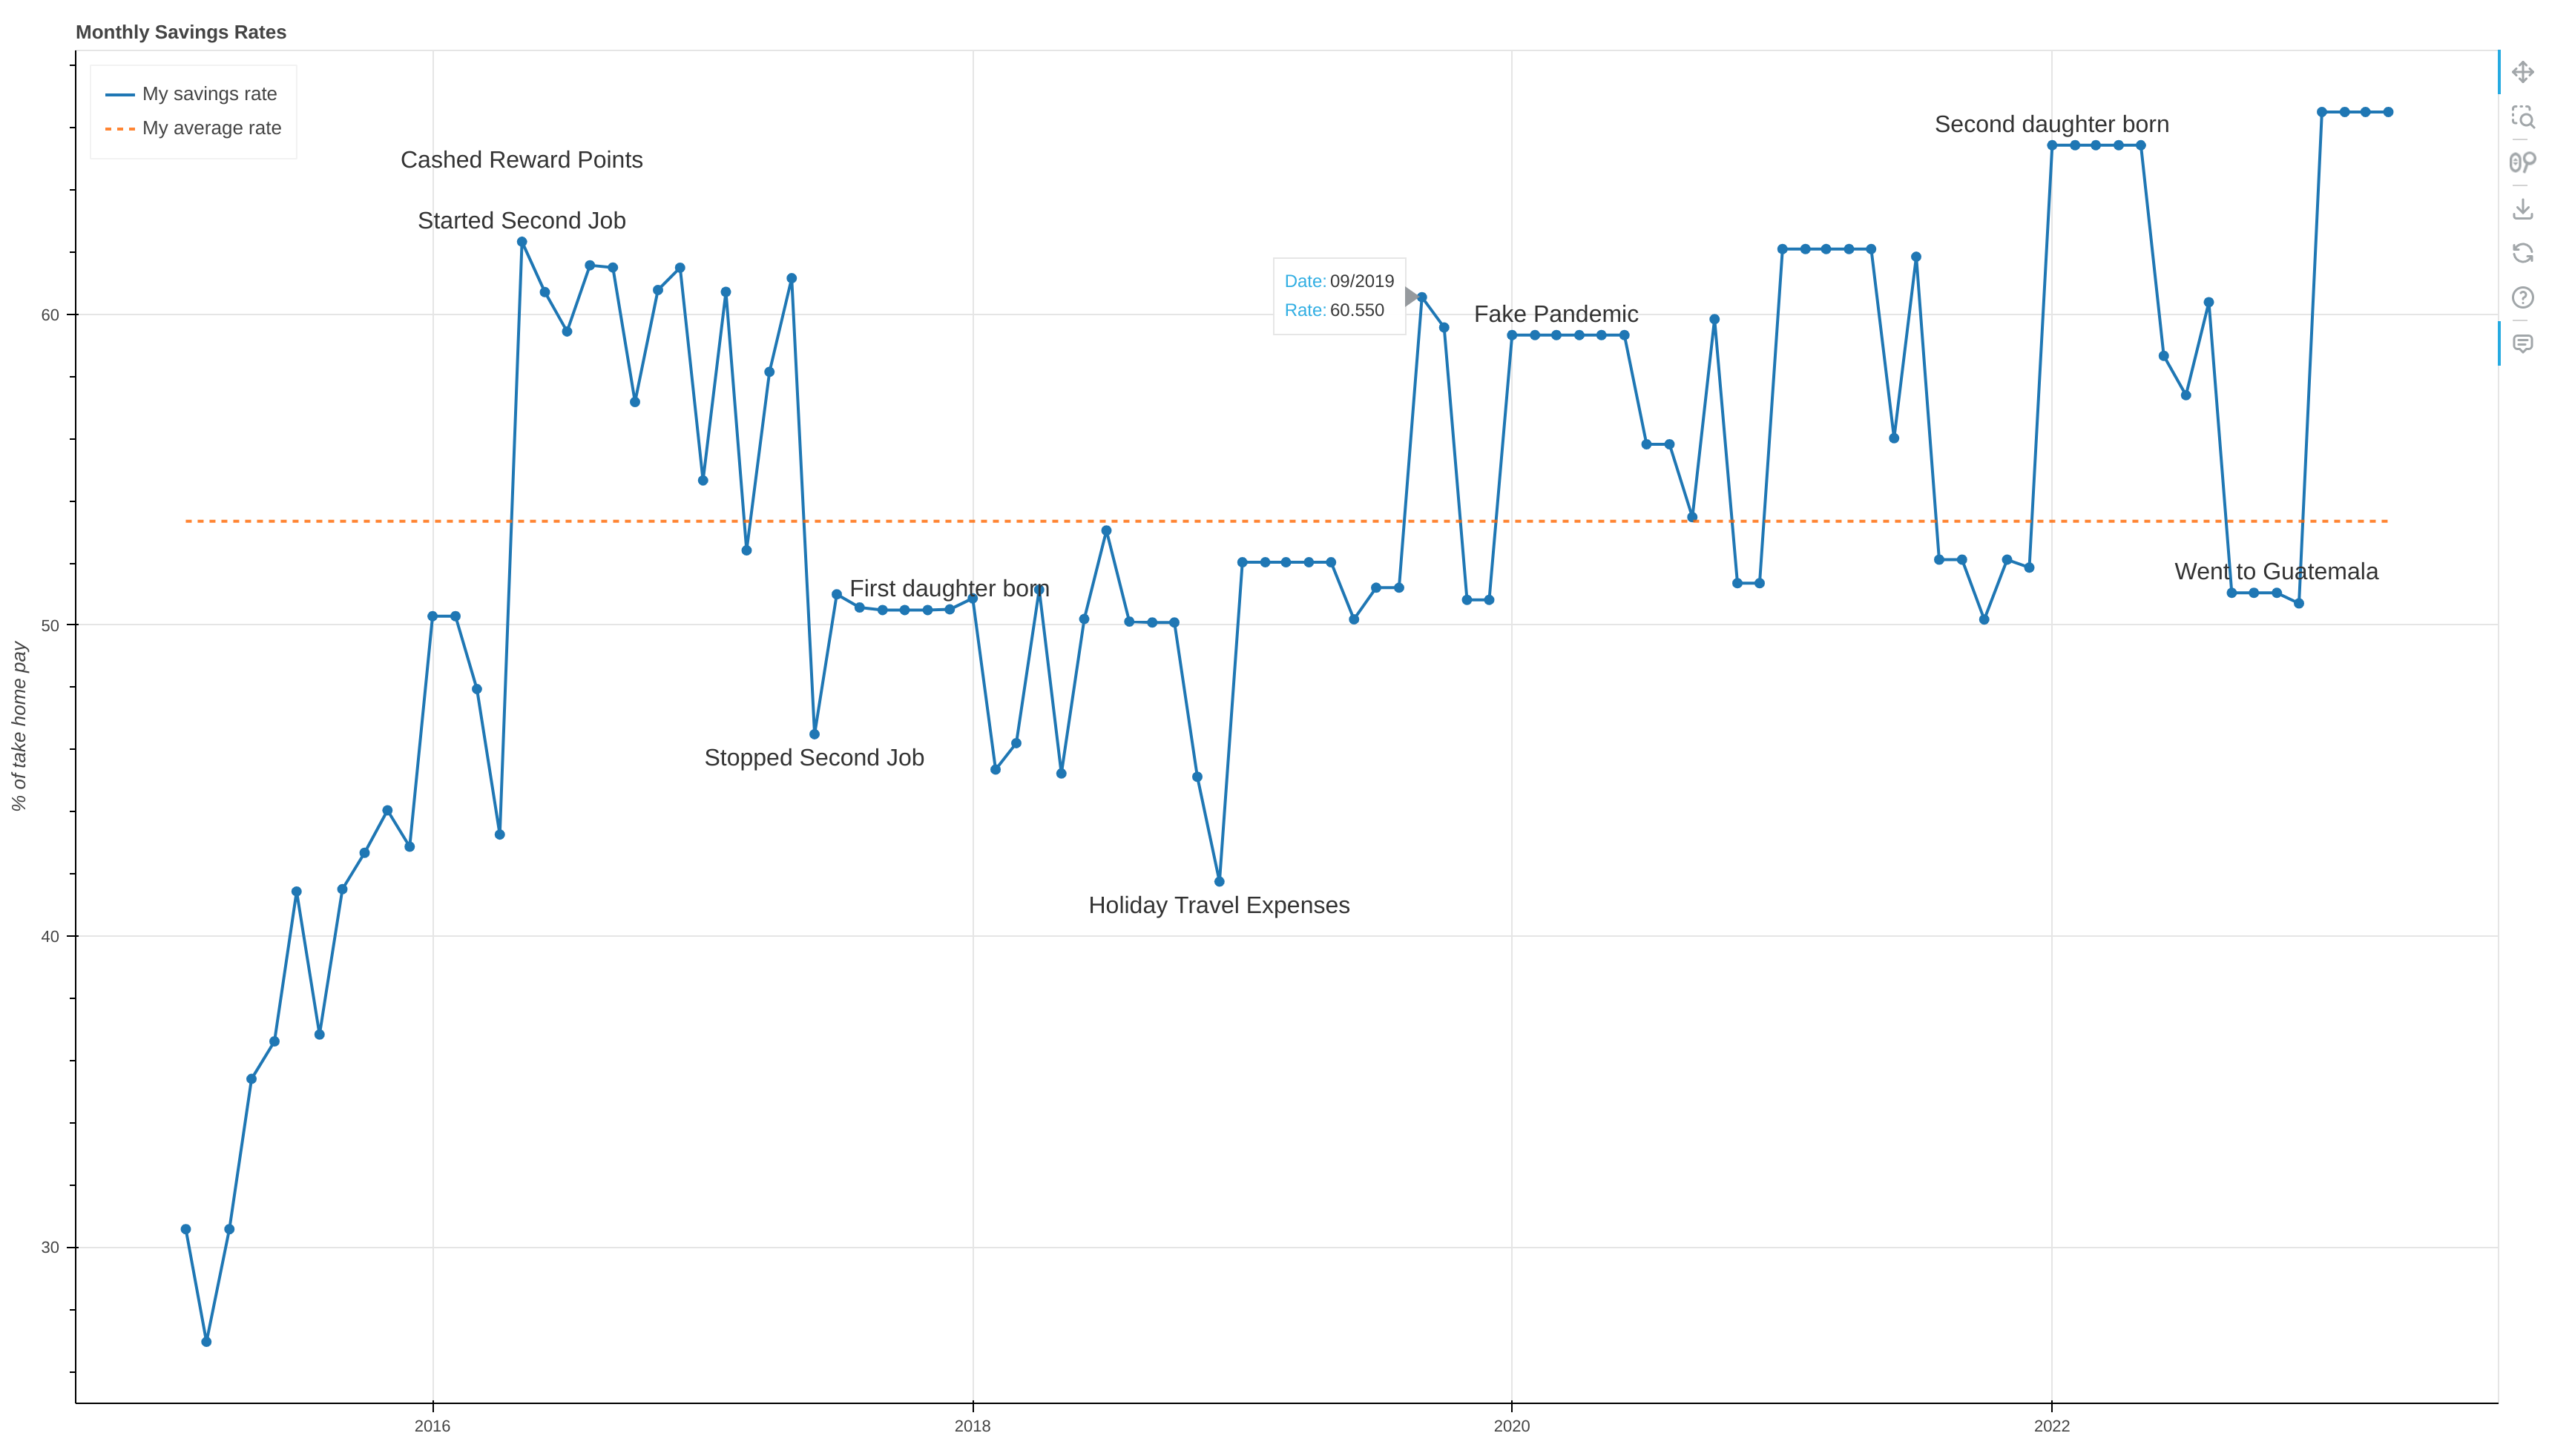
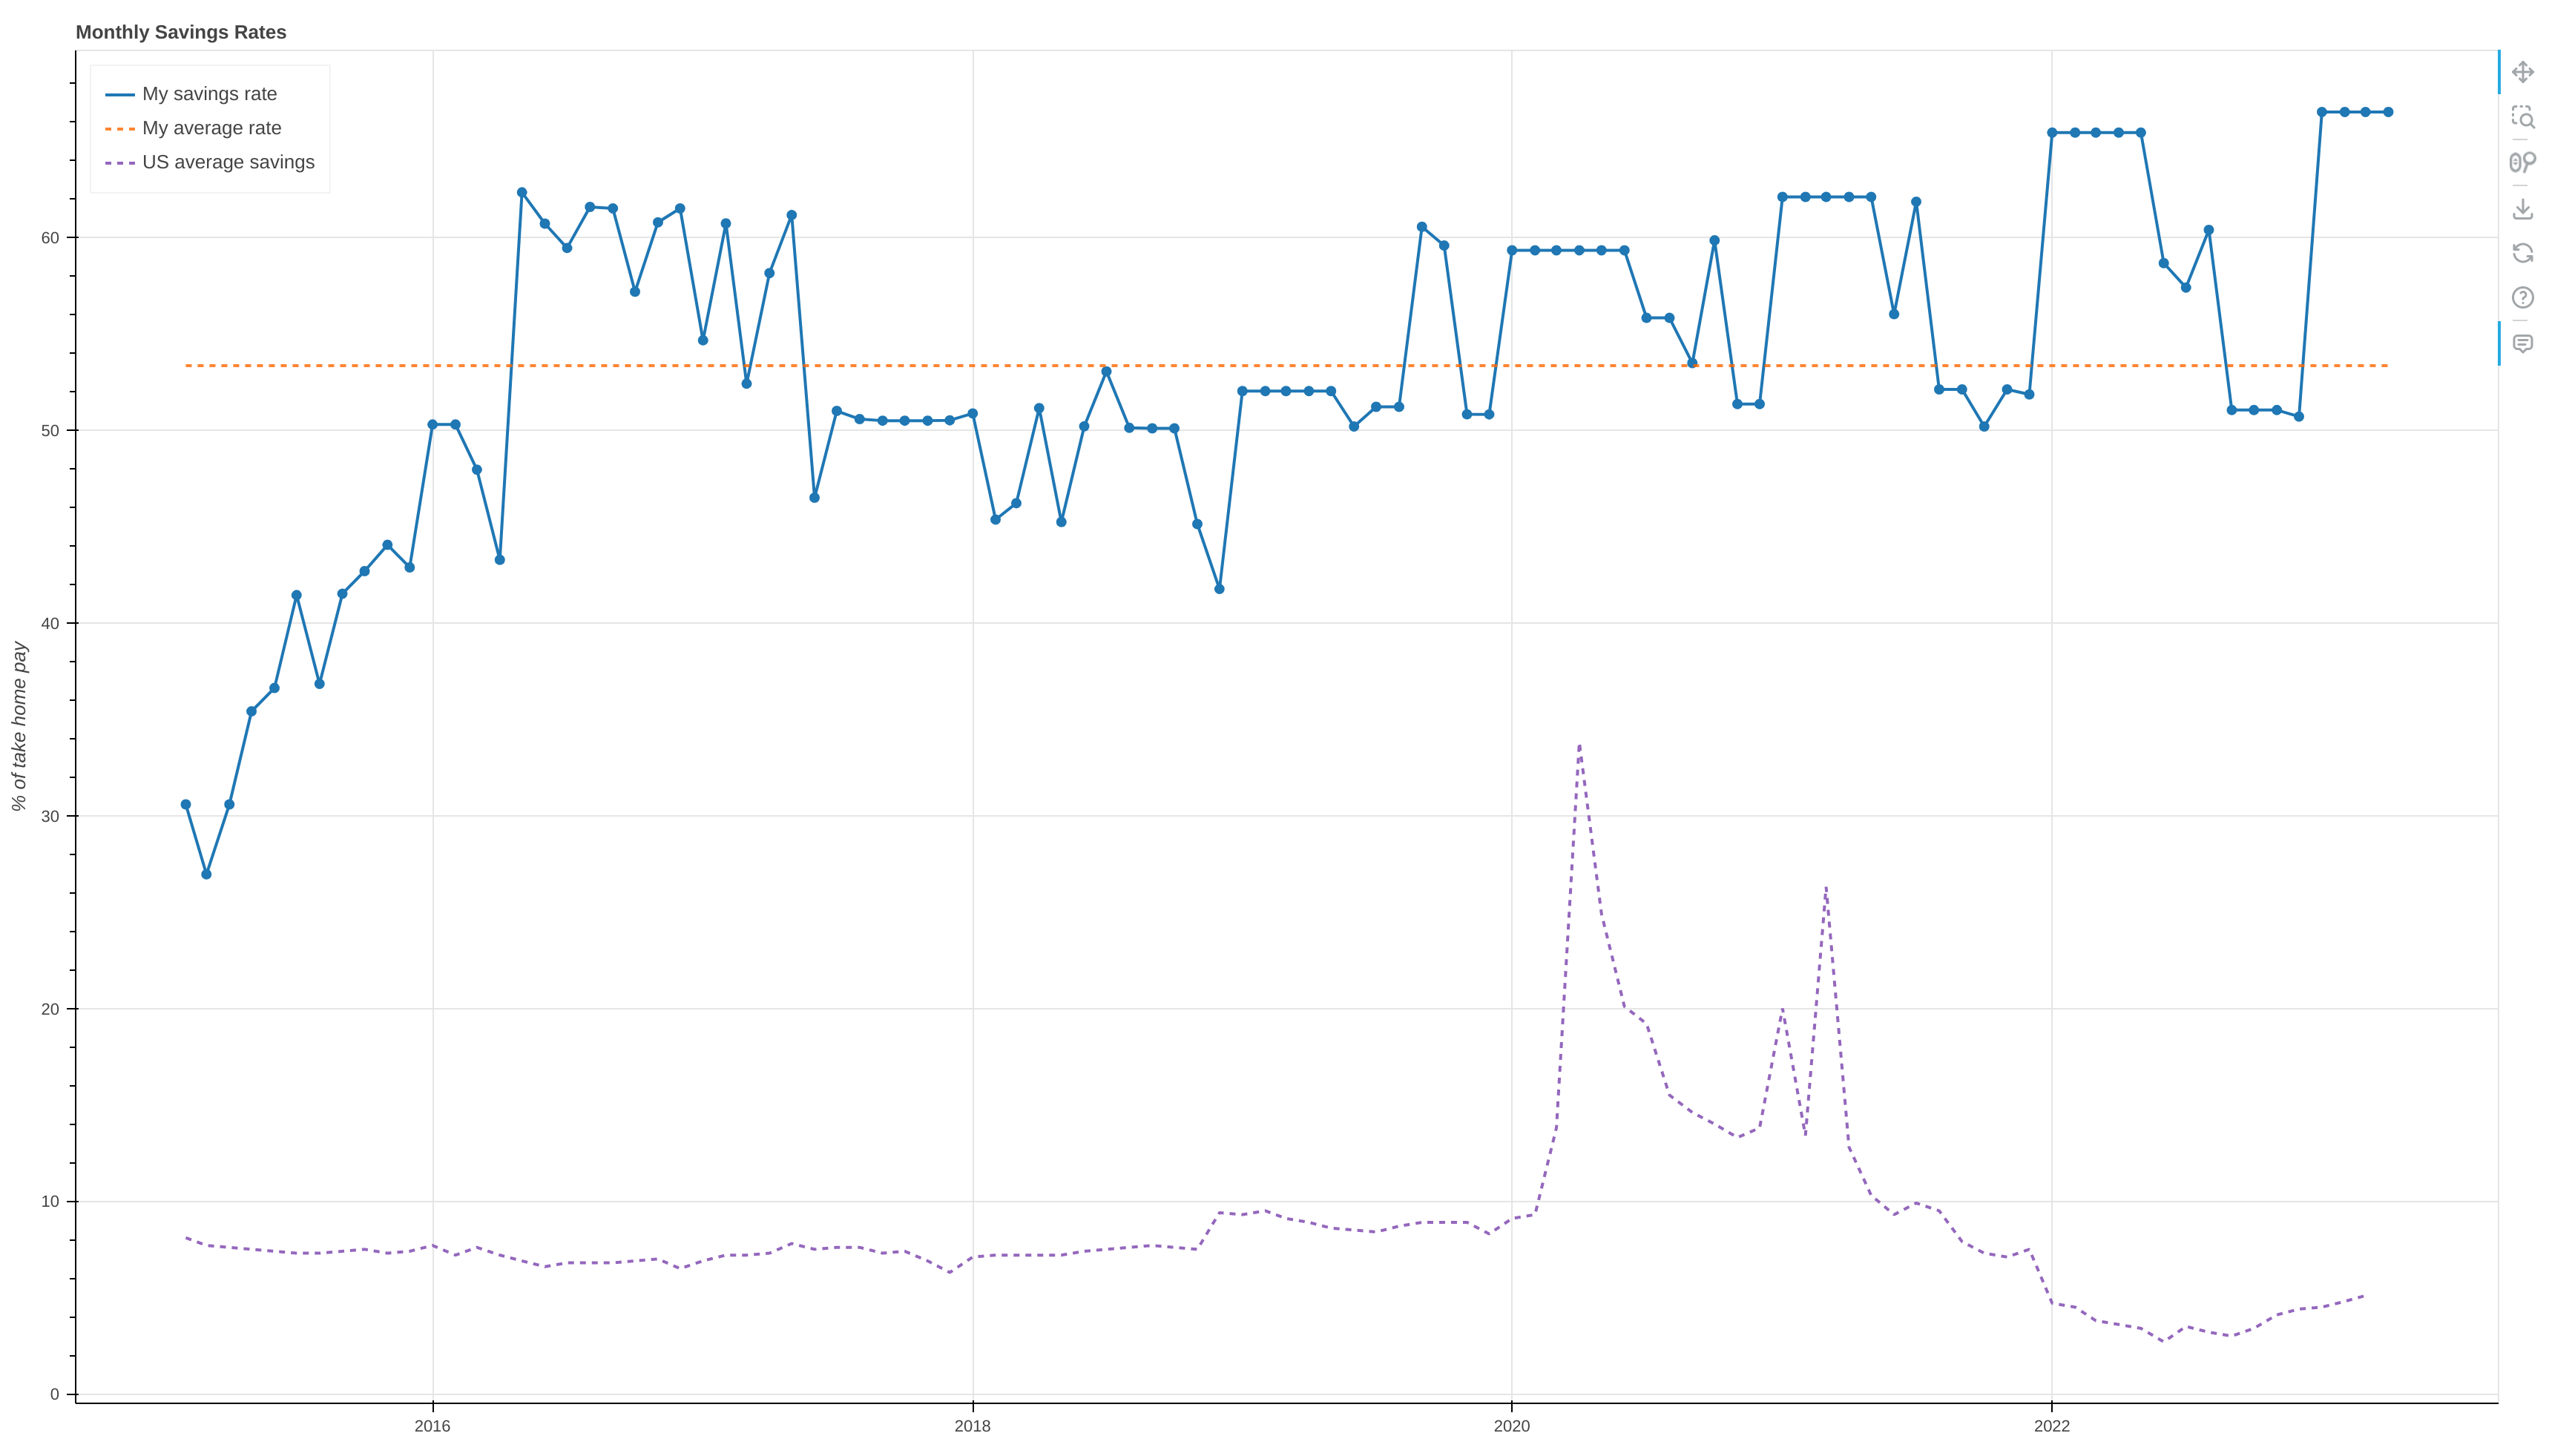
MMM Savings Rate is a tool that allows users to calculate and track their monthly savings rates over time. It was developed using functions from the FI module and plots savings rates using Bokeh. Users simply enter their savings and income data into a spreadsheet. Unique spreadsheet column headers are mapped to the application through user configuration files, allowing the utility to be used with any custom spreadsheet. When the simulation runs, the user's monthly savings rates are plotted on a line graph.
Users may also supply secondary, "enemy" spreadsheets. This feature is provided to make the experience fun, game-like, and competitive for people who prefer such an experience. If an enemy spreadsheet is provided, the enemy savings rates are plotted alongside those of the main user. This feature is optional.
MMM Savings Rate was inspired by Mr. Money Mustache. Visit the Mr. Money Mustache website and read this article to learn more.
Installation
This package should generally be installed using pip.
For users
pip install git+https://github.com/bbusenius/MMM_Savings_Rate.git#egg=mmm_savings_rate
For developers
pip install -e git+https://github.com/bbusenius/MMM_Savings_Rate.git#egg=mmm_savings_rate
Setting up the application
In order to get things going, you'll only need to take the following steps:
- Setup a directory of spreadsheet files with the financial data needed to run the simulation.
- Configuration:
- Create an account-config.ini with user information.
- Create a config.ini with personal settings and column mappings.
- Run the simulation command with a path to your configuration files.
Spreadsheet files
MMM Savings Rate was designed to be flexible in order to work with a variety of spreadsheets. At the moment, spreadsheets must be saved as .xlsx or .csv files, however, column headers can be unique, so it doesn't matter what labels you use to categorize things. To get started you'll need financial data for both income and savings.
This data can exist in a single spreadsheet with other financial data or it can exist in separate spreadsheets. How you set it up is your choice, however, certain data is required. The application will allow you to map your column labels to fields, so you don't have to name them the same as outlined here. You also might want to split some of these fields over multiple columns in your spreadsheet. Jump to the configuration section to learn how to do this. However you decide to enter the data in your spreadsheet, all of the following fields must be represented in some fashion.
- Date for pay - the date of your paycheck or date associated with the income being entered. The application can parse most date formats.
- Gross Pay - the amount of money you made in its entirety before taxes were withdrawn.
- Employer Match - money contributed to a retirement plan by your employer.
- Taxes and Fees - any taxes and fees taken out of your paycheck before it was delivered, e.g. FICA, Medicare, etc.
- Savings Accounts - a dollar amount (mapped to 1 or multiple accounts)
- Date for savings - the date you saved money into each account.
Note about "Savings Accounts": you might have multiple savings accounts, e.g. Bank Account, Vanguard Brokerage, Roth. Each one of these would contain a dollar amount representing the quantity of money saved for the month. Mapping will be handled in the configuration stage.
For example spreadsheets please look in the csv directory. This should give you a good idea of how to lay things out.
Configuration
In order to run the simulation the following two files are required:
- account-config.ini - the configuration for users. Think of this as a listing of users. Each user has an id, name, and a link to his or her personal configuration.
- config.ini - the configuration for the main user. Think of this as all of your personal settings.
Optional, "enemy" config files can be named however you like, e.g. config-spouse.ini. These should be setup in a similar fashion as config.ini and they should be listed as pipe separated groupings under "enemies" in account-config.ini.
account-config.ini
A file must exist with the name account-config.ini. An example account-config.ini might look like this:
[Users]
; Unique ID, name, and config file name for user.
self = 1,My name,config.ini

; Unique ID, name, and pipe separated list of config
; file names for user's enemies.
enemies = 2,Joe,config-spouse.ini|3,Brother,config-brother.ini
The [Users] section is required. The "self" field represents the main user (you). This field should contain a comma separated list with a unique numerical ID, followed by a name, and the name of a main user config file.
The "enemies" field is optional. If it's being used, it should be setup the same as the self field, however, if more than one enemy exists, this can be a pipe separated list of comma separated values.
config.ini
The config.ini file is the second configuration file. This file is required. It contains all of your personal settings and spreadsheet mappings.
Main settings
The majority of the main settings are listed under [Sources]. Settings include:
- pay - a full path to your income spreadsheet.
- pay_date - the name of a column header for the dates of income or payment transactions.
- savings - a full path to your savings spreadsheet (can be the same file used for pay).
- savings_date - the name of a column header for the dates of income or payment transactions.
- gross_income - the name of a column header in your spreadsheet representing gross pay.
- employer_match - the name of a column header in your spreadsheet that represents your employer match.
- taxes_and_fees - the names of column headers in your spreadsheet containing taxes and fees.
- savings_accounts - the names of column headers in your spreadsheet that contain savings data from an investment account or accounts.
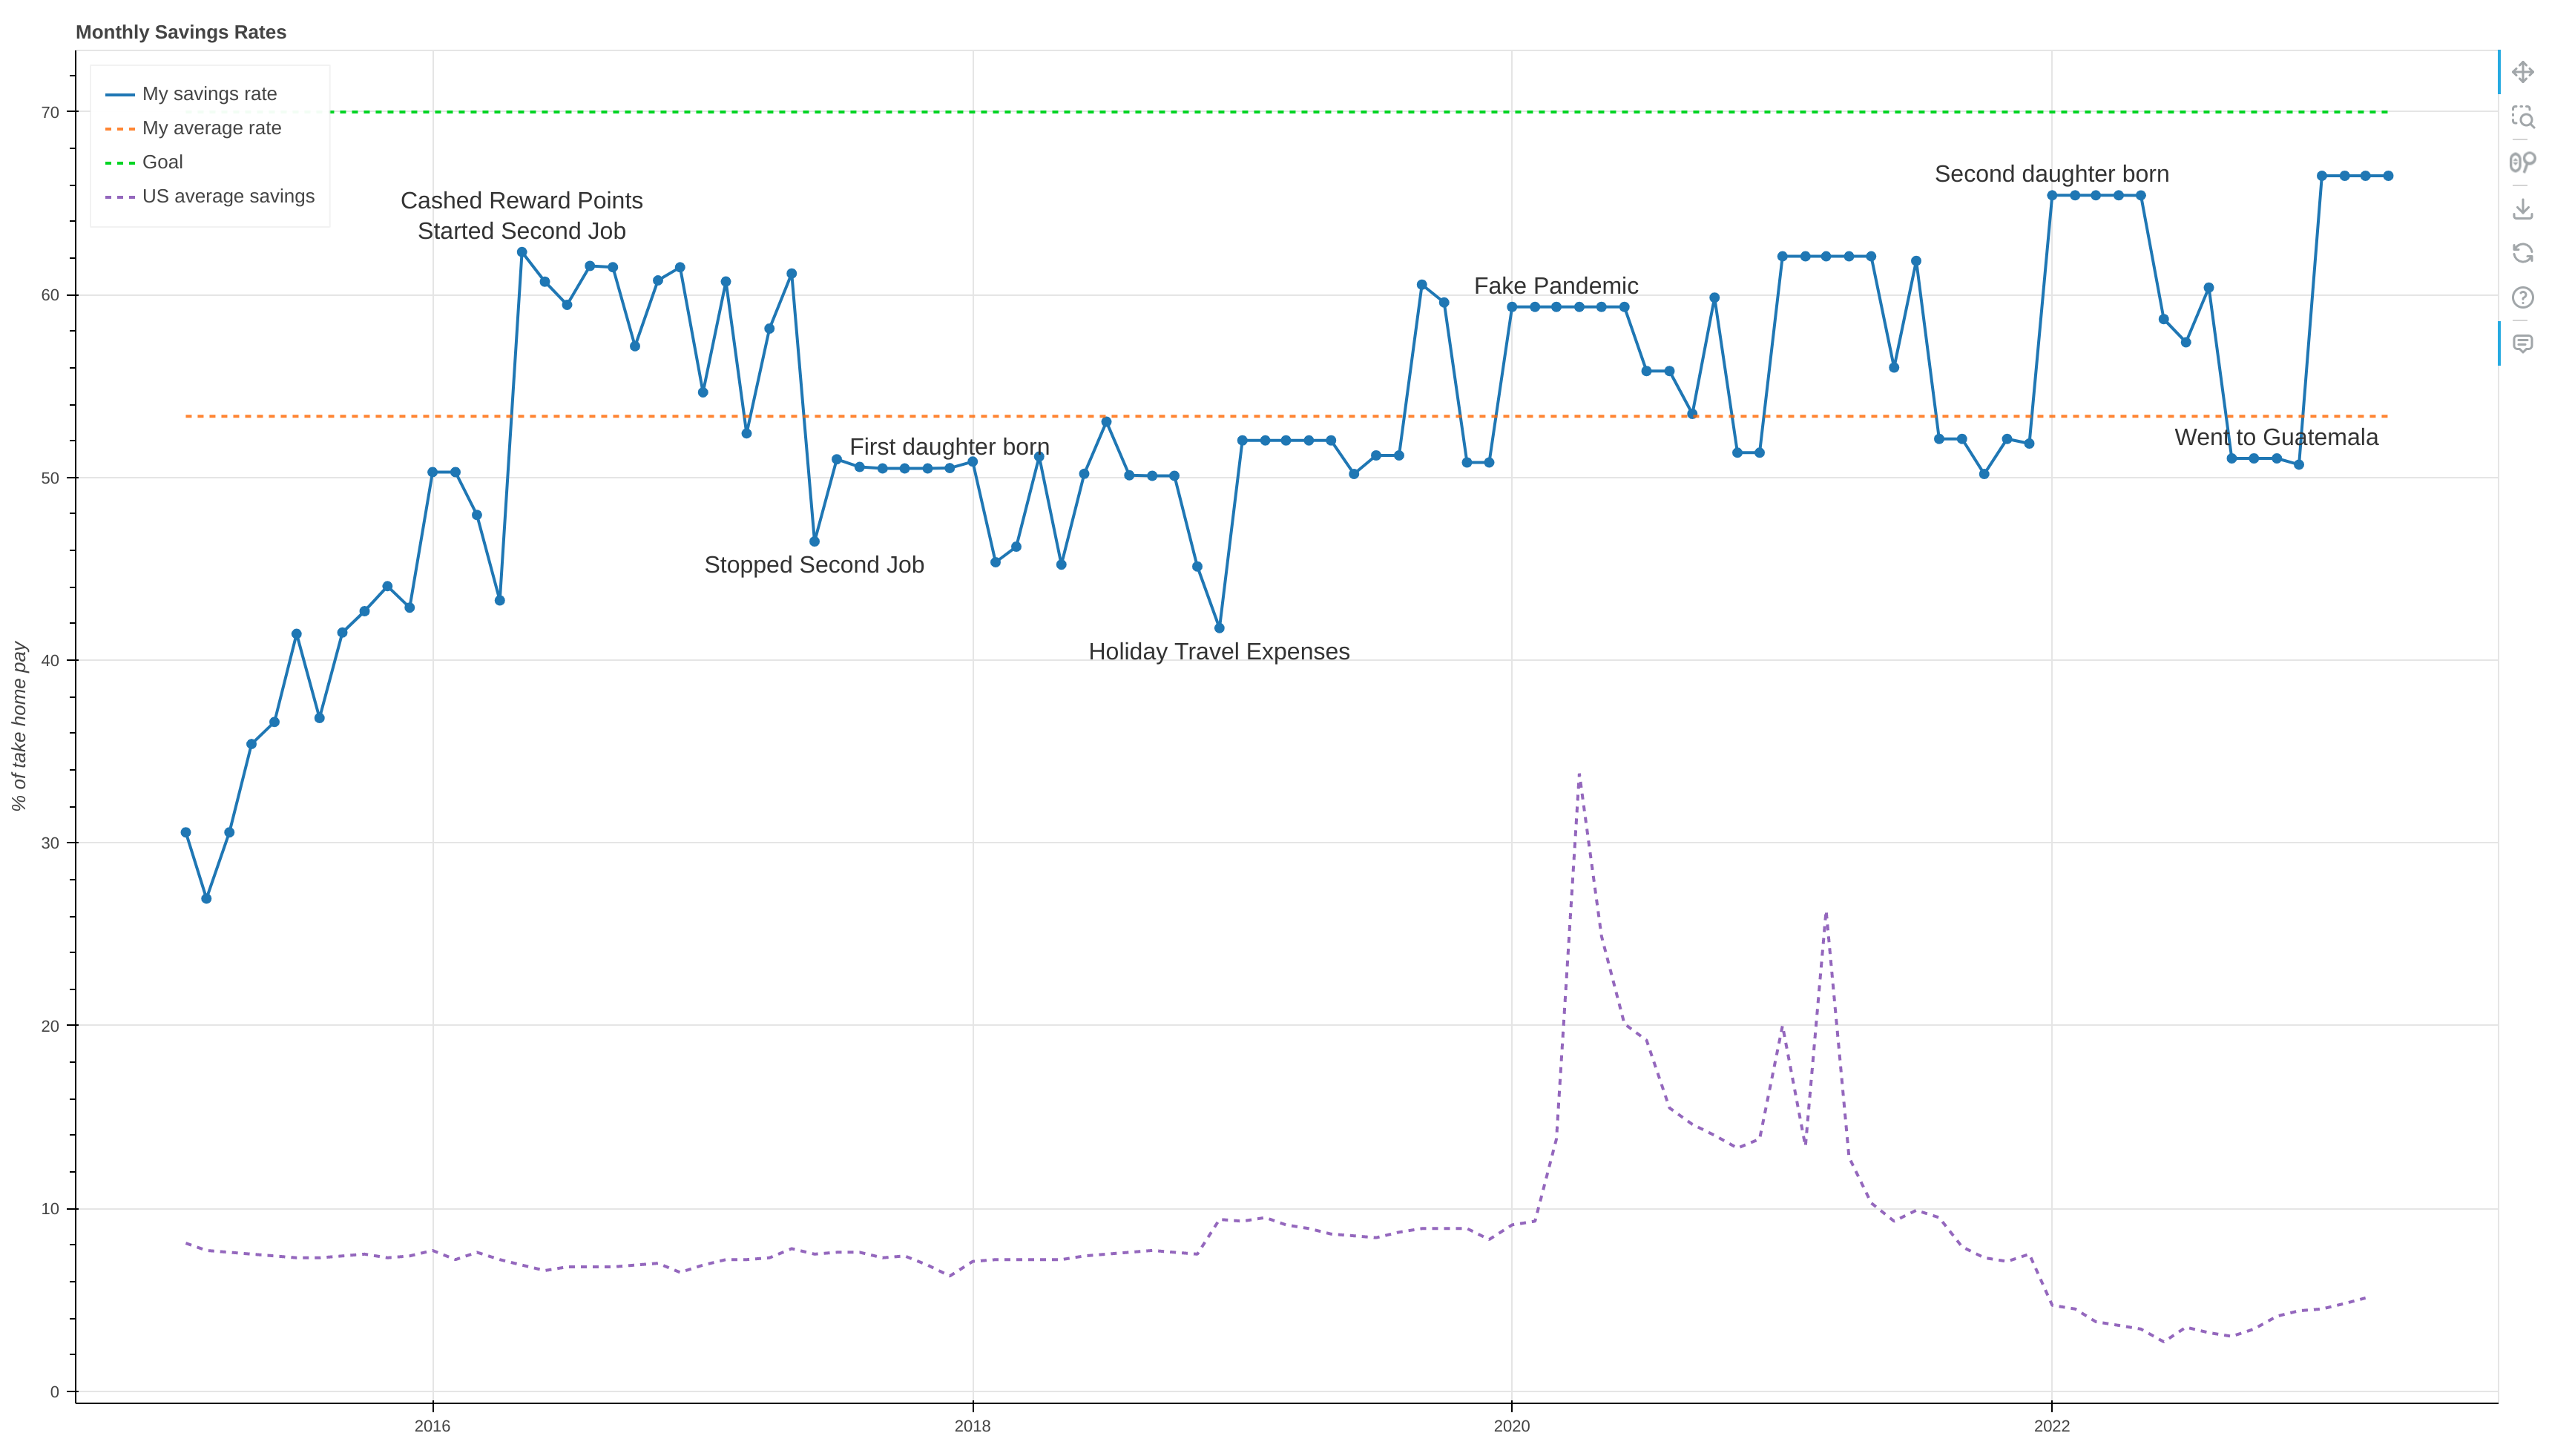
- goal - optional setting that allows you to set a savings rate goal that you're trying to reach.
- war - allows you to show or hide, "enemy" plots on your graph. Set this to, "off" if you only want to see your own data.
Graph settings
Settings under [Graph] allow you to change the width and height of the plot that's generated (though plots are generally responsive).
Additional settings
US Average Savings Rates from FRED
Optional settings allow you to plot the average US savings rates alongside your own. This data comes from the Federal Reserve Economic Data (FRED) at the Federal Reserve Bank of St. Louis.
- fred_url - the url of the FRED API endpoint.
- fred_api_key - an API token to use FRED.
In order to use these settings, you will need to sign up for an account with FRED and request an API token. This takes about 5 minutes and can be done on their website.
Once you enable FRED, you will be able to see how your savings rates dominate the US average*.
*US average savings rates calculated by FRED are generated after removing outlays from personal income. Since outlays include purchases of durable and non-durable goods, these savings rates are inflated. Even so, as a Mustachian you will easily beat these averages.
Notes and goal
If you want to annotate points on your plot with text from your spreadsheet, you can map a notes field. This should match a column header on your spreadsheet. If you're using separate spreadsheets for savings and income, the application will look for the same column name in both spreadsheets and de-dupe duplicate notes for the same month while displaying all notes from both spreadsheets for the same month if they're unique.
- notes - the name of a column header that maps to notes or special events that you want to show on your plot.
A goal can be added to your plot as well.
- goal - numeric value of a savings rate goal you'd like to reach, e.g. 70.
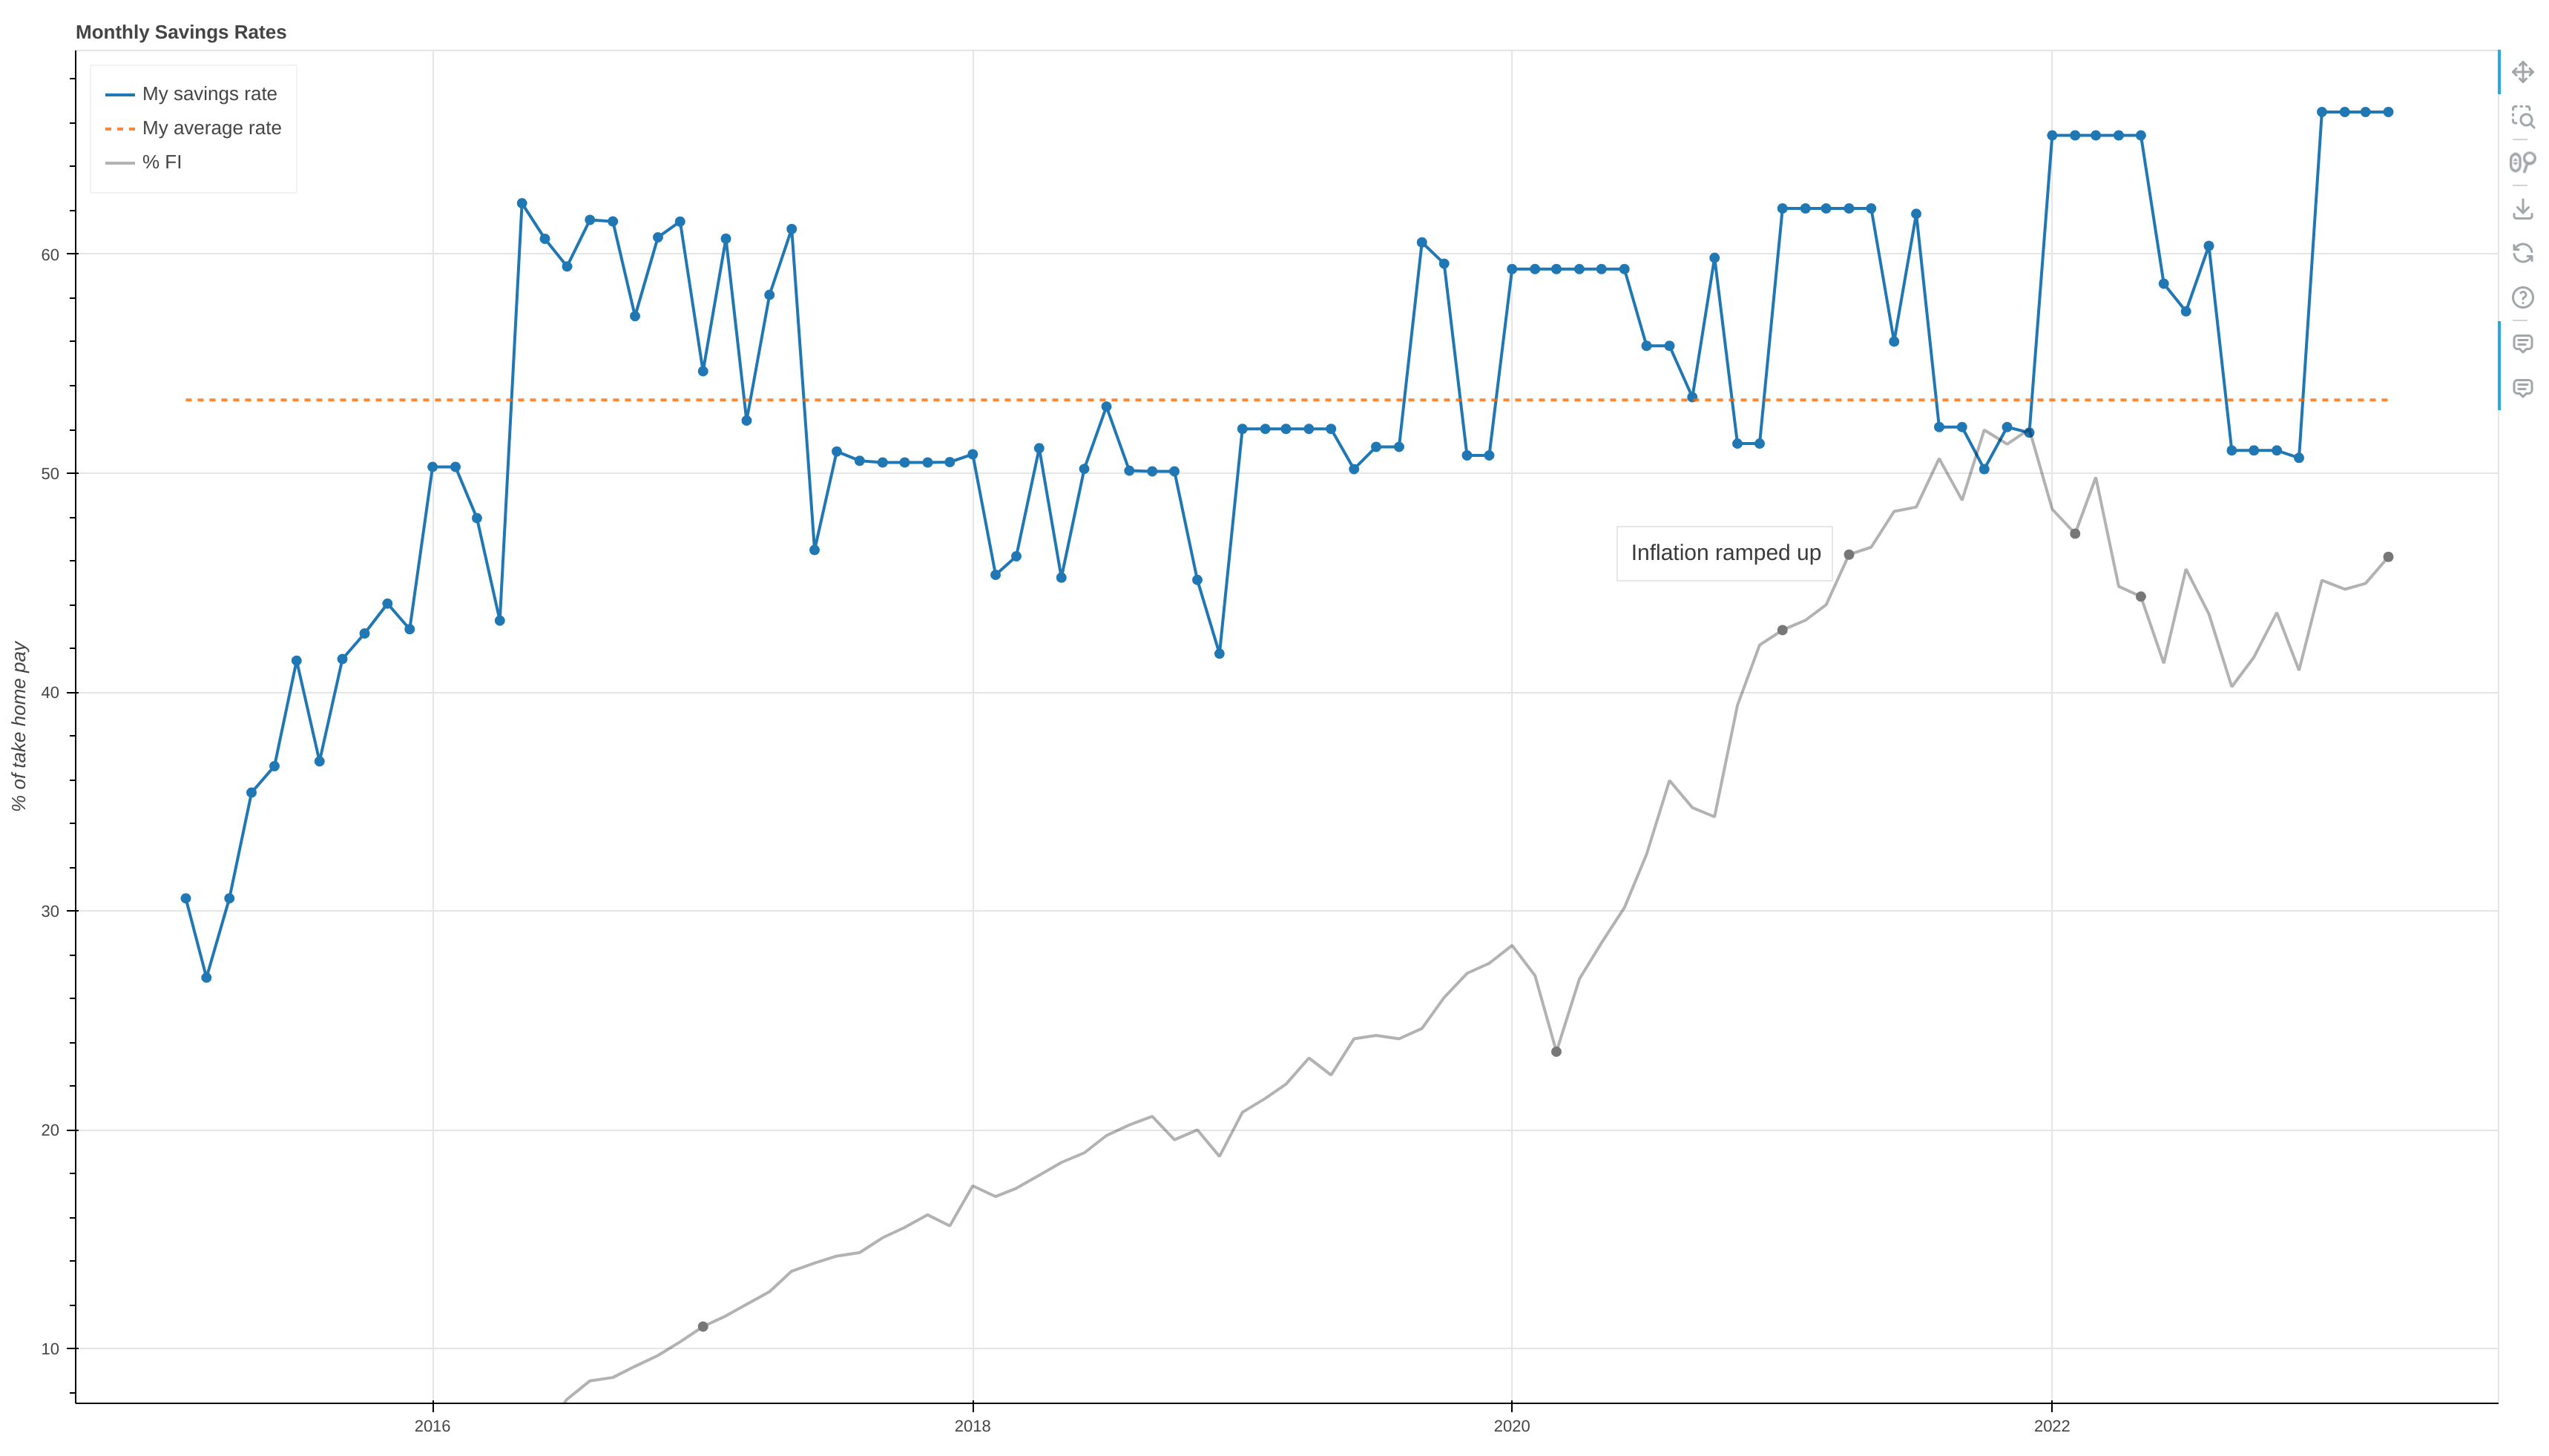
% FI
If you want to plot your progress towards FI as a percentage of your FI number, you can enable this with the following settings in your config.ini:
- fi_number - your FI number.
- total_balances - a spreadsheet heading that maps to a column where you track the total monthly balance of all your accounts.
- percent_fi_notes - a spreadsheet heading that maps to a column with text that you want to show on the % FI plot. Entries will appear as event dots on the plot and will display tooltips with the notes on hover.
This doesn't take into account liabilities so, if you have them, you can just as easily map these configurations to a column that tracks net worth.
Running the simulation
Once you have your spreadsheet and your configuration files ready to go, you can run the application. Just open a terminal and type the command:
savingsrates -p /home/joe_mustachian/Documents/Code/Projects/MMM_Savings_Rate/config/
The -p flag should specify the full path to your directory of configuration files. When you run the command a plot of your monthly savings rates should open in a browser window.
Requirements
This utility runs on python 3.x. All additional dependencies should be automatically downloaded and included during installation. If you'd like to see all of what will be installed look at setup.py and requirements.txt.
Running tests
python3 -m unittest discover tests -p 'test_*.py'
Project details
Download files
Download the file for your platform. If you're not sure which to choose, learn more about installing packages.
Source Distribution
File details
Details for the file MMM_Savings_Rate-1.0.tar.gz.
File metadata
- Download URL: MMM_Savings_Rate-1.0.tar.gz
- Upload date:
- Size: 44.4 kB
- Tags: Source
- Uploaded using Trusted Publishing? No
- Uploaded via: twine/4.0.2 CPython/3.10.6
File hashes
| Algorithm | Hash digest | |
|---|---|---|
| SHA256 |
89fabf59f3abf6e1f7ae7fe64c92ae8baa1f2610124804a9038c3d0c4f1ebca2
|
|
| MD5 |
8e6bf05a5836030181e2fd8dea614994
|
|
| BLAKE2b-256 |
c36162ad27a74cf0f649638a78a10fa115fac0a80376375c3813b375dc470438
|


