
AgentMode ✨
AgentMode is an all-in-one Model Context Protocol (MCP) server that connects your coding AI to dozens of databases, data warehouses, data pipelines, cloud services, and more. This extension is designed to streamline your development workflow by providing seamless integration with various data and cloud platforms.

Installation 👨💻
quick start with VS code
- Install our VS Code extension.
- Click the 'Install' button next to the agentmode extension.
- Start the MCP server via the Command Palette (
Ctrl+Shift+PorCmd+Shift+Pon macOS), then type in 'MCP', then select 'MCP: List Servers' and click on agentmode. - Click on the 'AgentMode' text in the bottom-right status bar corner of VS Code to open a browser tab, sign in, and then setup your connections.
without VS code (Python package)
- Open the terminal and install uv with
curl -LsSf https://astral.sh/uv/install.sh | sh uv inituv add agentmodeuv run agentmode
MCP configuration for VS code
If you installed our VS Code extension, it will automatically create or update your settings.json file for you. If you installed agentmode manually, please create a .vscode/settings.json file in your workspace, and replace ‘YOUR_INSTALLATION_FOLDER’ with the path to your uv environment below:{
"mcp": {
"servers": {
"agentmode": {
"command": "cd 'YOUR_INSTALLATION_FOLDER' && uv run agentmode",
"env": {}
}
}
}
}
MCP configuration for Cursor
Please create a \~/.cursor/mcp.json file in your home directory. This makes MCP servers available in all your Cursor workspaces. Please replace 'YOUR_INSTALLATION_FOLDER' below with the folder you setup your uv environment in:{
"mcpServers": {
"inputs": [],
"servers": {
"agentmode": {
"command": "cd 'YOUR_INSTALLATION_FOLDER' && uv run agentmode",
"env": {}
}
}
}
}
MCP configuration for Windsurf
Open the file ~/.codeium/windsurf/mcp_config.json Add the code below to the JSON file. Press the refresh button in Windsurf. Please replace 'YOUR_INSTALLATION_FOLDER' below with the folder you setup your uv environment in:{
"mcpServers": {
"inputs": [],
"servers": {
"agentmode": {
"command": "cd 'YOUR_INSTALLATION_FOLDER' && uv run agentmode",
"env": {}
}
}
}
}
MCP (Model Context Protocol) 🌐
AgentMode leverages the Model Context Protocol (MCP) to enable your coding AI to:
- Access and query databases and data warehouses.
- Interact with data pipelines for real-time or batch processing.
- Use a web browser.
- See logs from your production services.
- Connect to cloud services for storage, computation, and more.
Connections 🔌
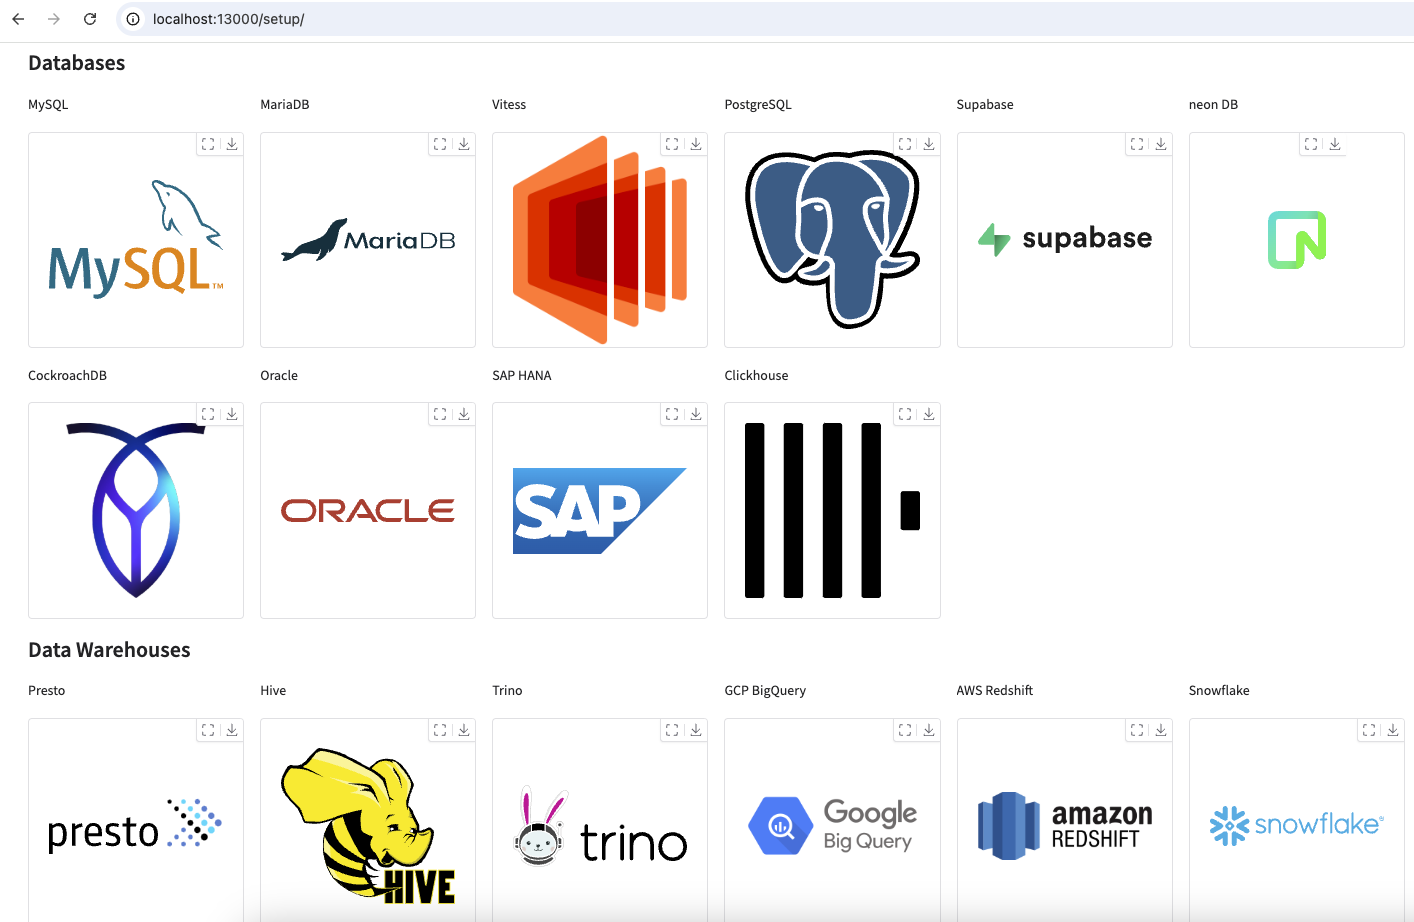
AgentMode supports a wide range of connections, including:
- Databases: MySQL, PostgreSQL, etc.
- Data Warehouses: Snowflake, BigQuery, Redshift, etc.
- Data Pipelines: Airflow, Prefect, etc.
- Cloud Services: AWS, Azure, Google Cloud, etc. (coming soon!)
To configure connections, follow these steps:
- Start the MCP server and go to
http://localhost:13000/setup - Click on the icon of the connection you'd like to setup.
- Fill out the connection details and credentials (all credentials are stored locally on your machine).
- Any required dependencies will be installed on-the-fly.
Help 🛟
If you encounter any issues or have questions, you can:
- See the documentation.
- Open an issue in the GitHub repository.
- Chat with us on our Discord server.
Contributing 💬
- add more connectors & tests
1 maintainer

Release files for agentmode 0.1.16
For a detailed explanation of source distributions (sdists) and built distributions (wheels), please see the package formats documentation.
Source distribution (sdist)
| File | Size | Uploaded | |
|---|---|---|---|
| agentmode-0.1.16.tar.gz | 412.9 kB | Details |
Built distribution (wheel)
| File | Interpreter | ABI | Platform | Reset |
|---|---|---|---|---|
| agentmode-0.1.16-py3-none-any.whl | Python 3 | none | any | Details |
Total release size: 835.4 kB
Release files / agentmode-0.1.16.tar.gz
| Download URL | agentmode-0.1.16.tar.gz |
|---|---|
| Size | 412.9 kB |
| Tags | Source |
|
SHA-256 checksum How to use checksums |
c0baa7b213e7c382e48e5fe75fae11ac12c00f3be116372d94cdb05c7296325a
|
|
BLAKE2b-256 checksum How to use checksums |
d5d07f2b614f06ff252e29c0c42c2fb36ad35db6d2bdd406c8a72eba92981052
|
| Upload date | |
|
Uploaded using Trusted Publishing? What is trusted publishing? |
No |
| Uploaded via |
uv/0.7.2
|
Release files / agentmode-0.1.16-py3-none-any.whl
| Download URL | agentmode-0.1.16-py3-none-any.whl |
|---|---|
| Size | 422.5 kB |
| Tags | Python 3 |
|
SHA-256 checksum How to use checksums |
a1e8b0a01b66d2377b6d137c4d138db2005be0096378a0e393251257858a26ef
|
|
BLAKE2b-256 checksum How to use checksums |
e3c0889c7f68e55e5923aaa14b03b542772d0598ae335d92fee7f9e6c23f4569
|
| Upload date | |
|
Uploaded using Trusted Publishing? What is trusted publishing? |
No |
| Uploaded via |
uv/0.7.2
|














