
A web server that interacts with Google's AIstudio to extract model responses

Project description
AI Studio to Web Server
A Flask-based web server that provides an OpenAI-compatible API interface for Google's AI Studio. This tool automates the process of sending prompts to AI Studio through browser automation, allowing you to use all State of the Art Gemini models through standard OpenAI compatible API calls.
TLDR; The website aistudio.google.com allows the use of Google's Gemini AI models for free. The API, however, is not free. While this program is meant to be used for coding tools, the api can be used for any text based input or output, with any conversation history or system prompt.
Features
- OpenAI-Compatible API: Drop-in replacement for OpenAI's chat completions endpoint
- Browser Automation: Uses Playwright to automate Google AI Studio interactions
- Google Drive Integration: Automatically uploads request files to Google Drive
- Persistent Authentication: Saves Google account login for future sessions
- Configurable Settings: (change model, model tempature, etc) via JSON file
How It Works
- Request Reception: Server receives OpenAI-format API request
- Format Transformation: Converts OpenAI request format to Gemini/AI Studio format
- File Upload: Saves transformed request and uploads to Google Drive
- Browser Automation:
- Navigates to AI Studio prompt URL
- Clicks the "Run" button
- Waits for processing to complete
- Copies the markdown response
- Response Delivery: Returns response in OpenAI-compatible format
Prerequisites
- Python 3.7 or higher
- Google account with access to AI Studio (any personal google account)
- Money
- Just kidding, this is entirely free. Maybe priceless, if you've been spending a ton of money on API calls before.
One time User Setup
-
In your browser, with your personal (not work or school) google account logged in, go to aistudio.google.com
-
Follow instructions, read the Terms & Conditions, Privacy Policy, and Generative AI Use Policy, and accept.
-
Click on the settings gear in the top right, make sure Autosave is selected to on.
-
Select "Chat" from the top left or go to https://aistudio.google.com/prompts/new_chat
-
Type in anything to the chatbox and send it. It doesn't matter! We do need this for later.
-
Click on the pencil next to the chat name. The chat name is based on what you typed in for the previous step.
-
Edit the title to be "CodeRequest" and do not set a description.
-
Save the url you are currently at and put it in the aistudio_url part of the config.json file (example: https://aistudio.google.com/prompts/1XwZtRWO1_TiAb7S3Dnm9iveQzDj1cgbR)
-
Now, go to Google Drive for the same account you used for AI Studio
-
Locate the new folder called "Google AI Studio"
-
Click into the folder. You should see a file called "CodeRequest"
-
Copy the link at the top of your browser window. Move this link into drive_folder_url in the config.json
Installation
Option 1: Install from PyPI (Recommended)
pip install aistudio-to-webserver
python -m playwright install chromium
Option 2: Install from Source
- Clone or download this repository.
- Install required dependencies from a terminal window located inside the folder:
pip install -r requirements.txt
- Install Playwright browsers:
python -m playwright install chromium
Configuration
Before running the server, you need to configure the config.json file:
Required Configuration (from the One time User Setup)
- Google Drive Folder URL: Replace
FILL_IN_YOUR_FOLDER_URLwith your Google Drive folder URL for AI studio - AI Studio Prompt URL: Replace
FILL_IN_YOUR_PROMPT_URLwith your AI Studio prompt URL
Setup and First Run
-
Configure URLs: Edit
config.jsonand fill in your Google Drive folder URL and AI Studio prompt URL -
First-time Authentication:
If installed from PyPI:
aistudio-to-webserver
If installed from source:
python api_server.py- The server will open a browser window for Google authentication
- Log in to your Google account (this can be a alt account, just any personal google account)
- Authentication state will be saved for future use (so you don't have to log in again!)
- Follow the on-screen instructions in the terminal
-
Subsequent Runs:
If installed from PyPI:
aistudio-to-webserver
Alternative ways to run (PyPI install):
python -m aistudio_to_webserver
If installed from source:
python api_server.py- The server will start immediately using saved authentication
Usage
Vibecoding Setup (what else were you going to use this program for anyways???)
Recomended: Cline, Roo Code, and Kilo Code. (in no specific order, try all 3 if you wish)
Also supported: Aider, Continue, anything that supports an "OpenAI Compatible API"
Not Supported (Limitations set by developer): Cursor, Windsurf, and many other editors that require you to pay a set price per month.
Example: Cline (easiest, what I use)
Settings -> API Configuration
- API Provider: OpenAI Compatible
- Base URL: http://127.0.0.1:8383/v1/
- API Key: You can set this to anything you want.
- Model ID: Again, whatever you want. The model is controlled through config.json however in the future I might have it through here.
Example of Cline in use when turning a CLI game into pygame
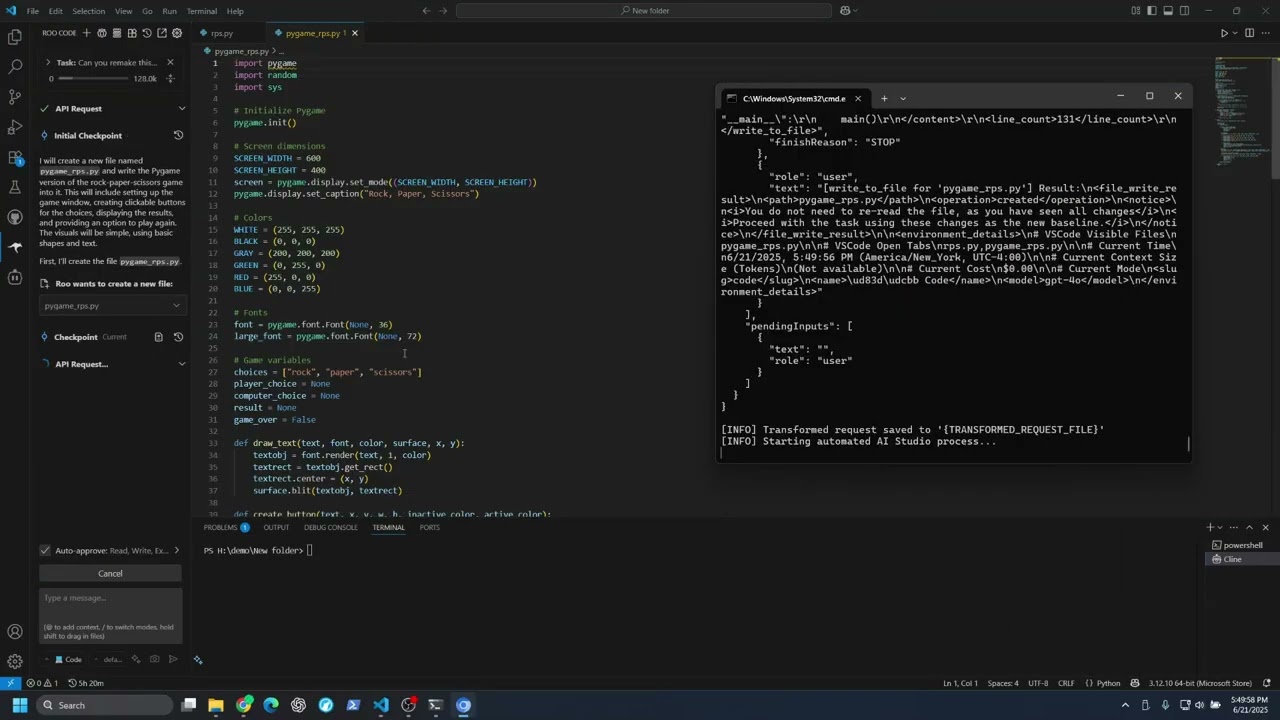
Example: Roo Code (easy)
Settings -> Providers
- API Provider: OpenAI Compatible
- Base URL: http://127.0.0.1:8383/v1/
- API Key: You can set this to anything you want.
- Model ID: Pre-Filled to gpt-4o. It's not really GPT 4o but is only a visual. Set to anything you like. The real model is controlled at config.json
- Scroll down, set Context Window Size to 1000000 (optional)
- Scroll down, deselect Image Support. (optional)
Example: Kilo Code (mix between Cline and Roo Code)
- API Provider: OpenAI Compatible
- Base URL: http://127.0.0.1:8383/v1/
- API Key: You can set this to anything you want.
- Model ID: Pre-Filled to gpt-4o. Instead, type in "Gemini" and click "Use custom: Gemini"
- Scroll down, set Context Window Size to 1000000
- Scroll down, deselect Image Support.
Example: Continue (also known as Continue.dev) with VS Code.
If you prefer Continue, great! However, setup for a new user is confusing along with using a custom API. I recomend the more popular Cline or Roo Code instead.
If downloading for the first time, you will be asked to sign in. Don't, you don't need to.
-
Go to the "Select Model" Tab
-
Click "+ Add Chat Model" and choose Provider:OpenAI and Model GPT-4o. Enter any string of text as an API key, eg, "apikey"
-
A config.yaml file should have opened in VS Code. If it didn't, Click "GPT-4o," then click the settings gear icon that appears to the left of the "Models" text
-
Below "apiKey:" add this: apiBase: "http://127.0.0.1:8383/v1/"
-
In the config.yaml file that opened, if you wish, change the name to "Gemini" from "GPT-4o" and DO NOT change the model from gpt-4o to anything else. Otherwise this disables agent mode.
-
Unrelated, but continue.dev makes an api call for every new chat (to give the chat a title). This can be slow with this program. I would recommend you go into settings (gear, top right), and turn off "Enable Session Titles".
-
Still unrelated but recommended. In settings -> Experimental Settings, Turn on Auto-Accept Agent Edits if you want similar functionality to Cline or Roo auto-accept.
Example:
name: Local Assistant version: 1.0.0 schema: v1 models: name: Gemini provider: openai model: Gemini apiKey: apikey apiBase: "http://127.0.0.1:8383/v1/"
API Endpoint
The server provides an OpenAI-compatible endpoint at:
POST http://127.0.0.1:8383/v1/
Of course, 127.0.0.1:8383 can be different based on what you set in the config file.
File Structure
AIstudioToWebServer/
├── api_server.py          # Main server script
├── config.json            # Configuration file
├── requirements.txt       # Python dependencies
├── browser_data/          # Browser persistence data (created automatically)
├── CodeRequest            # Temporary request file uploaded to drive (created automatically)
└── README.md             # This file (hello!)
Help! This annoying Chromium window pops up, make it go away!
Currently Headless mode doesn't work for Google AI Studio or Google Drive, so the browser does need to be "headed." otherwise the program does not work. Basically, the browser needs to stay on the screen. I'm working on making this not be an issue, possibly through docker, but it's not that important
However, Windows, MacOS, and many Linux Distros have a solution.
- For Windows (10 or 11): (Windows key + Tab), then click "New desktop" and click into that desktop. Open the program in that desktop, then switch to this desktop. The program will work in the backround without getting in your way.
- For Mac, enter Mission Control. In the Spaces bar, click +, this is pretty similar to Windows.
- For Gnome on Linux (also Ubuntu): Open the Activities overview. Click on a workspace in the workspace selector on the right side of the screen to view the open windows on that workspace. Click on any window thumbnail to activate the workspace.
- For Linux outside of Gnome/Ubuntu, it depends on your desktop environment. It's likely yours supports it.
OR, if you are ok with seeing the terminal and chromium window in the taskbar, you can minimize them entirely.
Help! Google Drive says "Upload Failed" when the "CodeRequest" File is uploading!
Google Drive appears to sometimes block reuploads of a certain file after about 300 times. (So 300 requests)
- Delete the CodeRequest file on Google Drive from the Google Drive folder.
- Go to back to AI Studio
- Click on the settings gear in the top right, make sure Autosave is selected to on.
- Select "Chat" from the top left or go to https://aistudio.google.com/prompts/new_chat
- Type in anything to the chatbox and send it.
- Click on the pencil next to the chat name. The chat name is based on what you typed in for the previous step.
- Edit the title to be "CodeRequest" and do not set a description.
- Save the url you are currently at and put it in the aistudio_url part of the config.json file (example: https://aistudio.google.com/prompts/1XwZtRWO1_TiAb7S3Dnm9iveQzDj1cgbR), this is different then the old url.
Security Notes
- The server runs on localhost by default for security, no other computer on the network can connect to the API.
- Chats used in AI Studio (may) be read by humans, as outlined in these terms.
- Consider the security implications of saving authentication data of your google account to a folder on your pc.
Other Configuration Options (You don't need to change these)
Server Settings
"server": {
  "host": "127.0.0.1",        // Server host (localhost)
  "port": 8383,               // Server port
  "secret_key": "..."         // Flask secret key
}
Browser Settings
"browser": {
  "headless_mode": false,     // Run browser in background (true) or visible (false). Must be kept to False.
  "visual_debug_mode": false, // Show visual debugging indicators
  "data_dir": "./browser_data" // Directory for browser data persistence
}
Mouse Hover Configuration
"hover_config": {
  "offset_x": -15,           // Mouse hover X offset for button clicking
  "offset_y": 10             // Mouse hover Y offset for button clicking
}
File Paths
"files": {
  "log_file": "api_requests.log",        // Log file name
  "transformed_request_file": "CodeRequest" // Temporary request file name
}
Gemini Model Settings (eg, you might want to adjust model temperature or the model used)
"gemini": {
  "model": "models/gemini-2.5-pro",     // Gemini model to use
  "temperature": 0.3,                   // Response creativity (0.0-2.0)
  "top_p": 0.95,                       // Nucleus sampling parameter
  "top_k": 64,                         // Top-k sampling parameter
  "max_output_tokens": 65536,          // Maximum response length
  "response_mime_type": "text/plain",  // Response format
  "enable_code_execution": false,      // Enable code execution in AI Studio
  "enable_search_as_tool": false,      // Enable search tool
  "enable_browse_as_tool": false,      // Enable browse tool
  "enable_auto_function_response": false, // Enable auto function responses
  "thinking_budget": -1                // Thinking time budget (-1 = unlimited). I wouldn't change this
}
Timeout Settings
"timeouts": {
  "max_wait_start": 1000,              // Max wait for processing to start (seconds)
  "max_wait_complete": 1,              // Max wait for processing to complete (seconds)
  "additional_wait": 1,                // Additional wait after completion (seconds)
  "before_run_button_click": 1         // Wait before clicking run button (seconds)
}
Release history Release notifications | RSS feed


Download files
Download the file for your platform. If you're not sure which to choose, learn more about installing packages.
Source Distribution
Built Distribution
Filter files by name, interpreter, ABI, and platform.
If you're not sure about the file name format, learn more about wheel file names.
Copy a direct link to the current filters
File details
Details for the file aistudio_to_webserver-1.0.1.tar.gz.
File metadata
- Download URL: aistudio_to_webserver-1.0.1.tar.gz
- Upload date:
- Size: 21.4 kB
- Tags: Source
- Uploaded using Trusted Publishing? No
- Uploaded via: twine/6.1.0 CPython/3.11.9
File hashes
| Algorithm | Hash digest | |
|---|---|---|
| SHA256 |
3a2812674e770888fbc090579bb1f585405eb0caac74f7eb4d491566cf020513
|
|
| MD5 |
2678e3ff014a08c1bfa0bf414699a859
|
|
| BLAKE2b-256 |
ddd816d2cb22020c91cfec59b9b1447eb9bfa7a79b3b838407a28e5df9a9f565
|
File details
Details for the file aistudio_to_webserver-1.0.1-py3-none-any.whl.
File metadata
- Download URL: aistudio_to_webserver-1.0.1-py3-none-any.whl
- Upload date:
- Size: 16.8 kB
- Tags: Python 3
- Uploaded using Trusted Publishing? No
- Uploaded via: twine/6.1.0 CPython/3.11.9
File hashes
| Algorithm | Hash digest | |
|---|---|---|
| SHA256 |
8eb9d6041cc7868fe3b0bcbfab20c7d7cd26f8b596b90f3db9ba4cd5604a0424
|
|
| MD5 |
bc1b42c516b290c926dec302e4a0bc87
|
|
| BLAKE2b-256 |
c72008cedd280d92b5d6ff713ec9b75448bf33205d3076678f100f019d9ad1a2
|






