An annotation and instance segmentation-based multiple animal tracking and behavior analysis package.

Project description
annolid


Annotate, segment, and track multiple animals (or any research target) in video with a single toolchain.
Table of Contents
- Overview
- Key Features
- Documentation & Support
- Quick Start
- Installation Options
- Using Annolid
- Annotation Guide
- Labeling Best Practices
- Tutorials & Examples
- Troubleshooting
- Docker
- Citing Annolid
- Publications
- Additional Resources
- Acknowledgements
- Contributing
- License
Overview
Annolid is a deep learning toolkit for animal behavior analysis that brings annotation, instance segmentation, tracking, and behavior classification into a single workflow. It combines state-of-the-art models—including Cutie for video object segmentation, Segment Anything, and Grounding DINO—to deliver resilient, markerless tracking even when animals overlap, occlude each other, or are partially hidden by the environment.
Use Annolid to classify behavioral states such as freezing, digging, pup huddling, or social interaction while maintaining fine-grained tracking of individuals and body parts across long video sessions.
Python support: Annolid runs on Python 3.10–3.13. The toolkit is not yet validated on Python 3.14, where several binary wheels (PyQt, Pillow) are still pending upstream releases.
Key Features
- Markerless multiple-animal tracking from a single annotated frame.
- Instance segmentation powered by modern foundation models and transfer learning.
- Interactive GUI for rapid annotation (LabelMe-based) plus automation with text prompts.
- Behavioral state classification, keypoint tracking, and downstream analytics.
- Works with pre-recorded video or real-time streams; supports GPU acceleration.
- Optional EfficientTAM video tracking backend, fully integrated and auto-downloaded (no separate installation needed).
Documentation & Support
- Latest documentation and user guide: https://annolid.com (mirror: https://cplab.science/annolid)
- Community updates and tutorials are shared on the Annolid YouTube channel.
- Sample datasets, posters, and publications are available in the
docs/folder of this repository. - Join the discussion on the Annolid Google Group.
Quick Start
Install Anaconda, then set up Annolid in a new environment:
conda create -n annolid-env python=3.11
conda activate annolid-env
conda install git ffmpeg
git clone --recurse-submodules https://github.com/healthonrails/annolid.git
cd annolid
pip install -e .
annolid  # launches the GUI
The annolid command detects your hardware automatically. If you need tighter control (for example, to target a specific CUDA toolkit), use the environment files described below.
Installation Options
Conda environment (GPU-ready, Ubuntu 20.04 tested)
git clone --recurse-submodules https://github.com/healthonrails/annolid.git
cd annolid
conda env create -f environment.yml
conda activate annolid-env
annolid
If you see CUDA capability sm_86 is not compatible with the current PyTorch installation, install a matching build:
conda install pytorch==2.2.0 torchvision==0.17.0 torchaudio==2.2.0 cudatoolkit=12.1 -c pytorch -c nvidia
Pip-only installation
python -m venv annolid-env
source annolid-env/bin/activate
pip install --upgrade pip
pip install annolid
pip install "segment-anything @ git+https://github.com/SysCV/sam-hq.git"
annolid
This route works well on machines without Conda, but you remain responsible for installing system dependencies such as ffmpeg.
uv (lightweight venv + installer)
Use uv if you prefer fast virtualenv creation and dependency resolution:
pip install --user uv  # or grab the standalone binary
git clone --recurse-submodules https://github.com/healthonrails/annolid.git
cd annolid
uv venv .venv --python 3.11
source .venv/bin/activate
uv pip install -e .
annolid
Generate a lock file for reproducible installs with uv pip compile pyproject.toml -o uv.lock, then reproduce the environment elsewhere via uv pip sync uv.lock. Ensure ffmpeg/ffprobe is available on your PATH (brew install ffmpeg on macOS, sudo apt install ffmpeg on Ubuntu) so timestamp tools work correctly.
Apple Silicon (macOS M1/M2)
Some Intel-specific libraries can trigger MKL errors on Apple Silicon. If you observe messages such as:
Intel MKL FATAL ERROR: This system does not meet the minimum requirements...
recreate the environment with native wheels:
conda create -n annolid-env python=3.11
conda activate annolid-env
git clone --recurse-submodules https://github.com/healthonrails/annolid.git
cd annolid
pip install -e .
annolid
Optional dependencies
- Detectron2 (required for training new instance segmentation models):
conda activate annolid-env
python -m pip install --user "git+https://github.com/facebookresearch/detectron2.git"
- Segment Anything 2 (SAM2) for object tracking:
cd segmentation/SAM/segment-anything-2
pip install -e .
- FFmpeg is recommended for format conversion and improved compatibility with OpenCV-based video I/O:
conda install -c conda-forge ffmpeg
Using Annolid
- Launch the GUI:
conda activate annolid-env
annolid
- Provide custom labels:
annolid --labels=/path/to/labels_custom.txt
- Pick between Ollama, OpenAI GPT, or Google Gemini for caption chat features by opening the caption panel and clicking
Configure…next to the model selector. API keys are stored in~/.annolid/llm_settings.json. - Summarise annotated behavior events into a time-budget report (GUI: File → Behavior Time Budget; CLI example with 60 s bins and a project schema):
python -m annolid.behavior.time_budget exported_events.csv \
    --schema project.annolid.json \
    --bin-size 60 \
    -o time_budget.csv
- Compress videos when storage is limited:
ffmpeg -i input.mp4 -vcodec libx264 output_compressed.mp4
Video Depth Anything
- The toolbar now includes a Video Depth Anything… action (also under View) that opens a dialog mirroring the original CLI. Choose your video, encoder, resolution, and output folder, and the bundled inference code runs inside Annolid without extra installs.
- Pretrained weights belong under
annolid/depth/checkpoints. Download just what you need via the bundled Python helper (useshuggingface-hub, already listed in dependencies):cd annolid python -m annolid.depth.download_weights --model video_depth_anything_vitl
Pass--allto fetch every checkpoint, or runpython -m annolid.depth.download_weights --listfor the full menu. Existing files are never re-downloaded. - The GUI runner now auto-downloads whichever checkpoint you select in the dialog, so you only need to invoke the helper when you want to prefetch models ahead of time.
- Depth run now streams inference frame-by-frame, emits a single
depth.ndjsonrecord alongside the video (with per-frame base64 depth PNGs plus scale metadata) instead of writing separate JSON files per frame, and still shows a live blended overlay while processing. Enablesave_depth_videoorsave_depth_framesonly if you also need rendered outputs. - Metric depth exports also save PLY point clouds; enable
Metric depth modelin the dialog and view them in the built-in VTk viewer. EXR outputs requireOpenEXR/Imath.
Annotation Guide

- Label polygons and keypoints clearly. Give each animal a unique instance name when tracking across frames (for example,
vole_1,mouse_2). Use descriptive behavior names (rearing,grooming) for polygons dedicated to behavioral events, and name body-part keypoints (nose,tail_base) consistently. - Accelerate timestamp annotation. While scoring behaviors, press
sto mark the start,eto mark the end,f/bto step ±10 frames, andrto remove events directly from the video slider. - Enable frame-level flags. Launch Annolid with
--flags "digging,rearing,grooming"to open a multi-select list of behaviors. Save selections withCtrl+Sor the Save button; remove events by pressingR. - Customize configuration. The first run creates
~/.labelmerc(orC:\Users\<username>\.labelmercon Windows). Edit this file to change defaults such asauto_save: true, or supply an alternative path viaannolid --config /path/to/file. - Learn more. Additional annotation tips live in
annolid/annotation/labelme.md.
Labeling Best Practices
- Label 20–100 frames per video to reach strong performance; the curve in
docs/imgs/AP_across_labeled_frames.pngshows how accuracy scales with annotation volume. - Close the loop with human-in-the-loop training (see
docs/imgs/human_in_the_loop.png): train on initial annotations, auto-label, correct, and retrain until predictions align with human expectations. - Draft labeling guidelines up front—start with this template and adapt it to your species and behaviors.
- Treat each animal instance as its own class when you need cross-frame identity. Use generic class names only when identity consistency is unnecessary, or when you are aggregating across many individuals.
- To generalize to new animals or videos, include diverse examples of each behavior and adjust the training set iteratively.
Tutorials & Examples
- DINOv3 Keypoint Tracking tutorial: book/tutorials/DINOv3_keypoint_tracking.md


| YouTube Channel | Annolid documentations |
|---|---|
 |
 |

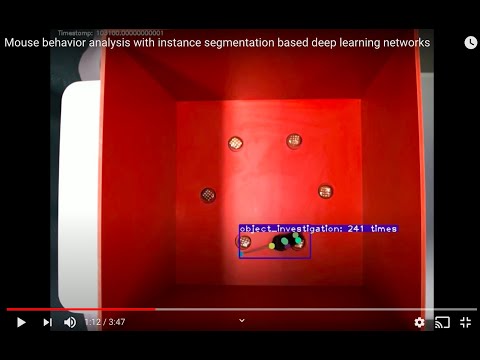
| Instance segmentations | Behavior prediction |
|---|---|
 |
 |
Troubleshooting
- Video playback errors (
OpenCV: FFMPEG: tag ...or missing codecs):
Install FFmpeg via your package manager orconda install -c conda-forge ffmpegto extend codec support. - macOS Qt warning (
Class QCocoaPageLayoutDelegate is implemented in both ...):
conda install qtpyresolves the conflict between OpenCV and PyQt. - If the GUI does not launch, confirm the correct environment is active and run
annolid --helpfor CLI usage.
Docker
Ensure Docker is installed, then run:
cd annolid/docker
docker build .
xhost +local:docker  # Linux only; allows GUI forwarding
docker run -it -v /tmp/.X11-unix:/tmp/.X11-unix/ -e DISPLAY=$DISPLAY <IMAGE_ID>
Replace <IMAGE_ID> with the identifier printed by docker build.
Citing Annolid
If you use Annolid in your research, please cite:
- Preprint: Annolid: Annotation, Instance Segmentation, and Tracking Toolkit
- Zenodo: Find the latest release DOI via the badge at the top of this README.
@misc{yang2024annolid,
      title={Annolid: Annotate, Segment, and Track Anything You Need},
      author={Chen Yang and Thomas A. Cleland},
      year={2024},
      eprint={2403.18690},
      archivePrefix={arXiv},
      primaryClass={cs.CV}
}

@article{yang2023automated,
  title={Automated Behavioral Analysis Using Instance Segmentation},
  author={Yang, Chen and Forest, Jeremy and Einhorn, Matthew and Cleland, Thomas A},
  journal={arXiv preprint arXiv:2312.07723},
  year={2023}
}

@misc{yang2020annolid,
  author = {Chen Yang and Jeremy Forest and Matthew Einhorn and Thomas Cleland},
  title = {Annolid: an instance segmentation-based multiple animal tracking and behavior analysis package},
  howpublished = {\url{https://github.com/healthonrails/annolid}},
  year = {2020}
}
Publications
- 2022 – Ultrasonic vocalization study. Pranic et al. relate mouse pup vocalizations to non-vocal behaviors (bioRxiv).
- 2022 – Digging and pain behavior. Pattison et al. link digging behaviors to wellbeing in mice (Pain, 2022).
- SfN Posters:
- 2021: Annolid — instance segmentation-based multiple-animal tracking
- 2023: PSTR512.01 Scoring rodent digging behavior with Annolid
- 2023: PSTR512.02 Annolid: Annotate, Segment, and Track Anything You Need
- For more applications and datasets, visit https://cplab.science/annolid.
Additional Resources
- Example dataset (COCO format): Download from Google Drive.
- Pretrained models: Available in the shared Google Drive folder.
- Feature requests & bug reports: Open an issue at github.com/healthonrails/annolid/issues.
- Additional videos: Visit the Annolid YouTube channel for demonstrations and talks.
Acknowledgements
Annolid's tracking module integrates Cutie for enhanced video object segmentation. If you use this feature, please cite Putting the Object Back into Video Object Segmentation (Cheng et al., 2023) and the Cutie repository.
The counting tool integrates CountGD; cite the original CountGD publication and repository when you rely on this module in your research.
Contributing
Contributions are welcome! Review the guidelines in CONTRIBUTING.md, open an issue to discuss major changes, and run relevant tests before submitting a pull request.
License
Annolid is distributed under the Creative Commons Attribution-NonCommercial 4.0 International License.
Release history Release notifications | RSS feed


Download files
Download the file for your platform. If you're not sure which to choose, learn more about installing packages.
Source Distribution
Built Distribution
Filter files by name, interpreter, ABI, and platform.
If you're not sure about the file name format, learn more about wheel file names.
Copy a direct link to the current filters
File details
Details for the file annolid-1.3.3.tar.gz.
File metadata
- Download URL: annolid-1.3.3.tar.gz
- Upload date:
- Size: 20.9 MB
- Tags: Source
- Uploaded using Trusted Publishing? No
- Uploaded via: twine/6.1.0 CPython/3.13.7
File hashes
| Algorithm | Hash digest | |
|---|---|---|
| SHA256 |
079e0574ff9610bf6a29ca2f7019fd7b6b084dd7e14050b7501b049c50700ac2
|
|
| MD5 |
a2de393a3696ef19a7d9b4c8149cfeab
|
|
| BLAKE2b-256 |
1880d6d09698e6278b9624386821660eeba7c3e7bc616568bd4426ae7d69c3b3
|
File details
Details for the file annolid-1.3.3-py3-none-any.whl.
File metadata
- Download URL: annolid-1.3.3-py3-none-any.whl
- Upload date:
- Size: 21.2 MB
- Tags: Python 3
- Uploaded using Trusted Publishing? No
- Uploaded via: twine/6.1.0 CPython/3.13.7
File hashes
| Algorithm | Hash digest | |
|---|---|---|
| SHA256 |
e1d942df4dd4a9bd2be5d064573065f5e945f7ea70c488125f4ec180ac4d8df5
|
|
| MD5 |
a2ef7dd230c827781f2cf1555552dba7
|
|
| BLAKE2b-256 |
fce6c2aa334e852a09b57b46d3c30a1bf592437126348a8e951a757fe55f7372
|


