BackPy is a library made in python for back testing in financial markets.

Project description


Light, realistic, fast and adaptable.
BackPy is a Python library for backtesting strategies in financial markets.
You can provide your own historical data or use the built-in integration with the yfinance or binance-connector modules.
With BackPy-binance-connector you can connect your strategy to the real market using Binance. Official repository: BackPy-binance-connector.
❓ Why BackPy?
BackPy integrates in one place:
- Backtesting
- Data loading from multiple sources (yfinance, Binance, your own files)
- Interactive charts
- Advanced statistics
In tests performed locally on a personal computer (PC with AMD Ryzen 7 5800X, 32 GB of RAM, and Python 3.12), BackPy showed exceptional performance even with large volumes of data.
Estimated time comparison for processing 260,000 candles:
🟢 Simple strategy Strategy with simple logic but a moderate trading volume (~60,000 trades).
🔴 Complex strategy Strategy with more complex logic and advanced indicators, more calculations per candle, and greater internal load (~130,000 trades).
| Method | Simple strategy 🟢 | Complex strategy 🔴 |
|---|---|---|
| Manual | ~76.4 hours ⏳ | ~186.1 hours 🎈 |
| BackPy v0.9.72 | ~18.6 seconds 💸 | ~25.4 seconds 🚀 |
📌 Important note and conclusion
- These times are illustrative comparisons, performed locally. Results may vary depending on hardware, configuration, and data size.
- BackPy not only centralizes your workflow but also accelerates your development and analysis.
🪄 Why so fast?
Unlike pure numerical libraries, BackPy focuses on event-driven execution. It processes each candle and order step-by-step, which allows for dynamic logic.
BackPy uses native Python lists for fast iteration and dynamic data growth. It relies on NumPy only for large amounts of data. This design maximizes the performance of real-world trading logic by avoiding unnecessary vectorization.
⚠️ Important Notices
Please make sure to read the following before using this software:
By using this software, you acknowledge that you have read and agree to the terms outlined in these documents.
📦 Installation
You can install BackPy (backpyf) in two different ways depending on your needs:
🧰 Option 1 — From PyPI (recommended)
You can simply run:
pip install backpyf
Then import it in Python:
import backpy
💻 Option 2 — From source (GitHub)
- Download the latest version from GitHub
- Go to this project GitHub page.
- Download the ZIP file of the latest version of the project.
- Unzip the ZIP file
- Unzip the ZIP file you downloaded.
- This will give you a folder containing the project files.
- Open the terminal
- Open the terminal in your operating system.
- Navigate to the folder you just unzipped. You can use the cd command to change directories.
- Install the module
- Once you are in the project folder in terminal, run the following command:
pip install .. - This command will install the Python module using the setup.py file located in the project folder.
- Verify installation
- After the installation process finishes without errors, you can verify if the module has been installed correctly by running some code that imports the newly installed module.
- Clean downloaded files
- After you have verified that the module is working correctly, you can delete the downloaded ZIP file and unzipped folder if you wish.
🚀 Code example
BackPy lets you prototype and test trading strategies fast and intuitively.
import backpy

backpy.load_binance_data_spot(
    symbol='BTCUSDT',
    start_time='2023-01-01',
    end_time='2024-01-01',
    interval='1h'
)

class macdStrategy(backpy.StrategyClass):
    def next(self):
        if len(self.date) < 30 or len(self.prev_positions()) > 0:
            return

        macd = self.idc_macd()[-1]
        sma = self.idc_sma(42)[-1]

        if (
            self.close[-1] > sma
            and macd['histogram'] > 0
        ):
            self.act_taker(True, amount=self.get_init_funds())

            self.ord_put('takeProfit', self.close[-1]*1.06)
            self.ord_put('stopLoss', self.close[-1]*0.98)

backpy.run_config(
    initial_funds=10000,
    commission=(0.04, 0.08),
    spread=0.01,
    slippage=0.01
)
backpy.run(macdStrategy)

backpy.plot_strategy(style='darkmode', block=False)
backpy.plot(log=True)
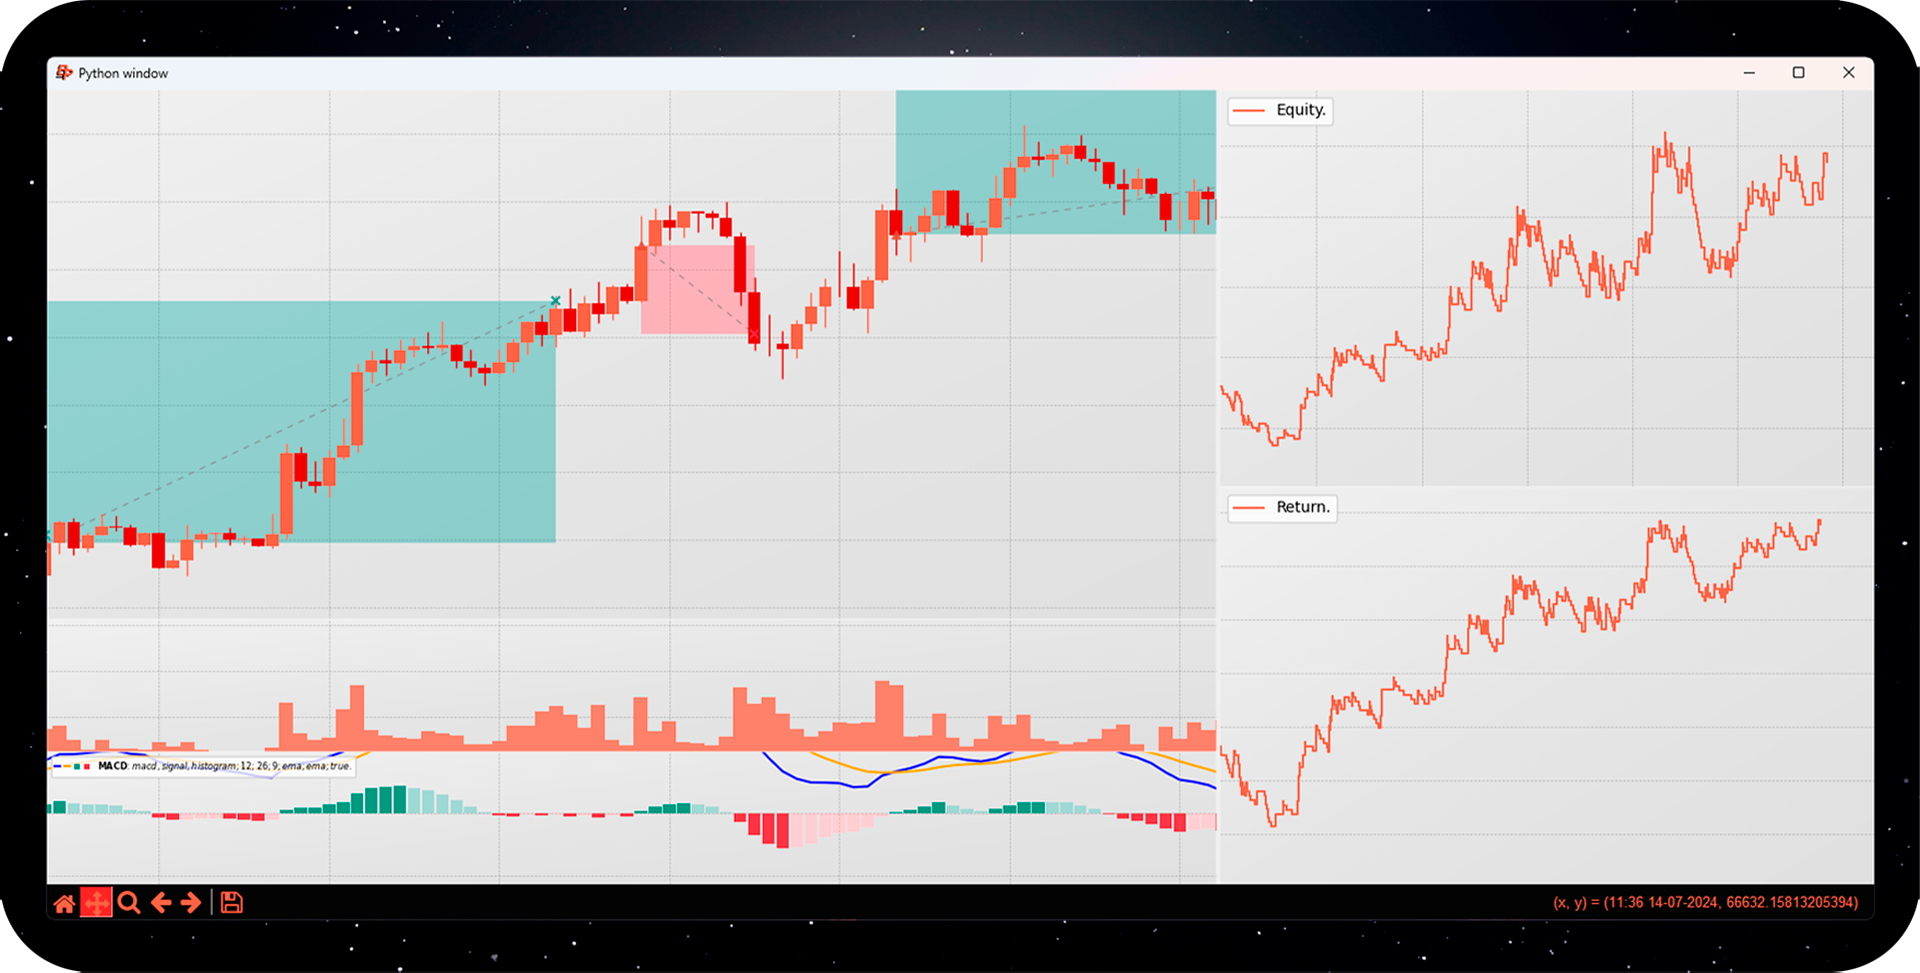
Finally, visualize your results:
♟️ Quick start
1️⃣ Load market data
To begin, we need to load market data. We can do this from several sources:
backpy.load_binance_data_spot(
    symbol='BTCUSDT',
    start_time='2023-01-01',
    end_time='2024-01-01',
    interval='1h'
)
We can also use yfinance:
backpy.load_yfinance_data(
    ticker='BTC-USD',
    start='2023-01-01',
    end='2024-12-01',
    interval='1h'
)
2️⃣ Create a strategy
Now let's create the strategy.
To do this, we define a class that inherits from StrategyClass.
The main method we must implement is next(), which is executed on each iteration of the candle loop.
class macdStrategy(backpy.StrategyClass):
    def next(self):
        pass
3️⃣ Implement the strategy logic
Inside the next method, we define the strategy.
In this example, we will enter a long position when:
- The MACD histogram is greater than 0.
- The closing price is above the 42-period simple moving average (SMA).
We can access the indicators from the self instance:
- All methods beginning with
idc_are indicators. - Internally,
DataWrapperuses arrays (sometimes structured). By executingself.idc_macd(), we obtain a structured array with the fields:macd,signal,histogram.
Then, we create a conditional and, if it is met, we execute the taker order.
macd = self.idc_macd()[-1]['histogram']
sma = self.idc_sma(42)[-1]

if (
    self.close[-1] > sma
    and macd > 0
):
    self.act_taker(True, amount=self.get_init_funds())
The current closing price is obtained simply with self.close[-1].
4️⃣ Setting Stop Loss and Take Profit
After opening a position, we can place take profit and stop loss orders using self.ord_put():
self.ord_put('takeProfit', self.close[-1]*1.06)
self.ord_put('stopLoss', self.close[-1]*0.98)
As long as you place them after executing a maker/taker order, you don't need to specify union_id.
If amount isn't specified, the order will close the entire position when executed.
5️⃣ Configure and run the backtest
Before running the strategy, we configure the backtest parameters with run_config():
backpy.run_config(
    initial_funds=10000,
    commission=(0.04, 0.08),
    spread=0.01,
    slippage=0.01
)
CostsValue format:
(maker, taker) can include an additional tuple to generate a random number between two values.
Parameters:
- initial_funds → Initial funds for statistics.
- commission → Maker and taker commission,
CostsValueformat. - spread/slippage → Also
CostsValueformat, but without any distinction between maker and taker. If you use a tuple, a random value will be generated within the range.
Then we run it with:
backpy.run(macdStrategy)
6️⃣ Visualizing Results
Once the strategy is executed, you can view the statistics and trades:
backpy.plot_strategy(style='darkmode', block=False)
backpy.plot()
Use block=False if you want to display multiple charts without blocking the main thread.
backpy.plot_strategy displays backtest statistics.
backpy.plot displays the candles and trades executed.
You can customize the style with the style argument (e.g., darkmode).
There are more than 15 predefined styles, and you can also create your own using configuration functions like style_c.
✨ Support
If you found BackPy useful, please consider leaving a ⭐ — it would be much appreciated!
Release history Release notifications | RSS feed


Download files
Download the file for your platform. If you're not sure which to choose, learn more about installing packages.
Source Distribution
Built Distribution
Filter files by name, interpreter, ABI, and platform.
If you're not sure about the file name format, learn more about wheel file names.
Copy a direct link to the current filters
File details
Details for the file backpyf-1.0.0.post1.tar.gz.
File metadata
- Download URL: backpyf-1.0.0.post1.tar.gz
- Upload date:
- Size: 93.8 kB
- Tags: Source
- Uploaded using Trusted Publishing? No
- Uploaded via: twine/6.2.0 CPython/3.12.12
File hashes
| Algorithm | Hash digest | |
|---|---|---|
| SHA256 |
d5b6e805a13e9965393329028eb036137c5fcc879f12dccbaf16851be86c816e
|
|
| MD5 |
922292288ebdceedc7e472625c4157a3
|
|
| BLAKE2b-256 |
20c1113c02f591f177bb19f3240b96b3f4282f46363f8bdd6c26a95742d43464
|
File details
Details for the file backpyf-1.0.0.post1-py3-none-any.whl.
File metadata
- Download URL: backpyf-1.0.0.post1-py3-none-any.whl
- Upload date:
- Size: 91.5 kB
- Tags: Python 3
- Uploaded using Trusted Publishing? No
- Uploaded via: twine/6.2.0 CPython/3.12.12
File hashes
| Algorithm | Hash digest | |
|---|---|---|
| SHA256 |
b72b8355e51d52a65033652760f55f6db5bf67db21ce9d54f8e8935dd5980610
|
|
| MD5 |
b9885d20ba3e838bc2348f7bb129b347
|
|
| BLAKE2b-256 |
3d6951aadefa7f17f08ff76948f715efad5e97dea73338d8949fffa130e47937
|


