Compile Markdown files into CDL-themed Marp presentations

Project description
CDL Slides


Compile Markdown files into beautiful CDL-themed Marp presentations. Includes the full Contextual Dynamics Lab slide theme with bundled fonts, images, and CSS.
Theme gallery
| Title Slide | Callout Boxes | Tip & Warning |
|---|---|---|
 |
 |
 |
| Definition, Example & Important | Code Highlighting | Math (KaTeX) |
|---|---|---|
 |
 |
 |
| Manim Animations | Flow Diagrams | Emoji Figures |
|---|---|---|
 |
 |
 |
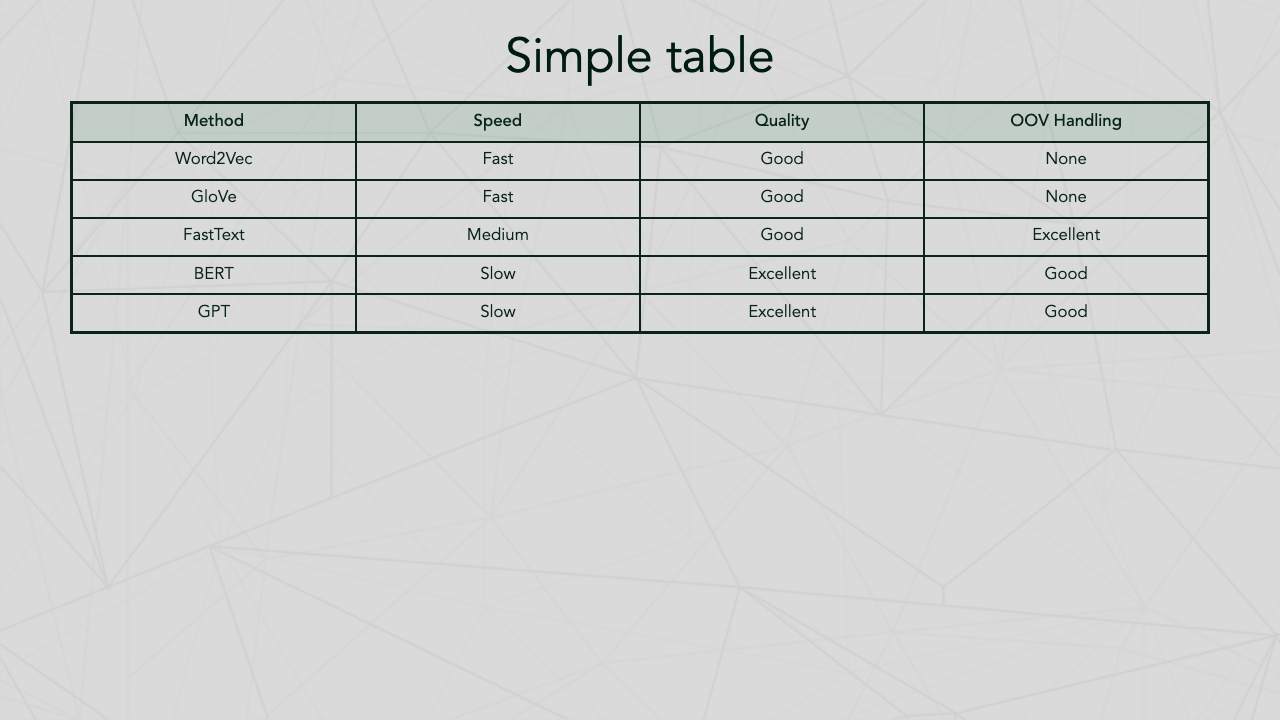
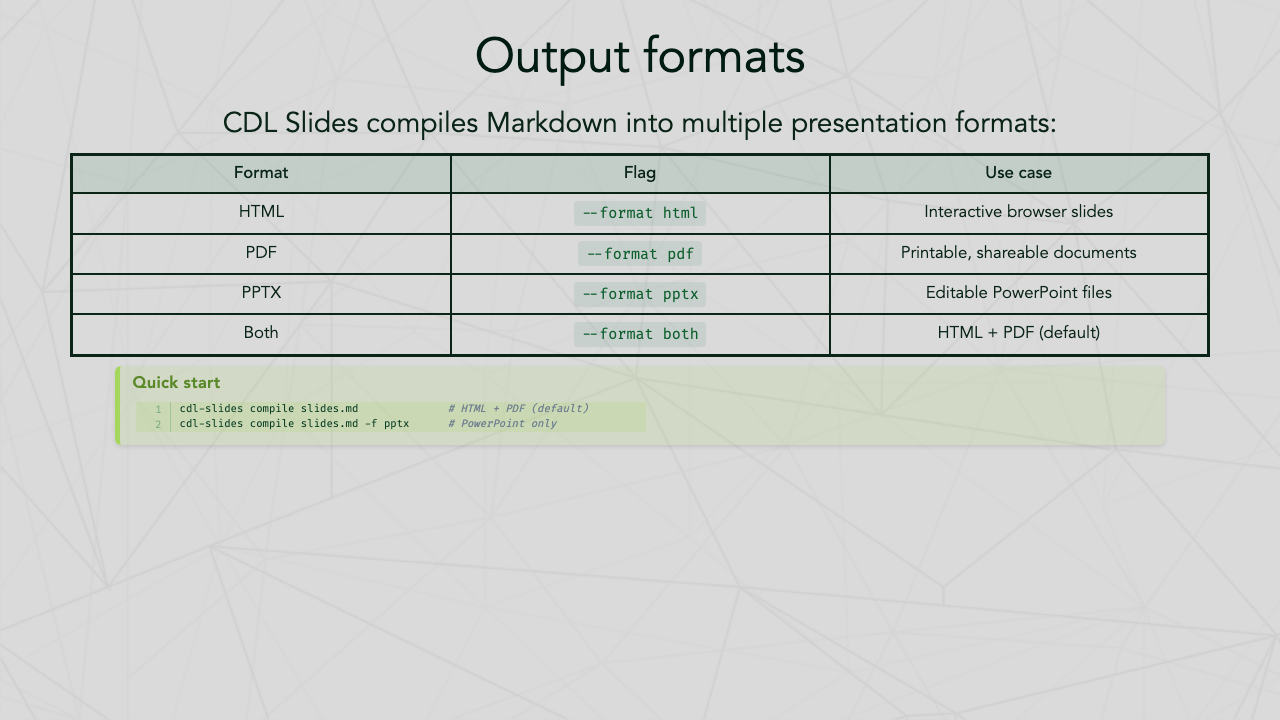
| Two-Column Layout | Simple Table | Output Formats |
|---|---|---|
 |
 |
 |
| Academic Poster |
|---|
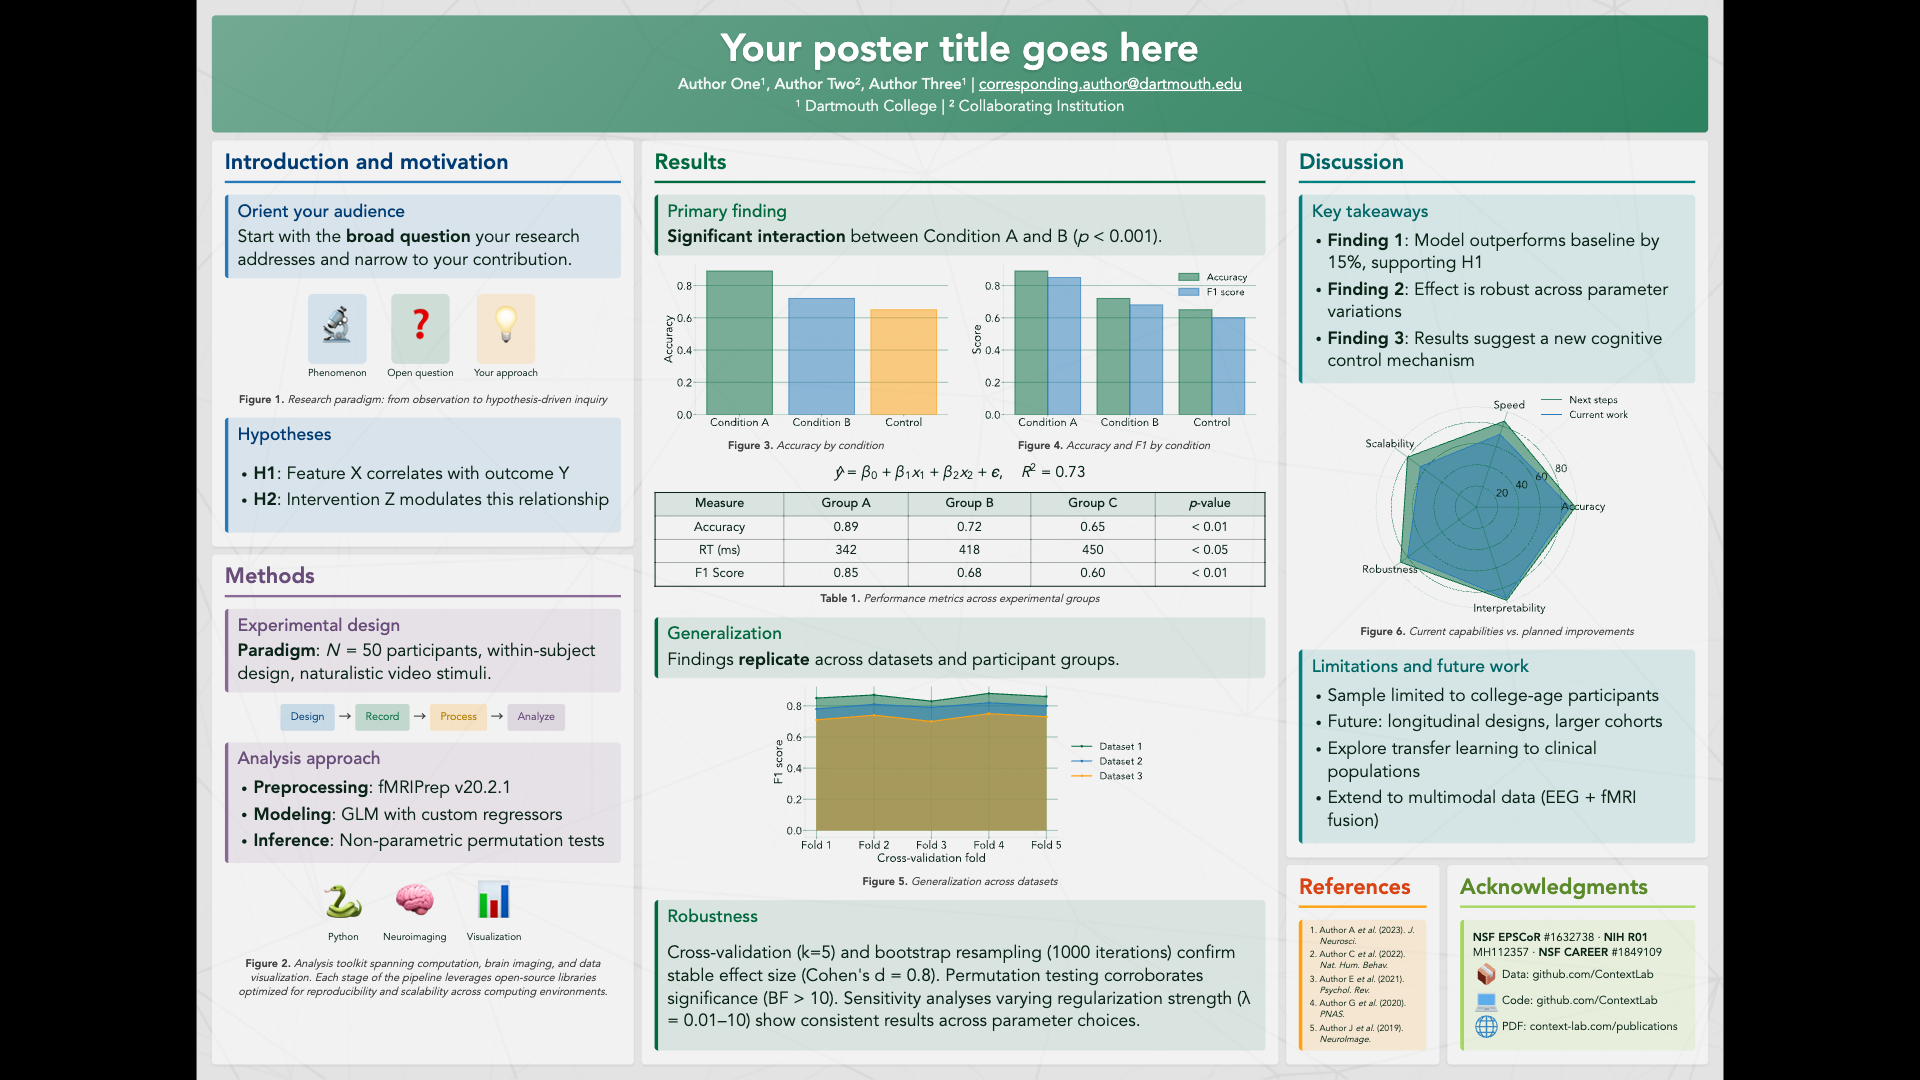 |
Table of contents
- Features
- Installation
- Quick start
- CLI reference
- Slide authoring guide
- Poster authoring guide
- Bundled fonts
- Development
- License
Features
- Cross-platform: Works on macOS, Windows, and Linux
- Zero-config Marp CLI: Automatically downloads the Marp CLI standalone binary on first use — no Node.js required
- Multiple output formats: HTML, PDF, and PPTX
- Bundled theme: Complete CDL/Dartmouth-branded theme with custom fonts, colors, and layouts
- Smart preprocessing: Auto-splits long code blocks and tables across slides
- Flow diagrams: Simple
```flowsyntax for pipeline diagrams - Manim animations: Embed animated equations and visualizations with
```manimblocks (optional) - Auto-scaling: Automatically adjusts font size for dense slides
- Syntax highlighting: Code blocks with line numbers via Pygments
- Math support: KaTeX for inline and display equations
- Callout boxes: Note, tip, warning, definition, example, and important boxes
- Academic posters: Compile poster markdown with ASCII grid layouts to HTML or PDF
Installation
macOS:
brew install pango cairo ffmpeg
pip install cdl-slides
Linux (Debian/Ubuntu):
sudo apt-get install -y libpango1.0-dev libcairo2-dev ffmpeg
pip install cdl-slides
Windows:
pip install cdl-slides
Then run setup to download Marp CLI:
cdl-slides setup
Or install from source:
git clone https://github.com/ContextLab/cdl-slides.git
cd cdl-slides
pip install -e .
Marp CLI resolution
cdl-slides finds or installs Marp CLI automatically in this order:
- System PATH — uses your existing
marpinstall (npm, brew, etc.) - Cached binary — standalone binary downloaded on first use (~
~/Library/Caches/cdl-slides/on macOS,~/.cache/cdl-slides/on Linux,AppData\Local\cdl-slides\on Windows) - npx fallback — runs
@marp-team/marp-clivia npx if Node.js is available
To check your Marp CLI status:
cdl-slides version
Quick start
- Create a Markdown file with CDL theme front matter:
---
marp: true
theme: cdl-theme
math: katex
transition: fade 0.25s
author: Contextual Dynamics Lab
---

# My Presentation Title
### Subtitle

Your Name
Your Institution

---

# Slide Two

- Point one
- Point two
- Point three
- Compile to HTML and PDF:
cdl-slides compile my_presentation.md
- Output files are created alongside the input:
my_presentation.htmlmy_presentation.pdf
CLI reference
cdl-slides compile
Compile a Markdown file into a presentation.
Usage: cdl-slides compile [OPTIONS] INPUT_FILE

Options:
  -o, --output PATH      Output file or directory (default: same dir as input)
  -f, --format TEXT       Output format: html, pdf, pptx, both (default: both)
  -l, --lines INTEGER     Max code lines per slide before splitting (default: 30)
  -r, --rows INTEGER      Max table rows per slide before splitting (default: 10)
  --no-split              Disable auto-splitting of code blocks and tables
  --keep-temp             Keep temporary processed files for debugging
  -t, --theme-dir PATH    Custom theme directory (overrides bundled CDL theme)
  --no-animations         Skip processing of animate blocks (useful for CI)
  --help                  Show this message and exit.
Examples:
# Compile to HTML only
cdl-slides compile slides.md --format html

# Compile to PDF only
cdl-slides compile slides.md --format pdf

# Compile to PowerPoint
cdl-slides compile slides.md --format pptx

# Compile with custom output location
cdl-slides compile slides.md --output ./build/

# Compile with custom code splitting threshold
cdl-slides compile slides.md --lines 15 --rows 5
cdl-slides init
Create a new presentation from a template.
cdl-slides init                    # Create template in current directory
cdl-slides init ./my-presentation  # Create template in specific directory
cdl-slides version
Show version and Marp CLI status.
cdl-slides version
cdl-slides setup
Pre-download the Marp CLI standalone binary. This is optional — Marp CLI is automatically downloaded on first compile if not already installed.
cdl-slides setup
cdl-slides poster compile
Compile a poster markdown file into HTML or PDF.
Usage: cdl-slides poster compile [OPTIONS] INPUT_FILE

Options:
  -o, --output PATH      Output file or directory (default: same dir as input)
  -f, --format TEXT       Output format: html, pdf, both (default: both)
  --keep-temp             Keep temporary processed files for debugging
  --help                  Show this message and exit.
Examples:
# Compile poster to HTML only
cdl-slides poster compile poster.md --format html

# Compile poster to PDF only
cdl-slides poster compile poster.md --format pdf

# Compile poster to both HTML and PDF
cdl-slides poster compile poster.md
Note: Posters support HTML and PDF output only (no PPTX). Math equations automatically use Avenir font to match poster typography.
Slide authoring guide
Front Matter
Every CDL presentation starts with this YAML front matter:
---
marp: true
theme: cdl-theme
math: katex
transition: fade 0.25s
author: Contextual Dynamics Lab
---
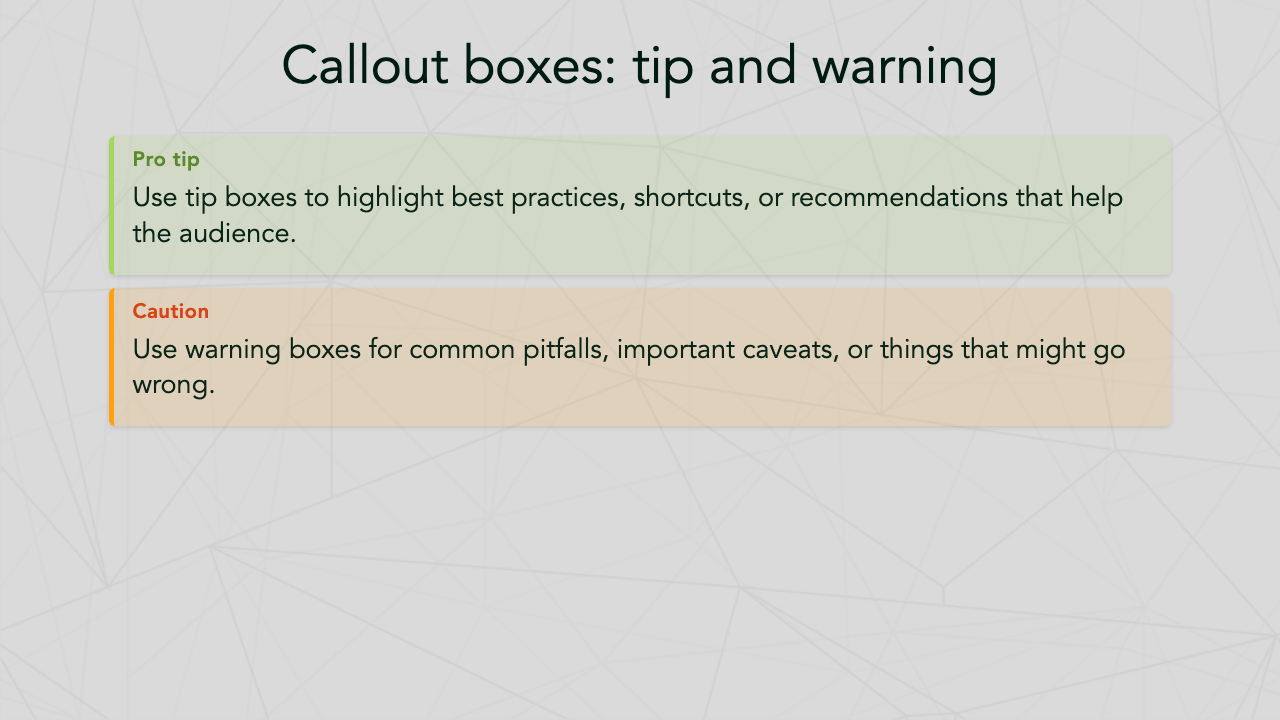
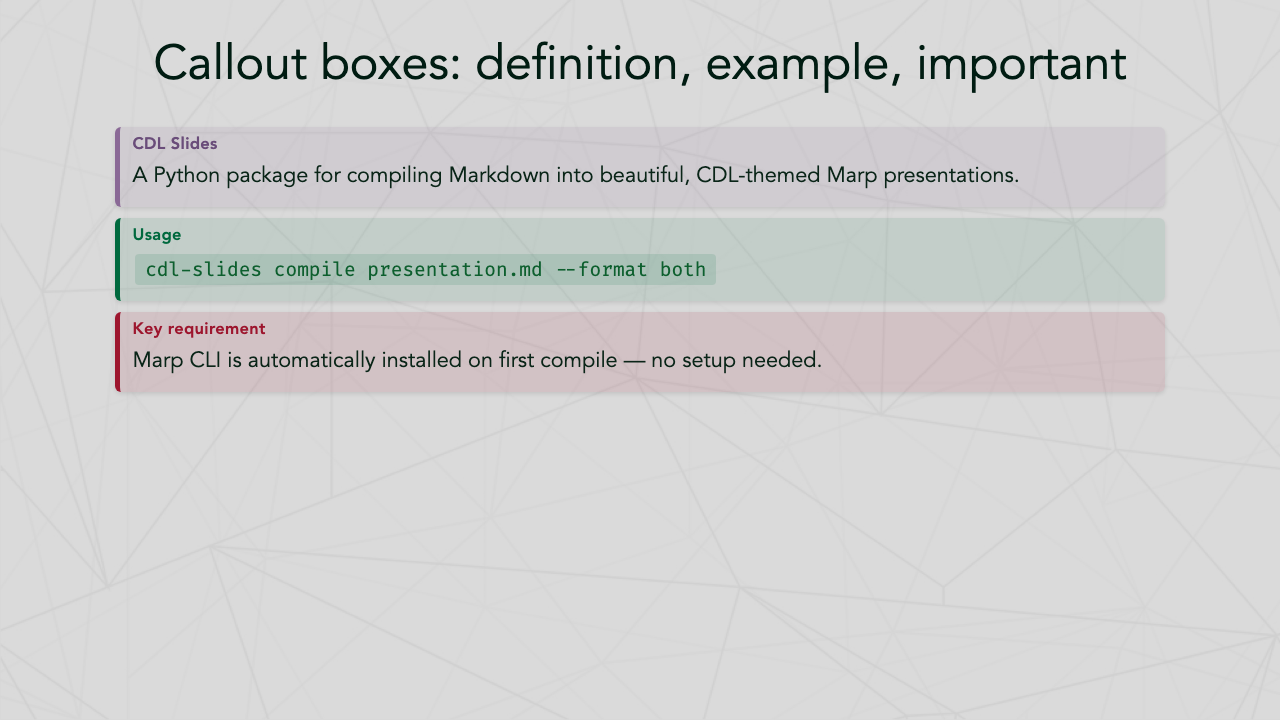
Callout Boxes
The CDL theme includes six styled box types:
<div class="note-box" data-title="Title">
Content here with **Markdown** support.
</div>

<div class="tip-box" data-title="Pro Tip">
Helpful advice goes here.
</div>

<div class="warning-box" data-title="Caution">
Important warnings here.
</div>

<div class="definition-box" data-title="Term">
Definition of the term.
</div>

<div class="example-box" data-title="Example">
A worked example.
</div>

<div class="important-box" data-title="Key Point">
Critical information.
</div>
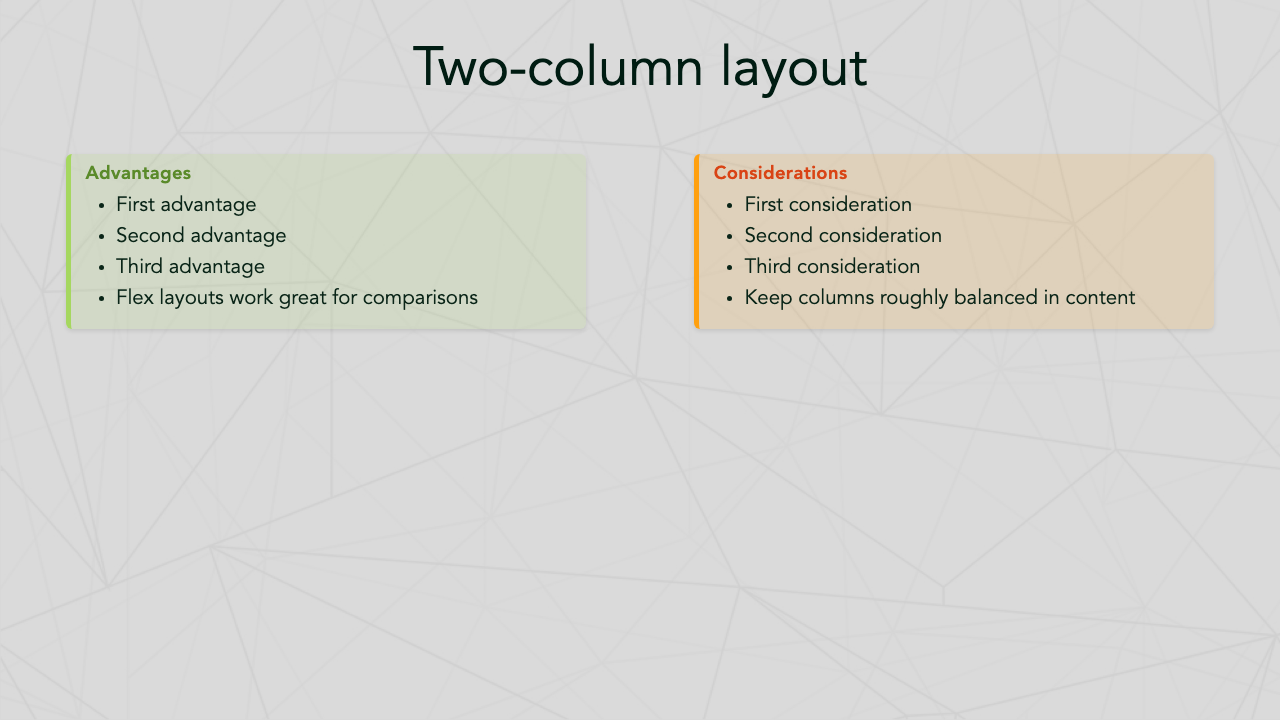
Two-Column Layouts
For two-column content, wrap each column's content in a callout box for best results:
<div style="display: flex; gap: 1.5em;">
<div style="flex: 1;">

<div class="example-box" data-title="Left topic">

- First point
- Second point

</div>

</div>
<div style="flex: 1;">

<div class="example-box" data-title="Right topic">

- First point
- Second point

</div>

</div>
</div>
Any box type works (tip-box, warning-box, note-box, etc.). The boxes give columns clear visual boundaries and headers.
Flow Diagrams
Use the ```flow syntax for simple pipeline diagrams:
```flow
[Input:blue] --> [Process:green] --> [Output:orange]
```
<!-- caption: A data processing pipeline -->
Available colors:
| Color | Alias | Description |
|---|---|---|
green |
— | Dartmouth Green (primary brand) |
blue |
river-blue |
River Blue |
navy |
river-navy |
River Navy |
teal |
— | Blue-green |
spring |
spring-green |
Spring Green |
rich-spring |
— | Rich Spring Green |
yellow |
summer |
Summer Yellow |
orange |
bonfire |
Bonfire Orange |
tuck |
tuck-orange |
Tuck Orange |
red |
bonfire-red |
Bonfire Red |
violet |
purple |
Violet |
brown |
autumn |
Autumn Brown |
gray |
granite, web-gray |
Granite Gray |
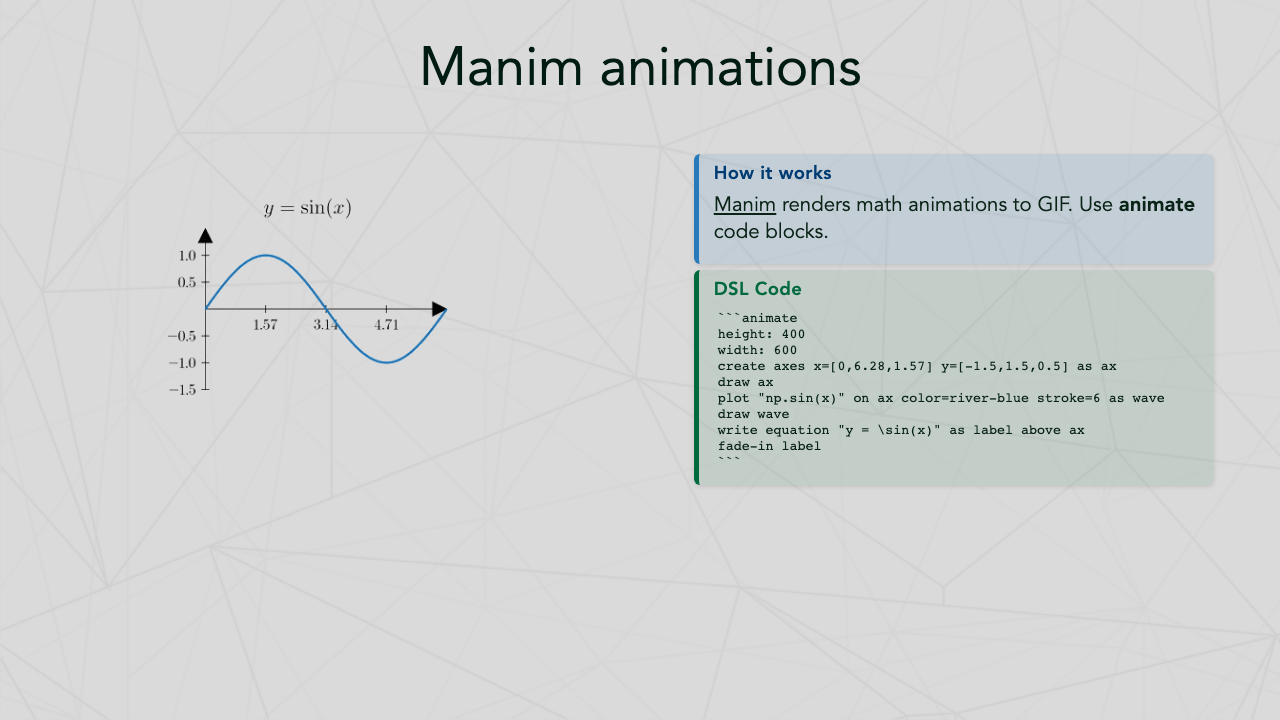
Manim Animations
Embed animated math visualizations using the Animate DSL — a simple, declarative syntax that compiles to Manim Community. Animations are rendered to transparent GIFs and embedded in slides.
FFmpeg is bundled automatically via imageio-ffmpeg — no system ffmpeg installation required.
Usage:
```animate
height: 400
write equation "E = mc^2" as eq at center
wait 0.5
fade-in eq
```
The preprocessor automatically renders to GIF and embeds in your slide. Rendered GIFs are cached by content hash, so unchanged animations won't re-render.
Animate DSL (Simplified Animation Syntax)
The animate DSL provides a simpler alternative to writing raw manim Python code. It uses a declarative syntax that gets transpiled to manim automatically.
Basic equation example:
```animate
height: 400
write equation "E = mc^2" as eq1 at center
wait 0.5
fade-in eq1
```
Graph/plot example:
```animate
height: 400
create axes x=[0,6.28,1.57] y=[-1.5,1.5,0.5] as ax
plot "np.sin(x)" on ax color=blue as wave
```
Metadata options:
| Option | Default | Description |
|---|---|---|
| height | 500 | Image height in pixels |
| width | 960 | Image width in pixels |
| quality | high | Render quality (low/medium/high) |
| scale | 1.0 | Scale factor for equations and text (e.g., 2.5 for larger) |
Object commands:
| Command | Description | Example |
|---|---|---|
write equation "LaTeX" as NAME |
Create LaTeX equation | write equation "E = mc^2" as eq1 |
write text "string" as NAME |
Create text object | write text "Hello" as title |
create circle color=COLOR as NAME |
Create colored circle | create circle color=blue as c1 |
create square color=COLOR as NAME |
Create colored square | create square color=red as s1 |
create arrow color=COLOR as NAME |
Create colored arrow | create arrow color=green as a1 |
create axes x=[min,max,step] y=[min,max,step] as NAME |
Create coordinate axes | create axes x=[-3,3,1] y=[-1,1,0.5] as ax |
create graph "formula" x=[min,max] color=COLOR as NAME |
Create standalone function graph | create graph "x**2" x=[-2,2] color=red as parabola |
Plot commands:
| Command | Description | Example |
|---|---|---|
plot "formula" on AXES color=COLOR as NAME |
Plot function on existing axes | plot "np.sin(x)" on ax color=blue as wave |
Animation commands:
| Command | Description |
|---|---|
fade-in NAME |
Fade in an object |
fade-out NAME |
Fade out an object |
draw NAME |
Draw/create an object (for axes, graphs) |
transform NAME1 -> NAME2 |
Transform one object into another |
wait SECONDS |
Wait for specified duration |
Generic manim escape (for advanced use):
| Command | Description | Example |
|---|---|---|
manim <python_code> as NAME |
Execute any manim code | manim Dot().move_to(ax.c2p(1,1)) as dot |
Position modifiers:
| Modifier | Description |
|---|---|
at center |
Place at screen center |
above NAME |
Place above another object |
below NAME |
Place below another object |
left-of NAME |
Place to the left of another object |
right-of NAME |
Place to the right of another object |
Available colors: blue, red, green, yellow, orange, white, black
Animation support is included by default with pip install cdl-slides.
Scale Directives
For dense slides, use scale directives to adjust font size:
<!-- _class: scale-80 -->
# Dense Slide Title

Lots of content here...
Available scales: scale-50 through scale-95 in increments of 5.
Note: The preprocessor auto-injects scale classes when slides overflow, so manual scaling is rarely needed.
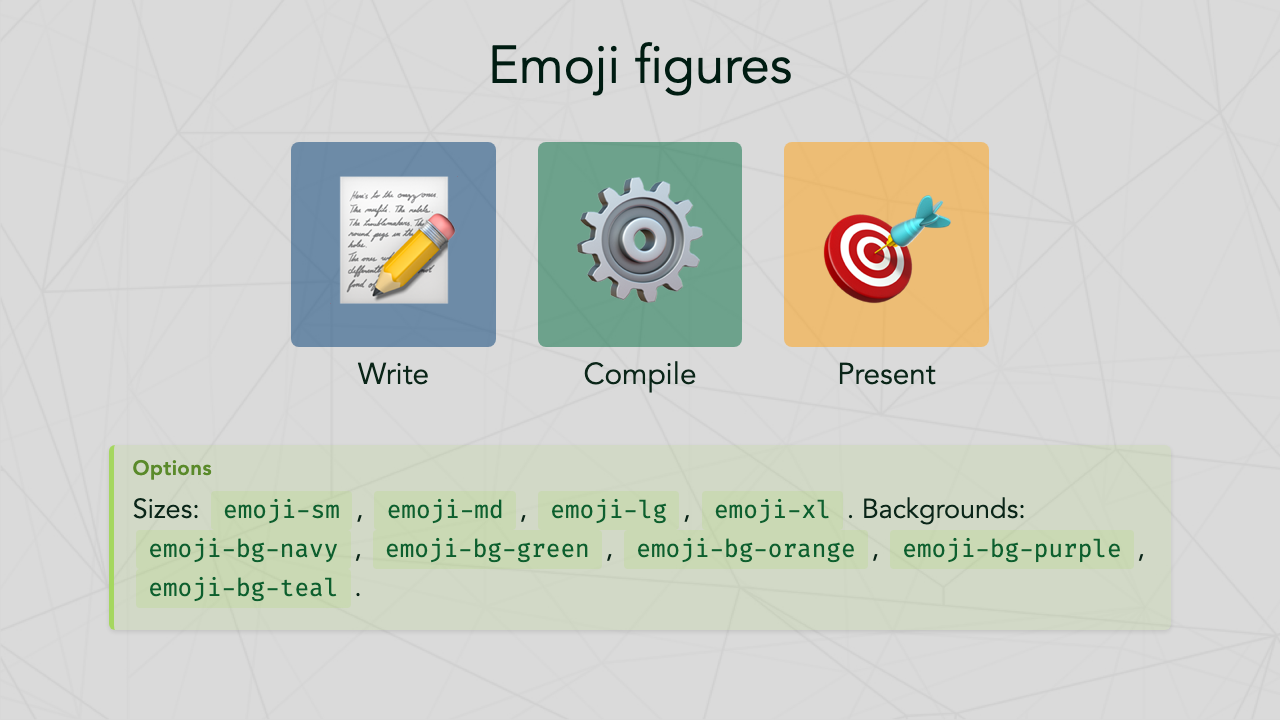
Emoji Figures
<div class="emoji-figure">
  <div class="emoji-col">
    <span class="emoji emoji-xl emoji-bg emoji-bg-navy">📊</span>
    <span class="label">Data</span>
  </div>
  <div class="emoji-col">
    <span class="emoji emoji-xl emoji-bg emoji-bg-green">🔬</span>
    <span class="label">Analysis</span>
  </div>
</div>
Available backgrounds: emoji-bg-navy, emoji-bg-green, emoji-bg-blue, emoji-bg-orange, emoji-bg-purple, emoji-bg-teal.
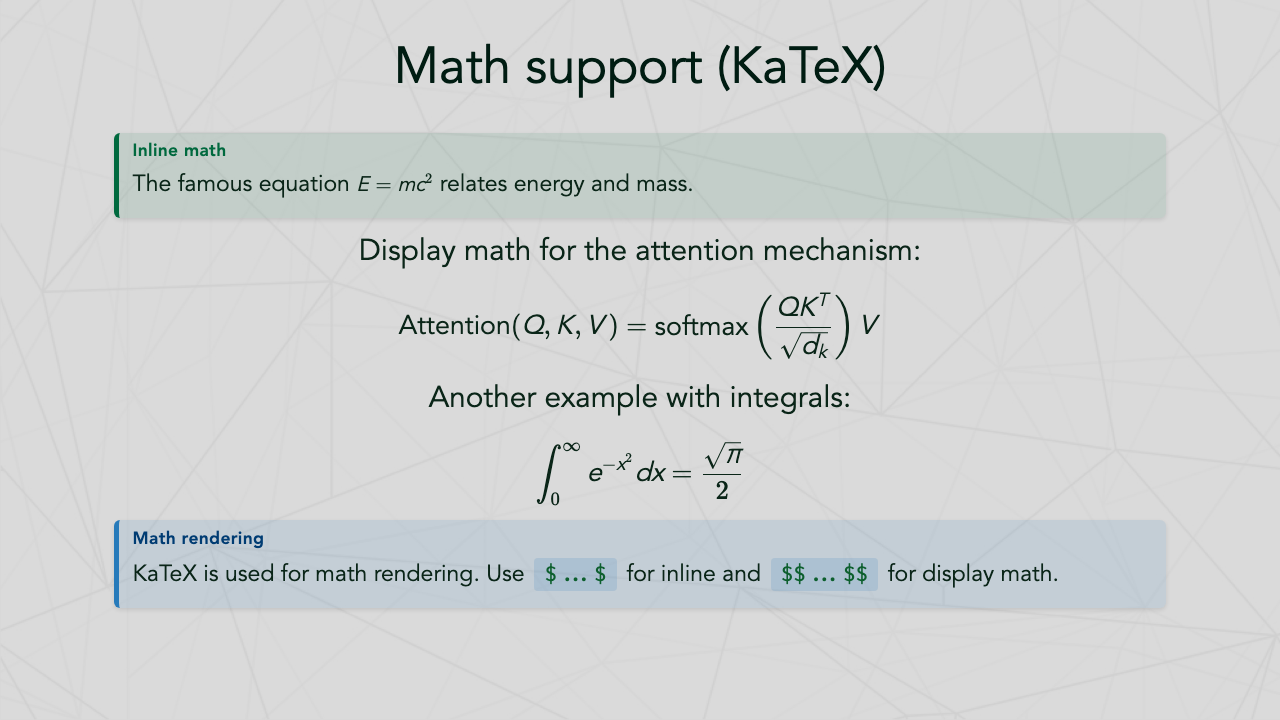
Math (KaTeX)
Inline: $E = mc^2$
Display:
$$\int_0^\infty e^{-x^2} dx = \frac{\sqrt{\pi}}{2}$$
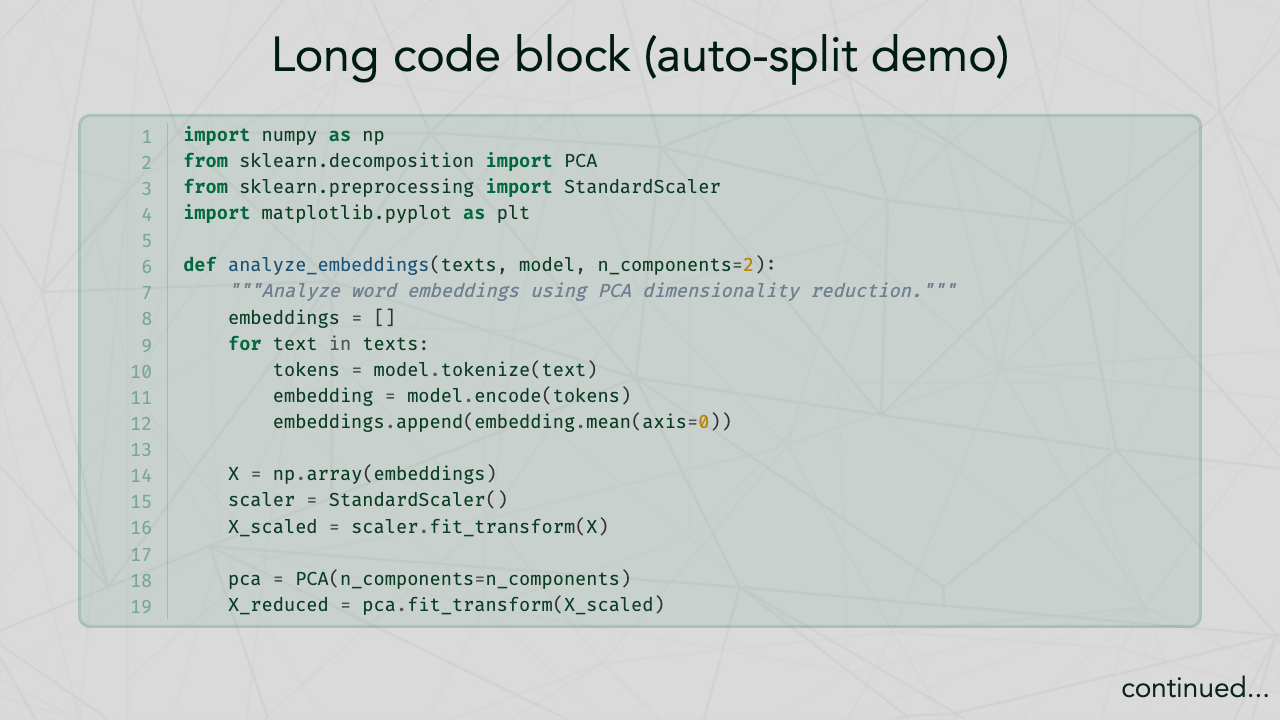
Code Blocks
Code blocks are automatically:
- Syntax highlighted (via Pygments)
- Line numbered
- Split across slides if they exceed
--linesthreshold (default: 30)
Tables
Markdown tables are automatically split across slides if they exceed --rows threshold (default: 10 data rows).
Arrow Syntax
Use arrow shorthand in slides:
A --[80]-> B --[lg]-> C
Options: --[80]-> (pixel width), --[lg]-> (named size: sm, md, lg, xl).
Poster authoring guide
Create academic posters with ASCII grid layouts. See examples/sample_poster.md for a complete example.
Poster front matter
---
marp: true
theme: cdl-poster
size: A0
math: katex
---
Available sizes: A0 (landscape, default), A0-portrait, A1, 48x36, 36x48, or any WxH pattern.
ASCII grid layout
Define your poster layout with a poster-layout code block. Each letter represents a section, and its area on the grid determines its position and size:
```poster-layout
TTTTTTTTTTTTTTTTTTTTTTTTTTTT
IIIIIIIIRRRRRRRRRRRRDDDDDDDD
IIIIIIIIRRRRRRRRRRRRDDDDDDDD
MMMMMMMMRRRRRRRRRRRRDDDDDDDD
MMMMMMMMRRRRRRRRRRRREEEEAAAA
```
Each letter maps to a ## X: Section Title heading in your markdown. The number of rows and columns a letter spans determines the relative size of that section.
Poster sections
Define sections with ## X: Title syntax, where X matches a letter from the grid:
## T: Your poster title goes here

**Author One**¹, **Author Two**² | email@institution.edu

¹ Dartmouth College | ² Collaborating Institution

## I: Introduction [blue]

Content with **Markdown**, callout boxes, emoji figures, math, and tables.

## M: Methods [violet]

Use callout boxes, flow diagrams, and emoji figures inside sections.

## R: Results [green]

$$\hat{y} = \beta_0 + \beta_1 x_1 + \epsilon$$

## D: Discussion [teal]

Callout boxes work inside poster sections just like in slides.

## E: References [orange]

1. Author A, Author B (2023). *Journal* 1:1-10.

## A: Acknowledgments [spring]

Supported by **NSF** #1234567.
The T section renders as the title bar. All other sections render as content panels with section headings. Use <div class="scale-80"> wrappers to adjust font size within sections.
Section colors
Add [color] after a section title to set its callout box color scheme:
## I: Introduction [blue]
## M: Methods [violet]
## R: Results [green]
Available colors: blue, green, violet/purple, orange, red, teal, spring.
Colors affect the section heading border, callout box backgrounds, and callout box borders. Individual boxes can override with data-color="..." on the div.
Bundled Fonts
The package includes these fonts for consistent rendering across platforms:
- Avenir LT Std (Light, Book, Roman, Medium, Heavy, Black) — body text
- Fira Code (Regular, Medium, Bold) — code blocks
- Noto Sans SC (Variable) — CJK character support
Development
# Clone and install in development mode
git clone https://github.com/ContextLab/cdl-slides.git
cd cdl-slides
pip install -e ".[dev]"

# Run tests
pytest tests/ -v

# Run linter
ruff check src/ tests/
ruff format src/ tests/
License
MIT License. See LICENSE for details.
Links
- Repository: https://github.com/ContextLab/cdl-slides
- Lab Website: https://www.context-lab.com
- Marp: https://marp.app/
Release history Release notifications | RSS feed


Download files
Download the file for your platform. If you're not sure which to choose, learn more about installing packages.
Source Distribution
Built Distribution
Filter files by name, interpreter, ABI, and platform.
If you're not sure about the file name format, learn more about wheel file names.
Copy a direct link to the current filters
File details
Details for the file cdl_slides-1.1.1.tar.gz.
File metadata
- Download URL: cdl_slides-1.1.1.tar.gz
- Upload date:
- Size: 20.6 MB
- Tags: Source
- Uploaded using Trusted Publishing? No
- Uploaded via: twine/6.2.0 CPython/3.9.13
File hashes
| Algorithm | Hash digest | |
|---|---|---|
| SHA256 |
22f4e90716632f460be50f72858d5e60973882557fa9e5756a0f05886059fa9f
|
|
| MD5 |
984a18cb6d4e42104f57a2d770ecadc4
|
|
| BLAKE2b-256 |
4b31efb71880c795ecdf16d8a57c69fa308817b04f75d482a4fa4d5dbcbbeff3
|
File details
Details for the file cdl_slides-1.1.1-py3-none-any.whl.
File metadata
- Download URL: cdl_slides-1.1.1-py3-none-any.whl
- Upload date:
- Size: 14.5 MB
- Tags: Python 3
- Uploaded using Trusted Publishing? No
- Uploaded via: twine/6.2.0 CPython/3.9.13
File hashes
| Algorithm | Hash digest | |
|---|---|---|
| SHA256 |
989778f6fe96a1146abdb71799c71e7f61656991666364c6fc0cbc66b5abbd08
|
|
| MD5 |
547aca604ab092701f72d4c93ea8b2c1
|
|
| BLAKE2b-256 |
1242d48b7842db86e20ea9fe283cc20ffd65e4851142db9a8c808285c2f86015
|


