
Chrome Lens API for Python
English | Русский




This project provides a powerful, asynchronous Python library and command-line tool for interacting with Google Lens. It allows you to perform advanced Optical Character Recognition (OCR), get segmented text blocks (e.g., for comics), translate text, and get precise word coordinates.
🚀 Quick Start for Windows Users
If you don't want to install Python, you can download the standalone lens_scan-windows-amd64.exe from the Releases section.
📸 Automated ShareX Setup
If you use ShareX, you can fully automate the setup with one command:
# Using the installed package:
lens_scan --setup-sharex

# Or using the standalone .exe:
lens_scan-windows-amd64.exe --setup-sharex
This will automatically configure a hotkey (Ctrl + O) and the necessary actions to use Google Lens OCR.
✨ Key Features
- Modern Backend: Utilizes Google's official Protobuf endpoint (
v1/crupload) for robust and accurate results. - Asynchronous & Safe: Built with
asyncioandhttpx. Includes a built-in semaphore to prevent API abuse and IP bans from excessive concurrent requests. - Powerful OCR & Segmentation:
- Extract text from images as a single string.
- Get text segmented into logical blocks (paragraphs, dialog bubbles) with their own coordinates.
- Get individual text lines with their own precise geometry.
- Built-in Translation: Instantly translate recognized text into any supported language.
- Versatile Image Sources: Process images from a file path, URL, bytes, PIL Image object, or NumPy array.
- Chromium-Accurate Text Overlay: Repaints translated text in place the way Chrome's own Lens overlay does — erasing the source with the server's inpainted background patch, then drawing the translation in the original colours, angle and line box. Handles right-to-left scripts, vertical CJK, and per-character font fallback.
- Region Queries: Re-read one region of an image at native resolution (
process_region), which reads small print far better than the full-image pass. - Local Daemon:
lens_scan --servekeeps a warm process so callers skip the ~1.2 s interpreter start on every invocation. Doubles as a backend for browser userscripts. - Feature-Rich CLI: A simple yet powerful command-line interface (
lens_scan) for quick use. - Proxy Support: Full support for HTTP, HTTPS, and SOCKS proxies, plus
--no-env-proxywhen you want to bypass the proxy your environment sets. - Clipboard Integration: Instantly copy OCR or translation results to your clipboard with the
--sharexflag. - Flexible Configuration: Manage settings via a
config.jsonfile, CLI arguments, or environment variables.
📦 Which install to pick
| startup | download | notes | |
|---|---|---|---|
uv tool install |
488 ms | ~10 MB | no binary at all, so nothing for antivirus heuristics to flag; updates with one command |
| standalone zip | 202 ms | 25 MB | no Python needed; a folder, not a single file |
.exe |
1782 ms | 18 MB | no longer built: self-extracts on every run, which is both the antivirus trigger and the startup cost |
Measured on the same machine, --help only, median of six runs.
The standalone build starts fastest of the three because Nuitka has compiled the imports away; the one-file variant lost to both by unpacking itself first.
# Python users - no binary, no antivirus noise
uv tool install chrome-lens-py       # or: pipx install chrome-lens-py
lens_scan --help
If you have no Python at all, uv will fetch one for you (uv python install),
which is still smaller and quieter than a frozen binary.
One-line install of the standalone build
Downloads the latest release, unpacks it, puts lens_scan on your PATH, and
checks it starts before declaring victory.
# Windows
irm https://raw.githubusercontent.com/bropines/chrome-lens-py/main/scripts/install.ps1 | iex
# Linux / macOS
curl -fsSL https://raw.githubusercontent.com/bropines/chrome-lens-py/main/scripts/install.sh | sh
Installs to %LOCALAPPDATA%\Programs\lens-scan or ~/.local/share/lens-scan;
re-running replaces the existing install. Both scripts refuse to install a
pre-standalone release rather than quietly handing you the self-extracting build
that caused the antivirus reports.
🚀 Installation
You can install the package using pip:
pip install chrome-lens-py
To enable clipboard functionality (the --sharex flag), install the library with the [clipboard] extra:
pip install "chrome-lens-py[clipboard]"
Or, install the latest version directly from GitHub:
pip install git+https://github.com/bropines/chrome-lens-py.git
🚀 Usage
🛠️ CLI Usage (`lens_scan`)
The command-line tool provides quick access to the library's features directly from your terminal.
lens_scan <image_source> [ocr_lang] [options]
<image_source>: Path to a local image file or an image URL.[ocr_lang](optional): BCP 47 language code for OCR (e.g., 'en', 'ja'). If omitted, the API will attempt to auto-detect the language.
Options
| Flag | Alias | Description |
|---|---|---|
--translate <lang> |
-t |
Translate the OCR text to the target language code (e.g., en, ru). |
--translate-from <lang> |
Specify the source language for translation (otherwise auto-detected). | |
--translate-out <path> |
-to |
Save the image with the translated text overlaid to the specified file path. |
--output-blocks |
-b |
Output OCR text as segmented blocks (useful for comics). Incompatible with --get-coords and --output-lines. |
--output-lines |
-ol |
Output OCR text as individual lines with their geometry. Incompatible with --output-blocks and --get-coords. |
--get-coords |
Output recognized words and their coordinates in JSON format. Incompatible with --output-blocks and --output-lines. |
|
--sharex |
-sx |
Copy the result (translation or OCR) to the clipboard. |
--ocr-single-line |
Join all recognized OCR text into a single line, removing line breaks. | |
--config-file <path> |
Path to a custom JSON configuration file. | |
--update-config |
Update the default config file with settings from the current command. | |
--font <path> |
Path to a .ttf font file for the text overlay. |
|
--font-size <size> |
Font size for the text overlay (default: 20). | |
--proxy <url> |
Proxy server URL (e.g., socks5://127.0.0.1:9050). |
|
--logging-level <lvl> |
-l |
Set logging level (DEBUG, INFO, WARNING, ERROR). |
--help |
-h |
Show this help message and exit. |
Examples
1. Basic OCR and Translation
Auto-detects the source language on the image and translates it to English. This is the most common use case.
lens_scan "path/to/your/image.png" -t en
2. Get Segmented Text Blocks (for Comics/Manga)
Ideal for images with multiple, separate text boxes. This command outputs each recognized text block individually, making it perfect for translating comics or complex documents.
lens_scan "path/to/manga.jpg" ja -b
-bis the alias for--output-blocks.
3. Get Individual Text Lines
Outputs each recognized line of text along with its geometry.
lens_scan "path/to/document.png" --output-lines
-olis the alias for--output-lines.
4. Get Coordinates of All Individual Words
Outputs a detailed JSON array containing every single recognized word and its precise geometric data (center, size, angle). Useful for programmatic analysis or custom overlays.
lens_scan "path/to/diagram.png" --get-coords
5. Translate, Save Overlay, and Copy to Clipboard
A power-user workflow. This command will:
- OCR a Japanese image.
- Translate it to Russian.
- Save a new image named
translated_manga.pngwith the Russian text rendered on it. - Copy the final translation to your clipboard.
lens_scan "path/to/manga.jpg" ja -t ru -to "translated_manga.png" -sx
6. Process an Image from a URL as a Single Line
Fetches an image directly from a URL and joins all recognized text into one continuous line, removing any line breaks.
lens_scan "https://i.imgur.com/VPd1y6b.png" en --ocr-single-line
7. Use a SOCKS5 Proxy
All requests to the Google API will be routed through the specified proxy server, which is useful for privacy or bypassing region restrictions.
lens_scan "image.png" --proxy "socks5://127.0.0.1:9050"
👨💻 Programmatic API Usage (`LensAPI`)
Basic Example (Full Text)
import asyncio
from chrome_lens_py import LensAPI

async def main():
    # Initialize the API. You can pass a proxy, region, etc. here.
    # By default, an API key is not required.
    api = LensAPI()

    image_source = "path/to/your/image.png" # Or a URL, PIL Image, NumPy array

    try:
        # Process the image and get a single string of text
        result = await api.process_image(
            image_path=image_source,
            ocr_language="ja",
            target_translation_language="en"
        )

        print("--- OCR Text ---")
        print(result.get("ocr_text"))

        print("\n--- Translated Text ---")
        print(result.get("translated_text"))

    except Exception as e:
        print(f"An error occurred: {e}")

if __name__ == "__main__":
    asyncio.run(main())
Working with Different Image Sources
The process_image method seamlessly handles various input types.
from PIL import Image
import numpy as np

# ... inside an async function ...

# From a URL
result_url = await api.process_image("https://i.imgur.com/VPd1y6b.png")

# From a PIL Image object
with Image.open("path/to/image.png") as img:
    result_pil = await api.process_image(img)

# From a NumPy array (e.g., loaded via OpenCV)
with Image.open("path/to/image.png") as img:
    numpy_array = np.array(img)
    result_numpy = await api.process_image(numpy_array)
Getting Segmented Text Blocks
To get text segmented into logical blocks (like dialog bubbles in a comic), use the output_format='blocks' parameter.
import asyncio
from chrome_lens_py import LensAPI

async def process_comics():
    api = LensAPI()
    image_source = "path/to/manga.jpg"

    result = await api.process_image(
        image_path=image_source,
        output_format='blocks' # Get segmented blocks instead of a single string
    )

    # The result now contains a 'text_blocks' key
    text_blocks = result.get("text_blocks", [])
    print(f"Found {len(text_blocks)} text blocks.")

    for i, block in enumerate(text_blocks):
        print(f"\n--- Block #{i+1} ---")
        print(block['text'])
        # block also contains 'lines' and 'geometry' keys

asyncio.run(process_comics())
Getting Individual Lines and their Geometry
To get each recognized line of text as a separate item, use the output_format='lines' parameter.
import asyncio
from chrome_lens_py import LensAPI

async def process_document_lines():
    api = LensAPI()
    image_source = "path/to/document.png"

    result = await api.process_image(
        image_path=image_source,
        output_format='lines' # Get individual lines with their geometry
    )

    # The result now contains a 'line_blocks' key
    line_blocks = result.get("line_blocks", [])
    print(f"Found {len(line_blocks)} lines.")

    for i, line in enumerate(line_blocks):
        print(f"\n--- Line #{i+1} ---")
        print(f"Text: {line['text']}")
        print(f"Geometry: {line['geometry']}")

asyncio.run(process_document_lines())
Getting Fully Detailed Text Structures
To get a complete, nested structure of paragraphs, lines, and words with geometry at each level, use output_format='detailed'.
import asyncio
from chrome_lens_py import LensAPI

async def process_with_details():
    api = LensAPI()
    image_source = "path/to/document.png"

    result = await api.process_image(
        image_path=image_source,
        output_format='detailed' # Get the fully nested structure
    )

    # The result now contains a 'detailed_blocks' key
    detailed_blocks = result.get("detailed_blocks", [])
    print(f"Found {len(detailed_blocks)} detailed blocks.")

    for i, block in enumerate(detailed_blocks):
        print(f"\n--- Block #{i+1} ---")
        print(f"  Geometry: {block['geometry']}")
        for j, line in enumerate(block['lines']):
            print(f"    --- Line #{j+1}: '{line['text']}' ---")
            for k, word in enumerate(line['words']):
                 print(f"      - Word: '{word['text']}', Geometry: {word['geometry']}")

asyncio.run(process_with_details())
LensAPI Constructor
api = LensAPI(
    api_key: str = "YOUR_API_KEY_OR_DEFAULT",
    client_region: Optional[str] = None,
    client_time_zone: Optional[str] = None,
    proxy: Optional[str] = None,
    timeout: int = 60,
    font_path: Optional[str] = None,
    font_size: Optional[int] = None,
    max_concurrent: int = 5
)
process_image Method
result: dict = await api.process_image(
    image_path: Any,
    ocr_language: Optional[str] = None,
    target_translation_language: Optional[str] = None,
    source_translation_language: Optional[str] = None,
    output_overlay_path: Optional[str] = None,
    ocr_preserve_line_breaks: bool = True,
    output_format: Literal['full_text', 'blocks', 'lines', 'detailed'] = 'full_text'
)
output_format: Controls the structure of the OCR output.'full_text'(default) returns a single string inocr_text.'blocks'returns a list intext_blocks.'lines'returns a list inline_blocks.'detailed'returns a fully nested structure indetailed_blocks.ocr_preserve_line_breaks: IfFalseandoutput_formatis'full_text', joins all OCR text into a single line.
The returned result dictionary contains:
ocr_text(Optional[str]): The full recognized text (ifoutput_format='full_text').text_blocks(Optional[List[dict]]): A list of segmented text blocks (ifoutput_format='blocks'). Each block is a dict withtext,lines, andgeometry.line_blocks(Optional[List[dict]]): A list of individual text lines (ifoutput_format='lines'). Each block is a dict withtextandgeometry.translated_text(Optional[str]): The translated text, if requested.word_data(List[dict]): A list of dictionaries for every recognized word with its geometry.detailed_blocks(Optional[List[dict]]): A list of fully structured text blocks (ifoutput_format='detailed'). Each block contains lines, which in turn contain words, with geometry at every level.raw_response_objects: The "raw" Protobuf response object for further analysis.
⚙️ Configuration
Settings are loaded with the following priority: CLI Arguments > config.json File > Library Defaults.
config.json
A config.json file can be placed in your system's default config directory to set persistent options.
- Linux:
~/.config/chrome-lens-py/config.json - macOS:
~/Library/Application Support/chrome-lens-py/config.json - Windows:
C:\Users\<user>\.config\chrome-lens-py\config.json
Example config.json
{
  "api_key": "OPTIONAL! If you don't know what this is, I don't recommend setting it here.",
  "proxy": "socks5://127.0.0.1:9050",
  "client_region": "DE",
  "client_time_zone": "Europe/Berlin",
  "timeout": 90,
  "font_path": "/usr/share/fonts/truetype/dejavu/DejaVuSans.ttf",
  "ocr_preserve_line_breaks": true
}
🖥️ Daemon mode
Importing Pillow, protobuf and httpx costs roughly a second. If something calls
lens_scan repeatedly — ShareX on every screenshot, say — run it as a daemon and
pay that once:
lens_scan --serve                      # http://127.0.0.1:8765
lens_scan --serve --port 9000 --token secret
| route | body |
|---|---|
POST /v1/ocr |
{"image": "<path or URL>"} or {"image_b64": "..."}, plus translate_to, ocr_language, output_format, vertical_text, overlay_mode |
POST /v1/region |
the same, plus "region": [center_x, center_y, width, height] normalized 0..1 |
GET /health |
liveness check |
Measured here, same work each time:
| median | |
|---|---|
| daemon | 0.37 s |
python -m, from source |
1.53 s |
| Nuitka onefile binary | 2.00 s |
The binary being the slowest is not a typo. Onefile extracts its payload to a
temporary directory on every run, which costs more than importing the modules
did: startup alone is 1.67 s against 0.52 s from source. Freezing is for
distribution, not for speed - if startup is what you care about, the daemon is
the answer, and --standalone rather than --onefile would at least stop the
binary making it worse.
The daemon binds to loopback and sends CORS headers, so a Tampermonkey userscript can use it directly.
🔍 Region queries
The full-image pass downscales anything over 1600px, which is exactly when small print suffers. A region query sends only the cropped pixels, at native scale:
async with LensAPI() as api:
    # (center_x, center_y, width, height), normalized against the full image
    result = await api.process_region("page.png", (0.8, 0.82, 0.35, 0.06))
    print(result["ocr_text"])
Geometry comes back in full-image coordinates, so it lines up with
process_image output directly.
🎨 Overlay rendering
lens_scan manga.png -t ru -to out.png                      # Chromium-style, default
lens_scan manga.png -t ru -to out.png --vertical-text horizontal
lens_scan page.png  -t ru -to out.png --overlay-mode legacy
--vertical-text controls what happens to top-to-bottom CJK source text:
| value | behaviour |
|---|---|
auto (default) |
stays vertical only when translating into a CJK language |
keep |
always vertical, exactly like Chromium |
horizontal |
reflows the paragraph into horizontal wrapped lines |
Right-to-left targets (Arabic, Hebrew, Persian…) need shaping that Pillow's published wheels cannot do, since they are built without libraqm:
pip install "chrome-lens-py[rtl]"      # python-bidi + arabic-reshaper
pip install "chrome-lens-py[fonts]"    # fontTools, for per-character font fallback
Without the fonts extra the renderer still works, but a font lacking glyphs for
the target script will draw tofu boxes.
Sharex Integration
Check sharex.md for more information on how to use this library with ShareX.
❤️ Support & Acknowledgments
- OWOCR: Greatly inspired by and based on OWOCR. Thank you to them for their research into Protobuf and OCR implementation.
- Chrome Lens OCR: For the original implementation and ideas that formed the basis of this library. The update with SHAREX support was originally tested and added by me to chrome-lens-ocr, thanks for the initial implementation and ideas.
- AI Collaboration: A significant portion of the v3.0 code, including the architectural refactor, asynchronous implementation, and Protobuf integration, was developed in collaboration with an advanced AI assistant.
- GOOGLE: For the convenient and high-quality Lens technology.
- Support the Author: If you find this library useful, you can support the author - Boosty
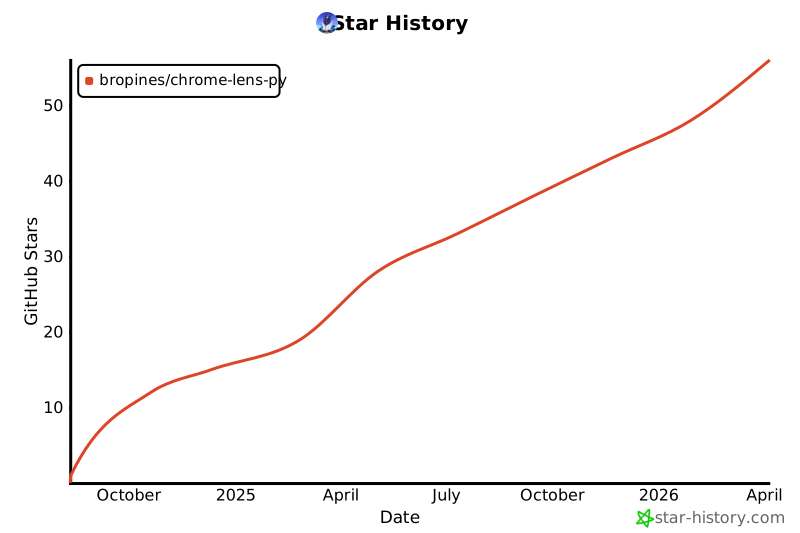
Star History
Disclaimer
This project is intended for educational and experimental purposes only. Use of Google's services must comply with their Terms of Service. The author is not responsible for any misuse of this software.
1 maintainer

Metadata
1 maintainer
Release files for chrome-lens-py 3.5.0
For a detailed explanation of source distributions (sdists) and built distributions (wheels), please see the package formats documentation.
Source distribution (sdist)
| File | Size | Uploaded | |
|---|---|---|---|
| chrome_lens_py-3.5.0.tar.gz | 97.1 kB | Details |
Built distribution (wheel)
| File | Interpreter | ABI | Platform | Reset |
|---|---|---|---|---|
| chrome_lens_py-3.5.0-py3-none-any.whl | Python 3 | none | any | Details |
Total release size: 221.5 kB
Release files / chrome_lens_py-3.5.0.tar.gz
| Download URL | chrome_lens_py-3.5.0.tar.gz |
|---|---|
| Size | 97.1 kB |
| Tags | Source |
|
SHA-256 checksum How to use checksums |
ad6ec36228101944e797ea57b09bfd360b1654055b1fffff904817f0877627e9
|
|
BLAKE2b-256 checksum How to use checksums |
fe961fd175157f5fbcbffbdc08dcfff611551dbb875f910fca99f06f409be1a9
|
| Upload date | |
|
Uploaded using Trusted Publishing? What is trusted publishing? |
Yes |
| Uploaded via |
twine/6.1.0 CPython/3.12.8
|
Provenance
Provenance describes where a file came from. On PyPI, provenance is shared via attestations, which provide a verifiable record of the build or publishing details. View details, limitations and caveats.


PyPI Publish Attestation
PyPI verified that this artifact, at this checksum, originated from the publisher listed below.
Signed by GitHub Actions, verified by PyPI on Sep 16, 2026.
Transparency logRelease files / chrome_lens_py-3.5.0-py3-none-any.whl
| Download URL | chrome_lens_py-3.5.0-py3-none-any.whl |
|---|---|
| Size | 124.4 kB |
| Tags | Python 3 |
|
SHA-256 checksum How to use checksums |
c6c284f4ccef51c08d4aea1467acc0b2f968276ac1bce873087d76da6d5d7dfa
|
|
BLAKE2b-256 checksum How to use checksums |
40aca486756ed015d6d1621ef459ba6e35f7996b435328f59db37ad3518363ca
|
| Upload date | |
|
Uploaded using Trusted Publishing? What is trusted publishing? |
Yes |
| Uploaded via |
twine/6.1.0 CPython/3.12.8
|
Provenance
Provenance describes where a file came from. On PyPI, provenance is shared via attestations, which provide a verifiable record of the build or publishing details. View details, limitations and caveats.
PyPI Publish Attestation
PyPI verified that this artifact, at this checksum, originated from the publisher listed below.
Signed by GitHub Actions, verified by PyPI on Sep 16, 2026.
Transparency log













