GUI software for submitting and managing Python jobs on Slurm Clusters

Project description
ClusterRunner
GUI software for submitting and managing Python jobs on Slurm Clusters
Motivation
In facilities with a SLURM cluster high-performance computing (HPC) system, to run a Python script users have to log in (ssh) to a submission node and write a sbatch script to request resources and submit the Python scripts, then use SLURM commands to manage jobs. This is inconvenient and inefficient, particularly for those who are not experienced with running jobs on a cluster. This GUI is designed to make submitting and managing jobs on a cluster easy for anyone who has access to the cluster and wants to make the most of it.
This GUI was originally built to support running tomography data processing workflows on clusters, driven by very high data generation rates of synchrotron-based tomography beamlines (20–100 GB/minute).
Features
-
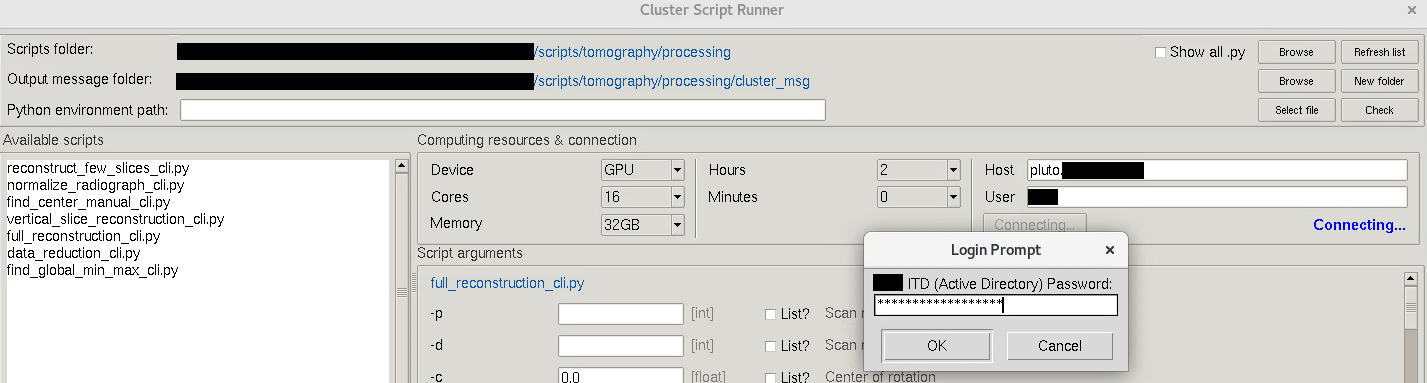
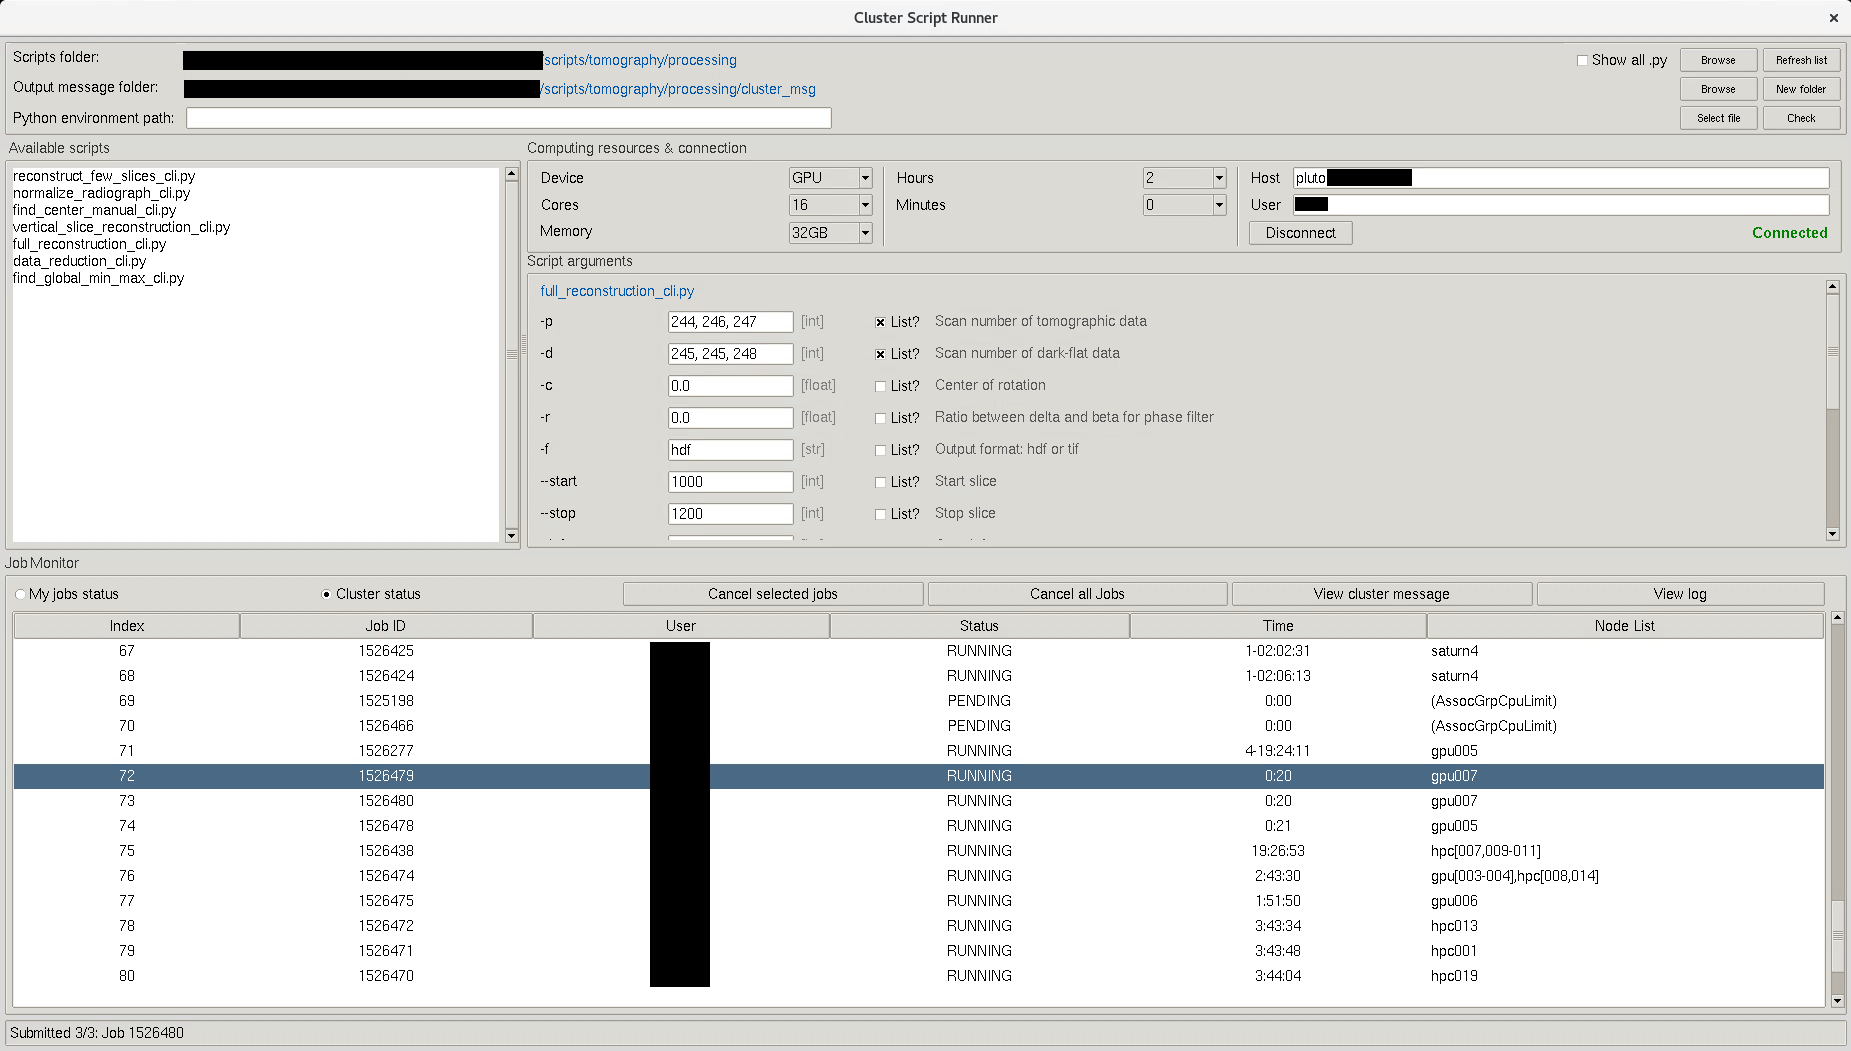
Simple cluster connection: connect to a Slurm cluster over SSH (supports interactive login such as Duo) without using the terminal. Users do not need to log in to a submission node manually; everything is done through the GUI.
-
Automatic input form generation: load an argparse-based Python script and the GUI automatically builds input fields from its arguments. This is especially useful for command-line data processing workflows, which is the main purpose of this GUI. For non-argparse scripts (tick "Show all .py"), users simply submit them to the cluster.
-
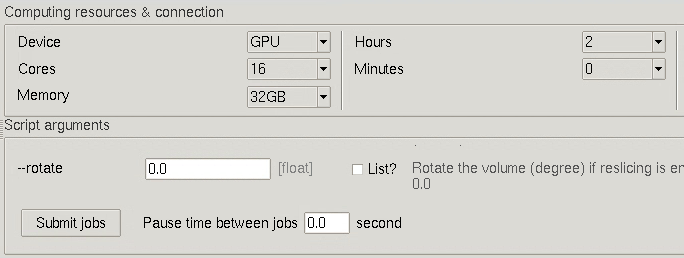
Easy job submission: choose CPU/GPU, memory, and runtime, then submit jobs with a single click.
-
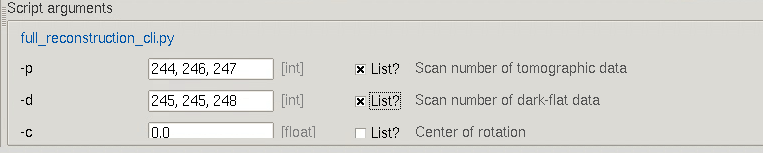
Batch jobs made simple: run multiple jobs at once by providing lists of input values.
-
Built-in job monitor: view job status, cancel jobs, and check output/error logs directly within the GUI.
-
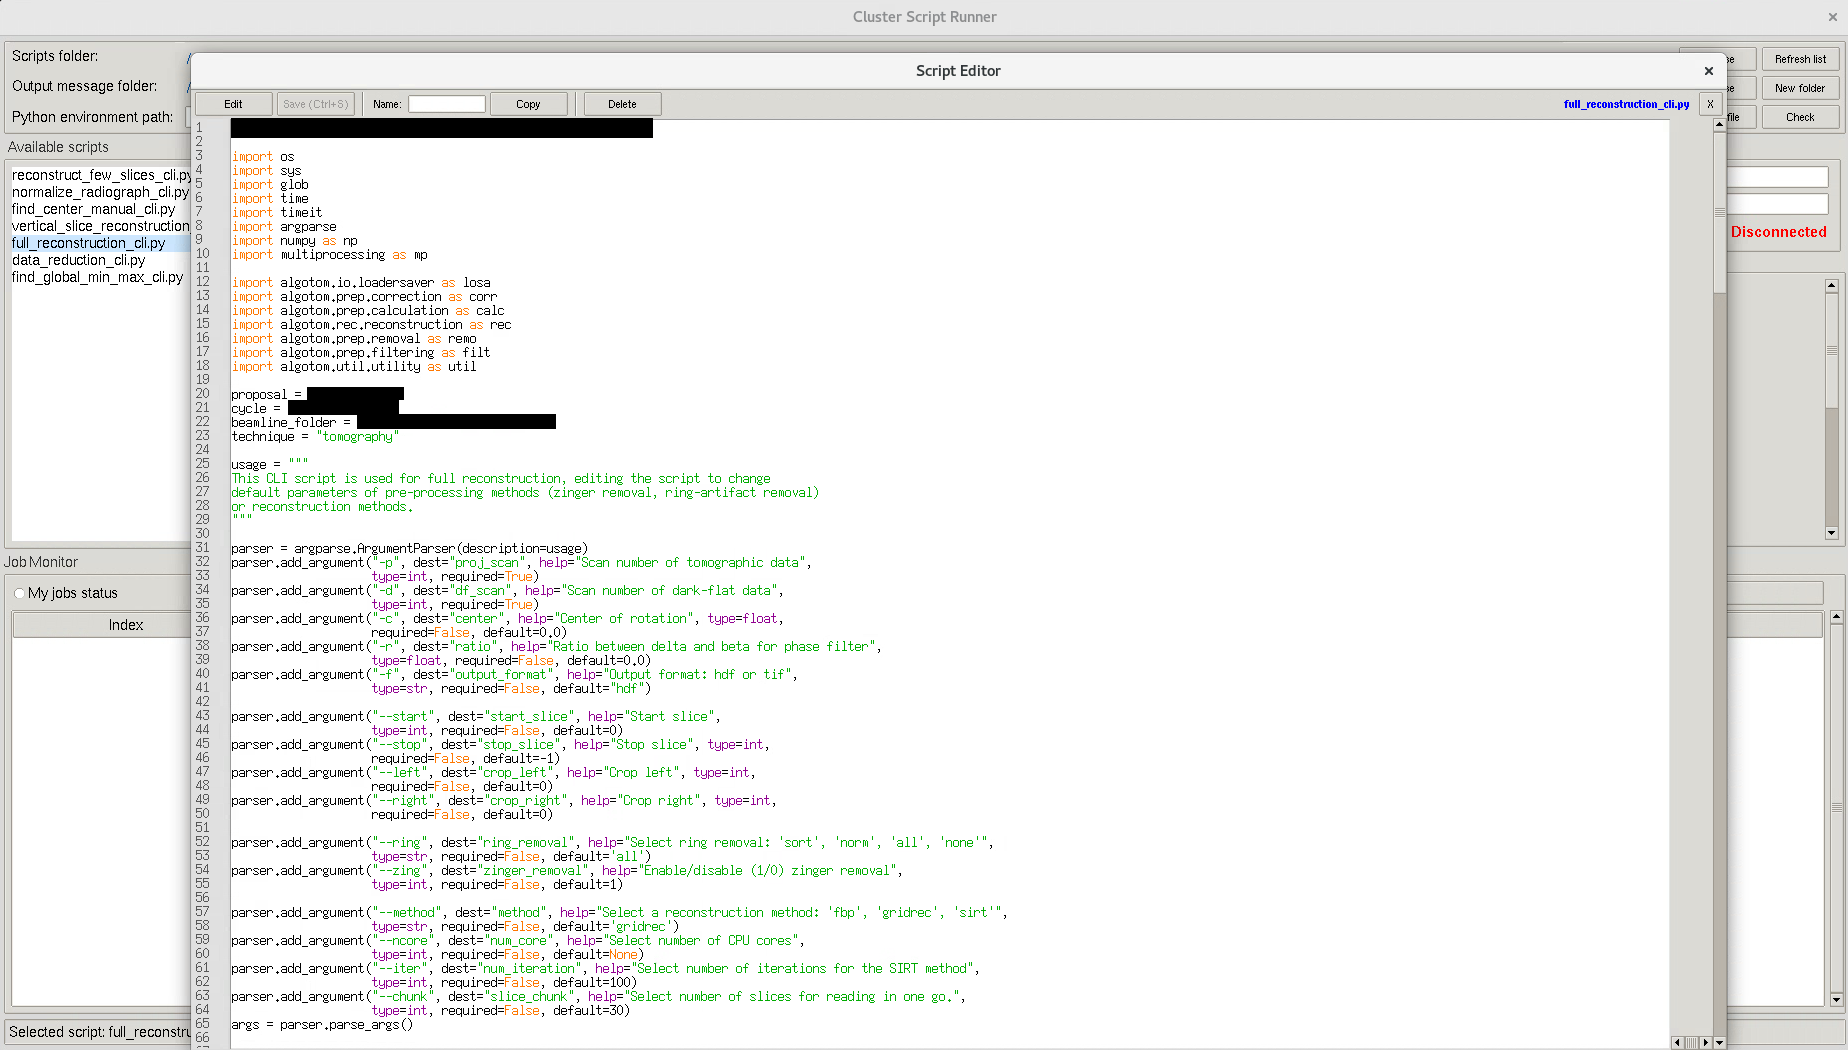
Built-in script editor: edit Python scripts directly inside the application, no need for external editors like VS Code or Vim. Compare two scripts side-by-side to track modifications or validate parameter changes.

Installation
Install Miniconda, Anaconda or Miniforge, then open a Linux terminal or the Miniconda/Anaconda PowerShell prompt and use the following commands for installation.
Using pip:
pip install clusterrunner
Using conda:
conda install -c algotom clusterrunner
Once installed, launching Cluster-Runner with
clusterrunner
Using -h for option usage
clusterrunner -h
Installing from source:
- If using a single file:
- Copy the file clusterrunner.py. Install python, paramiko.
- Run:
python clusterrunner.py
- If using setup.py
- Create conda environment
conda create -n clusterrunner python=3.11
conda activate clusterrunner
- Clone the source (git needs to be installed)
git clone https://github.com/algotom/clusterrunner.git
- Navigate to the cloned directory (having setup.py file)
pip install .
- Create conda environment
Usage
-
For users not familiar with using a cluster: the GUI must be run on a system that can SSH to a Slurm cluster (Linux OS). Because Python scripts run in the cluster environment, make sure outputs are written to files (e.g., interactive plots will not work). If the script reads from or writes to files, ensure the cluster can access those folders.
-
Select a base folder containing Python scripts and a folder for cluster output messages. Select the path to the Python environment. By default, the interpreter is chosen in the following priority: Manual entry, “Select file”, Script shebang, Same as the current GUI.
-
Clicking a script will show the arguments of that script in the right panel.
-
Double-clicking a script will open the Editor panel window.
-
Clicking "Submit jobs" will submit the current script to the cluster.
-
Tick "List" option to accept a list of values for submitting multiple-jobs.
-
By default, ClusterRunner picks and displays ArgParse-based scripts. However, users can choose to display all Python scripts by ticking the box "Show all .py".
Release history Release notifications | RSS feed

Download files
Download the file for your platform. If you're not sure which to choose, learn more about installing packages.
Source Distribution
Built Distribution
Filter files by name, interpreter, ABI, and platform.
If you're not sure about the file name format, learn more about wheel file names.
Copy a direct link to the current filters
File details
Details for the file clusterrunner-1.0.0.tar.gz.
File metadata
- Download URL: clusterrunner-1.0.0.tar.gz
- Upload date:
- Size: 31.0 kB
- Tags: Source
- Uploaded using Trusted Publishing? No
- Uploaded via: twine/6.2.0 CPython/3.11.15
File hashes
| Algorithm | Hash digest | |
|---|---|---|
| SHA256 |
0228947e59440ba6c76338e30107c251d3537e68627c61586cdf90f13bb8673f
|
|
| MD5 |
cad64954ead6664c64a85f7ecece7a61
|
|
| BLAKE2b-256 |
3681d64b775ad8a6d2b5f97f8be6ea4a2135de2bec5312d8ee097bd9fb86c3cd
|
File details
Details for the file clusterrunner-1.0.0-py3-none-any.whl.
File metadata
- Download URL: clusterrunner-1.0.0-py3-none-any.whl
- Upload date:
- Size: 30.0 kB
- Tags: Python 3
- Uploaded using Trusted Publishing? No
- Uploaded via: twine/6.2.0 CPython/3.11.15
File hashes
| Algorithm | Hash digest | |
|---|---|---|
| SHA256 |
4cc40733ae446f88111c7a2f15358415e6684920aa144dc050aa8e786872d01c
|
|
| MD5 |
e0f8361e8b1a43c06ade18d6cf501e97
|
|
| BLAKE2b-256 |
dc79bdc3eb4b82204ecf99614f6476a232a15113efbb0de751d0c4356184b34b
|


