Enhanced MCP server for dbt with Lightdash integration for visualization and chart management.

Project description
dbt MCP Server
This MCP (Model Context Protocol) server provides tools to interact with dbt. Read this blog to learn more. Add comments or questions to GitHub Issues or join us in the community Slack in the #tools-dbt-mcp channel.
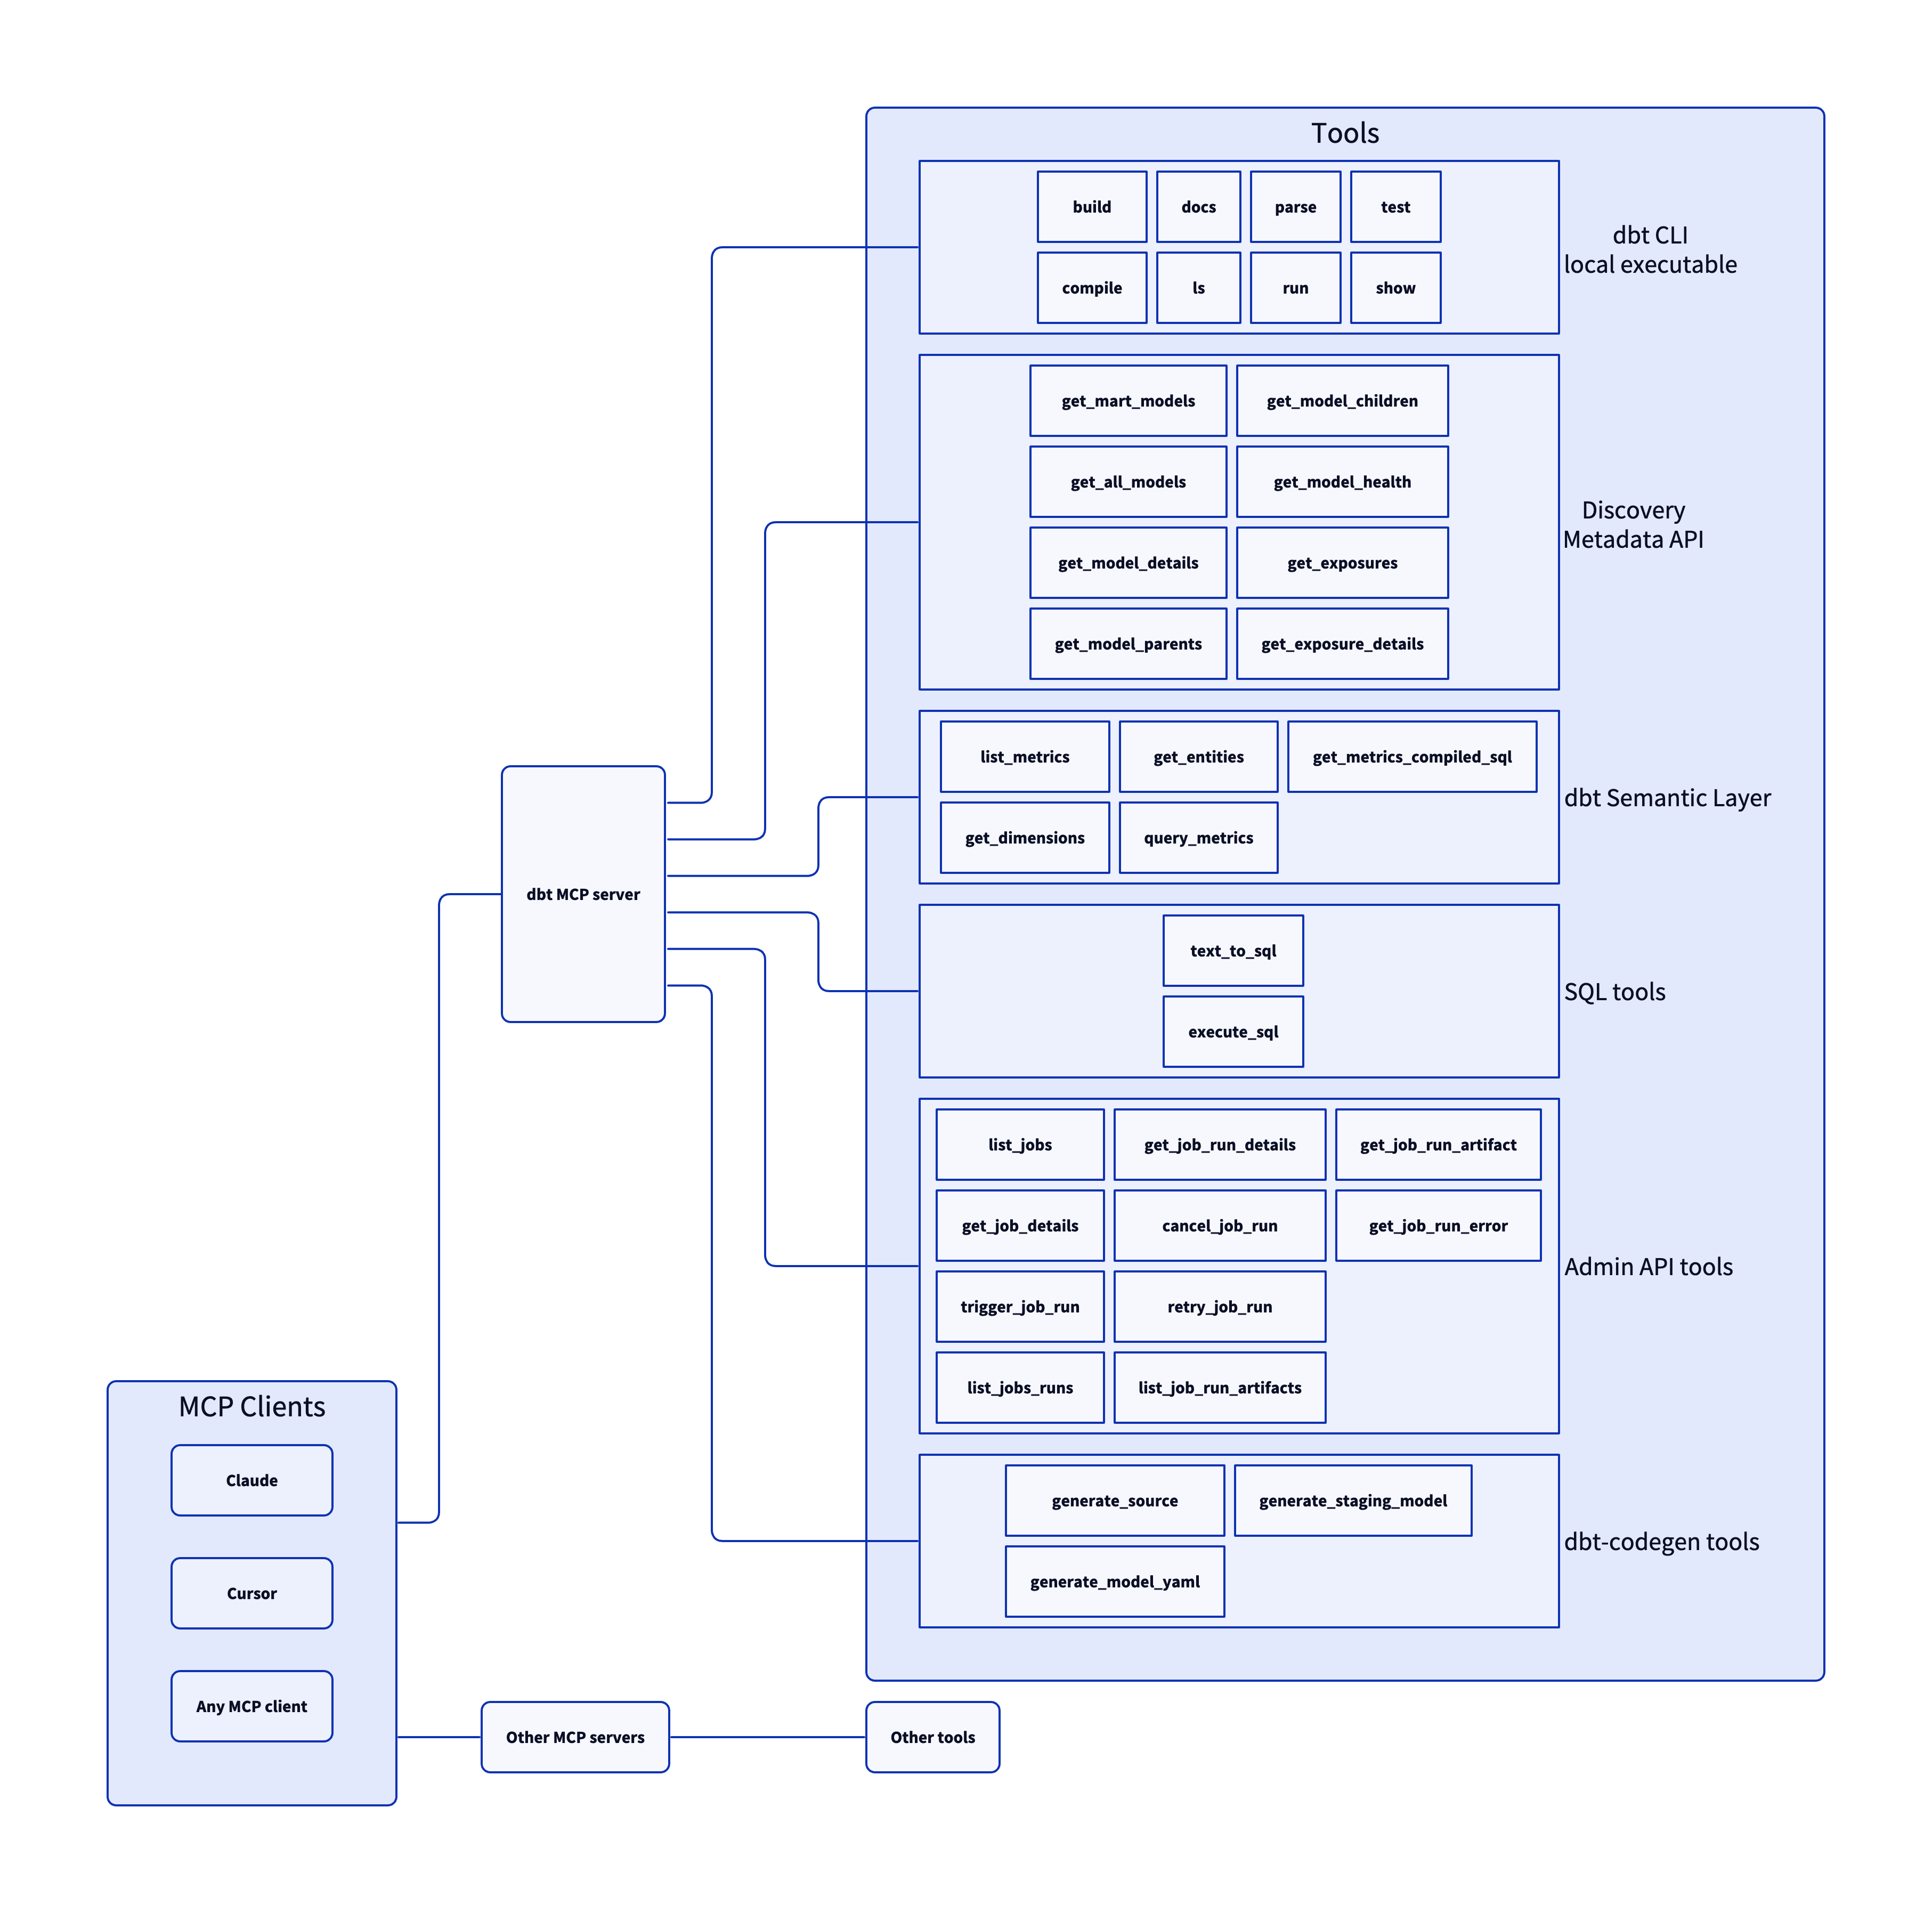
Architecture
Setup
- Install uv
- Copy the
.env.examplefile locally under a file called.envand set it with your specific environment variables (see theConfigurationsection of theREADME.md)
Configuration
The MCP server takes the following environment variable configuration:
Tool Groups
| Name | Default | Description |
|---|---|---|
DISABLE_DBT_CLI |
false |
Set this to true to disable dbt Core, dbt Cloud CLI, and dbt Fusion MCP tools |
DISABLE_SEMANTIC_LAYER |
false |
Set this to true to disable dbt Semantic Layer MCP objects |
DISABLE_DISCOVERY |
false |
Set this to true to disable dbt Discovery API MCP objects |
DISABLE_REMOTE |
true |
Set this to false to enable remote MCP objects |
DISABLE_TOOLS |
"" | Set this to a list of tool names delimited by a , to disable certain tools |
Configuration for Discovery, Semantic Layer, and Remote Tools
| Name | Default | Description |
|---|---|---|
DBT_HOST |
cloud.getdbt.com |
Your dbt Cloud instance hostname. This will look like an Access URL found here. If you are using Multi-cell, do not include the ACCOUNT_PREFIX here |
MULTICELL_ACCOUNT_PREFIX |
- | If you are using Multi-cell, set this to your ACCOUNT_PREFIX. If you are not using Multi-cell, do not set this environment variable. You can learn more here |
DBT_TOKEN |
- | Your personal access token or service token. Note: a service token is required when using the Semantic Layer and this service token should have at least Semantic Layer Only, Metadata Only, and Developer permissions. |
DBT_PROD_ENV_ID |
- | Your dbt Cloud production environment ID |
Configuration for Remote Tools
| Name | Description |
|---|---|
DBT_DEV_ENV_ID |
Your dbt Cloud development environment ID |
DBT_USER_ID |
Your dbt Cloud user ID |
Configuration for dbt CLI
| Name | Description |
|---|---|
DBT_PROJECT_DIR |
The path to where the repository of your dbt Project is hosted locally. This should look something like /Users/firstnamelastname/reponame |
DBT_PATH |
The path to your dbt Core, dbt Cloud CLI, or dbt Fusion executable. You can find your dbt executable by running which dbt |
DBT_CLI_TIMEOUT |
Configure the number of seconds before your agent will timeout dbt CLI commands. Defaults to 10 seconds. |
It is also possible to set any environment variable supported by your dbt executable (see here for the ones supported in dbt Core).
We automatically set DBT_WARN_ERROR_OPTIONS='{"error": ["NoNodesForSelectionCriteria"]}' so that the MCP server knows if no node is selected when running a dbt command.
You can overwrite it if needed but we believe that it provides a better experience when calling dbt from the MCP server, making sure that the tool is selecting valid nodes.
Using with MCP Clients
After going through the Setup, you can use dbt-mcp with an MCP client.
Add this configuration to the respective client's config file. Be sure to replace the sections within <>:
{
  "mcpServers": {
    "dbt-mcp": {
      "command": "uvx",
      "args": [
        "--env-file",
        "<path-to-.env-file>",
        "dbt-mcp"
      ]
    },
  }
}
<path-to-.env-file> is where you saved the .env file from the Setup step
Claude Code
Run the following command to add the MCP server to Claude Code:
claude mcp add dbt -- uvx --env-file <path-to-.env-file> dbt-mcp
By default the MCP server is installed in the "local" scope, meaning that it will be active for Claude Code sessions in the current directory for the user who installed it.
It is also possible to install the MCP server:
- in the "user" scope, to have it installed for all Claude Code sessions, independently of the directory used
- in the "project" scope, to create a config file that can be version controlled so that all developers of the same project can have the MCP server already installed
To install it in the project scope, run the following and and commit the .mcp.json file. Be sure to use an env var file path that is the same for all users.
claude mcp add dbt -s project -- uvx --env-file <path-to-.env-file> dbt-mcp
More info on scopes here
Claude Desktop
Follow these instructions to create the claude_desktop_config.json file and connect.
For debugging, you can find the Claude Desktop logs at ~/Library/Logs/Claude for Mac or %APPDATA%\Claude\logs for Windows.
Cursor
Note the configuration options here and input your selections with this link:
Cursor MCP docs here for reference
VS Code
-
Open the Settings menu (Command + Comma) and select the correct tab atop the page for your use case
Workspace- configures the server in the context of your workspaceUser- configures the server in the context of your user- Note for WSL users: If you're using VS Code with WSL, you'll need to configure WSL-specific settings. Run the Preferences: Open Remote Settings command from the Command Palette (F1) or select the Remote tab in the Settings editor. Local User settings are reused in WSL but can be overridden with WSL-specific settings. Configuring MCP servers in the local User settings will not work properly in a WSL environment.
-
Select Features → Chat
-
Ensure that "Mcp" is
Enabled

-
Open the command palette
Control/Command + Shift + P, and select either "MCP: Open Workspace Folder MCP Configuration" or "MCP: Open User Configuration" depending on whether you want to install the MCP server for this workspace or for all workspaces for the user -
Add your server configuration (
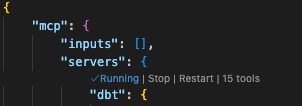
dbt) to the providedmcp.jsonfile as one of the servers:
{
	"servers": {
		"dbt": {
			"command": "uvx",
      "args": [
        "--env-file",
        "<path-to-.env-file>",
        "dbt-mcp"
      ]
		}
	}
}
<path-to-.env-file> is where you saved the .env file from the Setup step
- You can start, stop, and configure your MCP servers by:
- Running the
MCP: List Serverscommand from the Command Palette (Control/Command + Shift + P) and selecting the server - Utlizing the keywords inline within the
mcp.jsonfile
VS Code MCP docs here for reference
Troubleshooting
- Some MCP clients may be unable to find
uvxfrom the JSON config. If this happens, try finding the full path touvxwithwhich uvxon Unix systems and placing this full path in the JSON. For instance:"command": "/the/full/path/to/uvx".
Tools
dbt CLI
build- Executes models, tests, snapshots, and seeds in dependency ordercompile- Generates executable SQL from models, tests, and analyses without running themdocs- Generates documentation for the dbt projectls(list) - Lists resources in the dbt project, such as models and testsparse- Parses and validates the project’s files for syntax correctnessrun- Executes models to materialize them in the databasetest- Runs tests to validate data and model integrityshow- Runs a query against the data warehouse
Allowing your client to utilize dbt commands through this MCP tooling could modify your data models, sources, and warehouse objects. Proceed only if you trust the client and understand the potential impact.
Semantic Layer
list_metrics- Retrieves all defined metricsget_dimensions- Gets dimensions associated with specified metricsget_entities- Gets entities associated with specified metricsquery_metrics- Queries metrics with optional grouping, ordering, filtering, and limiting
Discovery
get_mart_models- Gets all mart modelsget_all_models- Gets all modelsget_model_details- Gets details for a specific modelget_model_parents- Gets parent nodes of a specific modelget_model_children- Gets children modes of a specific model
Remote
text_to_sql- Generate SQL from natural language requestsexecute_sql- Execute SQL on dbt Cloud's backend infrastructure with support for Semantic Layer SQL syntax. Note: using a PAT instead of a service token forDBT_TOKENis required for this tool.
Contributing
Read CONTRIBUTING.md for instructions on how to get involved!
Release history Release notifications | RSS feed


Download files
Download the file for your platform. If you're not sure which to choose, learn more about installing packages.
Source Distribution
Built Distribution
Filter files by name, interpreter, ABI, and platform.
If you're not sure about the file name format, learn more about wheel file names.
Copy a direct link to the current filters
File details
Details for the file dbt_mcp_lightdash-0.7.0.tar.gz.
File metadata
- Download URL: dbt_mcp_lightdash-0.7.0.tar.gz
- Upload date:
- Size: 99.5 kB
- Tags: Source
- Uploaded using Trusted Publishing? No
- Uploaded via: twine/6.1.0 CPython/3.13.2
File hashes
| Algorithm | Hash digest | |
|---|---|---|
| SHA256 |
151c7453a0574af8be3cdc9c0660d65cce9fd08a22410ace743997ae66031f2a
|
|
| MD5 |
e78c2687646a4f7ee8379f97bce0a7d5
|
|
| BLAKE2b-256 |
c6051b4a1ad6ebec88e00a28ba7c0954961ec3541b68902bb267af7e8f500bdc
|
File details
Details for the file dbt_mcp_lightdash-0.7.0-py3-none-any.whl.
File metadata
- Download URL: dbt_mcp_lightdash-0.7.0-py3-none-any.whl
- Upload date:
- Size: 96.4 kB
- Tags: Python 3
- Uploaded using Trusted Publishing? No
- Uploaded via: twine/6.1.0 CPython/3.13.2
File hashes
| Algorithm | Hash digest | |
|---|---|---|
| SHA256 |
12723975f977267ee0458436f41390edfc73eba5d1b172086191c49478eebc81
|
|
| MD5 |
c0cb7cacfae378131c74768fccf1d41a
|
|
| BLAKE2b-256 |
9fd9683d969d583040f8491a21a22a29e743889fac6a6581f0848171ca72df93
|


