
SBEL GPU DEM-Engine
A dual-GPU DEM solver with complex grain geometry support
🚨 DEM-Engine now works on both Linux (including WSL) and Windows! 🚨
⚠️ Windows users are still encouraged to use it via WSL for a more well-tested experience. ⚠️
Quick links
Description
DEM-Engine, nicknamed DEME, does Discrete Element Method simulations:
- Using up to two GPUs at the same time (works great on consumer and data center GPUs).
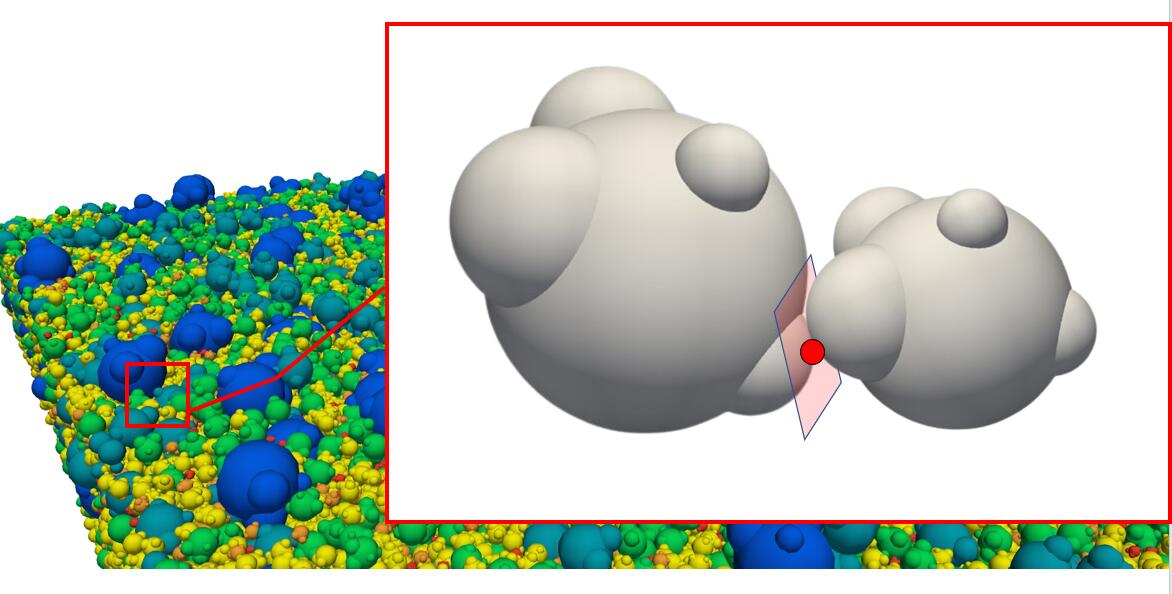
- With the particles having complex shapes represented by clumped spheres.
- With support for customizable contact force models (want to add a non-standard cohesive force, or an electrostatic repulsive force? You got this).
- With an emphasis on computational efficiency. As a rule of thumb, using 3-sphere clump elements, simulating 1 million elements for 1 million time steps takes around 1 hour on two RTX 3080s.
- Supporting a wide range of problems with flexible API designs. Deformable meshes and grain breakage can be simulated by leveraging the explicit controls given to the user.
- With support for co-simulation with other C/C++ packages, such as Chrono.
Currently DEME is a C++ package with an API design similar to Chrono's, and should be easy to learn for existing Chrono users.
You can find the movies of some of DEME's demos here.
You are welcome to discuss DEME on Project Chrono's forum.
PyDEME
DEME is now available as a Python package, pyDEME. It is quick to install and pick up its usage by trying this Python version. If you want to maximize the performance and use the cutting-edge features, you can instead install the C++ version of DEME from source.
To install pyDEME, use a Linux machine, install CUDA if you do not already have it. Useful installation instructions may be found here.
- CUDA 12.8 is recommended. Versions older than 12.8 generally work, but note there are scattered bugged versions such as 11.3, 12.1, 12.2, 12.3 etc.
- Avoid CUDA 13.0+. Currently version 13.0+ results in extremely slow just-in-time compilation. This may be fixed in future versions of DEME.
- On Linux, do not go above GCC 15+ because its glibc might bring math function conflicts with CUDA. In general, GCC 11 is recommended and if you use Ubuntu, simply go version 22.04 and do not try 26.04.
Once CUDA is ready, you can pip install pyDEME. In your conda environement, do
conda create -n pyDEME python=3.11
conda activate pyDEME
conda install cmake
pip3 install deme3
Use the conventional lowercase package name in Python:
import deme

solver = deme.DEMSolver()
The experimental deme3 distribution installs the same deme import namespace. The official release channel is
the deme distribution on PyPI.
The historical import DEME spelling is also supported for backward
compatibility, but new code should use import deme.
You can also install pyDEME via (Please don't use conda install:conda install for now, it is not yet behaving correctly)
conda create -n pyDEME python=3.11
conda activate pyDEME
conda install -c projectchrono pydeme
pyDEME can be replaced with an environment name of your choice. Supported Python versions other than 3.11 work as well.
Then Python scripts can be executed in this environment. To understand the content of each Python demo, refer to the explanations of the C++ demos with the same names in Numerical examples section.
If you use pyDEME in conjunction with PyChrono, import deme first, then PyChrono.
Persistent Jitify startup cache
DEME uses Jitify and NVRTC to discover CUDA headers and compile runtime kernels during solver initialization. Workloads
that repeatedly start fresh DEME processes can persist the discovered header sources and avoid repeating much of that
startup work. Set DEME_PERSISTENT_JITIFY_CACHE to a writable cache-file path:
export DEME_PERSISTENT_JITIFY_CACHE="$HOME/.cache/deme/jitify_header_cache.bin"
mkdir -p "$(dirname "$DEME_PERSISTENT_JITIFY_CACHE")"
Values such as 1, true, on, and yes select an automatic temporary path. Values such as 0, false, off, and
no, as well as an unset variable, disable the persistent cache. The cache is opt-in because an automatic shared
temporary path can be unsafe on multi-user systems, concurrent writers can contend, and header contents can change
without their paths or CUDA version changing. Prefer an explicit, user-owned path and remove the file after changing
CUDA toolchains or headers. An unreadable, incompatible, or unwritable cache falls back to normal Jitify discovery.
Compilation
You can also build C++ DEME from source. It allows for potentially more performance and more tailoring.
Linux and WSL
First, install CUDA. The newest release is recommended.
Once CUDA is ready, clone this project and then:
git submodule init
git submodule update
This will pull the submodule NVIDIA/jitify so that we can do runtime compilation.
Then, one typical choice is to make a build directory in it. Then in the build directory, use cmake to configure the compilation. An example:
mkdir build
cd build
cmake -DCMAKE_BUILD_TYPE=Release ..
You may want to use this information if you need to update cmake to the newest.
We suggest that you install a cmake GUI such as ccmake, and ninja_build generator, to better help you configure the project. In this case, the example above can be done like this alternatively:
mkdir build
cd build
ccmake -G Ninja ..
You generally do not have to change the build options in the GUI, but preferably you can change CMAKE_BUILD_TYPE to Release, and if you need to install this package as a library you can specify a CMAKE_INSTALL_PREFIX.
Some additional troubleshooting tips for generating the project:
- If some dependencies such as CUB are not found, then you probably need to manually set
$PATHand$LD_LIBRARY_PATH. An example is given below for a specific version of CUDA, note it may be different on your machine or cluster. You should also inspect ifnvidia-smiandnvcc --versiongive correct returns.
export CPATH=/usr/local/cuda-12.8/targets/x86_64-linux/include${CPATH:+:${CPATH}}
export PATH=/usr/local/cuda-12.8/bin${PATH:+:${PATH}}
export PATH=/usr/local/cuda-12.8/lib64/cmake${PATH:+:${PATH}}
export LD_LIBRARY_PATH=/usr/local/cuda-12.8/lib64${LD_LIBRARY_PATH:+:${LD_LIBRARY_PATH}}
export CUDA_HOME=/usr/local/cuda-12.8
Finally, build the project.
ninja
Some additional troubleshooting tips for building the project:
- If you see some grammatical errors during compilation, such as
filesystemnot being a member ofstdor arguments not expanded with..., then manually setting the flagTargetCXXStandardtoSTD_CXX17might help. - If CUB is not found, then you may manually set it in the
ccmakeGUI as/usr/local/cuda/lib64/cmake/cub. It may be a slightly different path on your machine or cluster. - If
libcudacxxis not found, then you may manually set it in theccmakeGUI as/usr/local/cuda-12.8/targets/x86_64-linux/lib/cmake/libcudacxx. Depending on your CUDA version it may be a slightly different path on your machine or cluster. You may also try to find these packages usingfind.
Windows
The process is similar to the installation of Chrono, which you can use as reference. The steps depend on your choice of tools, and what listed here are our recommendation.
- Follow the guide in the Linux and WSL section to install CUDA on Windows.
- Use Sourcetree to clone the repo's main branch, with the recursive option on.
- Use CMake GUI to configure the project. You should get all the dependency fields filled automatically; if not, manually fill them. Example CUB directory:
C:/Program Files/NVIDIA GPU Computing Toolkit/CUDA/v12.8/lib/cmake/cub. Use the defaultx64architecture andMSVCcompiler. If you need to install this package as a library later, you can specify aCMAKE_INSTALL_PREFIX. - After configuration and generation, find the file
Chrono-DEM-Engine.slnin the build directory, open it using Visual Studio, selectReleasebuild type and build the project.
Numerical examples
After the build process is done, you can start trying out the demos. On Windows, these demos may be in the bin\Release directory instead.
./bin/DEMdemo_SingleSphereCollidecan be used to test a correct installation. If it runs outputting a lot of texts (those are debug messages; the user do not have to worry about the content) and stops without an error in the end, the installation is probably good.- An all-rounder beginner example featuring a bladed mixer interacting with complex shaped particles:
./bin/DEMdemo_Mixer. - A place to learn how prescribed motions work in this package, using either analytical boundaries or particle-represented boundaries:
./bin/DEMdemo_Centrifugeand./bin/DEMdemo_Sieve. - A few representative engineering experiments reproduced in DEM simulations, which potentially serve as starting points for your own DEM scripts:
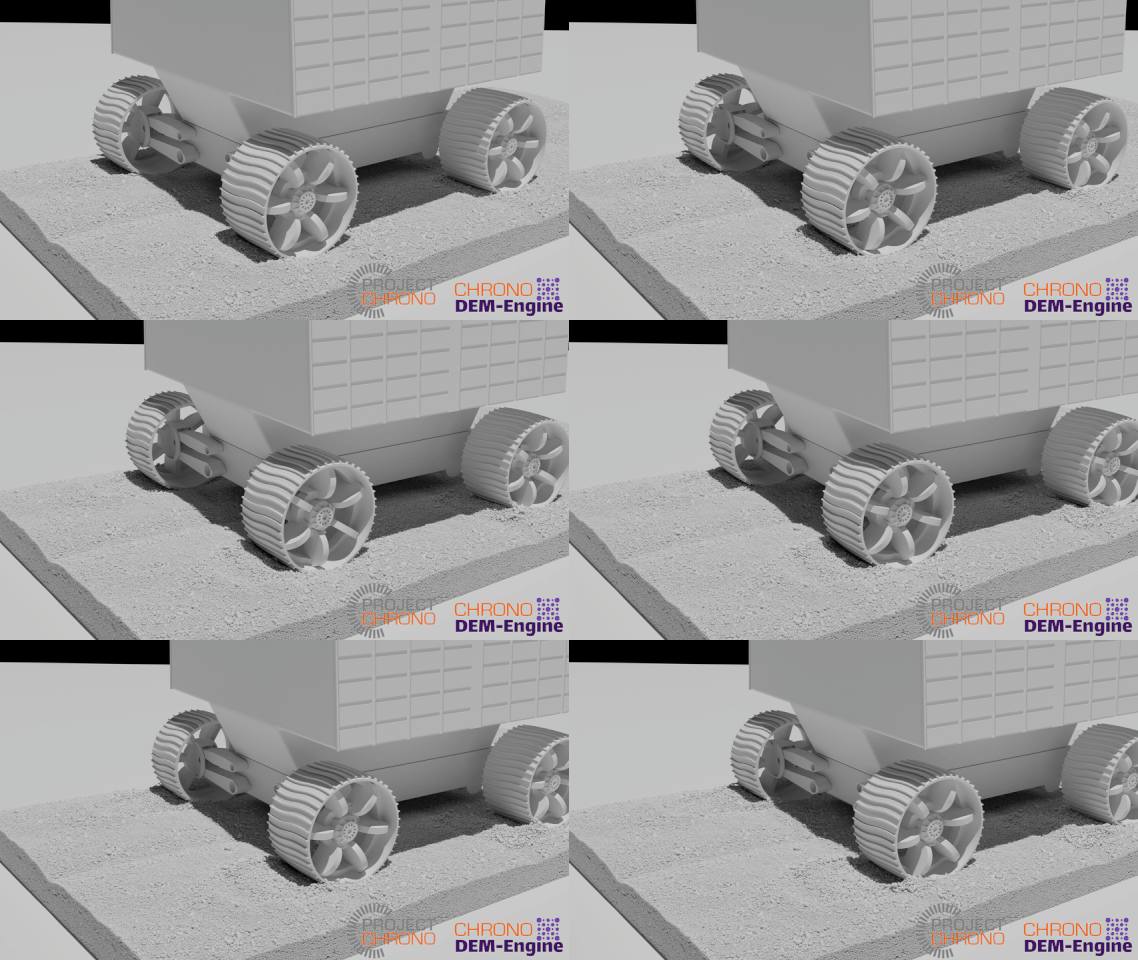
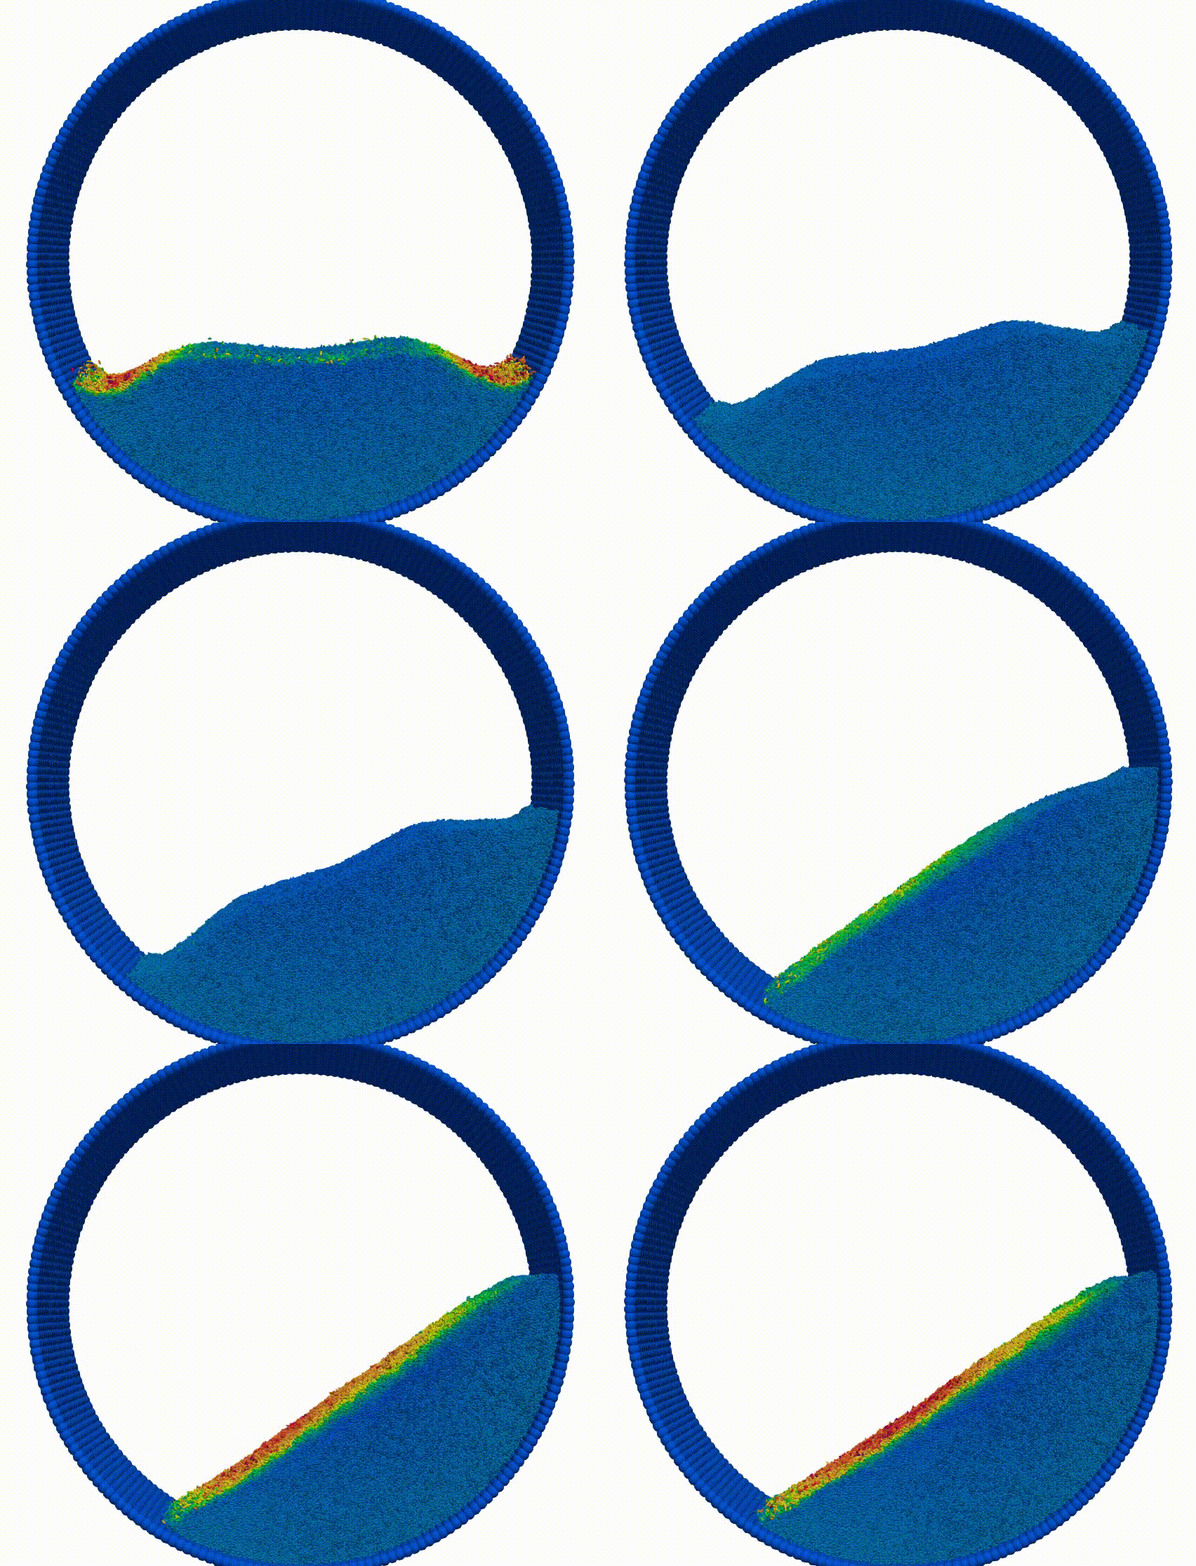
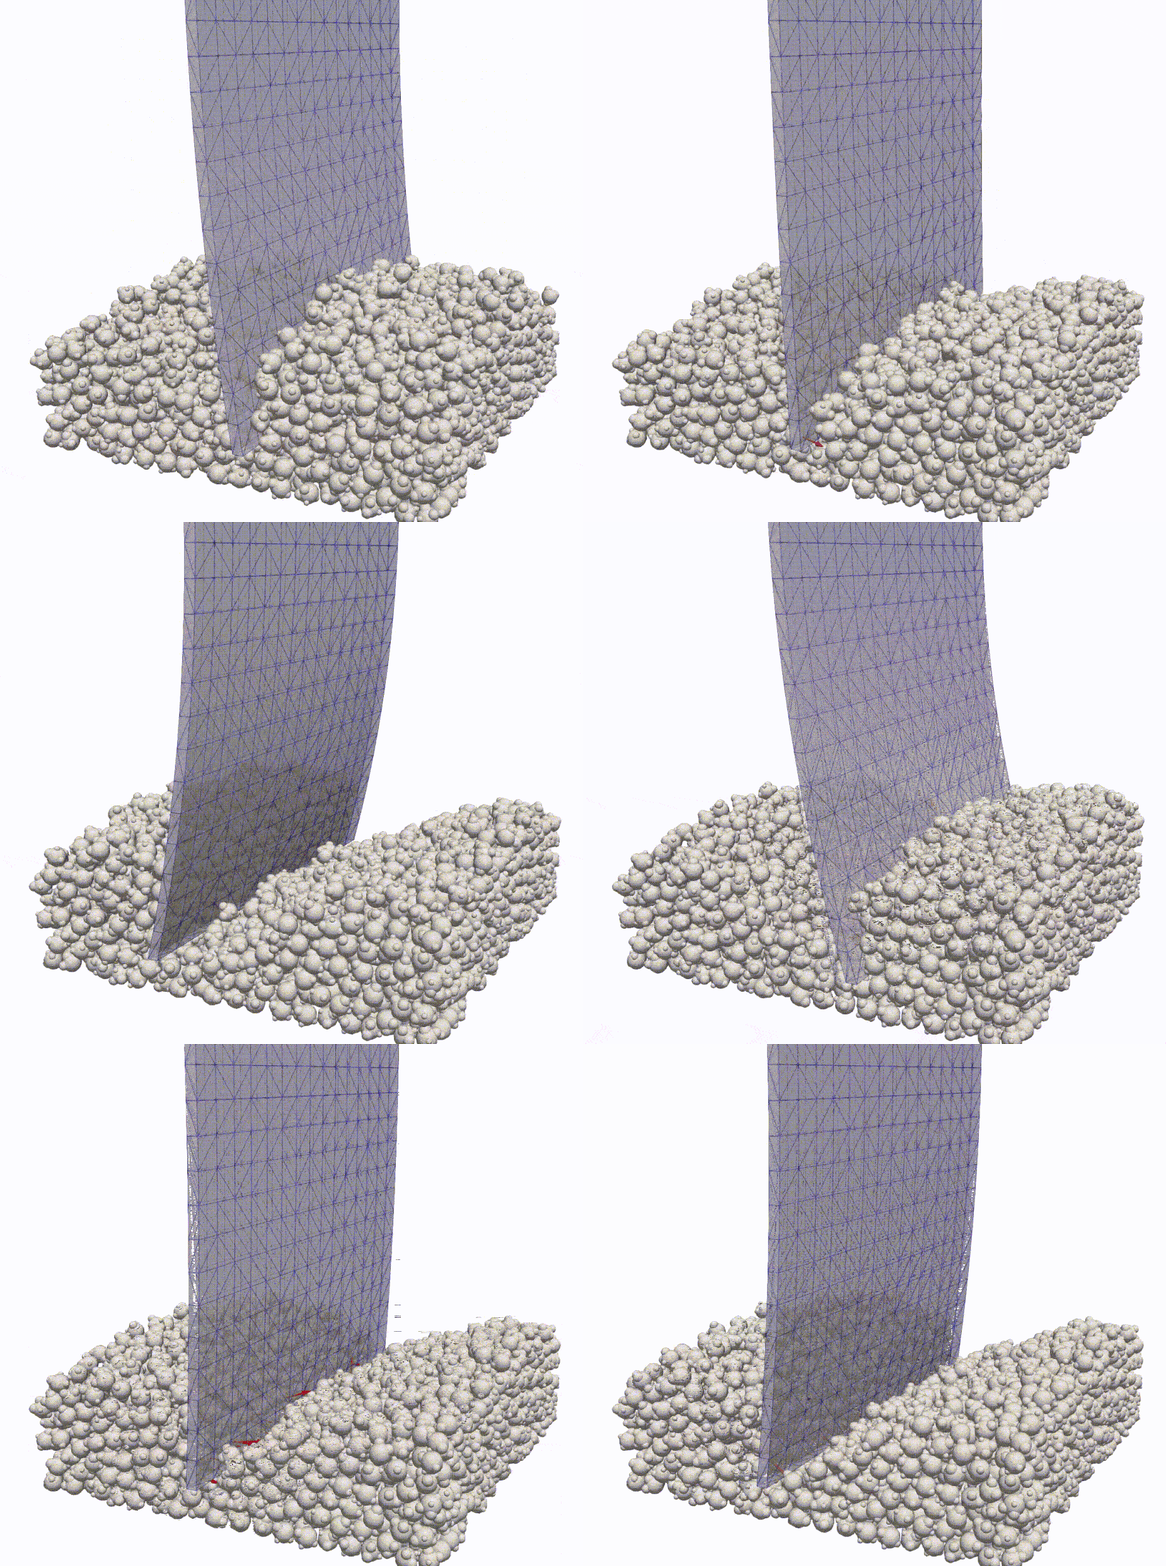
/bin/DEMdemo_BallDrop,./bin/DEMdemo_ConePenetration,/bin/DEMdemo_RotatingDrum,./bin/DEMdemo_Repose,./bin/DEMdemo_Plow. ./bin/DEMdemo_WheelDPshows how to load a checkpointed configuration file to instantly generate a settled granular terrain, then run a drawbar-pull test on it. This demo therefore requires you to first finish the two GRCPrep demos to obtain the terrain checkpoint file. The granular terrain in these demos features DEM particles with a variety of sizes and shapes../bin/DEMdemo_WheelDPSimplifiedis a simplified version of the previous drawbar-pull test which has no prerequisite. The terrain is simpilified to be made of only one type of irregular-shaped particles. It serves as a quick starting point for people who want to create similar experiments../bin/DEMdemo_Indentationis a more advanced examples showing the usage of the custom additional properties (called wildcards) that you can associate with the simulation entities, and use them in the force model and/or change them in simulation then deposit them into the output files. Wildcards have more use cases especially if coupled together with a custom force model, as shown in some of the follwing demos../bin/DEMdemo_Electrostaticsimulates a pile of complex-shaped and charged granular particles interacting with a mesh that is also charged. Its purpose is to show how to define a non-local force (electrostatic force) which takes effect even when the bodies are not in contact, using a custom force model file. This idea can be extended to modeling a custom cohesion force etc../bin/DEMdemo_FlexibleMeshsimulates a deforming mesh interacting with DEM particles. The intention is to show that the user can extract the force pairs acting on a mesh, then update the mesh with deformation information. DEME does not care how this deformation is calculated. Presumably the user can feed the forces to their own solid mechanics solver to get the deformation. DEME does not come with a built-in linear solver so for simplicity, in this demo the mesh deformation is instead prescribed../bin/DEMdemo_GameOfLifeis a fun game-of-life simulator built with the package, showing the flexibility in terms of how you can use this tool../bin/DEMdemo_FractureBoxsimulates a concrete bar breaking using a custom force model that creates inter-particle bonds and lets them break under certain conditions. This is a showcase for advanced usage of custom models that involves per-contact wildcard variables.- It is a good idea to read the comment lines at the top of the demo files to understand what they each does.
The DEME documentation sources live in docs/. The site combines
the user and Python guides with a Doxygen-generated C++ API reference. To build
the viewable HTML locally, install Doxygen and the Python dependencies in
docs/requirements.txt, then run:
make -C docs html
Open docs/_build/html/index.html after the build completes. See the
documentation build guide for the optional
CMake target and documentation conventions.
Some additional troubleshooting tips for running the demos:
- If the program silently exits while creating the
DEMSolverobject, check if your NVIDIA driver supports your current CUDA version (nvidia-smi). - If errors similar to
CUDA_ERROR_UNSUPPORTED_PTX_VERSIONare encountered while you run the demos, or (rarely) the simulations proceed without detecting any contacts, then please make sure the CUDA installation is the same version as when the code is compiled. - Another cause for the simulations proceeding without detecting any contacts, could be the force kernel silently failed. This could also lead to a too-many-geometries-in-bin crash. The cause is usually that the force kernel was launched with too many threads per block, therefore not enough registers can be leveraged. This can be avoided by calling
SetForceCalcThreadsPerBlockprior to the start of simulation with the argument being smaller choices like 128. Note that you should only try this if you are using a custom force model. - Used your own force model but got runtime compilation error like
expression must have pointer-to-object type but it has type "float", orunknown variable "delta_time"? Check out what we did in demoDEMdemo_Electrostatic. You may need to manually specify what material properties are pairwise and what contact wildcards you have usingSetMustPairwiseMatPropandSetPerContactWildcards. - Just running provided demos or a script that used to work, but the jitification of the force model failed or the simulation fails at the first kernel call (probably in
DEMContactDetection.cu)? Then did you pull a new version and just re-built in-place? A new update may modify the force model, and the force model in DEME are given as text files so might not be automatically copied over when the project is re-built. I am sorry for the trouble it might cause, but you can do a clean re-build from an empty directory and it should fix the problem. Do not forget to first commit your own branches' changes and relocate the data you generated in the build directory. Another solution is to copy everything insrc/DEMto theDEMdirectory in the build directory, then everything insrc/kernelto thekerneldirectory in the build directory, then try again.
Limitations
DEME is designed to simulate the interaction among clump-represented particles, the interaction between particles and mesh-represented bodies, as well as the interaction between particles and analytical boundaries. DEME does not resolve mesh–mesh or mesh–analytical contacts.
- It is able to handle mesh-represented bodies with relatively simple physics, for example a meshed plow moving through granular materials with a prescribed velocity, or several meshed projectiles flying and hitting the granular ground.
- However, if the bodies' physics are complex multibody problems, say it is a vehicle that has joint-connected parts and a motor with certain driving policies, or the meshed bodies have collisions among themselves that needs to be simulated, then DEME alone does not have the infrastructure to handle them. But you can install DEME as a library and do coupled simulations with other tools such as Chrono, where DEME is exclusively tasked with handling the granular materials and the influence they exert on the outside world (with high efficiency, of course). See the following section.
Install as library
Linux and WSL
Set CMAKE_INSTALL_PREFIX flag in cmake GUI to your desired installation path and then
ninja install
Windows
Set CMAKE_INSTALL_PREFIX flag in cmake GUI to your desired installation path, then open a command line window in Visual Studio (may be found in Tools -> Command Line), and use the following command to install
cmake --install .
Example scripts in Chrono-projects
We provide examples of linking against both Chrono and DEME for co-simulations in chrono-projects.
For now, you need to checkout the feature/DEME branch of chrono-projects after cloning the code to access the scripts!
You need to build chrono-projects linking against a Chrono installation (Chrono installation guide is here; note you have to make install to install Chrono, not just build it), then link against DEME. The steps for building chrono-projects:
- Start by linking against Chrono. Set
Chrono_DIR. It should be in<your_Chrono_install_dir>/lib/cmake. Then configure the project; - Make sure
ENABLE_PROJECTStoONand configure the project; - Linkage against Chrono is done, now move on to link against DEME. Set
ENABLE_DEME_TESTStoON. Then configure the project; - Set
DEME_DIRwhen prompted. It should be in<your_DEME_install_dir>/lib64/cmake/DEME. Then configure the project.
Then build the project and you should be able to run the demo scripts that demonstrate the co-simulation between DEME and Chrono.
More documentations on using this package for co-simulations are being added.
Postprocessing recommendation
DEME mainly outputs clumps or component spheres in csv format, so you can postprocess the raw data however you desire. The following is simply an example work flow which gives a quick and interactive rendering scene of the outputted component spheres (WriteSphereFile) using ParaView.
- Directly load the outputted
vtkmesh files in ParaView and show them. - Load the
csvcomponent sphere files. Use filter Table To Points, and set X, Y and Z coordinates to be read from the X, Y and Z columns of thecsvfiles, then click Apply. After that, apply Glyph filter. Set Glyph Type to be Sphere (you may reduce Theta and Phi Resolition to save memory), then set the option Scale Array to be the r column of thecsvfile, set Scale Factor to be 2 (DEME outputs the radii but in ParaView we should scale the spheres by diameter). Finally, set Glyph Mode to All Points, then click Apply.
Licensing
This project should be treated as the collective intellectual property of the Author(s) and the University of Wisconsin - Madison. The following copyright statement should be included in any new or modified source files
Copyright (c) 2021, Simulation-Based Engineering Laboratory
Copyright (c) 2021, University of Wisconsin - Madison

SPDX-License-Identifier: BSD-3-Clause
New authors should add their name to the file CONTRIBUTORS.md rather than to individual copyright headers.
Notes on code included from Project Chrono
This project exists independently of Chrono so developers should be sure to include the appropriate BSD license header on any code which is sourced from Chrono::GPU(DEM) or other parts of Chrono.
SAMPLE header for files sourced from Chrono
Copyright (c) 2021, SBEL GPU Development Team
Copyright (c) 2021, University of Wisconsin - Madison

SPDX-License-Identifier: BSD-3-Clause


This file contains modifications of the code authored by the Project Chrono
Development Team. The original license can be found below:

Copyright (c) 2016, Project Chrono Development Team
All rights reserved.

Use of this source code is governed by a BSD-style license that can be found
in the LICENSE file at the top level of the distribution and at
http://projectchrono.org/license-chrono.txt. A copy of the license is below.

Redistribution and use in source and binary forms, with or without modification, are permitted provided that the following conditions are met:

 - Redistributions of source code must retain the above copyright notice, this list of conditions and the following disclaimer.
 - Redistributions in binary form must reproduce the above copyright notice, this list of conditions and the following disclaimer in the documentation and/or other materials provided with the distribution.
 - Neither the name of the nor the names of its contributors may be used to endorse or promote products derived from this software without specific prior written permission.

THIS SOFTWARE IS PROVIDED BY THE COPYRIGHT HOLDERS AND CONTRIBUTORS "AS IS" AND ANY EXPRESS OR IMPLIED WARRANTIES, INCLUDING, BUT NOT LIMITED TO, THE IMPLIED WARRANTIES OF MERCHANTABILITY AND FITNESS FOR A PARTICULAR PURPOSE ARE DISCLAIMED. IN NO EVENT SHALL THE COPYRIGHT HOLDER OR CONTRIBUTORS BE LIABLE FOR ANY DIRECT, INDIRECT, INCIDENTAL, SPECIAL, EXEMPLARY, OR CONSEQUENTIAL DAMAGES (INCLUDING, BUT NOT LIMITED TO, PROCUREMENT OF SUBSTITUTE GOODS OR SERVICES; LOSS OF USE, DATA, OR PROFITS; OR BUSINESS INTERRUPTION) HOWEVER CAUSED AND ON ANY THEORY OF LIABILITY, WHETHER IN CONTRACT, STRICT LIABILITY, OR TORT (INCLUDING NEGLIGENCE OR OTHERWISE) ARISING IN ANY WAY OUT OF THE USE OF THIS SOFTWARE, EVEN IF ADVISED OF THE POSSIBILITY OF SUCH DAMAGE.
Citation
See the paper that explains the design and usage of DEME and cite
@article{zhang_2024_deme,
title = {Chrono {DEM-Engine}: A Discrete Element Method dual-{GPU} simulator with customizable contact forces and element shape},
journal = {Computer Physics Communications},
volume = {300},
pages = {109196},
year = {2024},
issn = {0010-4655},
doi = {https://doi.org/10.1016/j.cpc.2024.109196},
author = {Ruochun Zhang and Bonaventura Tagliafierro and Colin {Vanden Heuvel} and Shlok Sabarwal and Luning Bakke and Yulong Yue and Xin Wei and Radu Serban and Dan Negruţ},
keywords = {Discrete Element Method, GPU computing, Physics-based simulation, Scientific package, BSD3 open-source},
}
See the paper on using DEME for simulating rover dynamics and cite
@article{ruochunGRC-DEM2023,
      title={A {GPU}-accelerated simulator for the {DEM} analysis of granular systems composed of clump-shaped elements},
      author={Ruochun Zhang and Colin {Vanden Heuvel} and Alexander Schepelmann and Arno Rogg and Dimitrios Apostolopoulos and Samuel Chandler and Radu Serban and Dan Negrut},
      year={2024},
      journal={Engineering with Computers},
      doi={https://doi.org/10.1007/s00366-023-01921-9}
}
1 maintainer

Metadata
1 maintainer
Release files for deme3 3.0.11
For a detailed explanation of source distributions (sdists) and built distributions (wheels), please see the package formats documentation.
Built distributions (wheels)
| File | Reset | |||
|---|---|---|---|---|
| deme3-3.0.11-cp314-cp314-manylinux_2_27_x86_64.manylinux_2_28_x86_64.whl | CPython 3.14 | CPython 3.14 | Linux glibc 2.28+ x86-64, Linux glibc 2.27+ x86-64 | Details |
| deme3-3.0.11-cp313-cp313-manylinux_2_27_x86_64.manylinux_2_28_x86_64.whl | CPython 3.13 | CPython 3.13 | Linux glibc 2.27+ x86-64, Linux glibc 2.28+ x86-64 | Details |
| deme3-3.0.11-cp312-cp312-manylinux_2_27_x86_64.manylinux_2_28_x86_64.whl | CPython 3.12 | CPython 3.12 | Linux glibc 2.27+ x86-64, Linux glibc 2.28+ x86-64 | Details |
| deme3-3.0.11-cp311-cp311-manylinux_2_27_x86_64.manylinux_2_28_x86_64.whl | CPython 3.11 | CPython 3.11 | Linux glibc 2.27+ x86-64, Linux glibc 2.28+ x86-64 | Details |
| deme3-3.0.11-cp310-cp310-manylinux_2_27_x86_64.manylinux_2_28_x86_64.whl | CPython 3.10 | CPython 3.10 | Linux glibc 2.27+ x86-64, Linux glibc 2.28+ x86-64 | Details |
| deme3-3.0.11-cp39-cp39-manylinux_2_27_x86_64.manylinux_2_28_x86_64.whl | CPython 3.9 | CPython 3.9 | Linux glibc 2.27+ x86-64, Linux glibc 2.28+ x86-64 | Details |
Total release size: 304.7 MB
Release files / deme3-3.0.11-cp314-cp314-manylinux_2_27_x86_64.manylinux_2_28_x86_64.whl
| Download URL | deme3-3.0.11-cp314-cp314-manylinux_2_27_x86_64.manylinux_2_28_x86_64.whl |
|---|---|
| Size | 50.8 MB |
| Tags | CPython 3.14 Linux glibc 2.27+ x86-64 Linux glibc 2.28+ x86-64 |
|
SHA-256 checksum How to use checksums |
f235031cbfddff91ff236bc234e469471dd4caab82c9909cbcf3e026971880ad
|
|
BLAKE2b-256 checksum How to use checksums |
0a54e4fb8a38b3c7461b6c255ea3639f284a8f79a949634fed2381ca79cf9a28
|
| Upload date | |
|
Uploaded using Trusted Publishing? What is trusted publishing? |
Yes |
| Uploaded via |
twine/7.0.0 CPython/3.13.14
|
Provenance
Provenance describes where a file came from. On PyPI, provenance is shared via attestations, which provide a verifiable record of the build or publishing details. View details, limitations and caveats.


PyPI Publish Attestation
PyPI verified that this artifact, at this checksum, originated from the publisher listed below.
Signed by GitHub Actions, verified by PyPI on Sep 4, 2026.
Transparency logRelease files / deme3-3.0.11-cp313-cp313-manylinux_2_27_x86_64.manylinux_2_28_x86_64.whl
| Download URL | deme3-3.0.11-cp313-cp313-manylinux_2_27_x86_64.manylinux_2_28_x86_64.whl |
|---|---|
| Size | 50.8 MB |
| Tags | CPython 3.13 Linux glibc 2.27+ x86-64 Linux glibc 2.28+ x86-64 |
|
SHA-256 checksum How to use checksums |
cac867d41be9655477498a1131a33d50bf5c84544fcf133a2272db6f4e549e0f
|
|
BLAKE2b-256 checksum How to use checksums |
f94ba2202ea8805fad961128f5f9884d1ef22630a5d2571a539509b826bd84c5
|
| Upload date | |
|
Uploaded using Trusted Publishing? What is trusted publishing? |
Yes |
| Uploaded via |
twine/7.0.0 CPython/3.13.14
|
Provenance
Provenance describes where a file came from. On PyPI, provenance is shared via attestations, which provide a verifiable record of the build or publishing details. View details, limitations and caveats.
PyPI Publish Attestation
PyPI verified that this artifact, at this checksum, originated from the publisher listed below.
Signed by GitHub Actions, verified by PyPI on Sep 4, 2026.
Transparency logRelease files / deme3-3.0.11-cp312-cp312-manylinux_2_27_x86_64.manylinux_2_28_x86_64.whl
| Download URL | deme3-3.0.11-cp312-cp312-manylinux_2_27_x86_64.manylinux_2_28_x86_64.whl |
|---|---|
| Size | 50.8 MB |
| Tags | CPython 3.12 Linux glibc 2.27+ x86-64 Linux glibc 2.28+ x86-64 |
|
SHA-256 checksum How to use checksums |
fb77542a44d9d8bea444523bfb053c39b36b43348b67a417a00704a45d07259a
|
|
BLAKE2b-256 checksum How to use checksums |
9ed8a05aa1f0036ae0fea1a3977aae509c18cd2459a9081446c170091267d1c1
|
| Upload date | |
|
Uploaded using Trusted Publishing? What is trusted publishing? |
Yes |
| Uploaded via |
twine/7.0.0 CPython/3.13.14
|
Provenance
Provenance describes where a file came from. On PyPI, provenance is shared via attestations, which provide a verifiable record of the build or publishing details. View details, limitations and caveats.
PyPI Publish Attestation
PyPI verified that this artifact, at this checksum, originated from the publisher listed below.
Signed by GitHub Actions, verified by PyPI on Sep 4, 2026.
Transparency logRelease files / deme3-3.0.11-cp311-cp311-manylinux_2_27_x86_64.manylinux_2_28_x86_64.whl
| Download URL | deme3-3.0.11-cp311-cp311-manylinux_2_27_x86_64.manylinux_2_28_x86_64.whl |
|---|---|
| Size | 50.8 MB |
| Tags | CPython 3.11 Linux glibc 2.27+ x86-64 Linux glibc 2.28+ x86-64 |
|
SHA-256 checksum How to use checksums |
800922d6fd979c9da175f207f4f44063ac43f4cb3ff7d105eac511858e1f1a4d
|
|
BLAKE2b-256 checksum How to use checksums |
93f75fa2bc585969e8aa729841173584504d878cac0428023b1195aefc531b8a
|
| Upload date | |
|
Uploaded using Trusted Publishing? What is trusted publishing? |
Yes |
| Uploaded via |
twine/7.0.0 CPython/3.13.14
|
Provenance
Provenance describes where a file came from. On PyPI, provenance is shared via attestations, which provide a verifiable record of the build or publishing details. View details, limitations and caveats.
PyPI Publish Attestation
PyPI verified that this artifact, at this checksum, originated from the publisher listed below.
Signed by GitHub Actions, verified by PyPI on Sep 4, 2026.
Transparency logRelease files / deme3-3.0.11-cp310-cp310-manylinux_2_27_x86_64.manylinux_2_28_x86_64.whl
| Download URL | deme3-3.0.11-cp310-cp310-manylinux_2_27_x86_64.manylinux_2_28_x86_64.whl |
|---|---|
| Size | 50.8 MB |
| Tags | CPython 3.10 Linux glibc 2.27+ x86-64 Linux glibc 2.28+ x86-64 |
|
SHA-256 checksum How to use checksums |
eaf448f07ccb92f7b4ca8e5e0be9a4f377529b8fa64b7fabb57978061661db6a
|
|
BLAKE2b-256 checksum How to use checksums |
a2390843fb1d2547b785af74569ff6d6c9d0fbfa07531f7cf5f7036e744b4dd7
|
| Upload date | |
|
Uploaded using Trusted Publishing? What is trusted publishing? |
Yes |
| Uploaded via |
twine/7.0.0 CPython/3.13.14
|
Provenance
Provenance describes where a file came from. On PyPI, provenance is shared via attestations, which provide a verifiable record of the build or publishing details. View details, limitations and caveats.
PyPI Publish Attestation
PyPI verified that this artifact, at this checksum, originated from the publisher listed below.
Signed by GitHub Actions, verified by PyPI on Sep 4, 2026.
Transparency logRelease files / deme3-3.0.11-cp39-cp39-manylinux_2_27_x86_64.manylinux_2_28_x86_64.whl
| Download URL | deme3-3.0.11-cp39-cp39-manylinux_2_27_x86_64.manylinux_2_28_x86_64.whl |
|---|---|
| Size | 50.8 MB |
| Tags | CPython 3.9 Linux glibc 2.27+ x86-64 Linux glibc 2.28+ x86-64 |
|
SHA-256 checksum How to use checksums |
fa5804f5fcf5485c73fd4c30ae665a0dff6f93c9c3510858a669ba6f234cf755
|
|
BLAKE2b-256 checksum How to use checksums |
2e383e6dc94fd993b564a12842b8b5579899bc41826a25dfa80dfce2a534544c
|
| Upload date | |
|
Uploaded using Trusted Publishing? What is trusted publishing? |
Yes |
| Uploaded via |
twine/7.0.0 CPython/3.13.14
|
Provenance
Provenance describes where a file came from. On PyPI, provenance is shared via attestations, which provide a verifiable record of the build or publishing details. View details, limitations and caveats.
PyPI Publish Attestation
PyPI verified that this artifact, at this checksum, originated from the publisher listed below.
Signed by GitHub Actions, verified by PyPI on Sep 4, 2026.
Transparency log













