Display registered Django signals and receivers, showing what fires and where.

Project description


Dj Signals Panel
Display registered Django signals and receivers, showing what fires and where.
Docs
https://yassi.github.io/dj-signals-panel/
Features
- TBD: Add your main features here
Project Structure
dj-signals-panel/
├── dj_signals_panel/         # Main package
│   ├── templates/           # Django templates
│   ├── views.py             # Django views
│   └── urls.py              # URL patterns
├── example_project/         # Example Django project
├── tests/                   # Test suite
├── images/                  # Screenshots for README
└── requirements.txt         # Development dependencies
Requirements
- Python 3.9+
- Django 4.2+
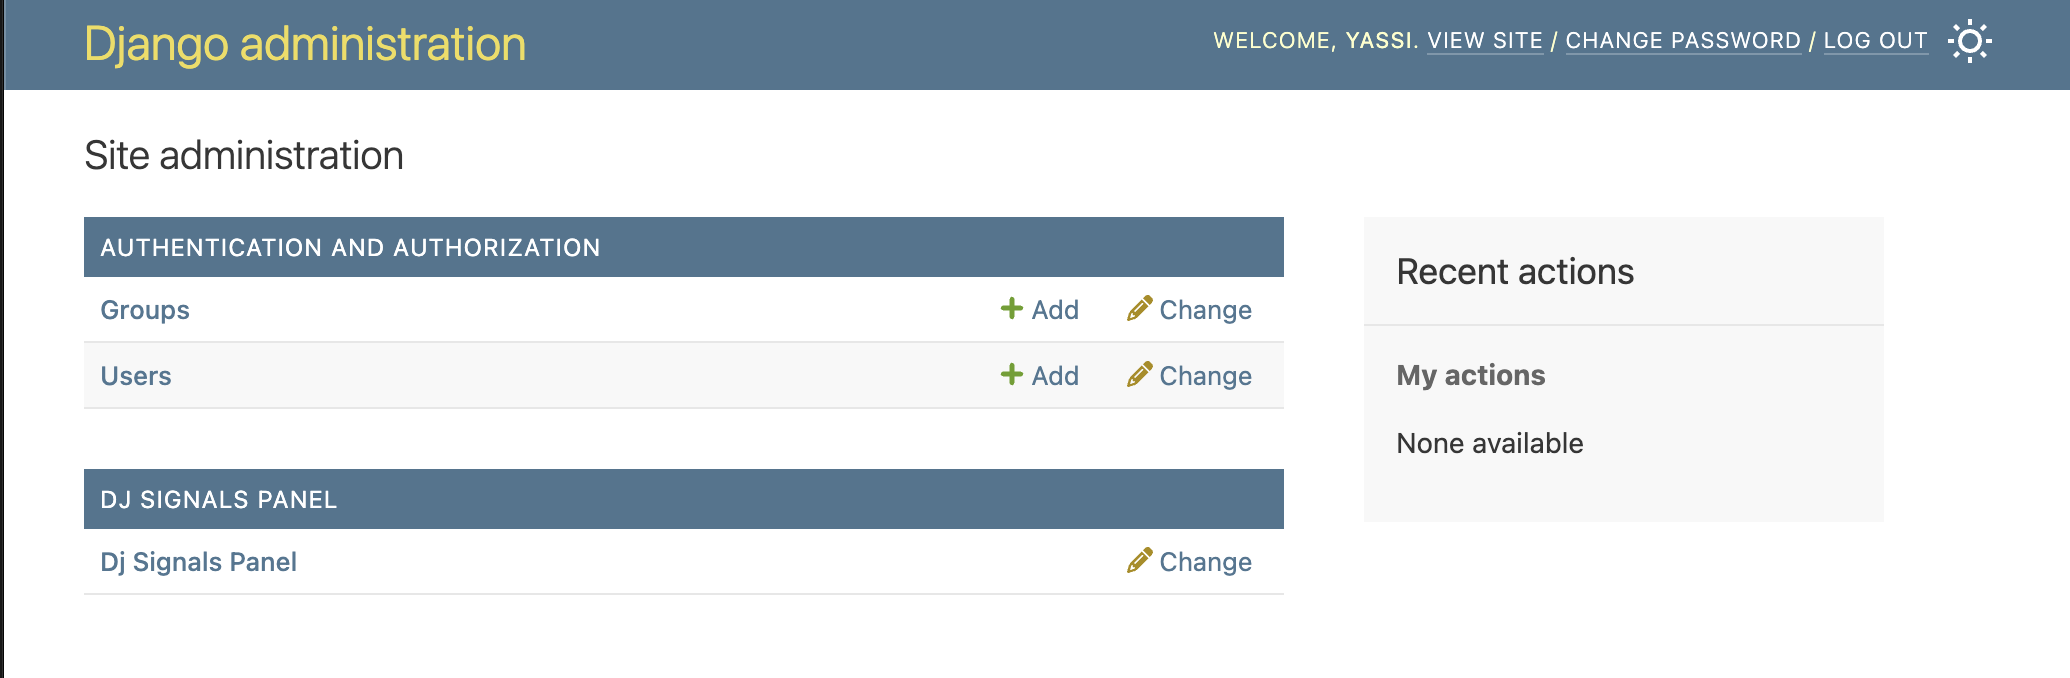
Screenshots
Django Admin Integration
Seamlessly integrated into your Django admin interface. A new section for dj-signals-panel will appear in the same places where your models appear.
NOTE: This application does not actually introduce any model or migrations.
Installation
1. Install the Package
pip install dj-signals-panel
2. Add to Django Settings
Add dj_signals_panel to your INSTALLED_APPS:
INSTALLED_APPS = [
    'django.contrib.admin',
    'django.contrib.auth',
    'django.contrib.contenttypes',
    'django.contrib.sessions',
    'django.contrib.messages',
    'django.contrib.staticfiles',
    'dj_signals_panel',  # Add this line
    # ... your other apps
]
3. Configure Settings (Optional)
Add any custom configuration to your Django settings if needed:
# Optional: Add custom settings for dj_signals_panel
DJ_SIGNALS_PANEL_SETTINGS = {
    'LOAD_DEFAULT_CSS': True,   # Set False to skip built-in styles
    # Static paths are relative to app's static/ dir (e.g. 'myapp/css/overrides.css'
    # for a file at myapp/static/myapp/css/overrides.css). Full URLs also accepted.
    'EXTRA_CSS': [],
}
4. Include URLs
Add the Panel URLs to your main urls.py:
from django.contrib import admin
from django.urls import path, include

urlpatterns = [
    path('admin/dj-signals-panel/', include('dj_signals_panel.urls')),  # Add this line
    path('admin/', admin.site.urls),
]
5. Run Migrations and Create Superuser
python manage.py migrate
python manage.py createsuperuser  # If you don't have an admin user
6. Access the Panel
-
Start your Django development server:
python manage.py runserver
-
Navigate to the Django admin at
http://127.0.0.1:8000/admin/ -
Look for the "DJ SIGNALS PANEL" section in the admin interface
License
This project is licensed under the MIT License. See the LICENSE file for details.
Development Setup
If you want to contribute to this project or set it up for local development:
Prerequisites
- Python 3.9 or higher
- Redis server running locally
- Git
- Autoconf
- Docker
It is reccommended that you use docker since it will automate much of dev env setup
1. Clone the Repository
git clone https://github.com/yassi/dj-signals-panel.git
cd dj-signals-panel
2a. Set up dev environment using virtualenv
python -m venv venv
source venv/bin/activate  # On Windows: venv\Scripts\activate

pip install -e . # install dj-signals-panel package locally
pip intall -r requirements.txt  # install all dev requirements

# Alternatively
make install # this will also do the above in one single command
2b. Set up dev environment using docker
make docker_up  # bring up all services (redis, memached) and dev environment container
make docker_shell  # open up a shell in the docker conatiner
3. Set Up Example Project
The repository includes an example Django project for development and testing
cd example_project
python manage.py migrate
python manage.py createsuperuser
4. Populate Test Data (Optional)
Add any custom management commands for populating test data if needed.
6. Run the Development Server
python manage.py runserver
Visit http://127.0.0.1:8000/admin/ to access the Django admin with Dj Signals Panel.
7. Running Tests
The project includes a comprehensive test suite. You can run them by using make or by invoking pytest directly:
# build and install all dev dependencies and run all tests inside of docker container
make test_docker

# Test without the docker on your host machine.
# note that testing always requires a redis and memcached service to be up.
# these are mostly easily brought up using docker
make test_local
Release history Release notifications | RSS feed


Download files
Download the file for your platform. If you're not sure which to choose, learn more about installing packages.
Source Distribution
Built Distribution
Filter files by name, interpreter, ABI, and platform.
If you're not sure about the file name format, learn more about wheel file names.
Copy a direct link to the current filters
File details
Details for the file dj_signals_panel-0.1.0.tar.gz.
File metadata
- Download URL: dj_signals_panel-0.1.0.tar.gz
- Upload date:
- Size: 68.5 kB
- Tags: Source
- Uploaded using Trusted Publishing? No
- Uploaded via: twine/6.1.0 CPython/3.9.7
File hashes
| Algorithm | Hash digest | |
|---|---|---|
| SHA256 |
595db48f789626e25d0244724190b072f399225f6ef877fbdb85d0b2873a534d
|
|
| MD5 |
634d81b93dfae648fdaa8b928f9c37c1
|
|
| BLAKE2b-256 |
c2dd8d6ee1226e79d402d1a183dd9ec9616560b0b52cfe4e5688b86922254b6e
|
File details
Details for the file dj_signals_panel-0.1.0-py3-none-any.whl.
File metadata
- Download URL: dj_signals_panel-0.1.0-py3-none-any.whl
- Upload date:
- Size: 64.5 kB
- Tags: Python 3
- Uploaded using Trusted Publishing? No
- Uploaded via: twine/6.1.0 CPython/3.9.7
File hashes
| Algorithm | Hash digest | |
|---|---|---|
| SHA256 |
e847995550938276ca07da1ff4b71739f17a4de41c8607aba6cb8d342b98f5c3
|
|
| MD5 |
fc3b4474eae2ec1f57cebc92c86de6a2
|
|
| BLAKE2b-256 |
1ff8eea76188a99b6cbedb4b0f99e5afa13495bd877db50c4bf7d0d93da10f32
|


