Drip campaigns for Django.


Project description


Django Drip Campaigns

Drip campaigns are pre-written sets of emails sent to customers or prospects over time. Django Drips lets you use the admin to manage drip campaign emails using querysets on Django's User model.
This project is a fork of the one written by Zapier.
You can check out the docs here.
Installation:
- Install django-drip-campaings using pip:
pip install django-drip-campaigns
- Add
'drip'and'campaigns'to yourINSTALLED_APPSlist on your settings.
INSTALLED_APPS = [
    'django.contrib.contenttypes',
    'django.contrib.comments',
    'django.contrib.sessions',
    'django.contrib.sites',
    'django.contrib.admin',

    # ...

    'drip',
    'campaigns',
]
-
(Optional) Set
DRIP_FROM_EMAIL = '<your_app_from_email>'in your settings, where<your_app_from_email>is the email account that is going to be shown in the sent emails. OtherwiseEMAIL_HOST_USERvalue will be used. -
Finally, run
python manage.py migrate dripandpython manage.py migrate campaignsto set up the necessary database tables.
Usage
If you haven't, create a superuser with the Django createsuperuser command. Login with the admin user, and select Drips to manage them. You will be able to:
- View created drips.
- Create a new drip.
- Select and delete drips.
Now you can also manage campaigns, select Campaigns to manage them. You will be able to:
- View created campaigns.
- Create a new campaign.
- Select and delete campaign.
Create Campaign
In the Django admin, after select Campaigns, you can click on ADD CAMPAIGN + button to create a new one. You will see the add campaign page:
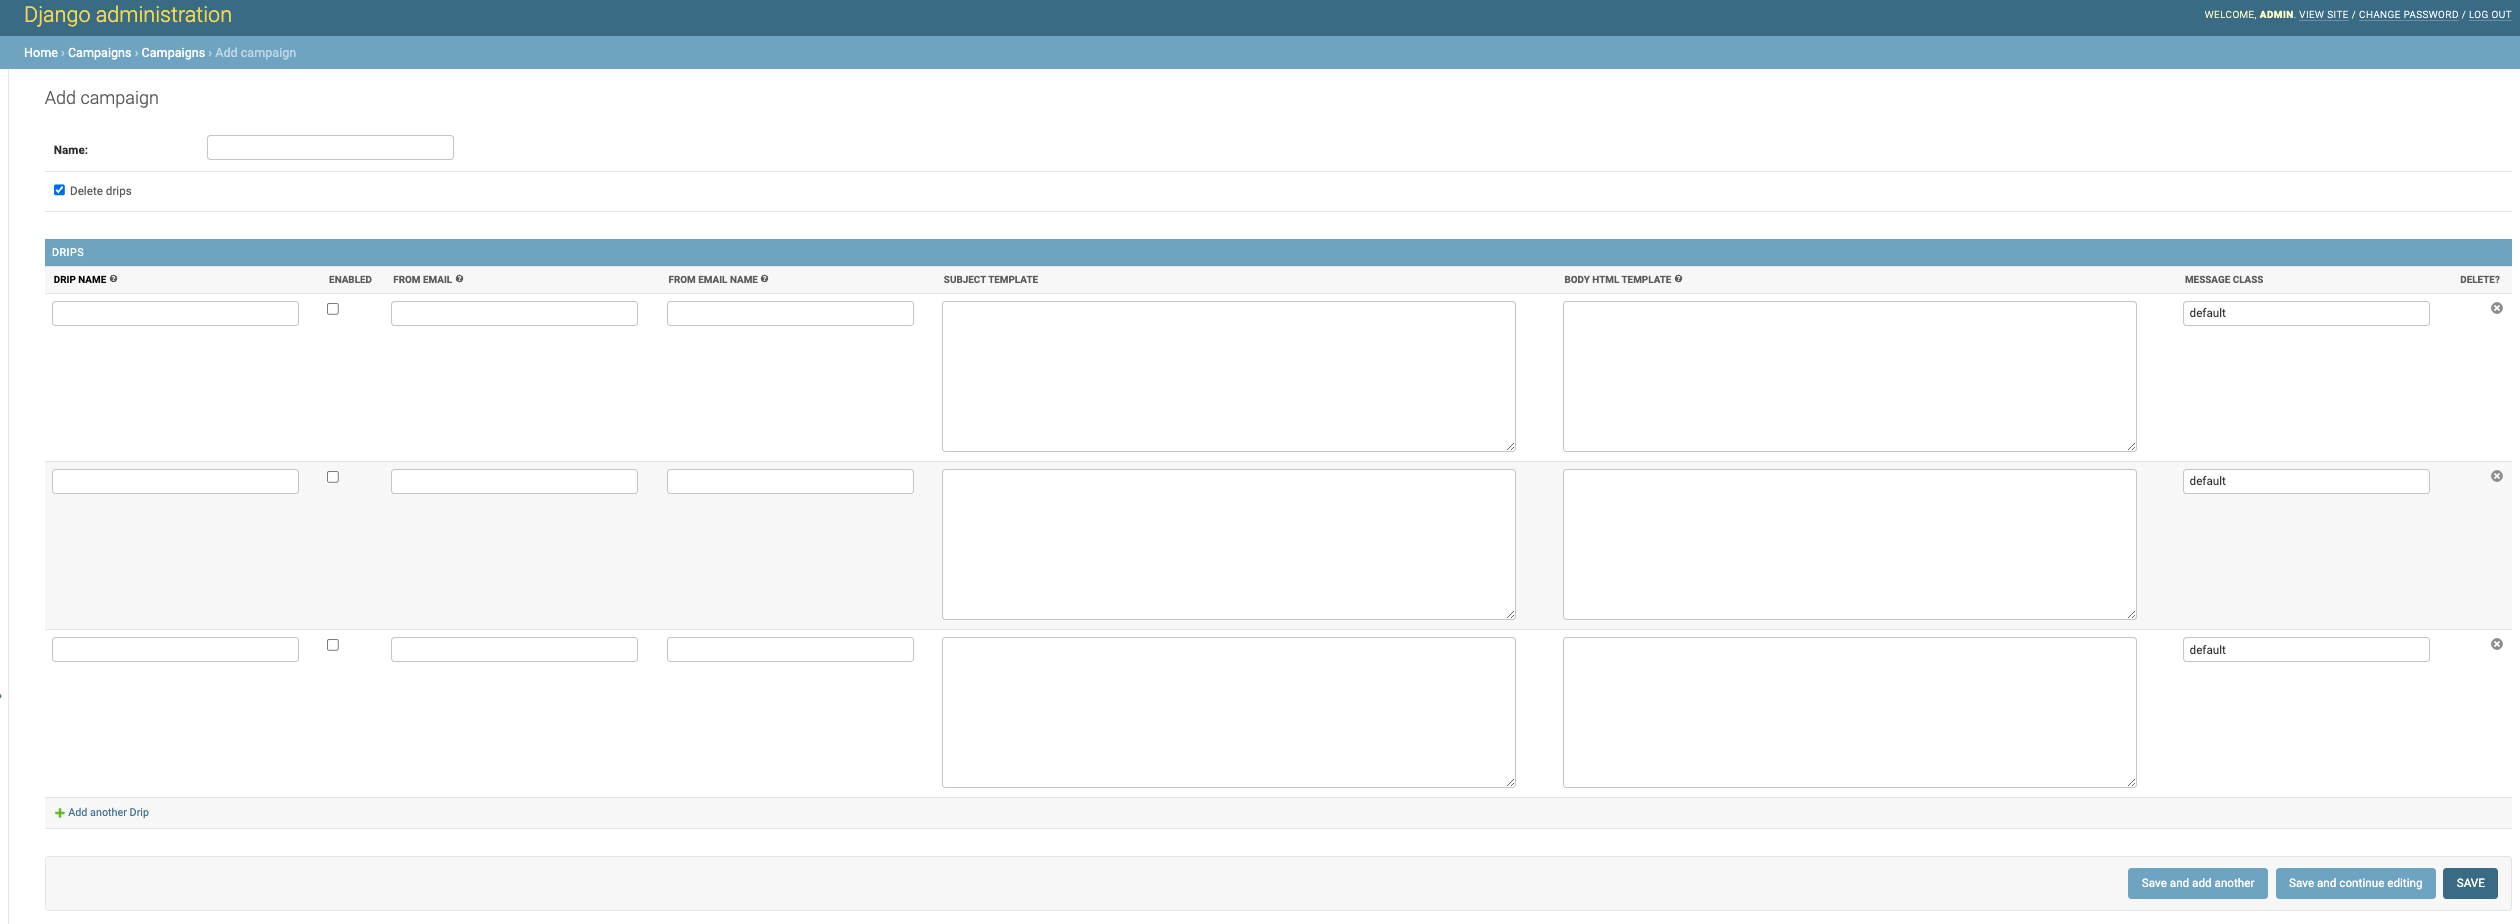
When you create a campaign, you need to decide if the related drips will be deleted along with the campaign, using the Delete drips field.
Here you will find an inline creation or edition for Drips this will not include the QUERY SET RULES section. It will only allow you to change the mail content in the Drip.
Campaigns will allow you to manage many Drips that need to be related between them.
Create Drip
In the Django admin, after select Drips, you can click on ADD DRIP + button to create a new one. You will see the add drip page:
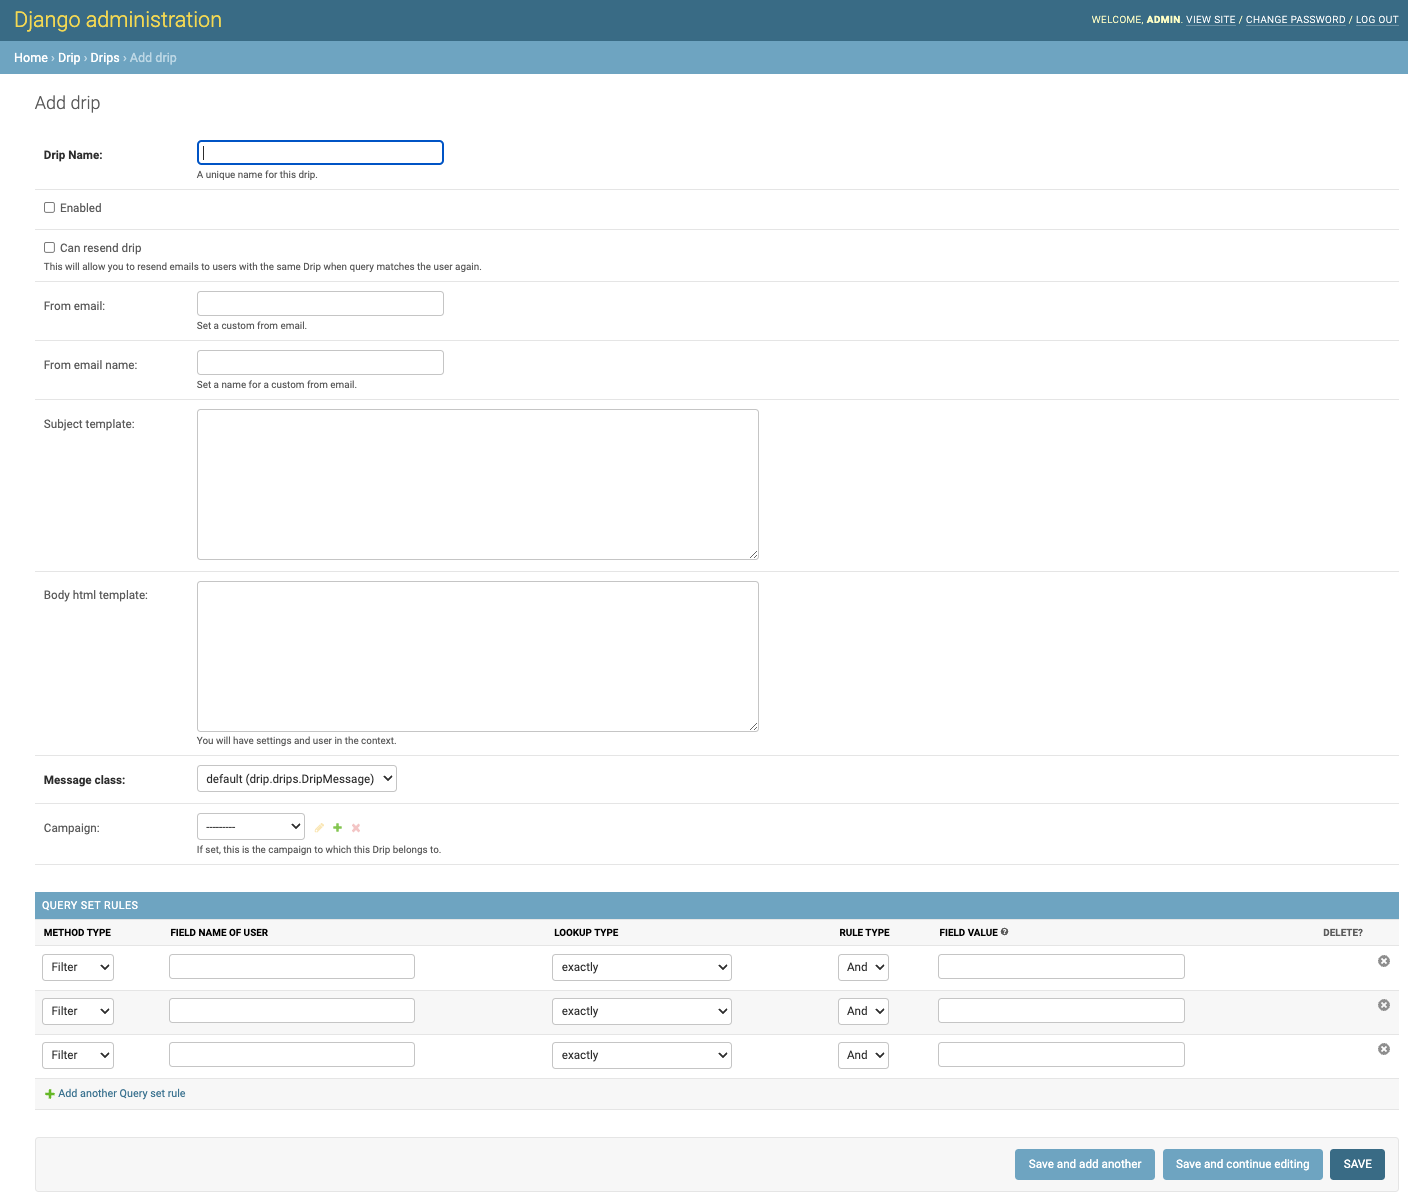
Here you can relate the Drip to the corresponding Campaign. Grouping several drips under a campaign.
On the FIELD NAME OF USER input, when you click on it, you will be able to view:
- The fields of your user's model.
- The fields of your user's model in other models that are related with it.
Please take a look a this example:
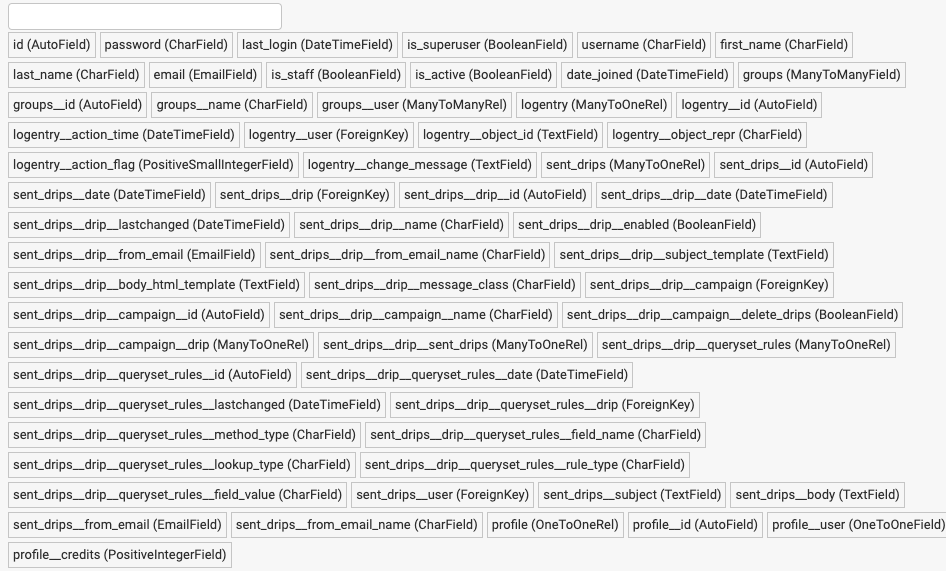
With this, you can select one or more fields to create useful drips.
Additionally if you select a field name of user that has a date type, you can enter in the FIELD VALUE input, a date value written in natural language that combines operations on the current datetime.
For example, if you have selected the field last_login that has a date type, and you want to create a drip to send emails to the users who logged in exactly one week ago; you can enter:
now-1 week
or
now- 1 w
Possible operations and values:
- Add (
+) or subtract (-) dates. - On the left side of the operation, write the current datetime value:
now. - On the right side of the operation:
secondsors.minutesorm.hoursorh.daysord.weeksorw.- If you enter the number
1, you can writesecond,minute, etc. - Don't enter a space between
nowand the operation symbol. Optionally you can add (or not) a space around the number value.
Let's see some examples of the date values that you can enter:
now-1 daynow+ 8daysnow+ 1 hnow-4hoursnow- 3 weeksnow-1 weeks
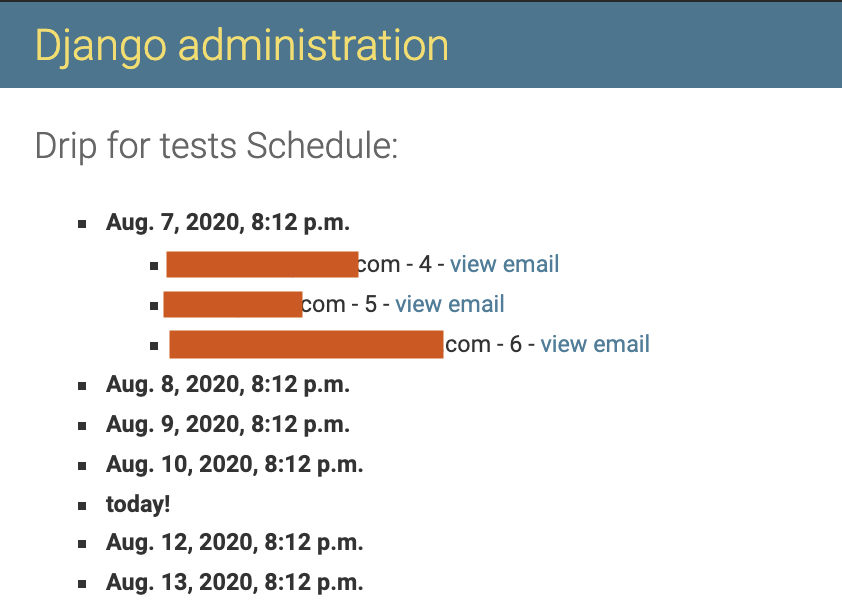
View Timeline
In the Django admin, you can select a drip and then click on the VIEW TIMELINE button to view the mails expected to be sent with the corresponding receivers:
Send drips
To send the created and enabled drips, run the command:
python manage.py send_drips
You can use cron to schedule the drips.
The cron scheduler
You may want to have an easy way to send drips periodically. It's possible to set a couple of parameters in your settings to do that. First activate the scheduler by adding the DRIP_SCHEDULE_SETTINGS dictionary:
# your settings file
DRIP_SCHEDULE_SETTINGS = {
   'DRIP_SCHEDULE': True,
}
After that, choose:
- A day of the week: An integer value between
0-6, or a string:'mon','tue','wed','thu','fri','sat','sun'. The name in the settings isDRIP_SCHEDULE_DAY_OF_WEEK(default is set to0). - An hour: An integer value between
0-23. The name in the settings isDRIP_SCHEDULE_HOUR(default is set to0). - A minute: An integer value between
0-59. The name in the settings isDRIP_SCHEDULE_MINUTE(default is set to0).
With those values, a cron scheduler will execute the send_drips command every week in the specified day/hour/minute. The scheduler will use the timezone of your TIME_ZONE parameter in your settings (default is set to 'UTC'). For example, if you have:
DRIP_SCHEDULE_SETTINGS = {
   'DRIP_SCHEDULE': True,
   'DRIP_SCHEDULE_DAY_OF_WEEK': 'mon',
   'DRIP_SCHEDULE_HOUR': 13,
   'DRIP_SCHEDULE_MINUTE': 57,
}
Then every Monday at 13:57 the send_drips command will be executed.
Last but not least, add this line at the end of your main urls.py file to start the scheduler:
# your main urls.py file
...
from drip.scheduler.cron_scheduler import cron_send_drips

...
cron_send_drips()
We recommend you to do it there because we know for sure that it's a file that is executed once at the beginning.
Some tips:
- If you want to run the command every day in the week, hour, or minute, just set the corresponding parameter to
'*'. - If you want to run the command more than a day in the week, just set the
DRIP_SCHEDULE_DAY_OF_WEEKto more than one value. For example, if you set that to'mon-fri'the command will be executed from Monday to Friday.
Release history Release notifications | RSS feed


Download files
Download the file for your platform. If you're not sure which to choose, learn more about installing packages.
Source Distribution
Built Distribution
Filter files by name, interpreter, ABI, and platform.
If you're not sure about the file name format, learn more about wheel file names.
Copy a direct link to the current filters
File details
Details for the file django-drip-campaigns-1.14.0.tar.gz.
File metadata
- Download URL: django-drip-campaigns-1.14.0.tar.gz
- Upload date:
- Size: 25.6 kB
- Tags: Source
- Uploaded using Trusted Publishing? No
- Uploaded via: twine/4.0.1 CPython/3.9.13
File hashes
| Algorithm | Hash digest | |
|---|---|---|
| SHA256 |
6cd87ec2555977eb474c346dfd7a92425a8a6c45e836b442167bf58de7756632
|
|
| MD5 |
bfed0021e96f68c6f34604c4ed098c36
|
|
| BLAKE2b-256 |
7e77e554dc4f386ed34157d3e32e68dee514401e32efccd84745360c2037644a
|
File details
Details for the file django_drip_campaigns-1.14.0-py3-none-any.whl.
File metadata
- Download URL: django_drip_campaigns-1.14.0-py3-none-any.whl
- Upload date:
- Size: 31.9 kB
- Tags: Python 3
- Uploaded using Trusted Publishing? No
- Uploaded via: twine/4.0.1 CPython/3.9.13
File hashes
| Algorithm | Hash digest | |
|---|---|---|
| SHA256 |
6976bb60f5b21860195a9f2ea33a68646411d9a0ddba57bcabde5475e0f391b9
|
|
| MD5 |
fc8da437f6fcb450f3e43eb74ed24d56
|
|
| BLAKE2b-256 |
756bad4fbd479de452e95d373bdd68413895eb8d202717600efe8ef894d669bc
|


