ESPnet: end-to-end speech processing toolkit


Project description

ESPnet: end-to-end speech processing toolkit


ESPnet is an end-to-end speech processing toolkit, mainly focuses on end-to-end speech recognition and end-to-end text-to-speech. ESPnet uses chainer and pytorch as a main deep learning engine, and also follows Kaldi style data processing, feature extraction/format, and recipes to provide a complete setup for speech recognition and other speech processing experiments.
- Key Features
- Requirements
- Installation
- Execution of example scripts
- Known issues
- Docker Container
- Results and demo
- Chainer and Pytorch backends
- References
- Citation
Key Features
- Hybrid CTC/attention based end-to-end ASR
- Fast/accurate training with CTC/attention multitask training
- CTC/attention joint decoding to boost monotonic alignment decoding
- Encoder: VGG-like CNN + BiRNN (LSTM/GRU), sub-sampling BiRNN (LSTM/GRU) or Transformer
- Attention: Dot product, location-aware attention, variants of multihead
- Incorporate RNNLM/LSTMLM trained only with text data
- Batch GPU decoding
- Tacotron2 based end-to-end TTS
- Transformer based end-to-end TTS
- Feed-forward Transformer (a.k.a. FastSpeech) based end-to-end TTS (new!)
- Flexible network architecture thanks to chainer and pytorch
- Kaldi style complete recipe
- Support numbers of ASR recipes (WSJ, Switchboard, CHiME-4/5, Librispeech, TED, CSJ, AMI, HKUST, Voxforge, REVERB, etc.)
- Support numbers of TTS recipes with a similar manner to the ASR recipe (LJSpeech, LibriTTS, M-AILABS, etc.)
- Support speech translation recipes (Fisher callhome Spanish to English, IWSLT'18)
- Support speech separation and recognition recipe (WSJ-2mix)
- State-of-the-art performance in several benchmarks (comparable/superior to hybrid DNN/HMM and CTC)
- Flexible front-end processing thanks to kaldiio and HDF5 support
- Tensorboard based monitoring
Requirements
- Python 3.6.1+
- gcc 4.9+ for PyTorch1.0.0+
- protocol buffer
- For the sentencepiece, you need to install via package manager e.g.
sudo apt-get install libprotobuf9v5 protobuf-compiler libprotobuf-dev.
See detailsInstallationof https://github.com/google/sentencepiece/blob/master/README.md
- For the sentencepiece, you need to install via package manager e.g.
- libsndfile
- For the soundfile, you need to install via package manager e.g.
sudo apt-get install libsndfile1-dev.
- For the soundfile, you need to install via package manager e.g.
Optionally, GPU environment requires the following libraries:
- Cuda 8.0, 9.0, 9.1, 10.0 depending on each DNN library
- Cudnn 6+, 7+
- NCCL 2.0+ (for the use of multi-GPUs)
Installation
Step 1) setting of the environment for GPU support
To use cuda (and cudnn), make sure to set paths in your .bashrc or .bash_profile appropriately.
CUDAROOT=/path/to/cuda

export PATH=$CUDAROOT/bin:$PATH
export LD_LIBRARY_PATH=$CUDAROOT/lib64:$LD_LIBRARY_PATH
export CFLAGS="-I$CUDAROOT/include $CFLAGS"
export CUDA_HOME=$CUDAROOT
export CUDA_PATH=$CUDAROOT
If you want to use multiple GPUs, you should install nccl
and set paths in your .bashrc or .bash_profile appropriately, for example:
CUDAROOT=/path/to/cuda
NCCL_ROOT=/path/to/nccl

export CPATH=$NCCL_ROOT/include:$CPATH
export LD_LIBRARY_PATH=$NCCL_ROOT/lib/:$CUDAROOT/lib64:$LD_LIBRARY_PATH
export LIBRARY_PATH=$NCCL_ROOT/lib/:$LIBRARY_PATH
export CFLAGS="-I$CUDAROOT/include $CFLAGS"
export CUDA_HOME=$CUDAROOT
export CUDA_PATH=$CUDAROOT
Step 2-A) installation with compiled Kaldi
using miniconda (default)
Install Python libraries and other required tools with miniconda
$ cd tools
$ make KALDI=/path/to/kaldi
You can also specify the Python (PYTHON_VERSION default 3.7), PyTorch (TH_VERSION default 1.0.0) and CUDA versions (CUDA_VERSION default 10.0), for example:
$ cd tools
$ make KALDI=/path/to/kaldi PYTHON_VERSION=3.6 TH_VERSION=0.4.1 CUDA_VERSION=9.0
using existing python
If you do not want to use miniconda, you need to specify your python interpreter to setup virtualenv
$ cd tools
$ make KALDI=/path/to/kaldi PYTHON=/usr/bin/python3.6
Step 2-B) installation including Kaldi installation
Install Kaldi, Python libraries and other required tools with miniconda
$ cd tools
$ make -j 10
As seen above, you can also specify the Python and CUDA versions, and Python path (based on virtualenv), for example:
$ cd tools
$ make -j 10 PYTHON_VERSION=3.6 TH_VERSION=0.4.1 CUDA_VERSION=9.0
$ cd tools
$ make -j 10 PYTHON=/usr/bin/python3.6
Step 2-C) installation for CPU-only
To install in a terminal that does not have a GPU installed, just clear the version of CUPY as follows:
$ cd tools
$ make CUPY_VERSION='' -j 10
This option is enabled for any of the install configuration.
Step 3) installation check
You can check whether the install is succeeded via the following commands
$ cd tools
$ make check_install
or make check_install CUPY_VERSION='' if you do not have a GPU on your terminal.
If you have no warning, ready to run the recipe!
If there are some problems in python libraries, you can re-setup only python environment via following commands
$ cd tools
$ make clean_python
$ make python
Execution of example scripts
Move to an example directory under the egs directory.
We prepare several major ASR benchmarks including WSJ, CHiME-4, and TED.
The following directory is an example of performing ASR experiment with the CMU Census Database (AN4) recipe.
$ cd egs/an4/asr1
Once move to the directory, then, execute the following main script with a chainer backend:
$ ./run.sh --backend chainer
or execute the following main script with a pytorch backend:
$ ./run.sh --backend pytorch
With this main script, you can perform a full procedure of ASR experiments including
- Data download
- Data preparation (Kaldi style, see http://kaldi-asr.org/doc/data_prep.html)
- Feature extraction (Kaldi style, see http://kaldi-asr.org/doc/feat.html)
- Dictionary and JSON format data preparation
- Training based on chainer or pytorch.
- Recognition and scoring
The training progress (loss and accuracy for training and validation data) can be monitored with the following command
$ tail -f exp/${expdir}/train.log
When we use ./run.sh --verbose 0 (--verbose 0 is default in most recipes), it gives you the following information
epoch       iteration   main/loss   main/loss_ctc  main/loss_att  validation/main/loss  validation/main/loss_ctc  validation/main/loss_att  main/acc    validation/main/acc  elapsed_time  eps
:
:
6           89700       63.7861     83.8041        43.768                                                                                   0.731425                         136184        1e-08
6           89800       71.5186     93.9897        49.0475                                                                                  0.72843                          136320        1e-08
6           89900       72.1616     94.3773        49.9459                                                                                  0.730052                         136473        1e-08
7           90000       64.2985     84.4583        44.1386        72.506                94.9823                   50.0296                   0.740617    0.72476              137936        1e-08
7           90100       81.6931     106.74         56.6462                                                                                  0.733486                         138049        1e-08
7           90200       74.6084     97.5268        51.6901                                                                                  0.731593                         138175        1e-08
     total [#################.................................] 35.54%
this epoch [#####.............................................] 10.84%
     91300 iter, 7 epoch / 20 epochs
   0.71428 iters/sec. Estimated time to finish: 2 days, 16:23:34.613215.
Note that the an4 recipe uses --verbose 1 as default since this recipe is often used for a debugging purpose.
In addition Tensorboard events are automatically logged in the tensorboard/${expname} folder. Therefore, when you install Tensorboard, you can easily compare several experiments by using
$ tensorboard --logdir tensorboard
and connecting to the given address (default : localhost:6006). This will provide the following information:
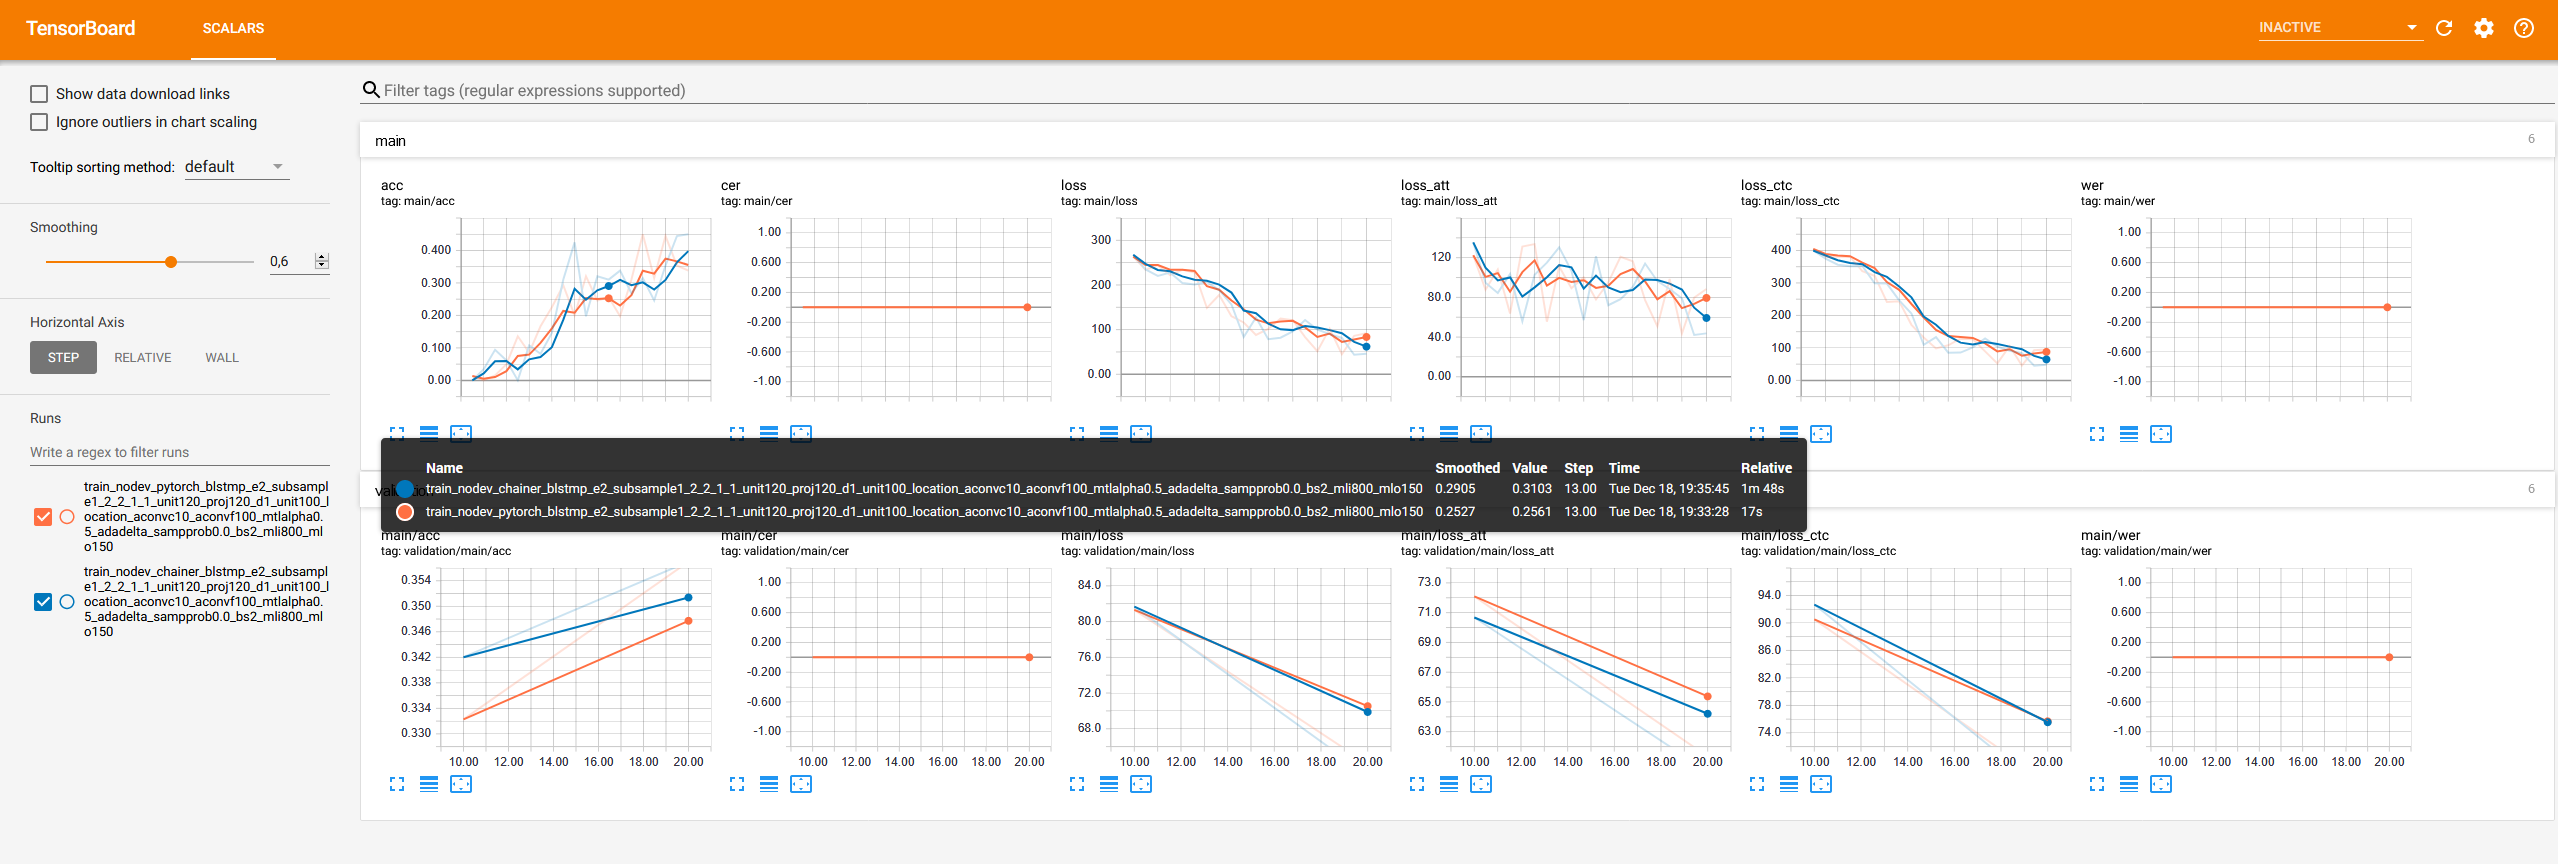
pip install tensorflow; pip install tensorboard) when you want to use Tensorboard.
Use of GPU
- Training:
If you want to use GPUs in your experiment, please set
--ngpuoption inrun.shappropriately, e.g.,# use single gpu $ ./run.sh --ngpu 1 # use multi-gpu $ ./run.sh --ngpu 3 # if you want to specify gpus, set CUDA_VISIBLE_DEVICES as follows # (Note that if you use slurm, this specification is not needed) $ CUDA_VISIBLE_DEVICES=0,1,2 ./run.sh --ngpu 3 # use cpu $ ./run.sh --ngpu 0
- Default setup uses a single GPU (
--ngpu 1).
- Default setup uses a single GPU (
- ASR decoding:
ESPnet also supports the GPU-based decoding for fast recognition.
- Please manually remove the following lines in
run.sh:#### use CPU for decoding ngpu=0
- Set 1 or more values for
--batchsizeoption inasr_recog.pyto enable GPU decoding - And execute the script (e.g.,
run.sh --stage 5 --ngpu 1) - You'll achieve significant speed improvement by using the GPU decoding
- Please manually remove the following lines in
- Note that if you want to use multi-gpu, the installation of nccl is required before setup.
Changing the configuration
The default configurations for training and decoding are written in conf/train.yaml and conf/decode.yaml respectively. It can be overwritten by specific arguments: e.g.
# e.g.
asr_train.py --config conf/train.yaml --batch-size 24
# e.g.--config2 and --config3 are also provided and the latter option can overwrite the former.
asr_train.py --config conf/train.yaml --config2 conf/new.yaml
In this way, you need to edit run.sh and it might be inconvenient sometimes.
Instead of giving arguments directly, we recommend you to modify the yaml file and give it to run.sh:
# e.g.
./run.sh --train-config conf/train_modified.yaml
# e.g.
./run.sh --train-config conf/train_modified.yaml --decode-config conf/decode_modified.yaml
We also provide a utility to generate a yaml file from the input yaml file:
# e.g. You can give any parameters as '-a key=value' and '-a' is repeatable.
#      This generates new file at 'conf/train_batch-size24_epochs10.yaml'
./run.sh --train-config $(change_yaml.py conf/train.yaml -a batch-size=24 -a epochs=10)
# e.g. '-o' option specifies the output file name instead of auto named file.
./run.sh --train-config $(change_yaml.py conf/train.yaml -o conf/train2.yaml -a batch-size=24)
How to set minibatch
From espnet v0.4.0, we have three options in --batch-count to specify minibatch size (see espnet.utils.batchfy for implementation);
-
--batch-count seq --batch-seqs 32 --batch-seq-maxlen-in 800 --batch-seq-maxlen-out 150.This option is compatible to the old setting before v0.4.0. This counts the minibatch size as the number of sequences and reduces the size when the maximum length of the input or output sequences is greater than 800 or 150, respectively.
-
--batch-count bin --batch-bins 100000.This creates the minibatch that has the maximum number of bins under 100 in the padded input/output minibatch tensor (i.e.,
max(ilen) * idim + max(olen) * odim). Basically, this option makes training iteration faster than--batch-count seq. If you already has the best--batch-seqs xconfig, try--batch-bins $((x * (mean(ilen) * idim + mean(olen) * odim))). -
--batch-count frame --batch-frames-in 800 --batch-frames-out 100 --batch-frames-inout 900.This creates the minibatch that has the maximum number of input, output and input+output frames under 800, 100 and 900, respectively. You can set one of
--batch-frames-xxxpartially. Like--batch-bins, this option makes training iteration faster than--batch-count seq. If you already has the best--batch-seqs xconfig, try--batch-frames-in $((x * (mean(ilen) * idim)) --batch-frames-out $((x * mean(olen) * odim)).
Setup in your cluster
Change cmd.sh according to your cluster setup.
If you run experiments with your local machine, please use default cmd.sh.
For more information about cmd.sh see http://kaldi-asr.org/doc/queue.html.
It supports Grid Engine (queue.pl), SLURM (slurm.pl), etc.
CTC, attention, and hybrid CTC/attention
ESPnet can completely switch the mode from CTC, attention, and hybrid CTC/attention
# hybrid CTC/attention (default)
#  --mtlalpha 0.5 and --ctc_weight 0.3 in most cases
$ ./run.sh

# CTC mode
$ ./run.sh --mtlalpha 1.0 --ctc_weight 1.0 --recog_model model.loss.best

# attention mode
$ ./run.sh --mtlalpha 0.0 --ctc_weight 0.0
The CTC training mode does not output the validation accuracy, and the optimum model is selected with its loss value
(i.e., --recog_model model.loss.best).
About the effectiveness of the hybrid CTC/attention during training and recognition, see [2] and [3].
Known issues
Error due to ACS (Multiple GPUs)
When using multiple GPUs, if the training freezes or lower performance than expected is observed, verify that PCI Express Access Control Services (ACS) are disabled. Larger discussions can be found at: link1 link2 link3. To disable the PCI Express ACS follow instructions written here. You need to have a ROOT user access or request to your administrator for it.
Error due to matplotlib
If you have the following error (or other numpy related errors),
RuntimeError: module compiled against API version 0xc but this version of numpy is 0xb
Exception in main training loop: numpy.core.multiarray failed to import
Traceback (most recent call last):
;
:
from . import _path, rcParams
ImportError: numpy.core.multiarray failed to import
Then, please reinstall matplotlib with the following command:
$ cd egs/an4/asr1
$ . ./path.sh
$ pip install pip --upgrade; pip uninstall matplotlib; pip --no-cache-dir install matplotlib
Docker Container
go to docker/ and follow README.md instructions there.
Results and demo
You can find useful tutorials and demos in Interspeech 2019 Tutorial
ASR results
We list the character error rate (CER) and word error rate (WER) of major ASR tasks.
| Task | CER (%) | WER (%) | Pretrained model |
|---|---|---|---|
| Aishell dev | 6.0 | N/A | link |
| Aishell test | 6.7 | N/A | same as above |
| Common Voice dev | 1.7 | 2.2 | link |
| Common Voice test | 1.8 | 2.3 | same as above |
| CSJ eval1 | 5.7 | N/A | link |
| CSJ eval2 | 3.8 | N/A | same as above |
| CSJ eval3 | 4.2 | N/A | same as above |
| HKUST dev | 23.5 | N/A | link |
| Librispeech dev_clean | N/A | 2.2 | link |
| Librispeech dev_other | N/A | 5.6 | same as above |
| Librispeech test_clean | N/A | 2.6 | same as above |
| Librispeech test_other | N/A | 5.7 | same as above |
| TEDLIUM2 dev | N/A | 9.3 | link |
| TEDLIUM2 test | N/A | 8.1 | same as above |
| TEDLIUM3 dev | N/A | 9.7 | link |
| TEDLIUM3 test | N/A | 8.0 | same as above |
| WSJ dev93 | 3.2 | 7.0 | N/A |
| WSJ eval92 | 2.1 | 4.7 | N/A |
Note that the performance of the CSJ, HKUST, and Librispeech tasks was significantly improved by using the wide network (#units = 1024) and large subword units if necessary reported by RWTH.
If you want to check the results of the other recipes, please check egs/<name_of_recipe>/asr1/RESULTS.md.
ASR demo
You can recognize speech in a WAV file using pretrained models.
Go to a recipe directory and run utils/recog_wav.sh as follows:
cd egs/tedlium2/asr1
../../../utils/recog_wav.sh --models tedlium2.transformer.v1 example.wav
where example.wav is a WAV file to be recognized.
The sampling rate must be consistent with that of data used in training.
Available pretrained models in the demo script are listed as below.
| Model | Notes |
|---|---|
| tedlium2.rnn.v1 | Streaming decoding based on CTC-based VAD |
| tedlium2.rnn.v2 | Streaming decoding based on CTC-based VAD (batch decoding) |
| tedlium2.transformer.v1 | Joint-CTC attention Transformer trained on Tedlium 2 |
| tedlium3.transformer.v1 | Joint-CTC attention Transformer trained on Tedlium 3 |
| librispeech.transformer.v1 | Joint-CTC attention Transformer trained on Librispeech |
| commonvoice.transformer.v1 | Joint-CTC attention Transformer trained on CommonVoice |
| csj.transformer.v1 | Joint-CTC attention Transformer trained on CSJ |
TTS results
You can listen to our samples in demo HP espnet-tts-sample. Here we list some notable ones:
- Single English speaker Tacotron2
- Single Japanese speaker Tacotron2
- Single other language speaker Tacotron2
- Multi English speaker Tacotron2
- Single English speaker Transformer
- Single English speaker FastSpeech
- Multi English speaker Transformer
- Single Italian speaker FastSpeech
- Single Mandarin speaker Transformer
- Single Mandarin speaker FastSpeech
- Multi Japanese speaker Transformer
- Single English speaker models with Parallel WaveGAN
- Single English speaker knowledge distillation-based FastSpeech (New!)
You can download all of the pretrained models and generated samples:
Note that in the generated samples we use three vocoders: Griffin-Lim (GL), WaveNet vocoder (WaveNet), and Parallel WaveGAN (ParallelWaveGAN). The neural vocoders are based on following repositories.
- kan-bayashi/ParallelWaveGAN: Parallel WaveGAN
- r9y9/wavenet_vocoder: 16 bit mixture of Logistics WaveNet vocoder
- kan-bayashi/PytorchWaveNetVocoder: 8 bit Softmax WaveNet Vocoder with the noise shaping
If you want to build your own neural vocoder, please check the above repositories.
Here we list all of the pretrained neural vocoders. Please download and enjoy the generation of high quality speech!
| Model link | Lang | Fs [Hz] | Mel range [Hz] | FFT / Shift / Win [pt] | Model type |
|---|---|---|---|---|---|
| ljspeech.wavenet.softmax.ns.v1 | EN | 22.05k | None | 1024 / 256 / None | Softmax WaveNet |
| ljspeech.wavenet.mol.v1 | EN | 22.05k | None | 1024 / 256 / None | MoL WaveNet |
| ljspeech.parallel_wavegan.v1 | EN | 22.05k | None | 1024 / 256 / None | Parallel WaveGAN |
| ljspeech.wavenet.mol.v2 | EN | 22.05k | 80-7600 | 1024 / 256 / None | MoL WaveNet |
| ljspeech.parallel_wavegan.v2 | EN | 22.05k | 80-7600 | 1024 / 256 / None | Parallel WaveGAN |
| libritts.wavenet.mol.v1 | EN | 24k | None | 1024 / 256 / None | MoL WaveNet |
| jsut.wavenet.mol.v1 | JP | 24k | 80-7600 | 2048 / 300 / 1200 | MoL WaveNet |
| jsut.parallel_wavegan.v1 | JP | 24k | 80-7600 | 2048 / 300 / 1200 | Parallel WaveGAN |
| csmsc.wavenet.mol.v1 | ZH | 24k | 80-7600 | 2048 / 300 / 1200 | MoL WaveNet |
| csmsc.parallel_wavegan.v1 | ZH | 24k | 80-7600 | 2048 / 300 / 1200 | Parallel WaveGAN |
If you want to use the above pretrained vocoders, please exactly match the feature setting with them.
TTS demo
(New!) We made a new real-time E2E-TTS demonstration in Google Colab.
Please access the notebook from the following button and enjoy the real-time synthesis!

You can synthesize speech in a TXT file using pretrained models.
Go to a recipe directory and run utils/synth_wav.sh as follows:
cd egs/ljspeech/tts1
echo "THIS IS A DEMONSTRATION OF TEXT TO SPEECH." > example.txt
../../../utils/synth_wav.sh example.txt
You can change the pretrained model as follows:
../../../utils/synth_wav.sh --models ljspeech.fastspeech.v1 example.txt
Waveform synthesis is performed with Griffin-Lim algorithm and neural vocoders (WaveNet and ParallelWaveGAN). You can change the pretrained vocoder model as follows:
../../../utils/synth_wav.sh --vocoder_models ljspeech.wavenet.mol.v1 example.txt
Note that WaveNet vocoder provides very high quality speech but it takes time to generate.
Available pretrained models in the demo script are listed as follows:
| Model link | Lang | Fs [Hz] | Mel range [Hz] | FFT / Shift / Win [pt] | Input | R | Model type |
|---|---|---|---|---|---|---|---|
| ljspeech.tacotron2.v1 | EN | 22.05k | None | 1024 / 256 / None | char | 2 | Tacotron 2 |
| ljspeech.tacotron2.v2 | EN | 22.05k | None | 1024 / 256 / None | char | 1 | Tacotron 2 + forward attention |
| ljspeech.tacotron2.v3 | EN | 22.05k | None | 1024 / 256 / None | char | 1 | Tacotron 2 + guided attention loss |
| ljspeech.transformer.v1 | EN | 22.05k | None | 1024 / 256 / None | char | 1 | Deep Transformer |
| ljspeech.transformer.v2 | EN | 22.05k | None | 1024 / 256 / None | char | 3 | Shallow Transformer |
| ljspeech.transformer.v3 | EN | 22.05k | None | 1024 / 256 / None | phn | 1 | Deep Transformer |
| ljspeech.fastspeech.v1 | EN | 22.05k | None | 1024 / 256 / None | char | 1 | FF-Transformer |
| ljspeech.fastspeech.v2 | EN | 22.05k | None | 1024 / 256 / None | char | 1 | FF-Transformer + CNN in FFT block |
| ljspeech.fastspeech.v3 | EN | 22.05k | None | 1024 / 256 / None | phn | 1 | FF-Transformer + CNN in FFT block + postnet |
| libritts.tacotron2.v1 | EN | 24k | 80-7600 | 1024 / 256 / None | char | 2 | Multi-speaker Tacotron 2 |
| libritts.transformer.v1 | EN | 24k | 80-7600 | 1024 / 256 / None | char | 2 | Multi-speaker Transformer |
| jsut.tacotron2 | JP | 24k | 80-7600 | 2048 / 300 / 1200 | phn | 2 | Tacotron 2 |
| jsut.transformer | JP | 24k | 80-7600 | 2048 / 300 / 1200 | phn | 3 | Shallow Transformer |
| csmsc.transformer.v1 | ZH | 24k | 80-7600 | 2048 / 300 / 1200 | pinyin | 1 | Deep Transformer |
| csmsc.fastspeech.v3 | ZH | 24k | 80-7600 | 2048 / 300 / 1200 | pinyin | 1 | FF-Transformer + CNN in FFT block + postnet |
Available pretrained vocoder models in the demo script are listed as follows:
| Model link | Lang | Fs [Hz] | Mel range [Hz] | FFT / Shift / Win [pt] | Model type |
|---|---|---|---|---|---|
| ljspeech.wavenet.softmax.ns.v1 | EN | 22.05k | None | 1024 / 256 / None | Softmax WaveNet |
| ljspeech.wavenet.mol.v1 | EN | 22.05k | None | 1024 / 256 / None | MoL WaveNet |
| ljspeech.parallel_wavegan.v1 | EN | 22.05k | None | 1024 / 256 / None | Parallel WaveGAN |
| libritts.wavenet.mol.v1 | EN | 24k | None | 1024 / 256 / None | MoL WaveNet |
| jsut.wavenet.mol.v1 | JP | 24k | 80-7600 | 2048 / 300 / 1200 | MoL WaveNet |
| jsut.parallel_wavegan.v1 | JP | 24k | 80-7600 | 2048 / 300 / 1200 | Parallel WaveGAN |
| csmsc.wavenet.mol.v1 | ZH | 24k | 80-7600 | 2048 / 300 / 1200 | MoL WaveNet |
| csmsc.parallel_wavegan.v1 | ZH | 24k | 80-7600 | 2048 / 300 / 1200 | Parallel WaveGAN |
Chainer and Pytorch backends
| Chainer | Pytorch | |
|---|---|---|
| Performance | ◎ | ◎ |
| Speed | ○ | ◎ |
| Multi-GPU | supported | supported |
| VGG-like encoder | supported | supported |
| Transformer | supported | supported |
| RNNLM integration | supported | supported |
| #Attention types | 3 (no attention, dot, location) | 12 including variants of multihead |
| TTS recipe support | no support | supported |
References
[1] Shinji Watanabe, Takaaki Hori, Shigeki Karita, Tomoki Hayashi, Jiro Nishitoba, Yuya Unno, Nelson Enrique Yalta Soplin, Jahn Heymann, Matthew Wiesner, Nanxin Chen, Adithya Renduchintala, and Tsubasa Ochiai, "ESPnet: End-to-End Speech Processing Toolkit," Proc. Interspeech'18, pp. 2207-2211 (2018)
[2] Suyoun Kim, Takaaki Hori, and Shinji Watanabe, "Joint CTC-attention based end-to-end speech recognition using multi-task learning," Proc. ICASSP'17, pp. 4835--4839 (2017)
[3] Shinji Watanabe, Takaaki Hori, Suyoun Kim, John R. Hershey and Tomoki Hayashi, "Hybrid CTC/Attention Architecture for End-to-End Speech Recognition," IEEE Journal of Selected Topics in Signal Processing, vol. 11, no. 8, pp. 1240-1253, Dec. 2017
Citations
@inproceedings{watanabe2018espnet,
  author={Shinji Watanabe and Takaaki Hori and Shigeki Karita and Tomoki Hayashi and Jiro Nishitoba and Yuya Unno and Nelson {Enrique Yalta Soplin} and Jahn Heymann and Matthew Wiesner and Nanxin Chen and Adithya Renduchintala and Tsubasa Ochiai},
  title={ESPnet: End-to-End Speech Processing Toolkit},
  year=2018,
  booktitle={Interspeech},
  pages={2207--2211},
  doi={10.21437/Interspeech.2018-1456},
  url={http://dx.doi.org/10.21437/Interspeech.2018-1456}
}
@misc{hayashi2019espnettts,
    title={ESPnet-TTS: Unified, Reproducible, and Integratable Open Source End-to-End Text-to-Speech Toolkit},
    author={Tomoki Hayashi and Ryuichi Yamamoto and Katsuki Inoue and Takenori Yoshimura and Shinji Watanabe and Tomoki Toda and Kazuya Takeda and Yu Zhang and Xu Tan},
    year={2019},
    eprint={1910.10909},
    archivePrefix={arXiv},
    primaryClass={cs.CL}
}
Release history Release notifications | RSS feed


Download files
Download the file for your platform. If you're not sure which to choose, learn more about installing packages.
Source Distribution
Built Distribution
Filter files by name, interpreter, ABI, and platform.
If you're not sure about the file name format, learn more about wheel file names.
Copy a direct link to the current filters
File details
Details for the file espnet-0.6.1.tar.gz.
File metadata
- Download URL: espnet-0.6.1.tar.gz
- Upload date:
- Size: 318.4 kB
- Tags: Source
- Uploaded using Trusted Publishing? No
- Uploaded via: twine/3.1.1 pkginfo/1.5.0.1 requests/2.22.0 setuptools/45.1.0.post20200127 requests-toolbelt/0.9.1 tqdm/4.42.0 CPython/3.7.4
File hashes
| Algorithm | Hash digest | |
|---|---|---|
| SHA256 |
e31d70a4e67a36fa6faf2bcae8f451c1fbb13b3d36c663f7b3787a069f0c1e6e
|
|
| MD5 |
f1fb4fa642dc11b852306252f3f9889c
|
|
| BLAKE2b-256 |
34dcf04020216478cd6adda3ad51b08853e6e6c162f36b3732194fd8a2177e54
|
File details
Details for the file espnet-0.6.1-py3-none-any.whl.
File metadata
- Download URL: espnet-0.6.1-py3-none-any.whl
- Upload date:
- Size: 376.0 kB
- Tags: Python 3
- Uploaded using Trusted Publishing? No
- Uploaded via: twine/3.1.1 pkginfo/1.5.0.1 requests/2.22.0 setuptools/45.1.0.post20200127 requests-toolbelt/0.9.1 tqdm/4.42.0 CPython/3.7.4
File hashes
| Algorithm | Hash digest | |
|---|---|---|
| SHA256 |
e7fa82ed61e70d6c37c85dc3c76f7ccebdd585b23d2bb33de0d5419ebbb3c328
|
|
| MD5 |
b12f00313079bc802fff2ab8adce4aad
|
|
| BLAKE2b-256 |
69391a21dc763bc40d0aefb49286fb3573c0a9e6bb4c20c8148426f9eda28d3d
|


