
FEABAS Workbench
Version 0.3.4: adds persistent LRZ execution through the usual Run buttons, guided SSH setup with home-folder or DSS storage (with a storage estimate), image synchronization over SSH or Globus, remote previews and export downloads. See cluster setup and data transfer. Cluster mode is explicit and green; Leave cluster mode restores workstation execution. This build also adds local within/across-section parallelism with resource estimates, pixel-based N2V selection, training and validation loss curves, and a live best-model preview with graceful stopping. See the user guide. Full FEABAS image processing at LRZ has not yet been validated; local pipeline and cluster transport tests are described in the changelog.
A desktop app for stitching and aligning serial-section EM volumes with FEABAS – for people who do not want to touch YAML files or a terminal.





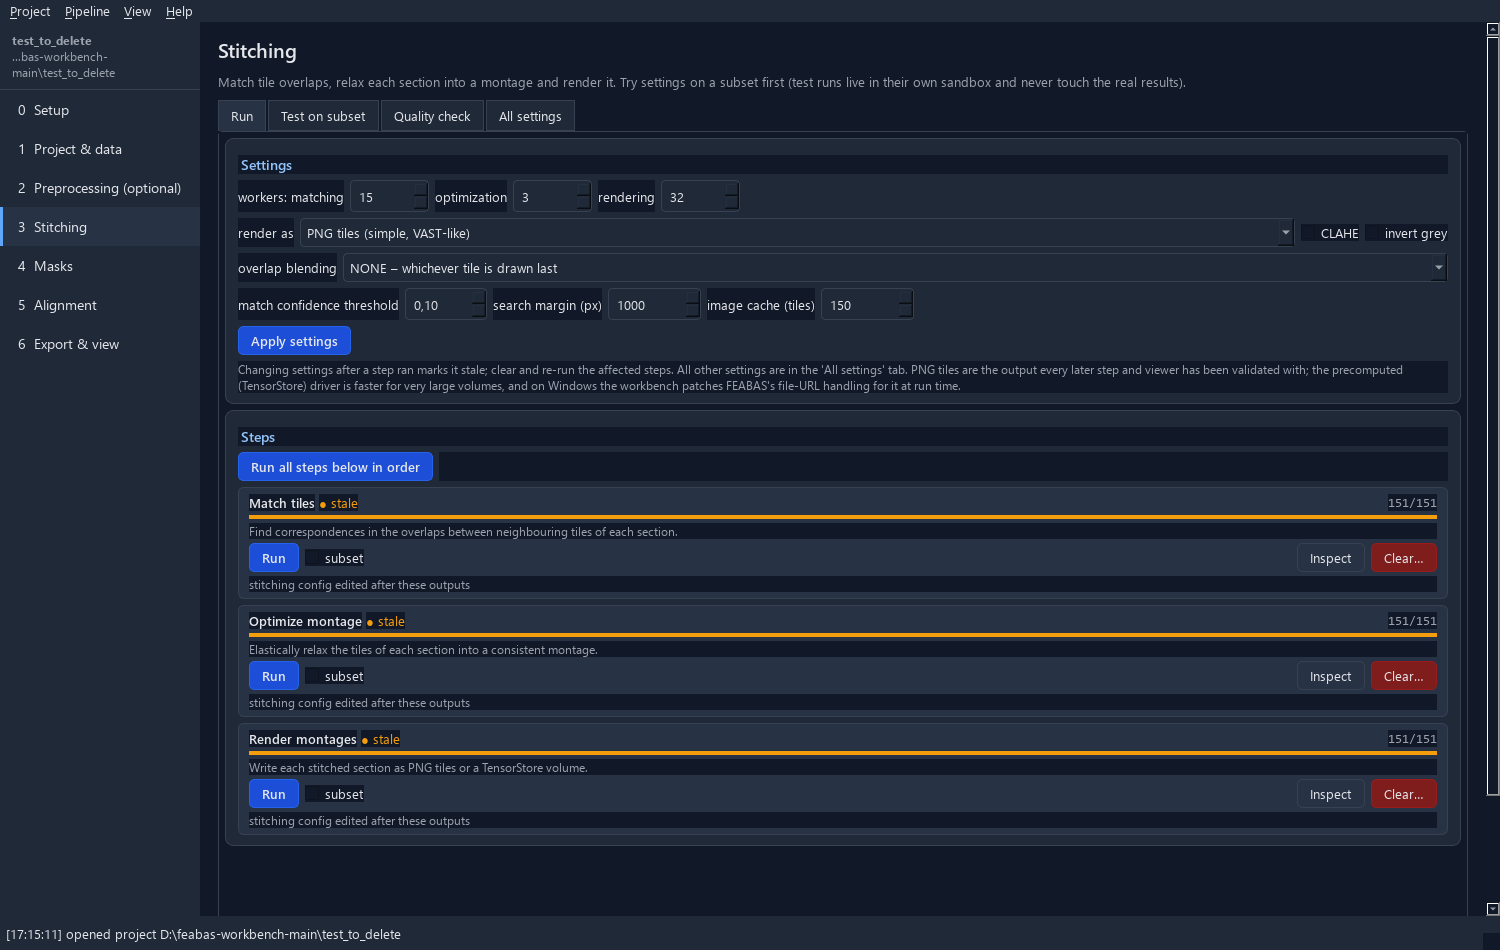
FEABAS – Finite-Element Assisted Brain Assembly System, by Yuelong Wu and Jeff W. Lichtman (Harvard; MIT licence) and described in Wu & Lichtman, 2026 – is a state-of-the-art pipeline for stitching and elastically aligning serial-section electron-microscopy data. It is driven from the command line by YAML files. The workbench wraps it in seven windows, one per stage, and adds the parts the command line leaves to you: reading tile positions out of microscope metadata, building the masks, test runs on subsets, quality overlays, rolling back, and exporting to a viewer.
FEABAS itself is not modified: its driver scripts (3.0.5) are vendored and run as subprocesses in your FEABAS environment with the project folder as working directory.
What it does
| Window | What happens there |
|---|---|
| 0 Setup | Finds or installs the Python environments (FEABAS; PyTorch + CAREamics + ultralytics + segmentation-models-pytorch), checks the GPU, remembers where Fiji and VASTlite are. |
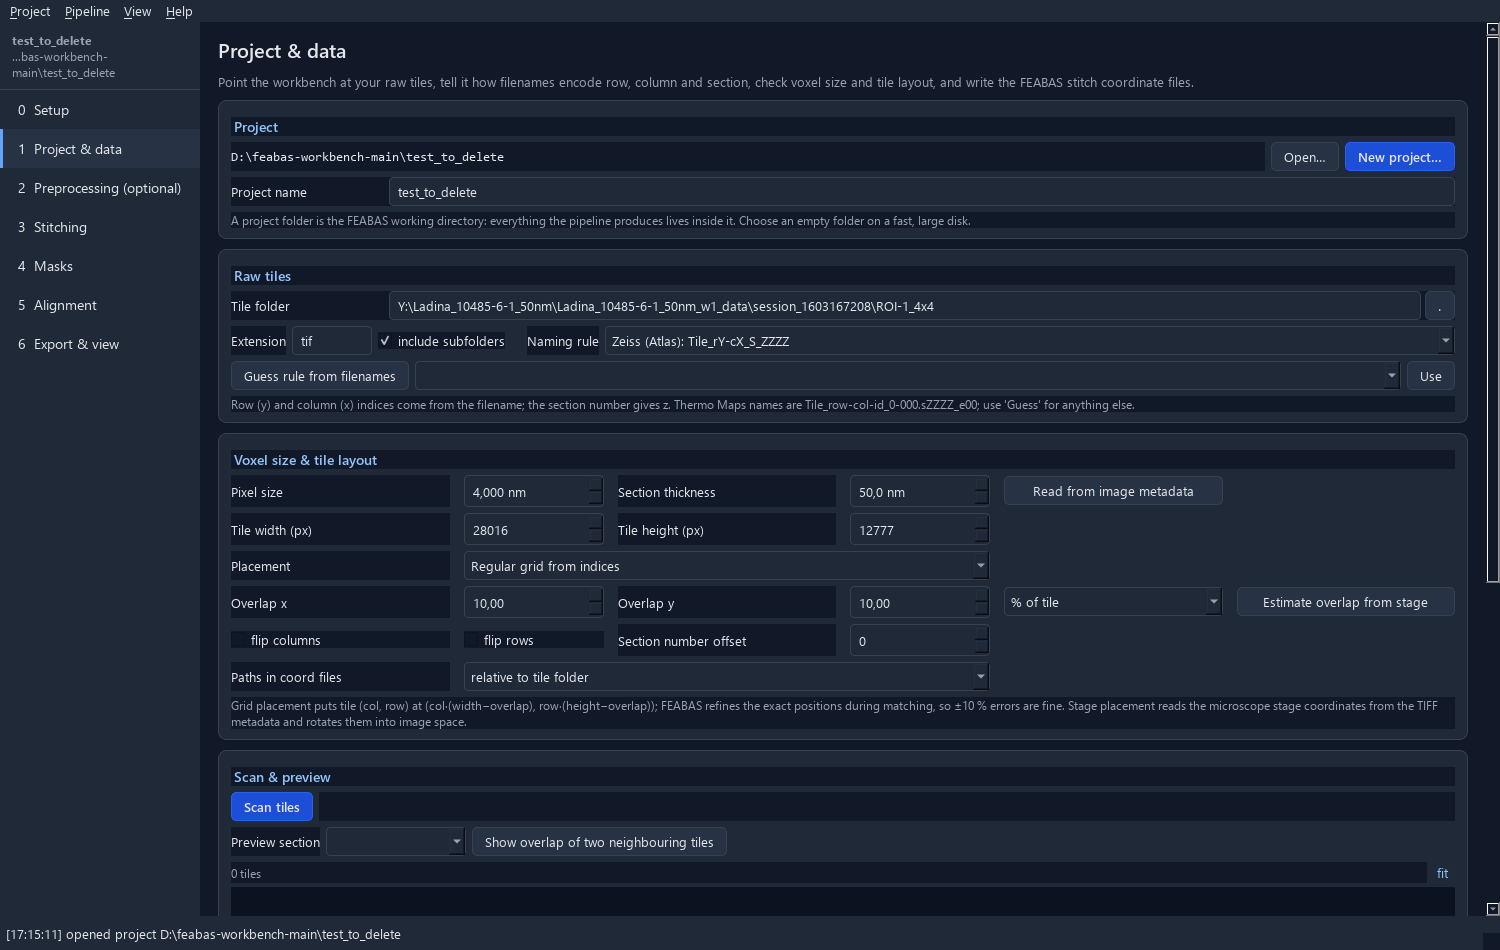
| 1 Project & data | Points at the raw tiles, guesses how filenames encode row/column/section (Thermo Maps, Zeiss Atlas, sequential numbers, custom pattern), reads pixel size and stage positions from the TIFF metadata, previews the layout, writes FEABAS's stitch_coord files. |
| 2 Preprocessing | Optional histogram matching to a template and CAREamics Noise2Void / N2V2 / StructN2V denoising trained on tiles you pick. |
| 3 Stitching | Tile matching, montage optimisation and rendering with the settings that matter up front; test runs on a few sections and tiles in a sandbox; a full-resolution viewer for seams; every other setting in a documented tree editor. |
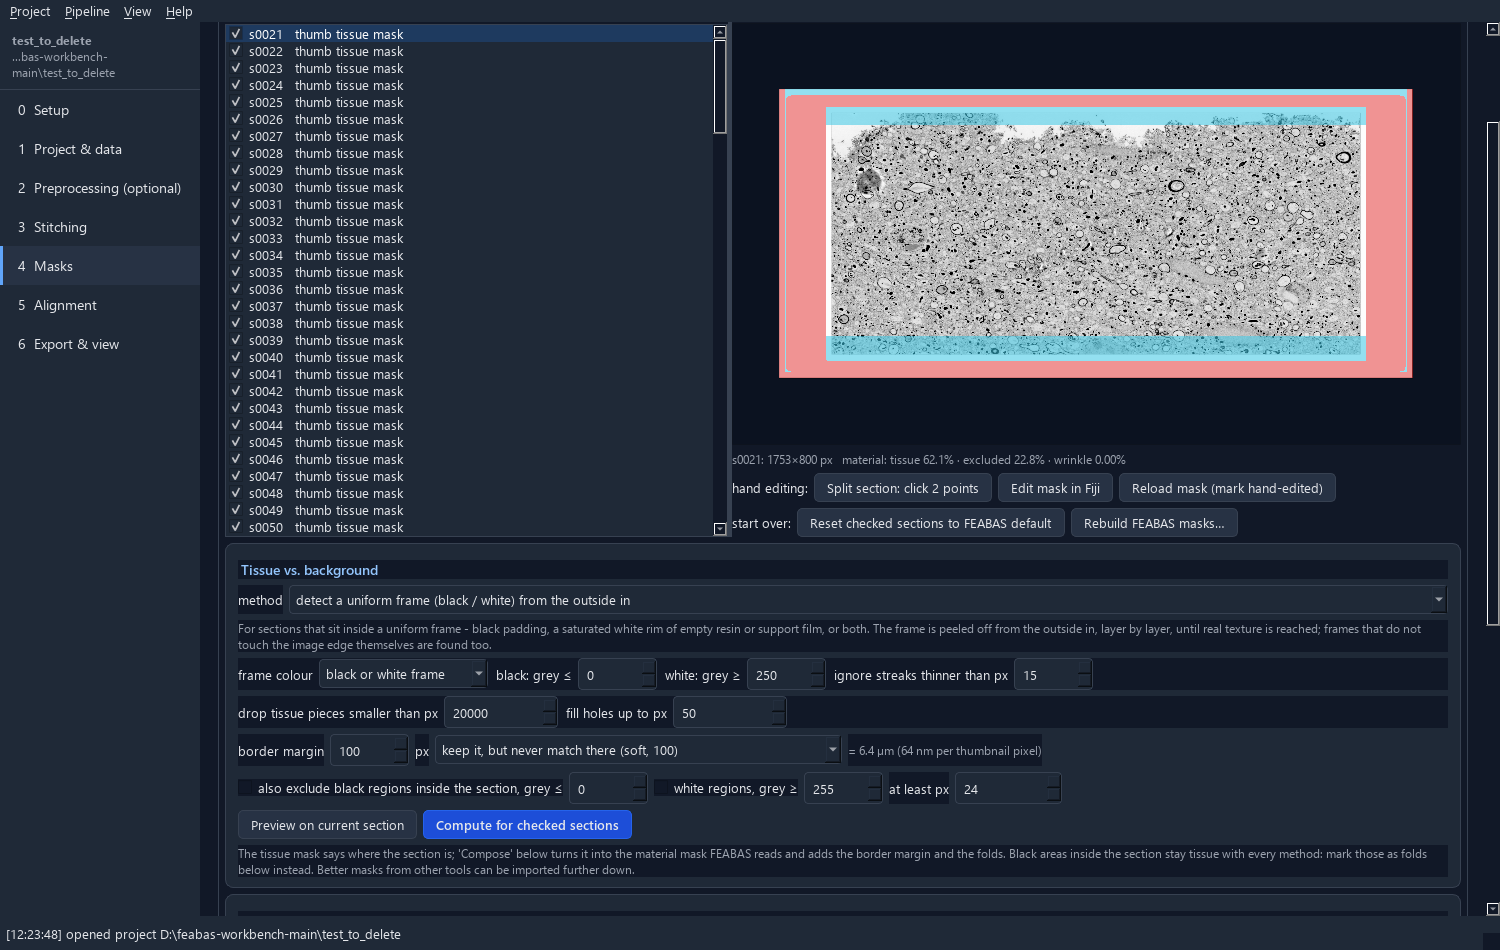
| 4 Masks | Thumbnails, tissue-vs-background masks (tile footprint, a black/white frame peeled from the outside in, fixed margins, or texture/intensity — each method shows only its own settings), fold detection with the bundled U-Net (or one you train here), import of masks made elsewhere, composition into FEABAS's material mask, split lines for broken sections, hand editing in Fiji. |
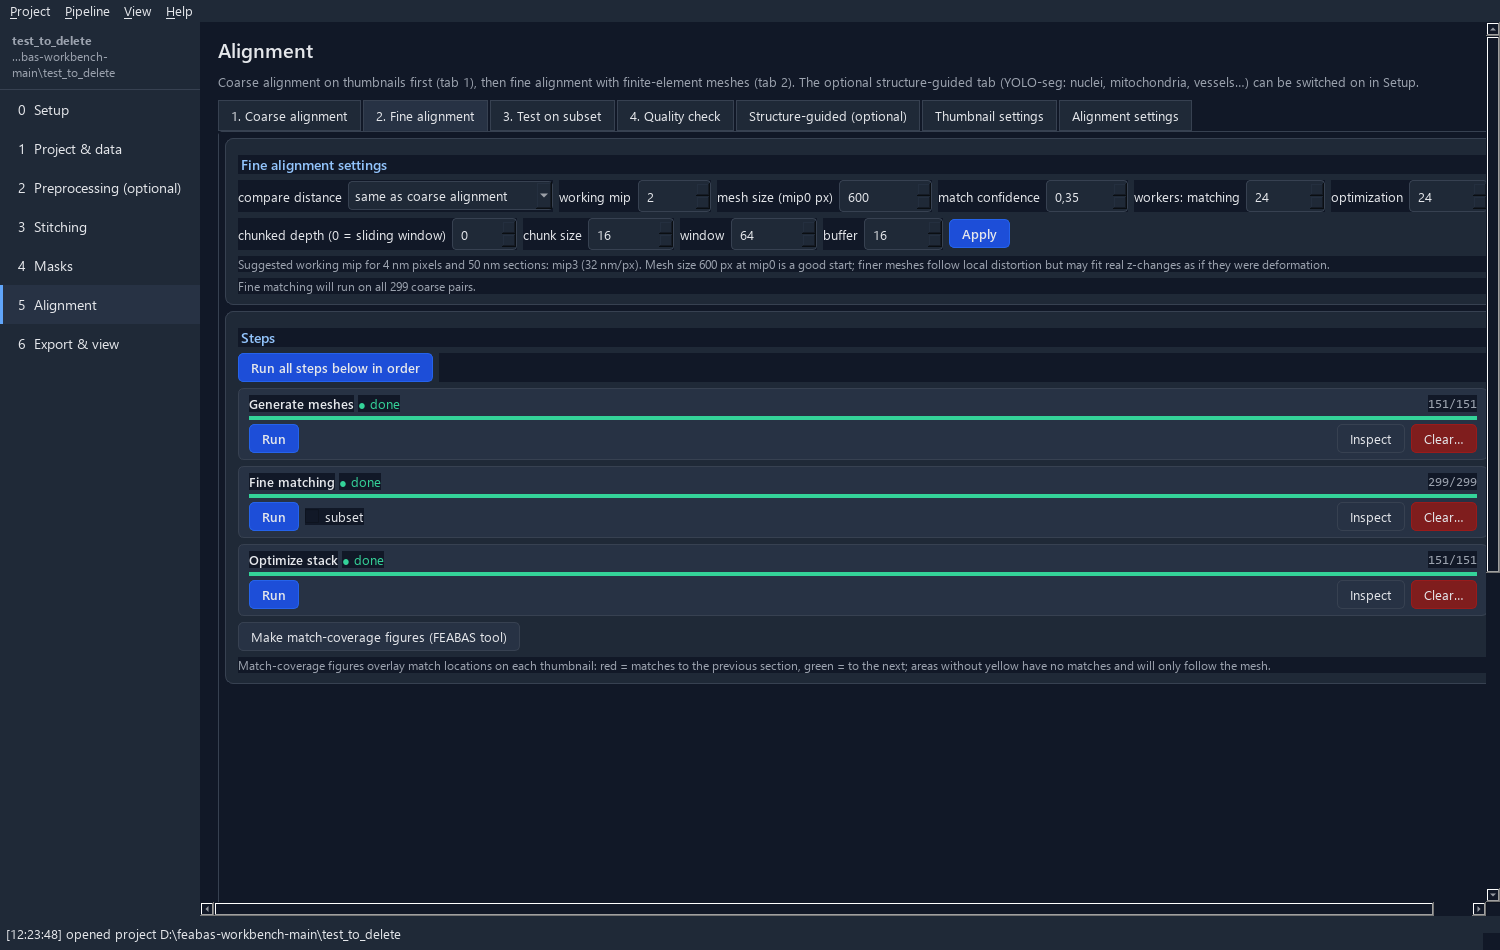
| 5 Alignment | Coarse (thumbnail) and fine (finite-element) alignment with its own compare distance, sandbox test runs, red/green and checkerboard overlays, and — optional, switched on in Setup — structure-guided alignment: a YOLO-seg model finds nuclei / mitochondria / vessels and the alignment is driven from them. |
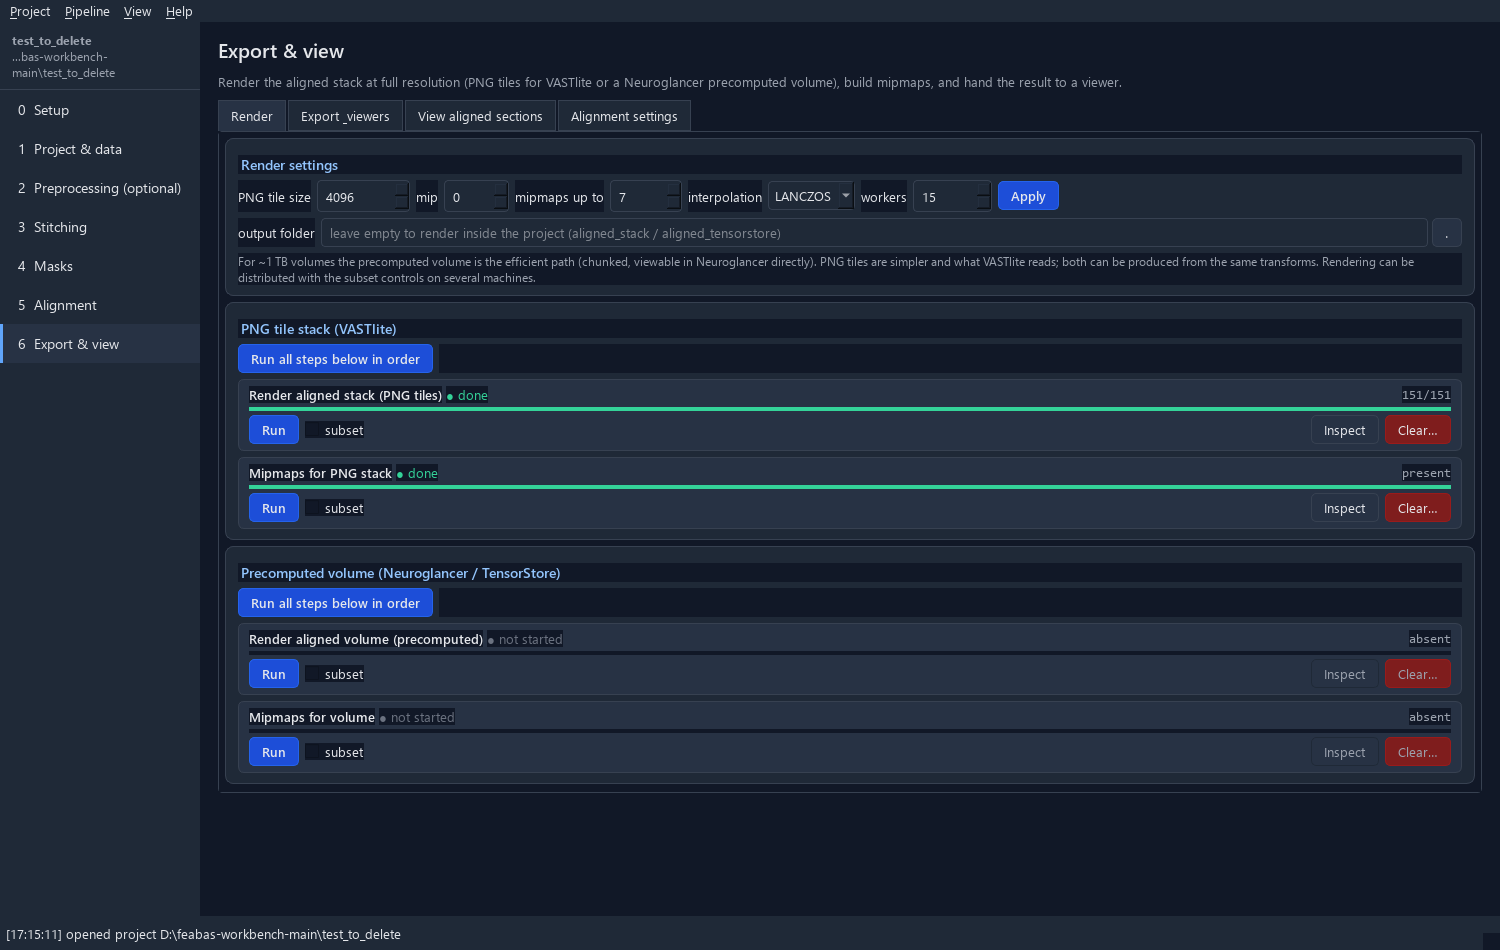
| 6 Export & view | Full-resolution PNG tiles or a Neuroglancer precomputed volume, mipmaps, VASTlite export (.vsvi, hard-linked, instant), OME-Zarr, open in VASTlite / Fiji / Neuroglancer. |
Across all of them: pipeline state is read from the files on disk (done / partly done / stale / errors /
blocked), clear a step and everything after it, snapshots to roll back to, a log with FEABAS's
own messages, cancellable jobs, and subset runs (--start/--stop/--step) for spreading work over machines.
What the result looks like
The example dataset used during development: 10 serial sections, 8 × 5 tiles of 6144 × 4096 px at 10 nm as written by a Thermo Fisher microscope, through the whole pipeline with default settings.
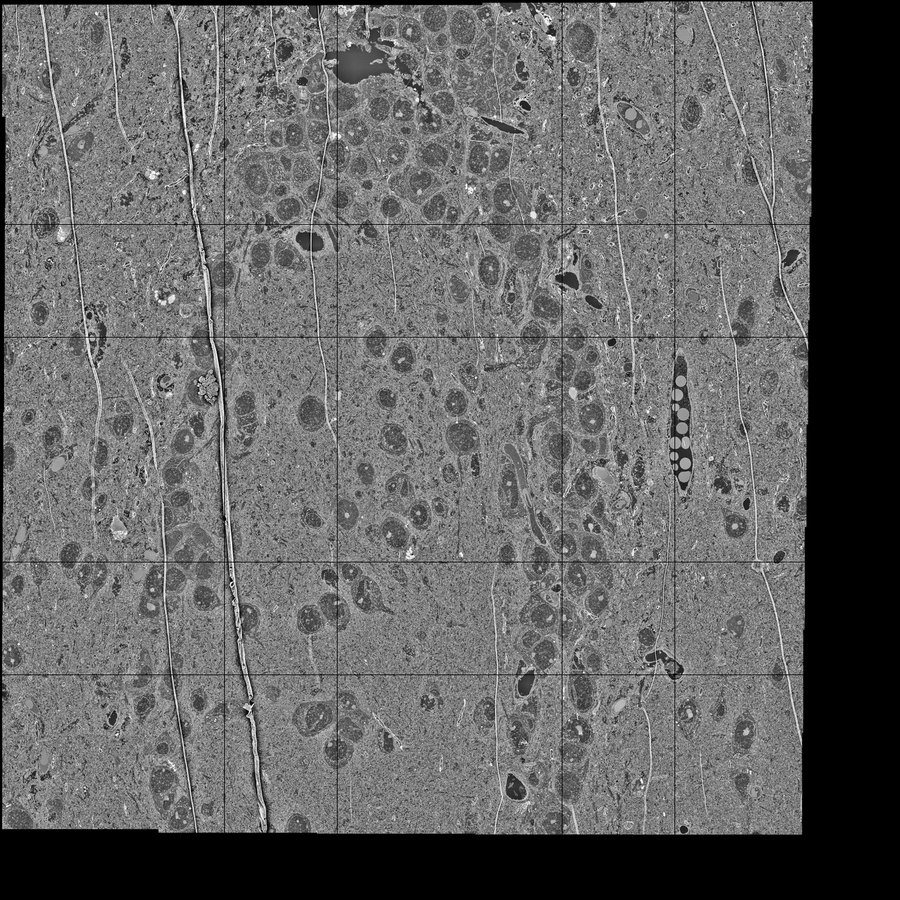 One stitched section, 32 768 × 32 768 px, from 40 tiles. |
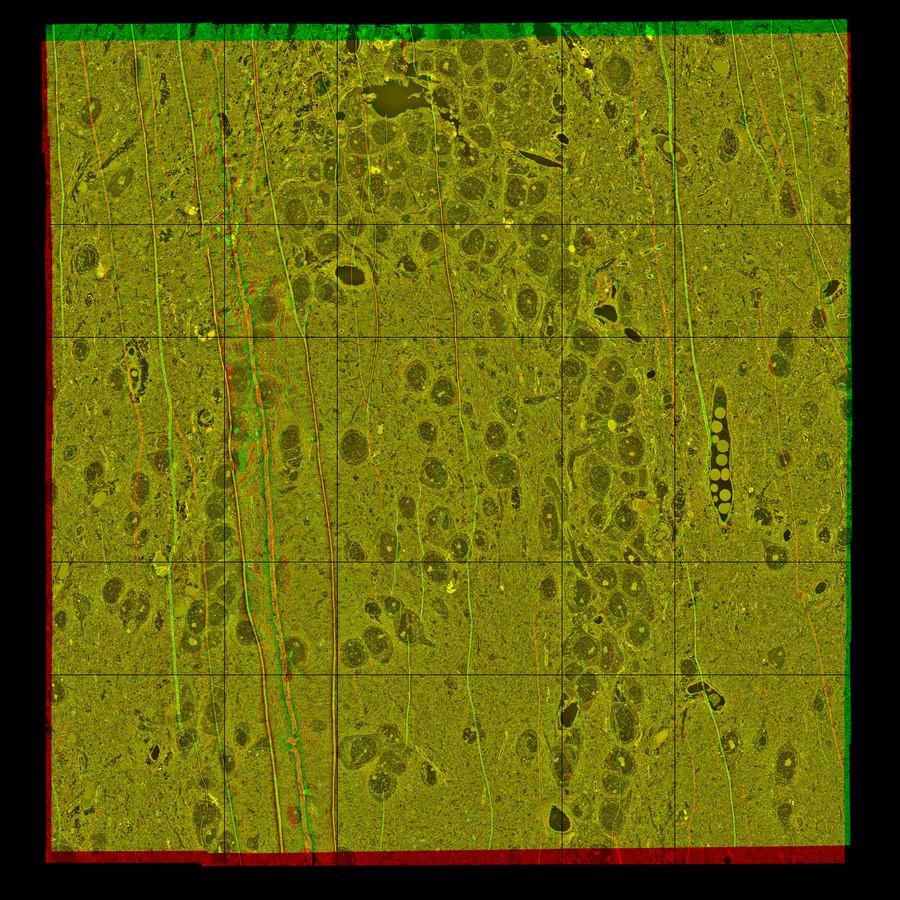 Two consecutive aligned sections in red and green: yellow where they coincide. |
More windows
Install
The heavy parts – FEABAS and PyTorch – go into separate environments that the app creates for you from its Setup page afterwards (internet needed; the deep-learning one is several GB; without conda the Setup page downloads micromamba for that). So this only concerns the GUI. Pick the row that matches your machine:
| You have | Do this |
|---|---|
| a Windows PC with nothing on it (no Python, no conda) | Download FEABAS-Workbench-<version>-windows-x64.zip from the Releases page, unpack it, start FEABAS-Workbench\FEABAS-Workbench.exe (SmartScreen warns once: More info → Run anyway). Or get the source (below) and double-click tools\install.bat: with no package manager on the PC it downloads a standalone micromamba and continues. |
| micromamba / Miniforge / Miniconda / Anaconda | Get the source (Code → Download ZIP, or git clone), unpack, then Windows: double-click tools\install.bat · Linux/macOS: bash tools/install.sh. The script finds the package manager, creates the feabas-workbench env, installs the app and hard-wires start_gui.bat / start_gui.sh to it. |
| plain Python ≥ 3.10, no conda | pip install feabas-workbench into any environment of yours (PyPI; the same wheel is attached to every GitHub release). Or, in the unpacked source: python -m venv .venv then .venv\Scripts\python -m pip install -e . (Linux: .venv/bin/python). |
Start with start_gui.bat (Windows) or ./start_gui.sh (Linux/macOS) – both find the
environment on their own – or, after a pip install, with feabas-workbench (feabas-workbench-cli
keeps a console window, for tracebacks). Then open Setup: Detect
environments finds existing FEABAS / PyTorch environments, otherwise Install fw-feabas and Install
fw-dl create them.
Tip: Linux desktops have the Qt libraries already. On a minimal server install add
sudo apt install libegl1 libopengl0 libxkbcommon0 libdbus-1-3 libxcb-cursor0 libfontconfig1.
Try it without data: python -m feabas_workbench.core.synthetic D:\demo makes a small synthetic
serial-section dataset with a ready project; open it in the workbench, or run the whole pipeline on it
with python tools/run_demo_pipeline.py D:\demo --feabas-python <fw-feabas python> (this is what CI does).
The full version with every option, and every window and setting explained – what it does, when to
change it, what it makes stale – is the user guide. The same text as a page
with a contents rail and search is docs/user_guide.html: open it in a browser
from your download.
A typical run
- Project & data – New project (an empty folder on a big disk) → tile folder → Guess rule → Read from image metadata → Scan tiles → check the preview → Write stitch_coord files.
- Stitching – set workers and render driver → Run all. For a new dataset, first Test on subset with one section and a few tiles, look at the seams, then run for real.
- Masks – Make thumbnails (about 500–2000 px; the suggested mip does that) → tissue rule → Detect folds → Compose. Check a few sections with the overlay; paint split lines through broken sections.
- Alignment – Match thumbnails → Optimize coarse stack → Render coarse stack → check red/green → Generate meshes → Fine matching → Optimize stack.
- Export & view – render PNG tiles + mipmaps → Export (VAST) → Open in VASTlite; or render the precomputed volume and open it in Neuroglancer.
For the plain case, Pipeline → Run the standard pipeline… (Ctrl+R) queues steps 2–4 in one go and stops at the first failure.
When something upstream changes, the affected steps show stale; Clear… on the earliest affected step lists what will be deleted, then re-run. Make a snapshot first if the previous state was valuable.
Structure-guided alignment
Off by default (Setup → Interface shows the tab). With a YOLO-seg model (bring .pt weights, or train on a YOLO-format dataset from the
Alignment window): Detect structures on thumbnails, then Match structures – centroids of the same
structures in neighbouring sections become coarse matches, either added to FEABAS's feature matches with a
weight or used instead of them where they succeed. For fine alignment, restrict turns tissue outside the
structures into a low-stiffness material, or Re-weight fine matches damps the matches outside them.
The idea: let the user say what the alignment should be driven from – nuclei, mitochondria, vessels –
instead of features they cannot see.
Layout of a project folder
project/
  workbench_project.json     workbench state (source folder, naming rule, voxel size, settings)
  configs/                   general_configs.yaml (points FEABAS here), default_*.yaml, your overrides
  stitch/stitch_coord/       one TSV per section (input to FEABAS)
  stitch/, stitched_sections/, thumbnail_align/, align/, aligned_stack/, logs/   FEABAS outputs
  preprocessed/{histmatch,denoised}/   preprocessed tiles mirroring the raw folder
  masks/{tissue,folds,structures}/     intermediate masks; manifest.json marks hand-edited ones
  models/{n2v,folds,yolo}/             trained models
  tests/<name>/              sandbox working directories for subset test runs
  snapshots/<stamp>/         rollback copies of matches/meshes/transforms/configs
  exports/                   VAST / OME-Zarr exports
The project folder is the FEABAS working directory. Your raw tiles stay where they are.
Running at LRZ (cluster mode, local build)
The same pages and Run buttons can send the work to the LRZ Linux Cluster instead of this PC. Cluster mode is chosen per project and is off until you switch it on; workstation runs and their results are untouched.
- Use cluster… (top bar) → 1. Sign in with your LRZ ID, password and MFA (entered in private dialogs, never stored).
- Storage folder: your home folder (100 GB, fine for the tutorial and projects up to ~15–20 GB of raw images) or a DSS container your project's data curator shared with you. Workbench estimates the space the project will need (about 5× the raw images) and warns if the folder is too small.
- 3. Prepare FEABAS at LRZ installs a private Python 3.11 + FEABAS 3.0.5 there (Miniforge, 5–15 min).
- Save cluster settings & use cluster → Sync project & images (directly over SSH, or Globus for very large data) → use the normal Run buttons. Green accents mark cluster mode; Leave cluster mode switches back.
Access: check your account's Linux Cluster permission in the LRZ ID Portal; DSS containers are created and shared by your project's data curator (DSS documentation). Details, resource presets and recovery: docs/CLUSTER_GUIDE.md.
Development
python -m pytest tests -q                                    # core tests + offscreen GUI smoke test
python -m feabas_workbench --project X --screenshot out/     # render every window offscreen
python -m build                                              # wheel + sdist
pyinstaller tools/feabas_workbench.spec                      # GUI-only executable (environments stay external)
feabas-workbench --selfcheck report.json verifies an installation (vendored FEABAS, checkpoint, worker
staging) without opening a window.
CI, on every commit: lint (ruff, pyflakes level), the tests, the offscreen render of every window on a
synthetic project and the wheel build on Ubuntu and Windows for Python 3.11 to 3.14; the whole
FEABAS pipeline on a synthetic 4-section dataset on Linux (tools/run_demo_pipeline.py, and once more
through the GUI's job queue with tools/run_demo_pipeline_gui.py); and the frozen Windows build with
its self-check. A v* tag builds the wheel, sdist and Windows zip, publishes the GitHub Release and
uploads the wheel and sdist to PyPI (trusted publishing, no stored token; the README goes through
tools/absolutize_readme.py first because PyPI does not resolve relative links).
Code map: feabas_workbench/core (Qt-free: project, tiles, configs, steps, jobs, pipeline, masks, images,
test runs, environments, synthetic data), feabas_workbench/workers (subprocess workers: histogram matching, N2V, fold U-Net, YOLO,
structure matching, match re-weighting, export), feabas_workbench/ui (PySide6 pages and widgets),
feabas_workbench/vendor/feabas_3_0_5 (FEABAS driver scripts, tools and default configs),
feabas_workbench/resources (the bundled fold U-Net weights: an fp16 export with every model weight, so it
detects and can be fine-tuned; only the original training run's optimizer state is not included, which
only matters for resuming that run — the full 280 MB checkpoint is not bundled).
Credits and license
This is a front end for FEABAS by Yuelong Wu (Center for
Brain Science, Harvard University), which does the actual stitching and alignment; the method is
described in Wu & Lichtman (2026), doi:10.64898/2026.06.07.730510. FEABAS is MIT-licensed;
its driver scripts and default configuration files are vendored here unchanged, with their license, under
feabas_workbench/vendor/feabas_3_0_5/ (see THIRD_PARTY_NOTICES.md).
The workbench is released under the Apache License 2.0. Its NOTICE file carries the author attribution; anyone who redistributes the workbench, or substantial parts of it, has to keep it.
How to cite
Cite FEABAS for the stitching and alignment – that is where the science is:
Wu, Y. & Lichtman, J. W. (2026). FEABAS: A Stitching and Alignment Tool for Serial EM Data. bioRxiv. https://doi.org/10.64898/2026.06.07.730510
and, if the workbench was useful in your work, the workbench too (GitHub's Cite this repository button uses CITATION.cff):
Kislinger, G. (2026). FEABAS Workbench (version 0.3.4) [Computer software]. https://github.com/georgkislinger/feabas-workbench — ORCID 0000-0002-6559-7421
1 maintainer

Release files for feabas-workbench 0.3.4
For a detailed explanation of source distributions (sdists) and built distributions (wheels), please see the package formats documentation.
Source distribution (sdist)
| File | Size | Uploaded | |
|---|---|---|---|
| feabas_workbench-0.3.4.tar.gz | 45.5 MB | Details |
Built distribution (wheel)
| File | Interpreter | ABI | Platform | Reset |
|---|---|---|---|---|
| feabas_workbench-0.3.4-py3-none-any.whl | Python 3 | none | any | Details |
Total release size: 90.9 MB
Release files / feabas_workbench-0.3.4.tar.gz
| Download URL | feabas_workbench-0.3.4.tar.gz |
|---|---|
| Size | 45.5 MB |
| Tags | Source |
|
SHA-256 checksum How to use checksums |
269399e4b269941b2f0edf99b8fe4209d4271e3df0686e843960679e74139840
|
|
BLAKE2b-256 checksum How to use checksums |
e1acaddd45a5072176b2580e1256f2dcdae1c9d361591095e44b8573650bb492
|
| Upload date | |
|
Uploaded using Trusted Publishing? What is trusted publishing? |
Yes |
| Uploaded via |
twine/7.0.0 CPython/3.13.14
|
Provenance
Provenance describes where a file came from. On PyPI, provenance is shared via attestations, which provide a verifiable record of the build or publishing details. View details, limitations and caveats.


PyPI Publish Attestation
PyPI verified that this artifact, at this checksum, originated from the publisher listed below.
Signed by GitHub Actions, verified by PyPI on Sep 25, 2026.
Transparency logRelease files / feabas_workbench-0.3.4-py3-none-any.whl
| Download URL | feabas_workbench-0.3.4-py3-none-any.whl |
|---|---|
| Size | 45.5 MB |
| Tags | Python 3 |
|
SHA-256 checksum How to use checksums |
54b2da3a735df94020dd5f35764f82990ebe2aba6f5c339bf547c89464ab286b
|
|
BLAKE2b-256 checksum How to use checksums |
6f148e925da961198e8fa01194d060d539b98e0a327bc22566555447f154a451
|
| Upload date | |
|
Uploaded using Trusted Publishing? What is trusted publishing? |
Yes |
| Uploaded via |
twine/7.0.0 CPython/3.13.14
|
Provenance
Provenance describes where a file came from. On PyPI, provenance is shared via attestations, which provide a verifiable record of the build or publishing details. View details, limitations and caveats.
PyPI Publish Attestation
PyPI verified that this artifact, at this checksum, originated from the publisher listed below.
Signed by GitHub Actions, verified by PyPI on Sep 25, 2026.
Transparency log













