Utility functions to help with the development of FastHTML applications.

Project description
FastHTML Developer Utils
Why?
Here’s a brief outline of the benefits of using fh-dev-utils.
- Super-easy to dynamically build Tailwind styles!
- Compatible with TailwindCSS v4.
- Cach buster to bypass browser styles during development.
- Run a Jupyter notebook server alongside your FastHTML app.
- Database browser to easily view/manage your apps db tables and records.
- TailwindCSS intellisense for a great developer experience.
It’s recommended by the authors of TailwindCSS uses a build step to compile styles for published websites, rather than just add the CDN version to the site header.
And if you like using Tailwind for your app styling then make sure you enable intellisense. This is only available if you dynamically build your styles. Being able to see inline color information, all available tailwind classes, and what CSS a class will be converted into is a game-changer!
A complete list of the benefits of compiling TailwindCSS styles can be found here.
Introduction
The fh-dev-utils package helps during the devlopment of FastHTML
applications by adding support for live TailwindCSS build, a Jupyter
notebook server, and an SQLite viewer/manager via the serve_dev()
function.
There is also a cache_buster() function available to help prevent
caching of CSS styles during development.
See here
for the full definition of serve_dev() and cache_buster() plus all
available parameters.
Usage
Install the fh-dev-utils package from PyPi.
$ pip install fh-dev-utils
Then import the fh_dev_utils package inside your FastHTML application.
main.py
from fasthtml.common import *
from fh_dev_utils.serve import *

app,rt = fast_app(live=True)

@rt('/')
def get(): return Div(P('Hello World!'))

#serve()
serve_dev()
Replace the default serve() function with serve_dev(). This performs
the same functionality as serve() but includes a few additional
enhancements, which make developing FastHTML applications a little
easier.
Currently serve_dev() offers three main features.
- TailwindCSS styles dynamic build process
- Jupyter notebook server
- SQLite database browser
Note: If you use serve_dev() without any options then it performs the
exact same function as serve().
1. TailwindCSS Dynamic Build
Uses the TailwindCSS CLI to dynamically build styles as you edit your apps source code.
Benefits include:
- Smaller CSS files size (only build what you have defined)
- Recommended best practice from the authors of TailwindCSS:
-
The [Play] CDN is designed for development purposes only, and is not intended for production.
-
- Use dynamic selectors such as
mb-[34px] - TailwindCSS intellisense support
- Custom configuration (e.g. plugins, and custom themes)
serve_dev(tw=True)
When you start a FastHTML app with the tw parameter enabled you’ll see
an additional link to open Jupyter Lab. By default the source
TailwindCSS file is assumed to be located in ./app.css and the output
is saved to ./public/app.css. Both these paths can be configured by
the tw_src and tw_dist parameters respectively.
$ python main.py
Watching for Tailwind class changes...
Link: http://localhost:5001
INFO:     Will watch for changes in these directories: ['/home/david/fh-dev-utils-test']
INFO:     Uvicorn running on http://0.0.0.0:5001 (Press CTRL+C to quit)
INFO:     Started reloader process [1951725] using WatchFiles
INFO:     Started server process [1951759]
INFO:     Waiting for application startup.
INFO:     Application startup complete.
TailwindCSS Setup
The serve_dev(tw=True) function runs the TailwindCSS CLI to watch for
class name changes but you need to setup your FastHTML to be Tailwind
‘compatible’. This means adding a Tailwind source CSS file and a config
file.
In the root of your FastTML project add an app.css file:
@import "tailwindcss";
This is for TailwindCSS v4. If you’re using an older version then use this format instead:
@tailwind base;
@tailwind components;
@tailwind utilities;
If your Tailwind CSS file is named something other then app.css or is
in a different location then you can use the tw_src parameter in
serve_dev() to change the name/path as required.
The last thing to do is add the generated Tailwind CSS file to the header of your FastHTML site.
app,rt,todos,ToDo = fast_app(
    pico=False,
    live=True,
    hdrs=(
        Link(rel="stylesheet", href=f"/public/app.css{cache_buster() if DEV_MODE else ""}", type="text/css"),
    ),
)
This will add the necessary styles and will also bypass the browser CSS
cache via the fh-dev-utils cache_buster() function.
Tailwind Intellisense
One of the advantages to building TailwindCSS styles dynamically is that it enables support for auto-completion (intellisense) of Tailwind classes as you type.
To get this working you need to be using VS Code and install the Tailwind CSS IntelliSense extension.
You also need to edit the TailwindCSS VS Code settings so that intellisense is auto-triggered as you edit your FastHTML app source code.
Open the JSON user settings in VS Code and add the following settings to the existing ones:
 {
  "tailwindCSS.includeLanguages": {
    "python": "html"
  },
  "tailwindCSS.experimental.classRegex": [
    "\\b[a-zA-Z_]+\\s*=\\s*[\"']([^\"']*)[\"']",
    "\"[^\"]+\"\\s*:\\s*\"([^\"]*)\"",
    "'[^']+'\\s*:\\s*'([^']*)'"
  ],
}
Once this is set up then you get full intellisense support.
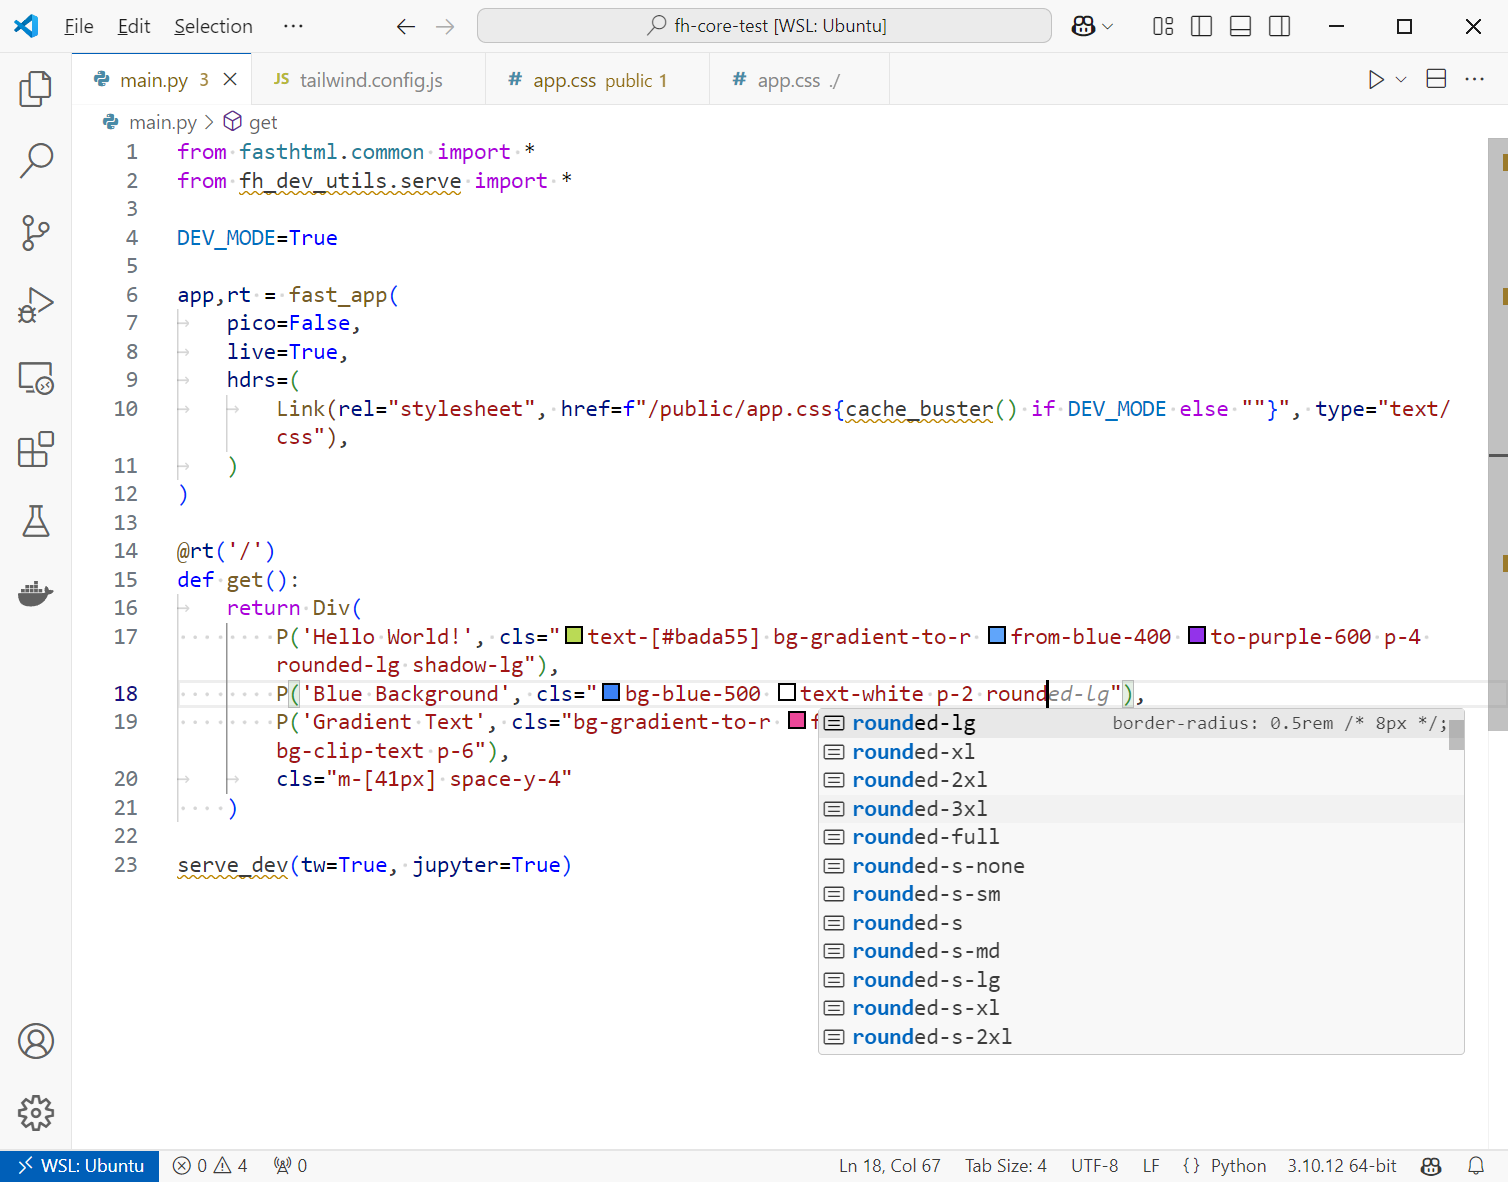
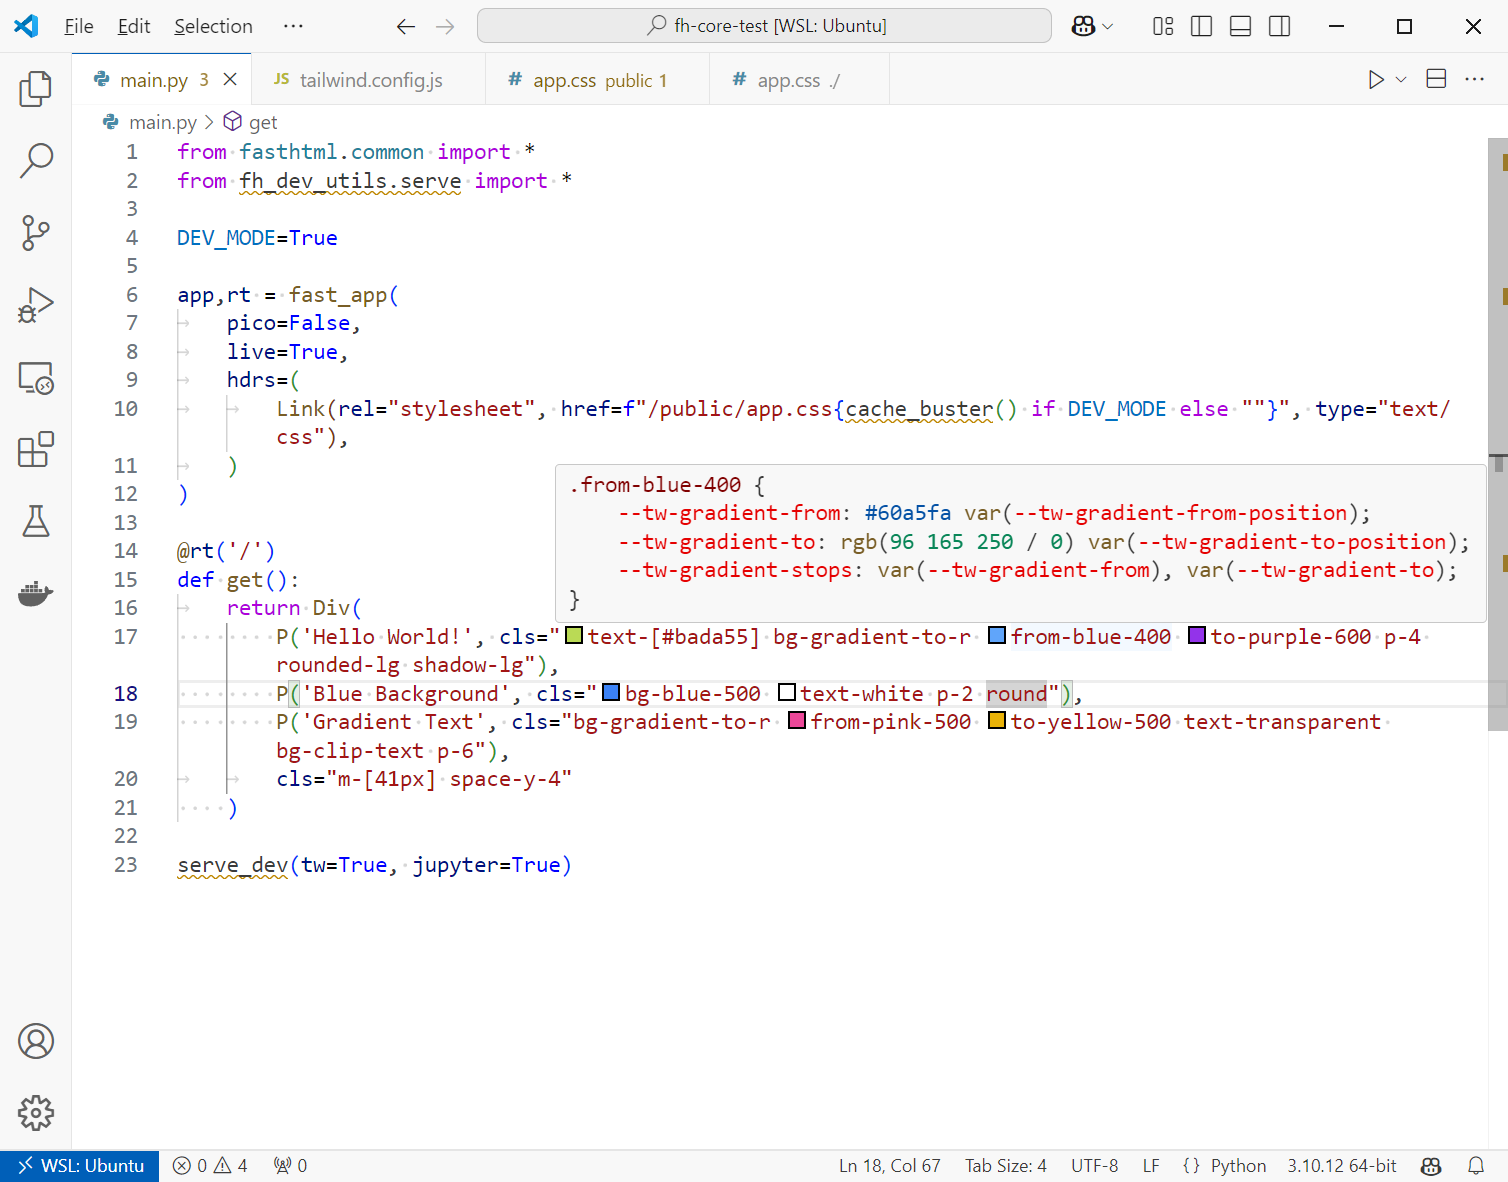
Plus, all colors are highlighted inline too, and you can hover over the Tailwind class to see what the computed CSS will be when rendered!
Troubleshooting
If you don’t see a little color swatch next to the Tailwind color
classes then intellisense isn’t working. This is usually because the
TailwindCSS CLI is not running, or you don’t have a tailwind.config.js
added to the root of your FastHTML app.
Also, if you are using Linux under Windows (WSL) then make sure the Tailwind CSS Intellisense VS Code extension is enabled for WSL.
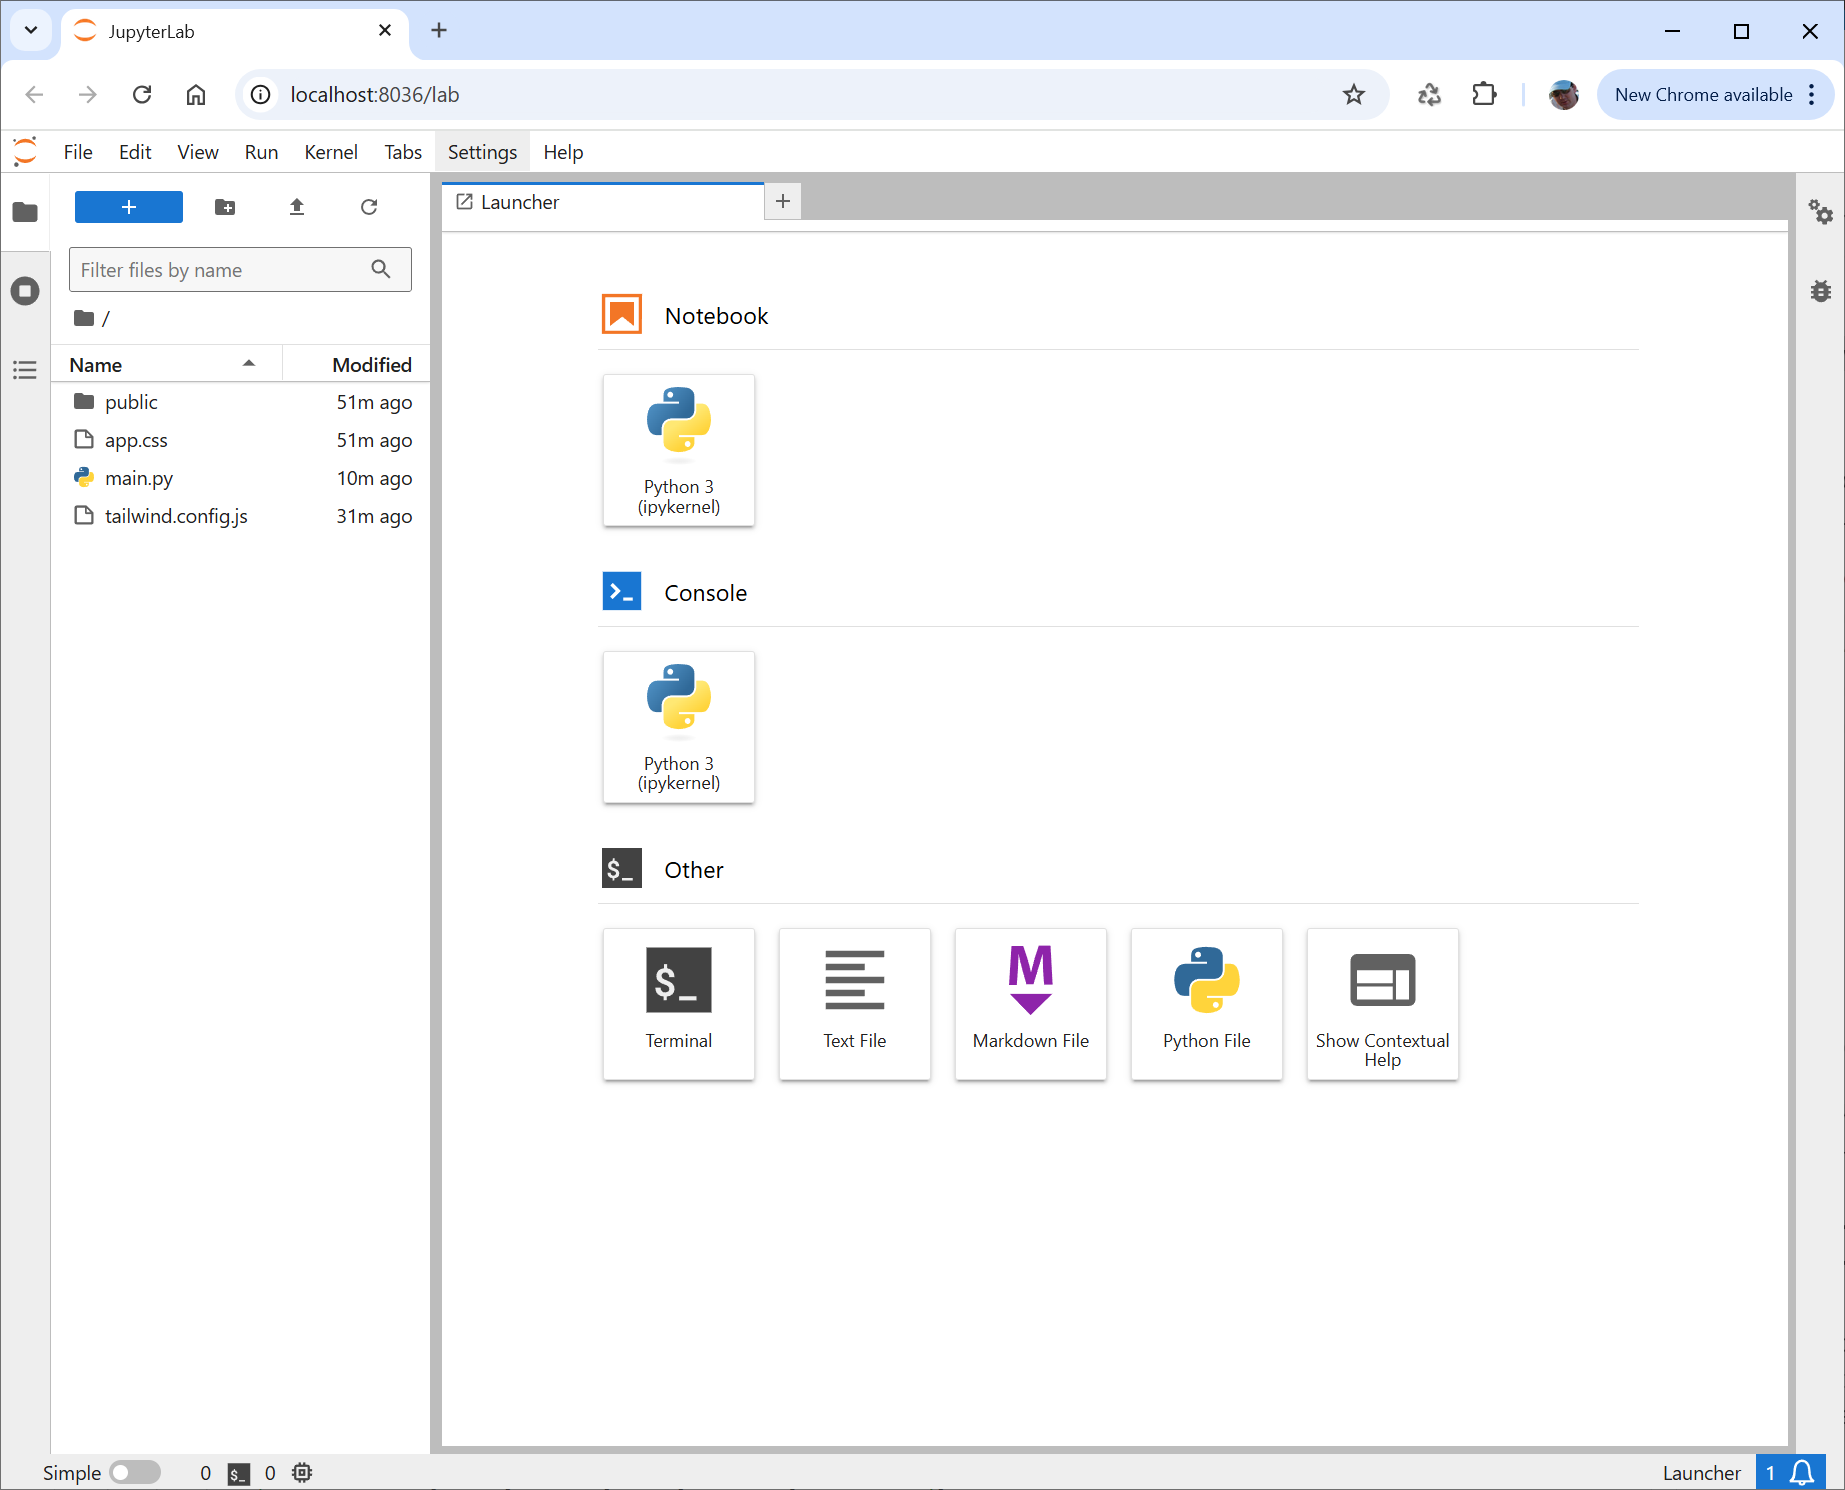
2. Jupyter Notebook Server
It is often really useful to add one or more notebooks to your FastHTML to enable quick exploration or research when developing you app. Use it to test things out or as a scratch pad to try out ideas. You can then transfer any code you want to incorporate into the FastHTML app.
The serve_dev() function makes this super-easy. Simply set the
jupyter argument to True:
serve_dev(jupyter=True)
When you start a FastHTML app with the jupyter parameter enabled
you’ll see an additional link to open Jupyter Lab. By default port 8036
will be used for the Jupyter lab server but this can be changed via the
jupyter_port parameter.
$ python main.py
Jupyter Lab link: http://localhost:8036/lab
Link: http://localhost:5001
INFO:     Will watch for changes in these directories: ['/home/david/fh-dev-utils-test']
INFO:     Uvicorn running on http://0.0.0.0:5001 (Press CTRL+C to quit)
INFO:     Started reloader process [1951725] using WatchFiles
INFO:     Started server process [1951759]
INFO:     Waiting for application startup.
INFO:     Application startup complete.
This will give you access to a full Jupyter Lab server that runs along side your FastHTML app.
A particularly useful way to use a notebook to complement your FastHTML app is to view the schema for an SQLite database (only relevant if your app includes a database).
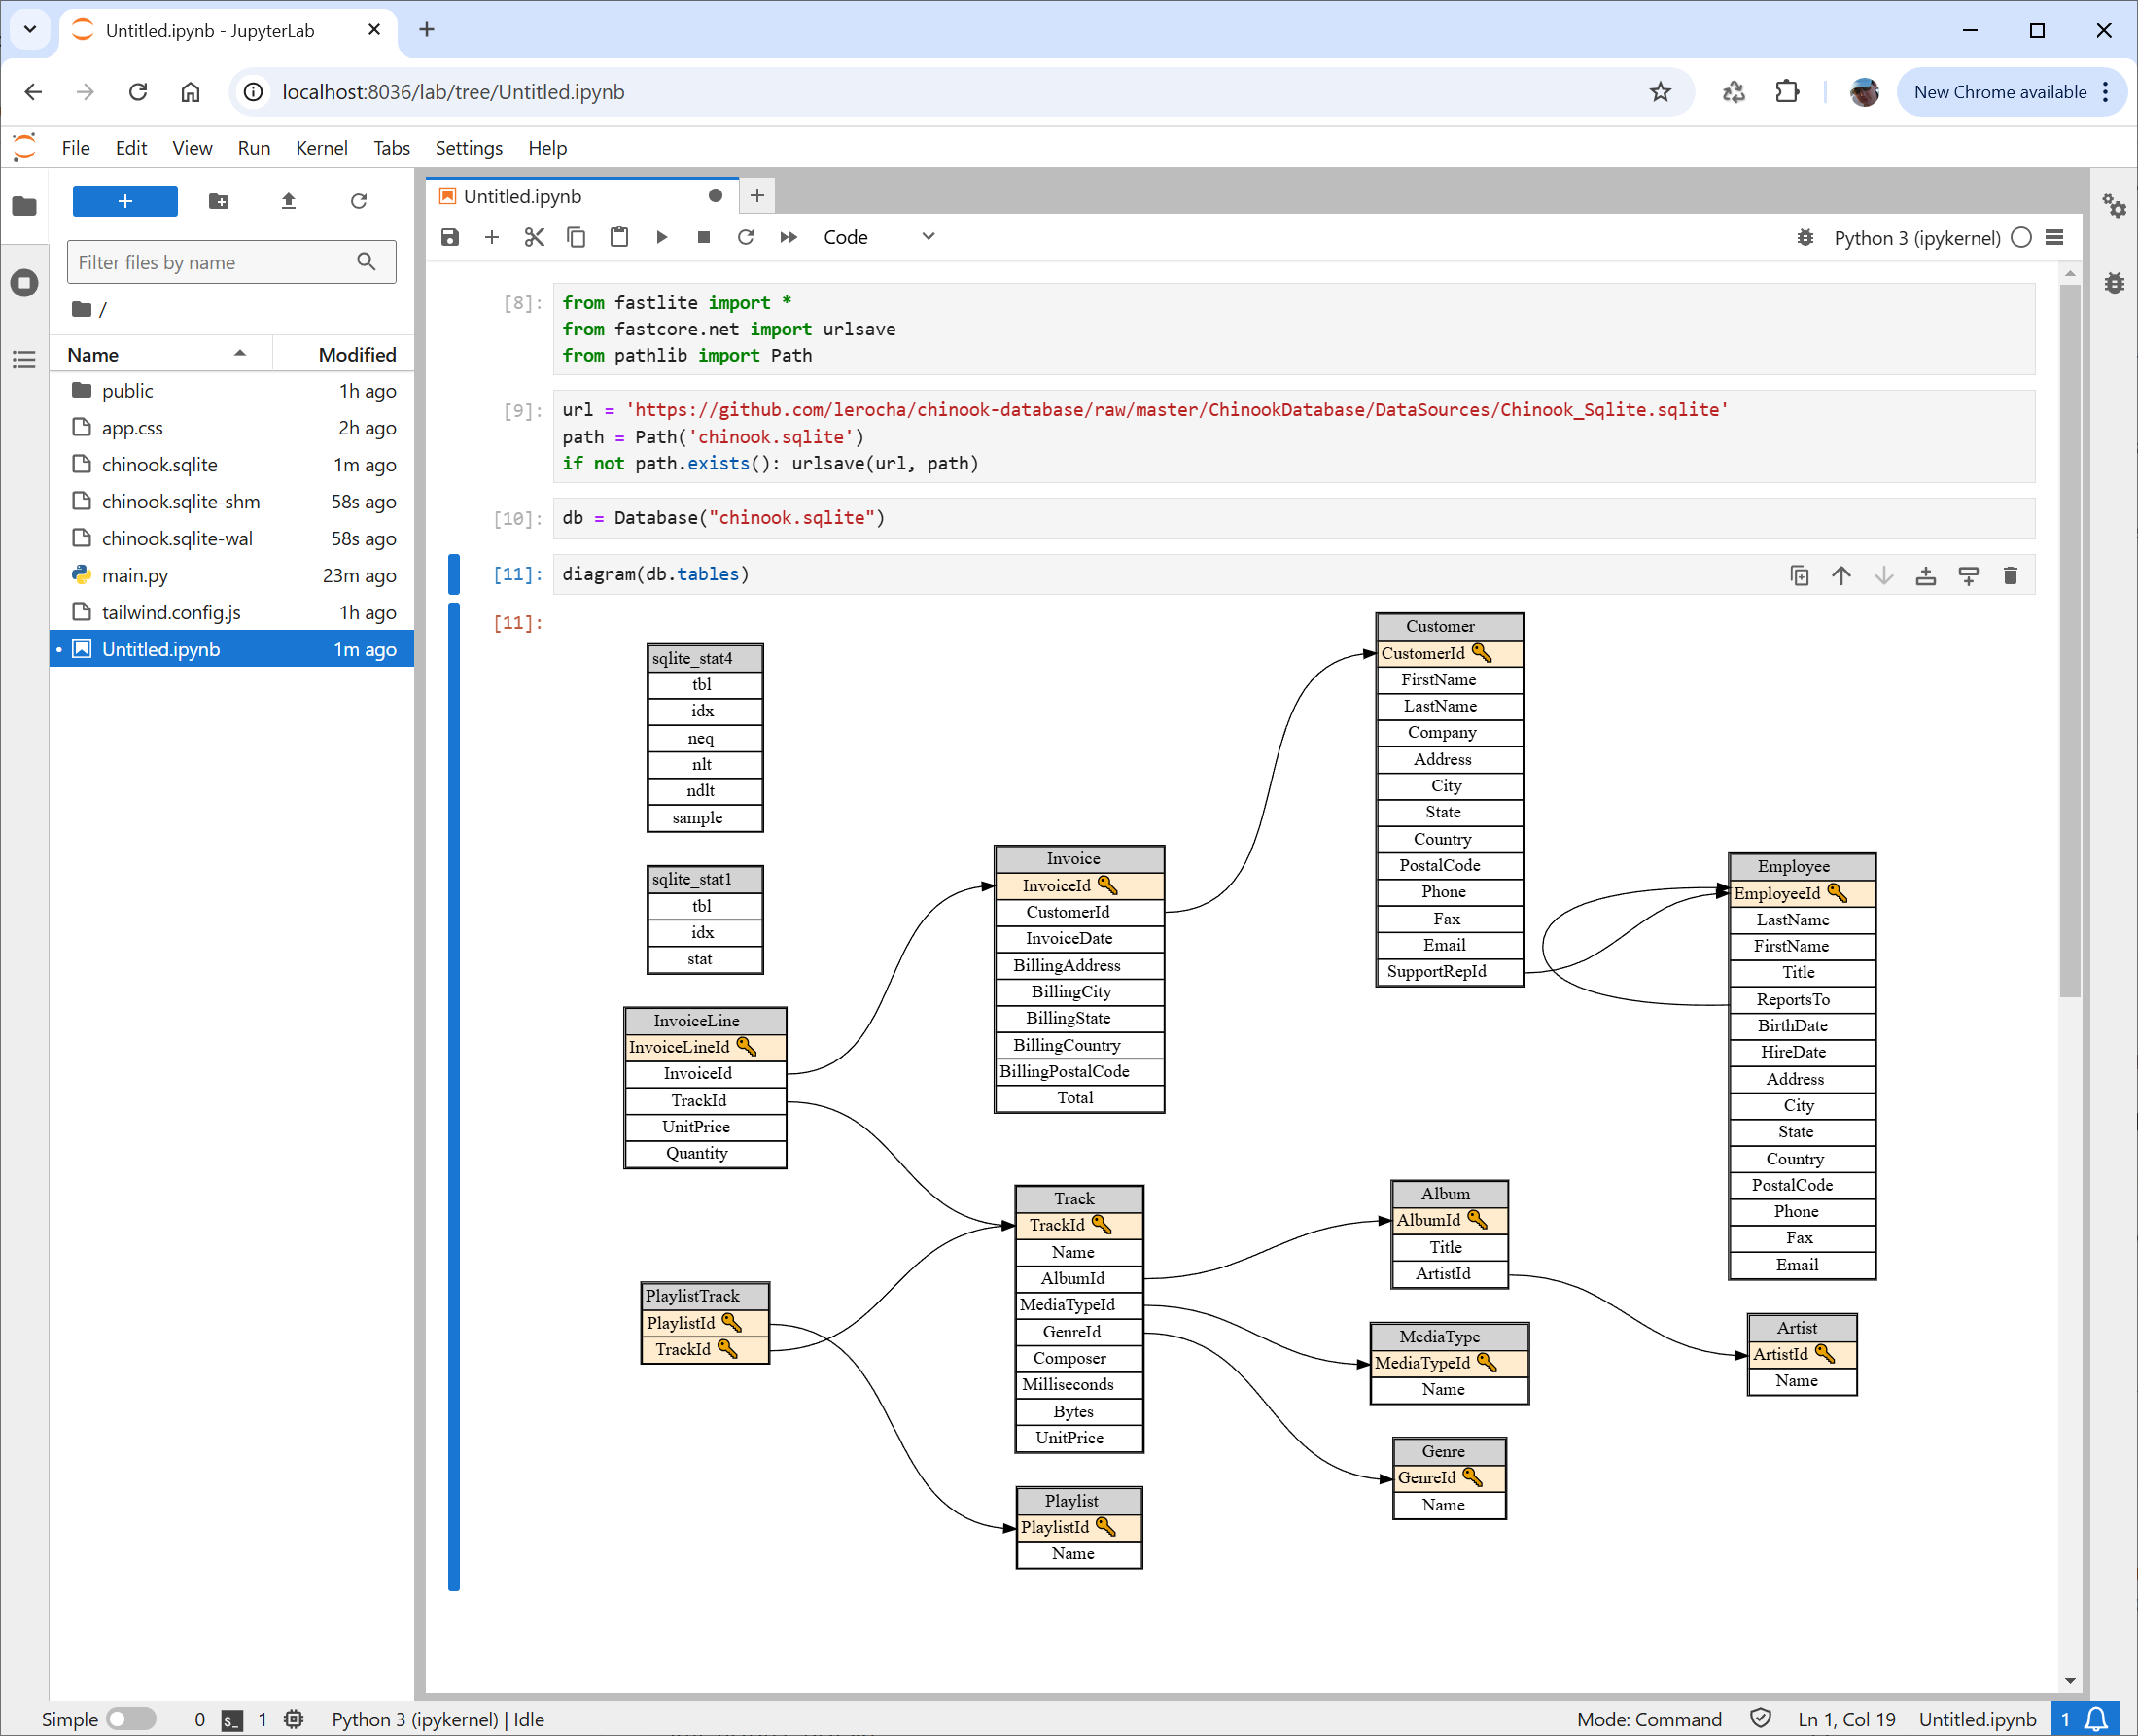
Note: The fastlite diagram() function requires
graphviz to be installed.
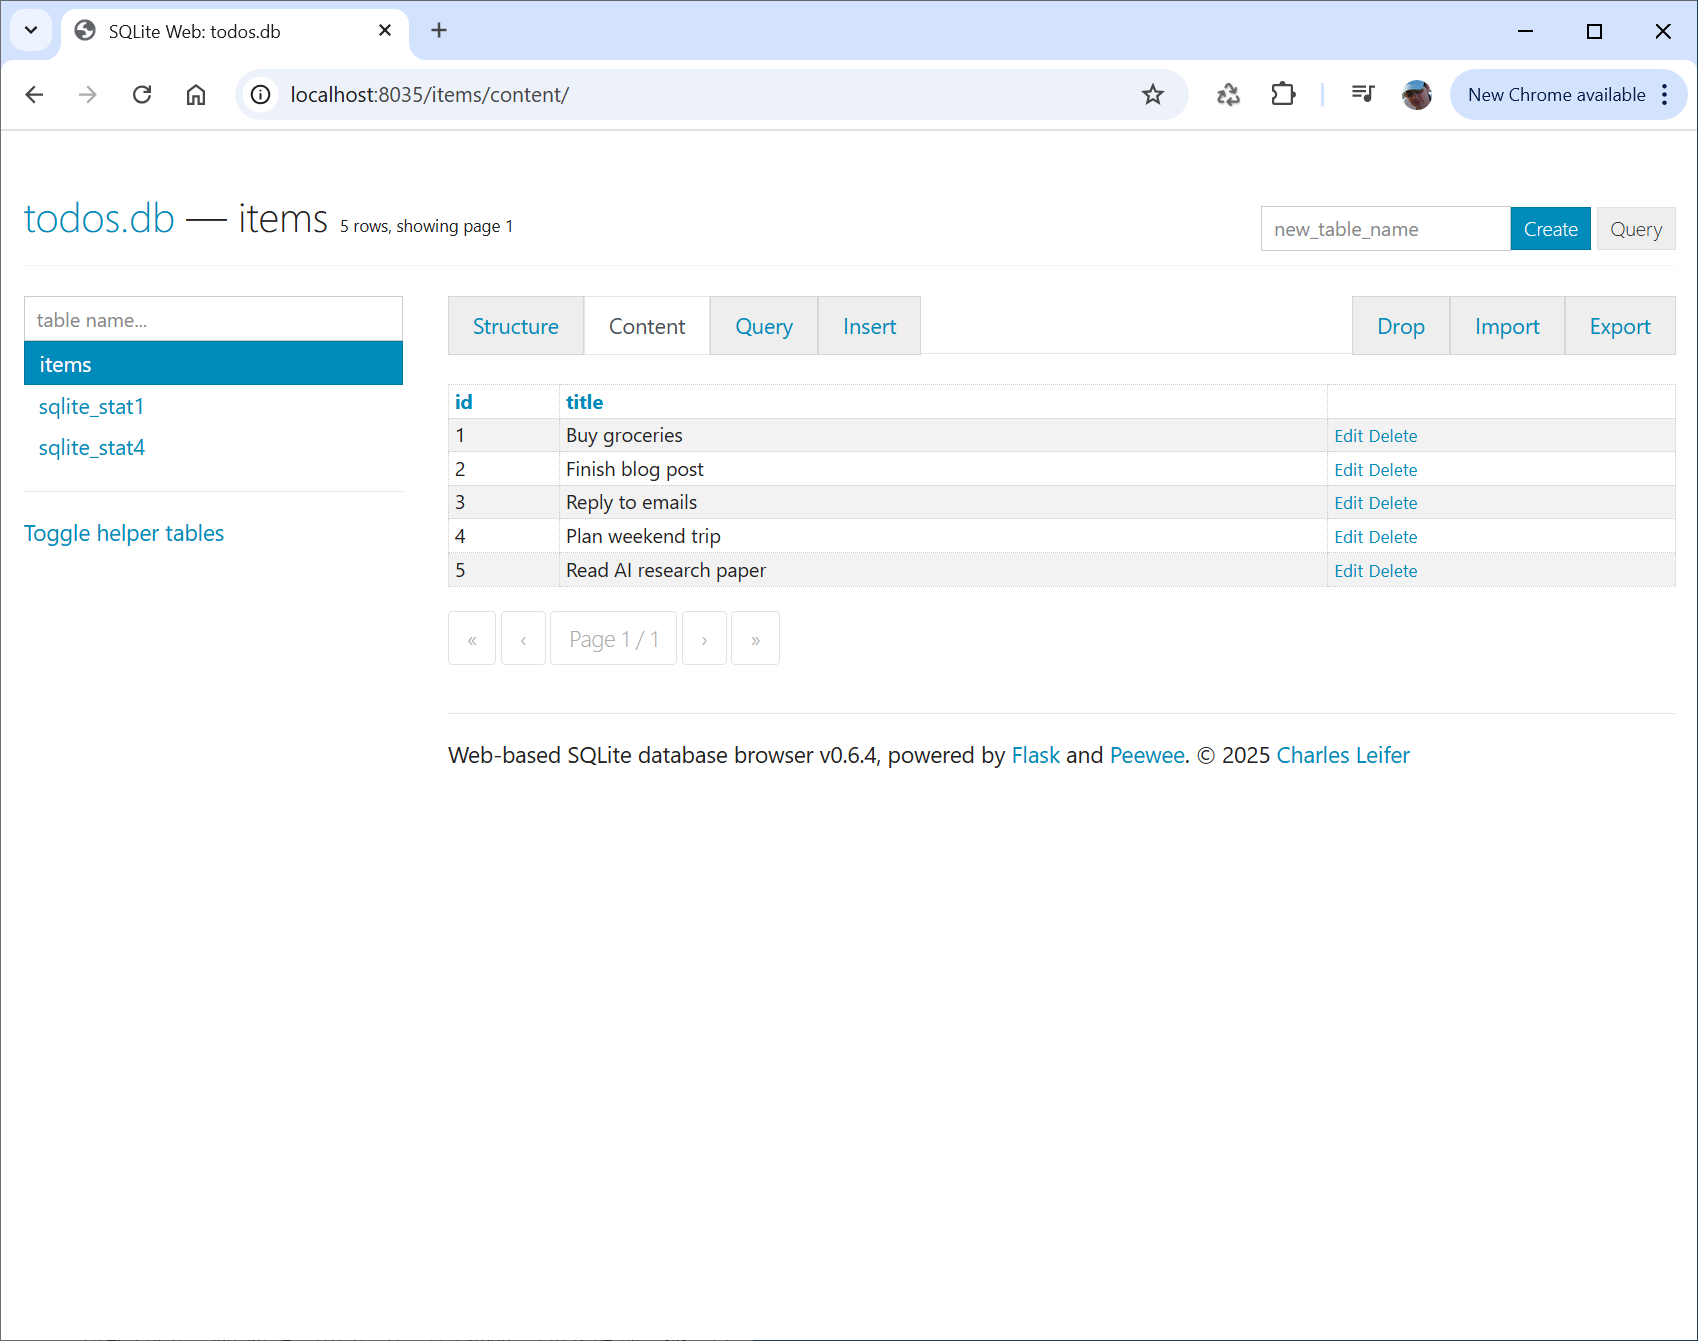
3. SQLite Database Browser
When working with an SQLite database in your FastHTML app it is often useful to be able to easily view/edit database data. You can also do this manually via a Jupyter Lab notebook too but it is very convenient to have a dedicated app to be able to interect with your database.
We have included support for the
sqlite-web browser which is
written in Python.
serve_dev(db=True)
When you start a FastHTML app with the db parameter enabled you’ll see
an additional link to open sqlite-web database browser. By default port
8035 will be used for the SQLite browser but this can be changed via the
sqlite_port parameter. The database file can be configured via
db_path. By default it is set to ./data/app.db.
$ python main.py
SQLite link: http://localhost:8035
Link: http://localhost:5001
INFO:     Will watch for changes in these directories: ['/home/david/fh-dev-utils-test']
INFO:     Uvicorn running on http://0.0.0.0:5001 (Press CTRL+C to quit)
INFO:     Started reloader process [1988346] using WatchFiles
INFO:     Started server process [1988418]
INFO:     Waiting for application startup.
INFO:     Application startup complete.
This will give you access to a full sqlite-web database server that runs along side your FastHTML app.
Enabling All Options
If you enable TailwindCSS file watching, Jupyter Lab server, and sqlite-web database browser altogether then the console output will look like this when you first start a FastHTML app.
$ python main.py
Watching for Tailwind class changes...
SQLite link: http://localhost:8035
Jupyter Lab link: http://localhost:8036/lab
Link: http://localhost:5001
INFO:     Will watch for changes in these directories: ['/home/david/fh-dev-utils-test']
INFO:     Uvicorn running on http://0.0.0.0:5001 (Press CTRL+C to quit)
INFO:     Started reloader process [1988346] using WatchFiles
INFO:     Started server process [1988418]
INFO:     Waiting for application startup.
INFO:     Application startup complete.
All links are placed next to each other for convenience making it easy to select which server (FastHTML, Jupyter, or sqlite-web) you want to open in the browser.
Example FastHTML Apps
Here are a couple of examples of full minimal FastHTML apps that
implement the fh-dev-utils package to make development easier.
Remember to include a config file if using TailwindCSS so that live
reload and auto-intellisense works properly.
In both examples a DEV_MODE variable is used to easily switch between
development and production. When DEV_MODE is enabled it uses CSS
browser cache busting, and uses the serve_dev() function. Otherwise,
in production, the CSS is cached and the FastHTML serve() function is
used.
This first one is very simple and doesn’t include a database:
from fasthtml.common import *
from fh_dev_utils.serve import *

DEV_MODE=True

app,rt = fast_app(
    pico=False,
    live=True,
    hdrs=(
        Link(rel="stylesheet", href=f"/public/app.css{cache_buster() if DEV_MODE else ""}", type="text/css"),
    )
)

@rt('/')
def get():
    return Div(
        P('Hello World!', cls="text-[#bada55] bg-gradient-to-r from-blue-400 to-purple-600 p-4 rounded-lg shadow-lg"),
        P('Blue Background', cls="bg-blue-500 text-white p-2 round"),
        P('Gradient Text', cls="bg-gradient-to-r from-pink-500 to-yellow-500 text-transparent bg-clip-text p-6"),
        cls="m-[41px] space-y-4"
    )

if DEV_MODE: serve_dev(tw=True, jupyter=True)
else: serve()
And here’s one that includes an SQLite database.
from fasthtml.common import *
from fh_dev_utils.serve import *

DEV_MODE=True

app,rt,todos,ToDo = fast_app('data/todos.db', id=int, title=str, pk='id', pico=True, live=True)

if not todos(): # Seed database if empty
    todos.insert_all([
        {"title": "Buy groceries"},
        {"title": "Finish blog post"},
        {"title": "Reply to emails"},
        {"title": "Plan weekend trip"},
        {"title": "Read AI research paper"}
    ]
)

def TodoRow(todo): return Li(todo.title, href=f'/todos/{todo.id}', id=f'todo-{todo.id}')

def home():
    add = Form(
            Group(
                Input(name="title", placeholder="New Todo"),
                Button("Add")
            ), action="/", method='post'
        )
    card = Card(
                Ul(*map(TodoRow, todos()), id='todo-list', style="padding:20px;"),
                header=add,
                footer=Div(id='current-todo')
            )
    return Titled('Todo list', card)

@rt("/")
def get(): return home()

@rt("/")
def post(todo:ToDo):
    todos.insert(todo)
    return home()

if DEV_MODE: serve_dev(db=True, db_path='data/todos.db')
else: serve()
This is a very minimal database app just as an illustrative example of
using serve_dev() to spin up a database browser. You can only add and
view todo items. However, using sqlite-web you can browse the database
and add/edit/remove items very easily!


Download files
Download the file for your platform. If you're not sure which to choose, learn more about installing packages.
Source Distribution
Built Distribution
Filter files by name, interpreter, ABI, and platform.
If you're not sure about the file name format, learn more about wheel file names.
Copy a direct link to the current filters
File details
Details for the file fh_dev_utils-0.0.1.tar.gz.
File metadata
- Download URL: fh_dev_utils-0.0.1.tar.gz
- Upload date:
- Size: 13.6 kB
- Tags: Source
- Uploaded using Trusted Publishing? No
- Uploaded via: twine/6.1.0 CPython/3.12.5
File hashes
| Algorithm | Hash digest | |
|---|---|---|
| SHA256 |
746a0c4c4635ad4d58987c5166a4f6d8721a459948ca3ff75ec4cdd2e3da164b
|
|
| MD5 |
5dc22703d46bc98d98820b9dfc398d90
|
|
| BLAKE2b-256 |
3e43779b1e9c6067ee6e4efcaa39d0637fe722e460e377608792bf1b79687055
|
File details
Details for the file fh_dev_utils-0.0.1-py3-none-any.whl.
File metadata
- Download URL: fh_dev_utils-0.0.1-py3-none-any.whl
- Upload date:
- Size: 12.4 kB
- Tags: Python 3
- Uploaded using Trusted Publishing? No
- Uploaded via: twine/6.1.0 CPython/3.12.5
File hashes
| Algorithm | Hash digest | |
|---|---|---|
| SHA256 |
4ad874c53c6682cc934537463c37a2ac0fde7115d45ab0b4fc93066c0a4c3013
|
|
| MD5 |
ec9239cef3689b5cde04f1a52585082b
|
|
| BLAKE2b-256 |
5b113fe48670f7f9268f68803e13eebfde619ff68c79f646104f898688f00330
|


