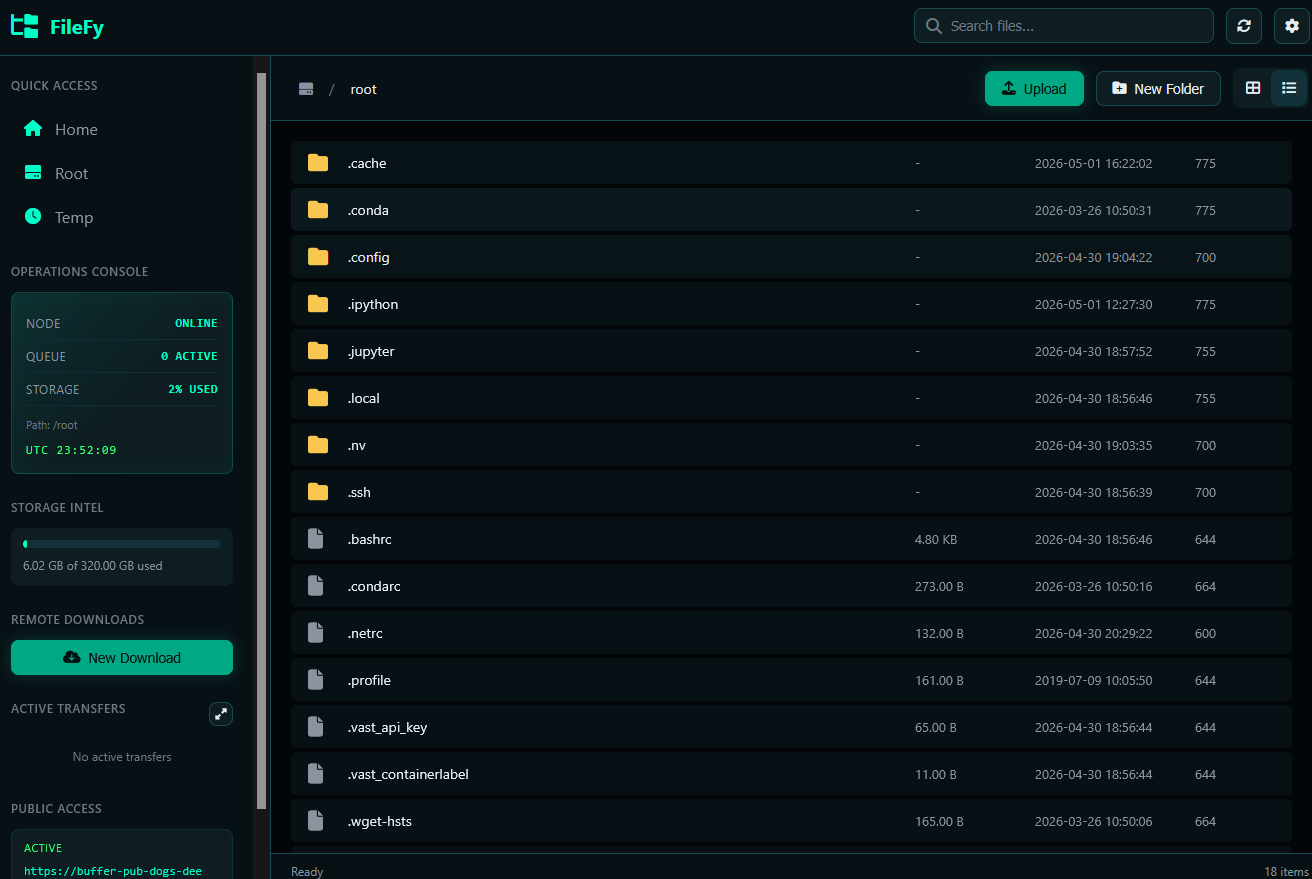
A professional web-based file manager with dark theme UI

Project description
FileFy


A professional web-based File Manager Written in Python. Features a Beautiful Dark Theme UI, File Upload/Download, Remote URL Downloads With Progress Tracking, and Comprehensive File Operations.

Features
- Professional Dark Theme UI - Modern, responsive design
- File Upload - Drag & drop or click to upload files. Uploads are chunked, with per-file progress, pause / resume / cancel controls, and they survive transient connection drops.
- File Download - Download files directly from the browser, with HTTP Range support so the in-browser transfer manager can pause and resume large local downloads.
- Remote Download - Download files from URLs with progress tracking and pause / resume / cancel support. Screenshot
- Compress - Right-click any file or folder and create an archive
(
.zip,.tar,.tar.gz) directly on the server. - Transfer Center - Centered, project-themed panel that shows every in-flight transfer (upload, download, remote download). It can be minimised to the sidebar and never gets stuck on a Cancelled / Error state — every row has Pause, Resume, Cancel and Dismiss controls.
- Cloudflare Tunnel - Optional
--tunnelflag that publishes the server through a free*.trycloudflare.comURL alongside the local one. Requires thecloudflaredbinary to be installed on PATH. - File Operations - Copy, move, rename, delete files and folders
- Search - Quick file search functionality
- Context Menu - Right-click menu with common actions
- Keyboard Shortcuts - Ctrl+C, Ctrl+V, F2, Del, F5
- File Preview - Preview text files and images
- Disk Usage - View disk space information
Quick Start
Install from PyPI (One Command!)
pip install filefy
Run the File Manager
# Start with default settings (port 5000, home directory)
filefy

# Custom port
filefy --port 8080

# Custom directory
filefy --dir /path/to/directory

# Bind to specific host
filefy --host 127.0.0.1 --port 3000

# Enable debug mode
filefy --debug

# Also expose the server on a public Cloudflare tunnel
# (install cloudflared first: https://github.com/cloudflare/cloudflared)
filefy --tunnel
Then open your browser and go to: http://localhost:5000
Installation Methods
Method 1: pip (Recommended)
pip install filefy
Method 2: From Source
git clone https://github.com/Pymmdrza/filefy.git
cd filefy
pip install -e .
Method 3: Using pipx (Isolated Environment)
pipx install filefy
Method 4: Docker (GitHub Container Registry)
Pre-built multi-arch (linux/amd64, linux/arm64) images are published on every
push to the default branch and on every v* tag at
ghcr.io/pymmdrza/filefy.
# Pull and run the latest image, mounting the host directory you want to manage
docker run -d \
  --name filefy \
  -p 5000:5000 \
  -v "$PWD/data:/data" \
  ghcr.io/pymmdrza/filefy:latest
Open http://localhost:5000 to use the file manager. The container exposes the following environment variables (all optional):
| Variable | Default | Description |
|---|---|---|
FILEFY_HOST |
0.0.0.0 |
Interface to bind the server to |
FILEFY_PORT |
5000 |
Port to listen on (inside the container) |
FILEFY_DIR |
/data |
Base directory exposed by the manager |
Pin a specific version by tag, e.g. ghcr.io/pymmdrza/filefy:v1.0.0.
Docker Compose
A ready-to-use docker-compose.yml is included:
docker compose up -d
This will mount ./data into the container and expose the UI on
http://localhost:5000. Replace the image: line with build: . to build the
image locally from the source tree instead of pulling from GHCR.
Build the image yourself
git clone https://github.com/Pymmdrza/filefy.git
cd filefy
docker build -t filefy:local .
docker run --rm -p 5000:5000 -v "$PWD/data:/data" filefy:local
CLI Usage
usage: filefy [-h] [-H HOST] [-p PORT] [-d DIR] [--debug] [--tunnel] [-v]

filefy - Professional Web-Based File Manager

options:
  -h, --help            show this help message and exit
  -H, --host HOST       Host to bind the server to (default: 0.0.0.0)
  -p, --port PORT       Port to run the server on (default: 5000)
  -d, --dir DIR         Base directory for file management (default: home)
  --debug               Enable Flask debug mode
  --tunnel              Also publish the server through a Cloudflare quick
                        tunnel and print the public URL alongside the local
                        URL. Requires the 'cloudflared' binary on PATH.
  -v, --version         show program's version number and exit

Examples:
  filefy                         Start with default settings
  filefy -p 8080                 Use port 8080
  filefy --host 127.0.0.1        Only allow local connections
  filefy -d /home/user/files     Set base directory
  filefy --debug                 Enable Flask debug mode
  filefy --tunnel                Also expose a public Cloudflare URL
Python API
You can also use filefy programmatically:
from filefy import app, create_app
from filefy.server import run

# Option 1: Run with default settings
run()

# Option 2: Run with custom settings
run(host='127.0.0.1', port=8080, base_dir='/home/user/files')

# Option 3: Get Flask app for custom deployment
app = create_app(base_dir='/var/www/files')
# Use with gunicorn, waitress, etc.
Using with Gunicorn
pip install gunicorn
gunicorn "filefy:create_app()" -b 0.0.0.0:8000 -w 4
Using with Waitress (Windows)
pip install waitress
waitress-serve --listen=0.0.0.0:8000 filefy:app
Development
Setup Development Environment
git clone https://github.com/Pymmdrza/filefy.git
cd filefy
python -m venv .venv
source .venv/bin/activate  # On Windows: .venv\Scripts\activate
pip install -e ".[dev]"
[!NOTE] More details about API
License
This project is licensed under the MIT License - see the LICENSE file for details.
Contributing
Contributions are welcome! Please feel free to submit a Pull Request.
- Fork the repository
- Create your feature branch (
git checkout -b feature/AmazingFeature) - Commit your changes (
git commit -m 'Add some AmazingFeature') - Push to the branch (
git push origin feature/AmazingFeature) - Open a Pull Request
Made by MMdrza
Release history Release notifications | RSS feed


Download files
Download the file for your platform. If you're not sure which to choose, learn more about installing packages.
Source Distribution
Built Distribution
Filter files by name, interpreter, ABI, and platform.
If you're not sure about the file name format, learn more about wheel file names.
Copy a direct link to the current filters
File details
Details for the file filefy-2.0.8.tar.gz.
File metadata
- Download URL: filefy-2.0.8.tar.gz
- Upload date:
- Size: 94.2 kB
- Tags: Source
- Uploaded using Trusted Publishing? No
- Uploaded via: twine/6.2.0 CPython/3.11.15
File hashes
| Algorithm | Hash digest | |
|---|---|---|
| SHA256 |
71460d6a0dd86101fdcc6a5d7e4b931c4c70ecee50ad8cfbc1745e18b1fe05f7
|
|
| MD5 |
202c2e801dfa49aad42f8d0a10b7f342
|
|
| BLAKE2b-256 |
c21e689a1305f02718748c4e75a755341cae13fbf2617c2151b06a2207f2711a
|
File details
Details for the file filefy-2.0.8-py3-none-any.whl.
File metadata
- Download URL: filefy-2.0.8-py3-none-any.whl
- Upload date:
- Size: 90.0 kB
- Tags: Python 3
- Uploaded using Trusted Publishing? No
- Uploaded via: twine/6.2.0 CPython/3.11.15
File hashes
| Algorithm | Hash digest | |
|---|---|---|
| SHA256 |
7b3395774612e7d9400c974c03e9bf473c90932014d43e5e600c716c8caa49b3
|
|
| MD5 |
16ad46ef153aa7ce25eb0af7e06433d0
|
|
| BLAKE2b-256 |
b82e7abea659dff8b6d08d26ad3babc4f738b7ec82dce11b8488a69cfa76c00a
|


