Fiber photometry analysis tools used by Fipster.

Project description
Fipster Python
Fipster Python is actively maintained and updated. There is no GUI, but you can use matplotlib controls (both task bar as well as code) to control figure behavior. Fipster_python is completely Matplotlib and Pandas based and can be conveniently incorporated into an analysis pipeline, for instance into a Jupyter Notebook.
Installation
Install Fipster into the Python environment you want to use:
python -m pip install -e /path/to/Fipster/Fipster_python
If you are already in the Fipster_python directory, you can instead run:
python -m pip install -e .
The -e flag performs an editable install, which is convenient during development because changes to the package are picked up without reinstalling it.
After installation:
- Import the package anywhere with
import fipster - Legacy code can still use
import Fipster as fip - Launch the command-line viewer with
fipster path/to/recording.mat
The basic structure of the code is as follows. There are two main classes, FIP_signal and Sweepset.
FIP_signal
Contains the main dataset. From a Python script or Jupyter Notebook, import the package and load a dataset like so:
import fipster

# To load the data
signal = fipster.FIP_signal(filename="your/filename/here.mat")
For backwards compatibility, the legacy import continues to work:
import Fipster as fip

# To load the data
signal = fip.FIP_signal(filename='your/filename/here.mat')
You can also run Fipster Python directly from the command line. This will present the complete dataset in a figure and make the dataset available in your workspace as an object named signal.
fipster ../raw_data/example_1.mat
(This will load the example data, change this to load you own data)
If you run Fipster from the command line, have a look at the end of the code under __name__ == '__main__' and include your own main function with formatting and/or normalization rules.
Development
The package now uses a standard src/ layout:
Fipster_python/
  pyproject.toml
  Fipster.py
  src/fipster/
  tests/
src/fipster/core.pycontains the main implementationsrc/fipster/cli.pycontains the console entry pointFipster.pyis a thin compatibility shim for older codebasestests/contains pytest-based regression tests
Overview of the available methods and important properties
Note: the examples below suppose you loaded your dataset in an object named "signal" as demonstrated above. To get a complete overview of all methods and their docstrings type "dir(signal)". To read the docstring of a particular method use the 'help' function like so:
dir(signal) # Will print a list of properties and methods
help(signal) # Will print available docstrings of methods
help(signal.plot) # Will print docstring of the 'plot' method
help(signal.derive_timestamps) # Will print docstring of the "derive_timestamps" method
# etc..
Properties:
- signal.settings: a dict with the settings the most important one of which is called "fit ref" which can be set to
- "polyfit": (DEFAULT) will fit the 405nm and 470nm trace using a polynomal fit
- "means": will fit the signal means
- "rolling polyfit": will fit using a polynomal fit executed on a rolling window
- "no fit": will not fit the 405nm and 470nm traces
- signal.timestamps: a dict where derived or imported timestamps are stored
- Include new stamps simply so: signal.timestamps['my_new_stamps'] = np.array([list of times in 's'])
- signal.facecolor, .axcolor & .colormap
- formatting options for your plots. Will include more in the future.
Methods:
- signal.plot: will plot the signal
- Use the "raw_data" and "timestamps" parameters to indicate what data you want to see plotted
- signal.derive_timestamps: derive timestamps from all or one particular analog input channel
- signal.peri_event: will output a peri-event (sweepset) object, see below.
- signal.sync_time: used to align the timeline of the 'signal' object with some external dataset.
- signal.quick_peri: essentially a wrapper for "derive_timestamps" and "peri_event" to quickly make a PEH of your FIP data
- signal.import_signal: to include an additional signal in the object
- For instance: I've used this to include the temporal derivative of a FIP signal into the dataset.
- Active development: not very robust.
- signal.get_data: get your fitted and/or normalized data for use in the rest of your code.
- signal.get_ref: get your fitted reference trace.
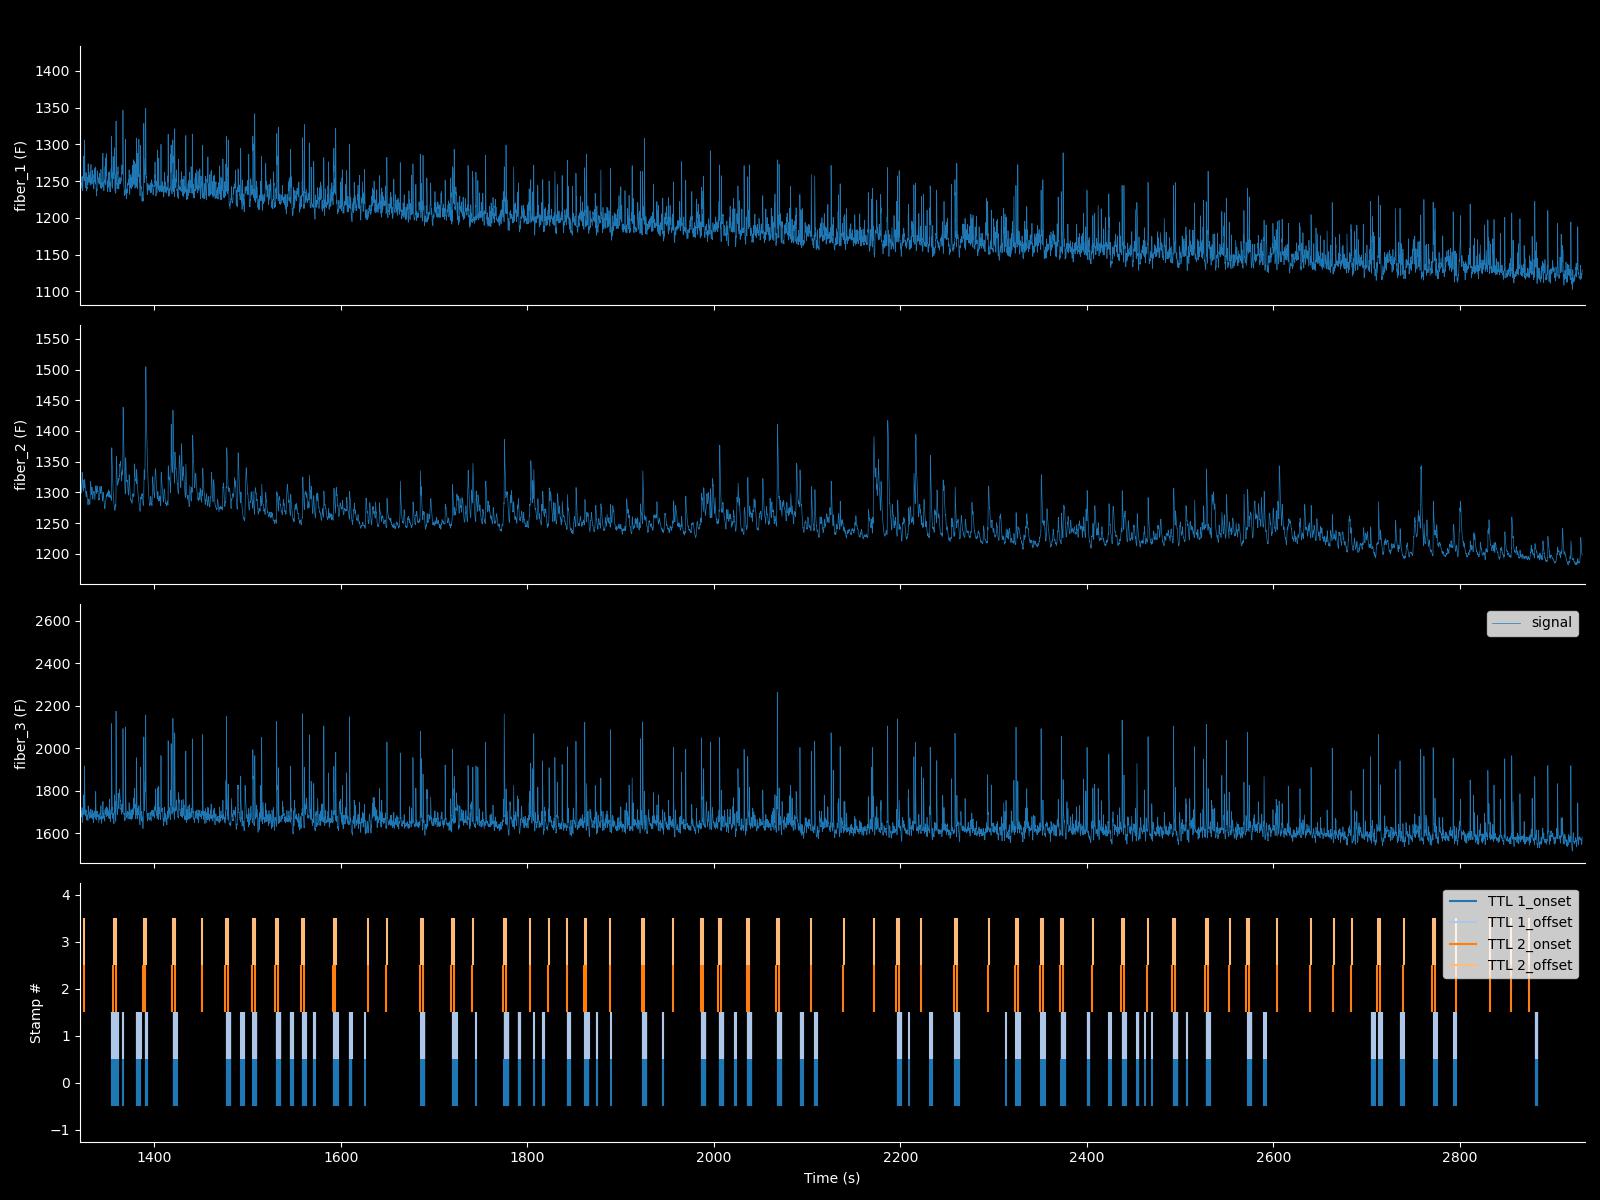
What FIP_signal.plot() looks like:
This is with facecolor = 'k' and axcolor='w'
Sweepset
This is the standard peri-event dataset class. It is usually created by using the 'peri_event' or 'quick_peri' methods of the FIP_signal class. Again: use 'dir' and 'help' to read docstrings of the included methods.
These examples suppose you named our sweepset object PE:
Properties:
- PE.settings: dict with baseline and normalization settings
- PE.selector: list of bools about which trials (sweeps) to include in your analysis (used to exclude individual trials)
- PE.facecolor & .axcolor: formatting rules
Methods
- PE.get_data: get normalized peri-event data:
- Note: this uses PE.settings to normalize based on a baseline window.
- PE.make_Figure: Plot all channels
- PE.get_average: to get the response averaged over the trials.
- Note that if you have enough trials, it is almost always better to use auROC instead of the average (Z-score or dF) response to combine/compare multiple animals/recordings.
- PE.auroc: To get the auROC-normalized response:
- For trial-based assays, this has many advantaged over Z-score normalization (if you have enough trials!): The idea is from Cohen et al. Nature 2012. Specifically, it is in figure S1 of that paper.
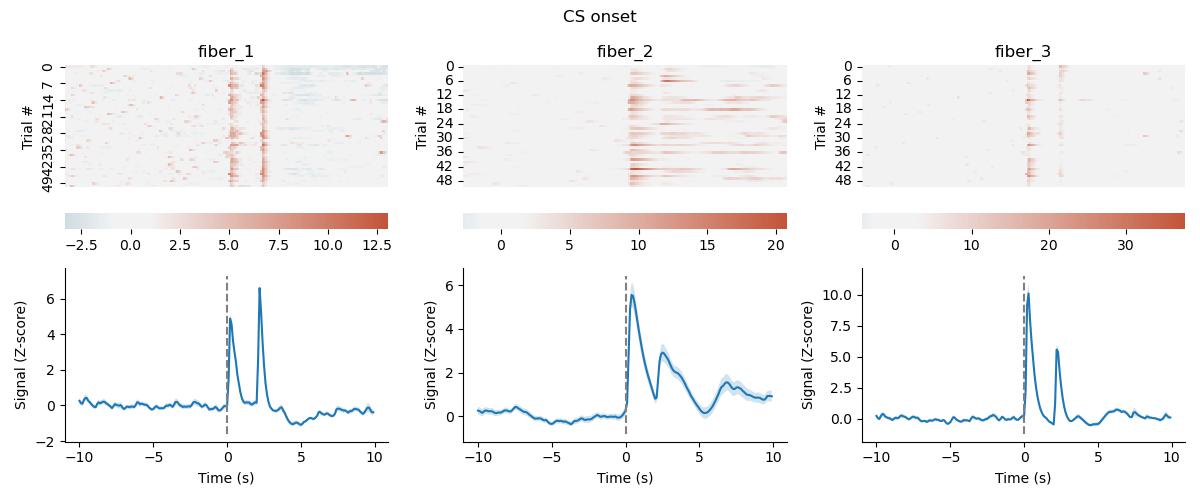
What sweepset.make_figure() looks like:
Example code
Have a look at FIP_example.py for an overview of what an analysis could look like.
Release history Release notifications | RSS feed

Download files
Download the file for your platform. If you're not sure which to choose, learn more about installing packages.
Source Distribution
Built Distribution
Filter files by name, interpreter, ABI, and platform.
If you're not sure about the file name format, learn more about wheel file names.
Copy a direct link to the current filters
File details
Details for the file fipster-0.1.0.tar.gz.
File metadata
- Download URL: fipster-0.1.0.tar.gz
- Upload date:
- Size: 21.9 kB
- Tags: Source
- Uploaded using Trusted Publishing? No
- Uploaded via: twine/6.2.0 CPython/3.11.7
File hashes
| Algorithm | Hash digest | |
|---|---|---|
| SHA256 |
3225e6bcc2785dd126d13e1ed5f1e9d40d5105ee83dc1b3d85ed7ddeb5d05a61
|
|
| MD5 |
6d178e275062c78f56c20feb4c90057e
|
|
| BLAKE2b-256 |
dde69efc465d24f3ef94d43c6ef3549e641d1d4d338dec98120b142d850f84e3
|
File details
Details for the file fipster-0.1.0-py3-none-any.whl.
File metadata
- Download URL: fipster-0.1.0-py3-none-any.whl
- Upload date:
- Size: 18.9 kB
- Tags: Python 3
- Uploaded using Trusted Publishing? No
- Uploaded via: twine/6.2.0 CPython/3.11.7
File hashes
| Algorithm | Hash digest | |
|---|---|---|
| SHA256 |
479e1d725178448432fa25ddcfc53885e5e2ded7566338a292fb18ee9cdde349
|
|
| MD5 |
656dc5b4cddac5fa628805541ed8c62f
|
|
| BLAKE2b-256 |
cd07e743cda8e69326b07585110e7c20a8ef83aaa187307f33c7bf16651a1679
|


