An easy to use UI Framework on top of Qt.

Project description
An easy-to-use Python UI Framework on top of Qt (PySide6). Simple things are simple, hard things are not any harder than they are in Qt.
Features
- Cross Platform: Tested on Windows and macOS
- Low Boilerplate: Save, load and autosave functionality out of the box
- A unified API to set and retrieve data in UI elements
- Layout using tabs, segments, a sidebar and a grid system
Row,Col - Singe instance enforcement
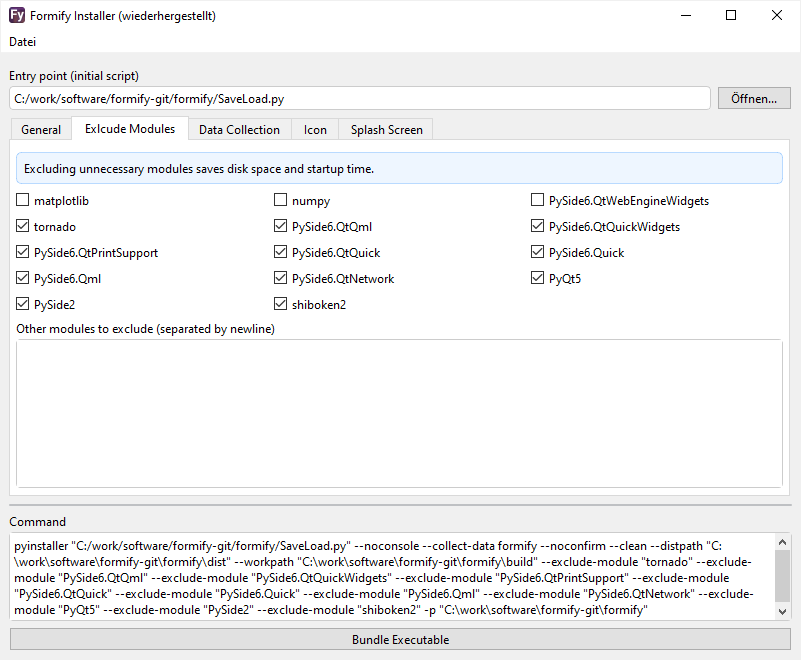
- Installation UI based on PyInstaller (Windows only)
Getting Started
Install formify using PyPi:
pip install formify
Write your first App featuring a text area with save, load, and autosave functionality.
from formify import *

ui = ControlTextarea("Write Here", variable_name="text")

MainWindow(ui, title="First App", margin=8)

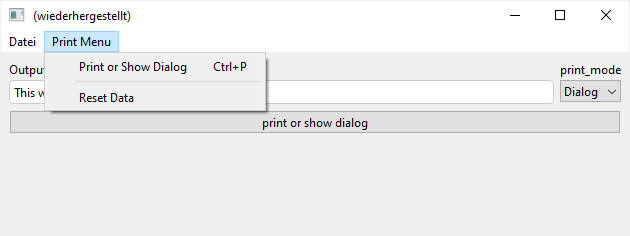
A more complex Example
...including a menu and basic grid layout:
from formify import *


def reset_value():
    # set the values of our UI elements with variable names.
    # This works because we wrapped out UI in a "Form"
    ui.value = {'text': 'This will be printed!', 'print_mode': 'Dialog'}


def print_text():
    _text = ui.value["text"]
    if ui.value["print_mode"] == "Dialog":
        tools.ok_dialog("Title", _text)
    else:
        print(_text)


# Create a grid layout by nesting "Row" and "Col" as needed
# Wrap the layout in "Form" to enable querying: ui.value["text"]
ui = Form(Col(
    Row(
        # provide variable names to enable save, load and autosave functionality as a JSON file
        ControlText(label="Output Text", variable_name="text", value="This will be printed!"),
        # if no label is provided, the variable name is treated as the name
        ControlSelect(items=["Dialog", "Print"], variable_name="print_mode"),
    ),
    ControlButton("print or show dialog", on_click=print_text),
))

# create the main menu as a dict
menu = {
    "Print Menu": {
        # The value can either be a tuple (callable, shortcut)
        # or just a callable
        "Print or Show Dialog": (print_text, "ctrl+p"),
        # If the key starts with "-" its treated as a separator.
        # The number of dashes does not matter.
        "-": None,
        "Reset Data": reset_value
    }
}

# create the main window. If you do not pass auto_run=False, the app launches.
MainWindow(ui, menu=menu, margin=8)
Bundle Your App
Your app can be bundled into an executable using PyInstaller. Make sure to pyinstaller <your_app.py> --collect-data formify collect all data from the formify module. Otherwise, the css files won't make it resulting in an import error.
If you're running Windows, use formify-install:
Release history Release notifications | RSS feed


Download files
Download the file for your platform. If you're not sure which to choose, learn more about installing packages.
Source Distribution
Built Distribution
Filter files by name, interpreter, ABI, and platform.
If you're not sure about the file name format, learn more about wheel file names.
Copy a direct link to the current filters
File details
Details for the file formify-1.3.4.tar.gz.
File metadata
- Download URL: formify-1.3.4.tar.gz
- Upload date:
- Size: 150.8 kB
- Tags: Source
- Uploaded using Trusted Publishing? No
- Uploaded via: twine/4.0.1 CPython/3.9.13
File hashes
| Algorithm | Hash digest | |
|---|---|---|
| SHA256 |
3b363f9ad14085708ec8506676c23e6ffcbb9118b1eb3808e0ebcfe3d6905b5c
|
|
| MD5 |
8725ba81a87e447a36c4b99d056fb58c
|
|
| BLAKE2b-256 |
112c6df324eca4033dfc3bc5309a4d67a57adffacb732850886bc657659b5bc0
|
File details
Details for the file formify-1.3.4-py3-none-any.whl.
File metadata
- Download URL: formify-1.3.4-py3-none-any.whl
- Upload date:
- Size: 162.3 kB
- Tags: Python 3
- Uploaded using Trusted Publishing? No
- Uploaded via: twine/4.0.1 CPython/3.9.13
File hashes
| Algorithm | Hash digest | |
|---|---|---|
| SHA256 |
5ecfc2857540a8f542e94e9c9ac4381f323c1f5515d762e803d79bfd4dcc8ab2
|
|
| MD5 |
08f26b95e0f1857102651b7268c5f635
|
|
| BLAKE2b-256 |
cf1a87c9834e4b7082bb54053a18c03d16e18d76df0b59cdbca3c51e2549d626
|


