A modular CLI pattern engine

Project description
Pytterns
One stop library for all your Terminal Patterns
With pytterns, you can make your projects pop with patterns and shapes. With this, you can print any pattern, with high customization, in any senario in the terminal. You can even make your custom Patterns through .py based pattern template system. This project has solid security and large compatibility with terminal sizes, color rendering, and OS. If you are working on a terminal project, need a loading page or you need to print shapes in any case, No need to learn each and every pattern. Just use Pytterns!
How it works
Pytterns has default patterns which can be used to get basic shapes with quite a lot of customization directly printed in the console.
You may also make your own pattern theme by making your own .py templates. Once added to Pytterns, you can use it in your code RIGHT AWAY!
Installation
To get started, you can use 2 options.
- Download the files from git and integrate with your code.
OR
- Download the library through pip. → Download Through PIP
Get started with Default Pytterns
Each Pyttern Pattern file which is made by me is heavily documented, so if you open it in the /patterns folder, you can get a good understanding of the args and how its processed.
Once installed, just use this to start using Pytterns in your code
from pytterns import Pytterns
pt = Pytterns()
Basic Default Args for Patterns
To make any supported shape, we use the following method to print it in the terminal:
pt.<shape name>(<size>, char=<char>, center=<Bool>, color=<color> ...)
For a simple square of side length 10:
pt.square(10)
Output:
* * * * * * * * * *
* * * * * * * * * *
* * * * * * * * * *
* * * * * * * * * *
* * * * * * * * * *
* * * * * * * * * *
* * * * * * * * * *
* * * * * * * * * *
* * * * * * * * * *
* * * * * * * * * *
Char
To make this same square with different characters, we can use the char arg.
Char takes in a String Input.
For Example, to make the above square with "x":
pt.square(10,char="x")
You get a square made with x
Center
With the center arg, we can center most of the shapes perfectly in the terminal.
Center takes a boolean input, True/False
For Example, to center the above square, we use:
pt.square(10, char="x", center=True)
Color
With the color arg, you can color your shapes with the following colors:
- red
- green
- blue
- yellow
- magenta
- cyan
- white
- reset
For example, you can color the above square like:
pt.square(10, char="x", center=True,color="red")
Hollow
With the hollow arg, you can make shapes hollow, and just get its border.
The hollow arg takes in a Boolean, True/False.
For Example, you can make a Red Centered hollow square of radius 10, made with $ like:
pt.square(10, char="$",center=True,color="red",hollow=True)
Output:
-$ $ $ $ $ $ $ $ $ $
-$                 $
-$                 $
-$                 $
-$                 $
-$                 $
-$                 $
-$                 $
-$                 $
-$ $ $ $ $ $ $ $ $ $
Terminal render would be proper and centered.
Filler
As you may have noticed in above output examples, each shape has a space (filler) between the characters. This is a space by default, but we can customize this through the filler arg.
For Example, for the above hollow square filled with Spaces, we can make it fill with - through:
pt.square(10, char="$",center=True,color="red",hollow=True, filler="-")
Output:
- $-$-$-$-$-$-$-$-$-$
- $-----------------$
- $-----------------$
- $-----------------$
- $-----------------$
- $-----------------$
- $-----------------$
- $-----------------$
- $-----------------$
- $-$-$-$-$-$-$-$-$-$
Terminal render would be proper and centered.
Other Important Args
For special shapes like Triangles or Pyramids, which could be flipped upside down, Direction and Invert can be used.
Direction:
Used to set pointing direction of a supported shape.
For Example, We can make a triangle point to 2 directions, Left and Right:
pt.triangle(10, char="*",hollow=True,filler="-",direction="left")
Output:
*-
*-*-
*- -*-
*- - -*-
*- - - -*-
*- - - - -*-
*- - - - - -*-
*- - - - - - -*-
*- - - - - - - -*-
*-*-*-*-*-*-*-*-*-*-
Invert:
With this, we can make supported shapes Upside-Down. This can be used with direction arg to gain full control of the shape's pointing.
For example, to make a left triangle inverted we use:
pt.triangle(10, char="*",hollow=True,filler="-",direction="left",invert=True)
Output:
*-*-*-*-*-*-*-*-*-*-
*- - - - - - - -*-
*- - - - - - -*-
*- - - - - -*-
*- - - - -*-
*- - - -*-
*- - -*-
*- -*-
*-*-
*-
Custom Templates
Through templates, we can make custom patterns based on our own code, and seamlessly use it just like we did with the default code.
This may sound difficult, but we don't even need a bit of advanced programming for this.
Getting Started:
Firstly ensure Pytterns is installed in your project. Then make a folder /patterns in your project's root directory.
You can create files in this folder now, and through this you can add custom patterns to your projects.
Once you make a .py file, start with the draw() function and define the args you need for the pattern you are trying to make. Size and Center is always must to keep, rest args are based on your wish.
For Example, this is the function definition for Triangles.
def draw(size,center, char="*", filler=" ", hollow=False, direction="left", invert=False):
In this, Size (int) is the shape's size, and Center is a boolean telling if trigger has opted for centering or not.
⭐Note: If you wish to use centering in your code, you need not to make any centering system in your template file. Just make sure its compatible with our centering and you are good to go. Similarly, you also do not need to worry about colors, those get added automatically too!
After this, you can just make your pattern function, and print the output in that function itself and the Pytterns takes care of everything!
Panels
Pytterns can also make Panels. To make a Panel List, you can use the pt.panel() Function
Panels are extremely customizable. You can use the following arguments by default.
Size [int]
Horizontal Width of the Panel
Center [bool]
To horizontally center the panel in terminal
Title [str]
The Heading/Title of the panel
Content [list]
List of items to add to contents of panel
Padding [int]
Set minimum distance of text from borders
Customize Border Characters & Corners Characters
-
v_borderVertical Line Characters -
h_borderHorizontal Line Characters -
top_leftTop Left Corner Merger Character -
top_rightTop Right Corner Merger Character -
bottom_leftBottom Left Corner Merger Character -
bottom_rightBottom Right Corner Merger Character
border_bold [bool]
This makes the border characters bold, thick and bright.
center_content [bool]
This makes the content itself center within the panel's borders.
All Color args work same as they did in Shapes, and would work same in all types of patterns.
Examples for Panels.
pt.panel(
    size=80,
    content=["Onion","Carrot","Pencils","RTX4090"],
    title="Shopping List",
    padding=2,
    border_bold=True,
    center_content=False,
    color="Magenta"
)
You may also use Colorama's editing in the content, to give each line its own color and style. The framework adapts accordingly.
Advanced Use
With pytterns, you can also make terminal animations/loading-graphics.
Eg. 1
For Example, if you want fast upward moving arrows, use this:
import time
colors=["red", "green", "yellow", "blue", "magenta", "cyan"]

while True:
    for i in range(0, 6):
        pt.triangle(i, char="-", color=colors[i], hollow=False, center=True)
        time.sleep(0.05)
Output:
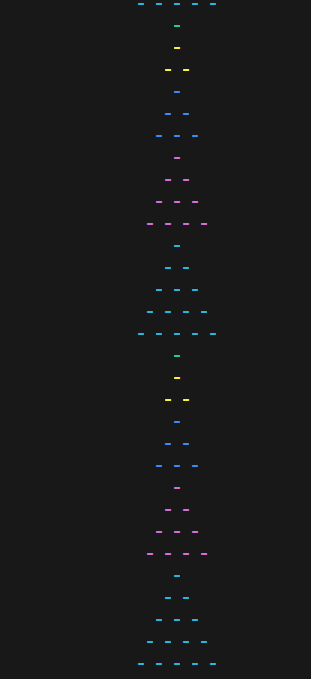
*It would be animated due to loop, demo videos in /images folder
Eg. 2
Or, For Example you can use my favorite, the Square Loading:
import time,os
colors=["red", "green", "yellow", "blue", "magenta", "cyan"]
while True:
    for i in range(0, 6):
        pt.square(i, char="-", color=colors[i], hollow=False, center=True)
        time.sleep(0.05)
        os.system("cls" if os.name == "nt" else "clear")
For this you would need to see the video at /images folder
Eg. 3
You can use this to make a fun dynamic display of text through Panels.
import time, os
from colorama import Fore, Style

from pytterns import Pytterns
pt = Pytterns()

os.system('cls' if os.name == 'nt' else 'clear')
print("\033[?25l", end="")

logs = [
    f"{Fore.CYAN}My code is hungry... it hasn't seen a 'Star' in weeks.",
    f"{Fore.RED}If you use 1960s Print() statements, {Style.BRIGHT}Users CRY.",
    f"{Fore.GREEN}I spent {Style.BRIGHT}3 business days {Style.NORMAL}fixing this right border.",
    f"{Fore.YELLOW}My family thinks I'm {Style.BRIGHT}studying.{Style.NORMAL} I'm actually just making {Style.BRIGHT}boxes centered.{Style.NORMAL}",
    f"{Fore.LIGHTBLUE_EX}Please use Pytterns or I'll be forced to use Light Mode.",
    f"{Fore.MAGENTA}Status: Desperately seeking validation (and a snack).",
    f"{Fore.MAGENTA}and Maybe a Break.. idk."
]

try:
    for i in range(1, len(logs) + 1):
        if i ==len(logs):
            time.sleep(4)
        print("\033[H", end="")
        pt.panel(size=80, content=logs[:i], title="DEV-DESPERATION",padding=2,
                border_bold=True, center_content=False,color="Magenta"
        )
        time.sleep(3)
    print(f"\n{Fore.WHITE}{Style.BRIGHT}   >> Hehe hope this was fun :)")
finally:
    print("\033[?25h")
Video in /images for the output
Contribution
This project is all open for your contributions! You can make more patterns for the default installation, and fix common rendering bugs. Lets together make the best python patterns library in the world!
License
MIT


Download files
Download the file for your platform. If you're not sure which to choose, learn more about installing packages.
Source Distribution
Built Distribution
Filter files by name, interpreter, ABI, and platform.
If you're not sure about the file name format, learn more about wheel file names.
Copy a direct link to the current filters
File details
Details for the file get_pytterns-0.1.2.tar.gz.
File metadata
- Download URL: get_pytterns-0.1.2.tar.gz
- Upload date:
- Size: 10.1 kB
- Tags: Source
- Uploaded using Trusted Publishing? No
- Uploaded via: twine/6.2.0 CPython/3.12.10
File hashes
| Algorithm | Hash digest | |
|---|---|---|
| SHA256 |
e5110a591484d4bd8f4a8d4967e9768420688dafe8c3f157c754c0d55fb8d266
|
|
| MD5 |
02519f6789198e339d73beb6c23f6949
|
|
| BLAKE2b-256 |
d31f8d2980209cfa250358010a270973b7e3b4ffeb4673c59112a0e2dcb40001
|
File details
Details for the file get_pytterns-0.1.2-py3-none-any.whl.
File metadata
- Download URL: get_pytterns-0.1.2-py3-none-any.whl
- Upload date:
- Size: 12.2 kB
- Tags: Python 3
- Uploaded using Trusted Publishing? No
- Uploaded via: twine/6.2.0 CPython/3.12.10
File hashes
| Algorithm | Hash digest | |
|---|---|---|
| SHA256 |
2eaaaad18373af36de5a0e49b7c51eecc5bcde1fbfbc88c083a60162eac56a68
|
|
| MD5 |
8c9788dfd53c32bdc3209a9281f795be
|
|
| BLAKE2b-256 |
ce902b7e27e36720e098b4c05bb09a0a98109874f7216a4ffe4d448eacfa27b3
|


