
This release is a pre-release and may not be stable for production use.

WARNING: This is a test branch/pip build, you probably don't want it yet.
For the time being you are better off with the install images from the graxpert homepage! for questions regarding this test build contact kevinh@geeksville.com.
GraXpert is an astronomical image processing program for extracting and removing gradients in the background of your astrophotos. We provide several methods traditional interpolation methods such as Radial Basis Functions (RBF), Splines and Kriging which require the user to manually select sample points in the background of the image. Our newest addition is an AI method which does not require any user input.
| Original | Gradients removed with AI |
|---|---|
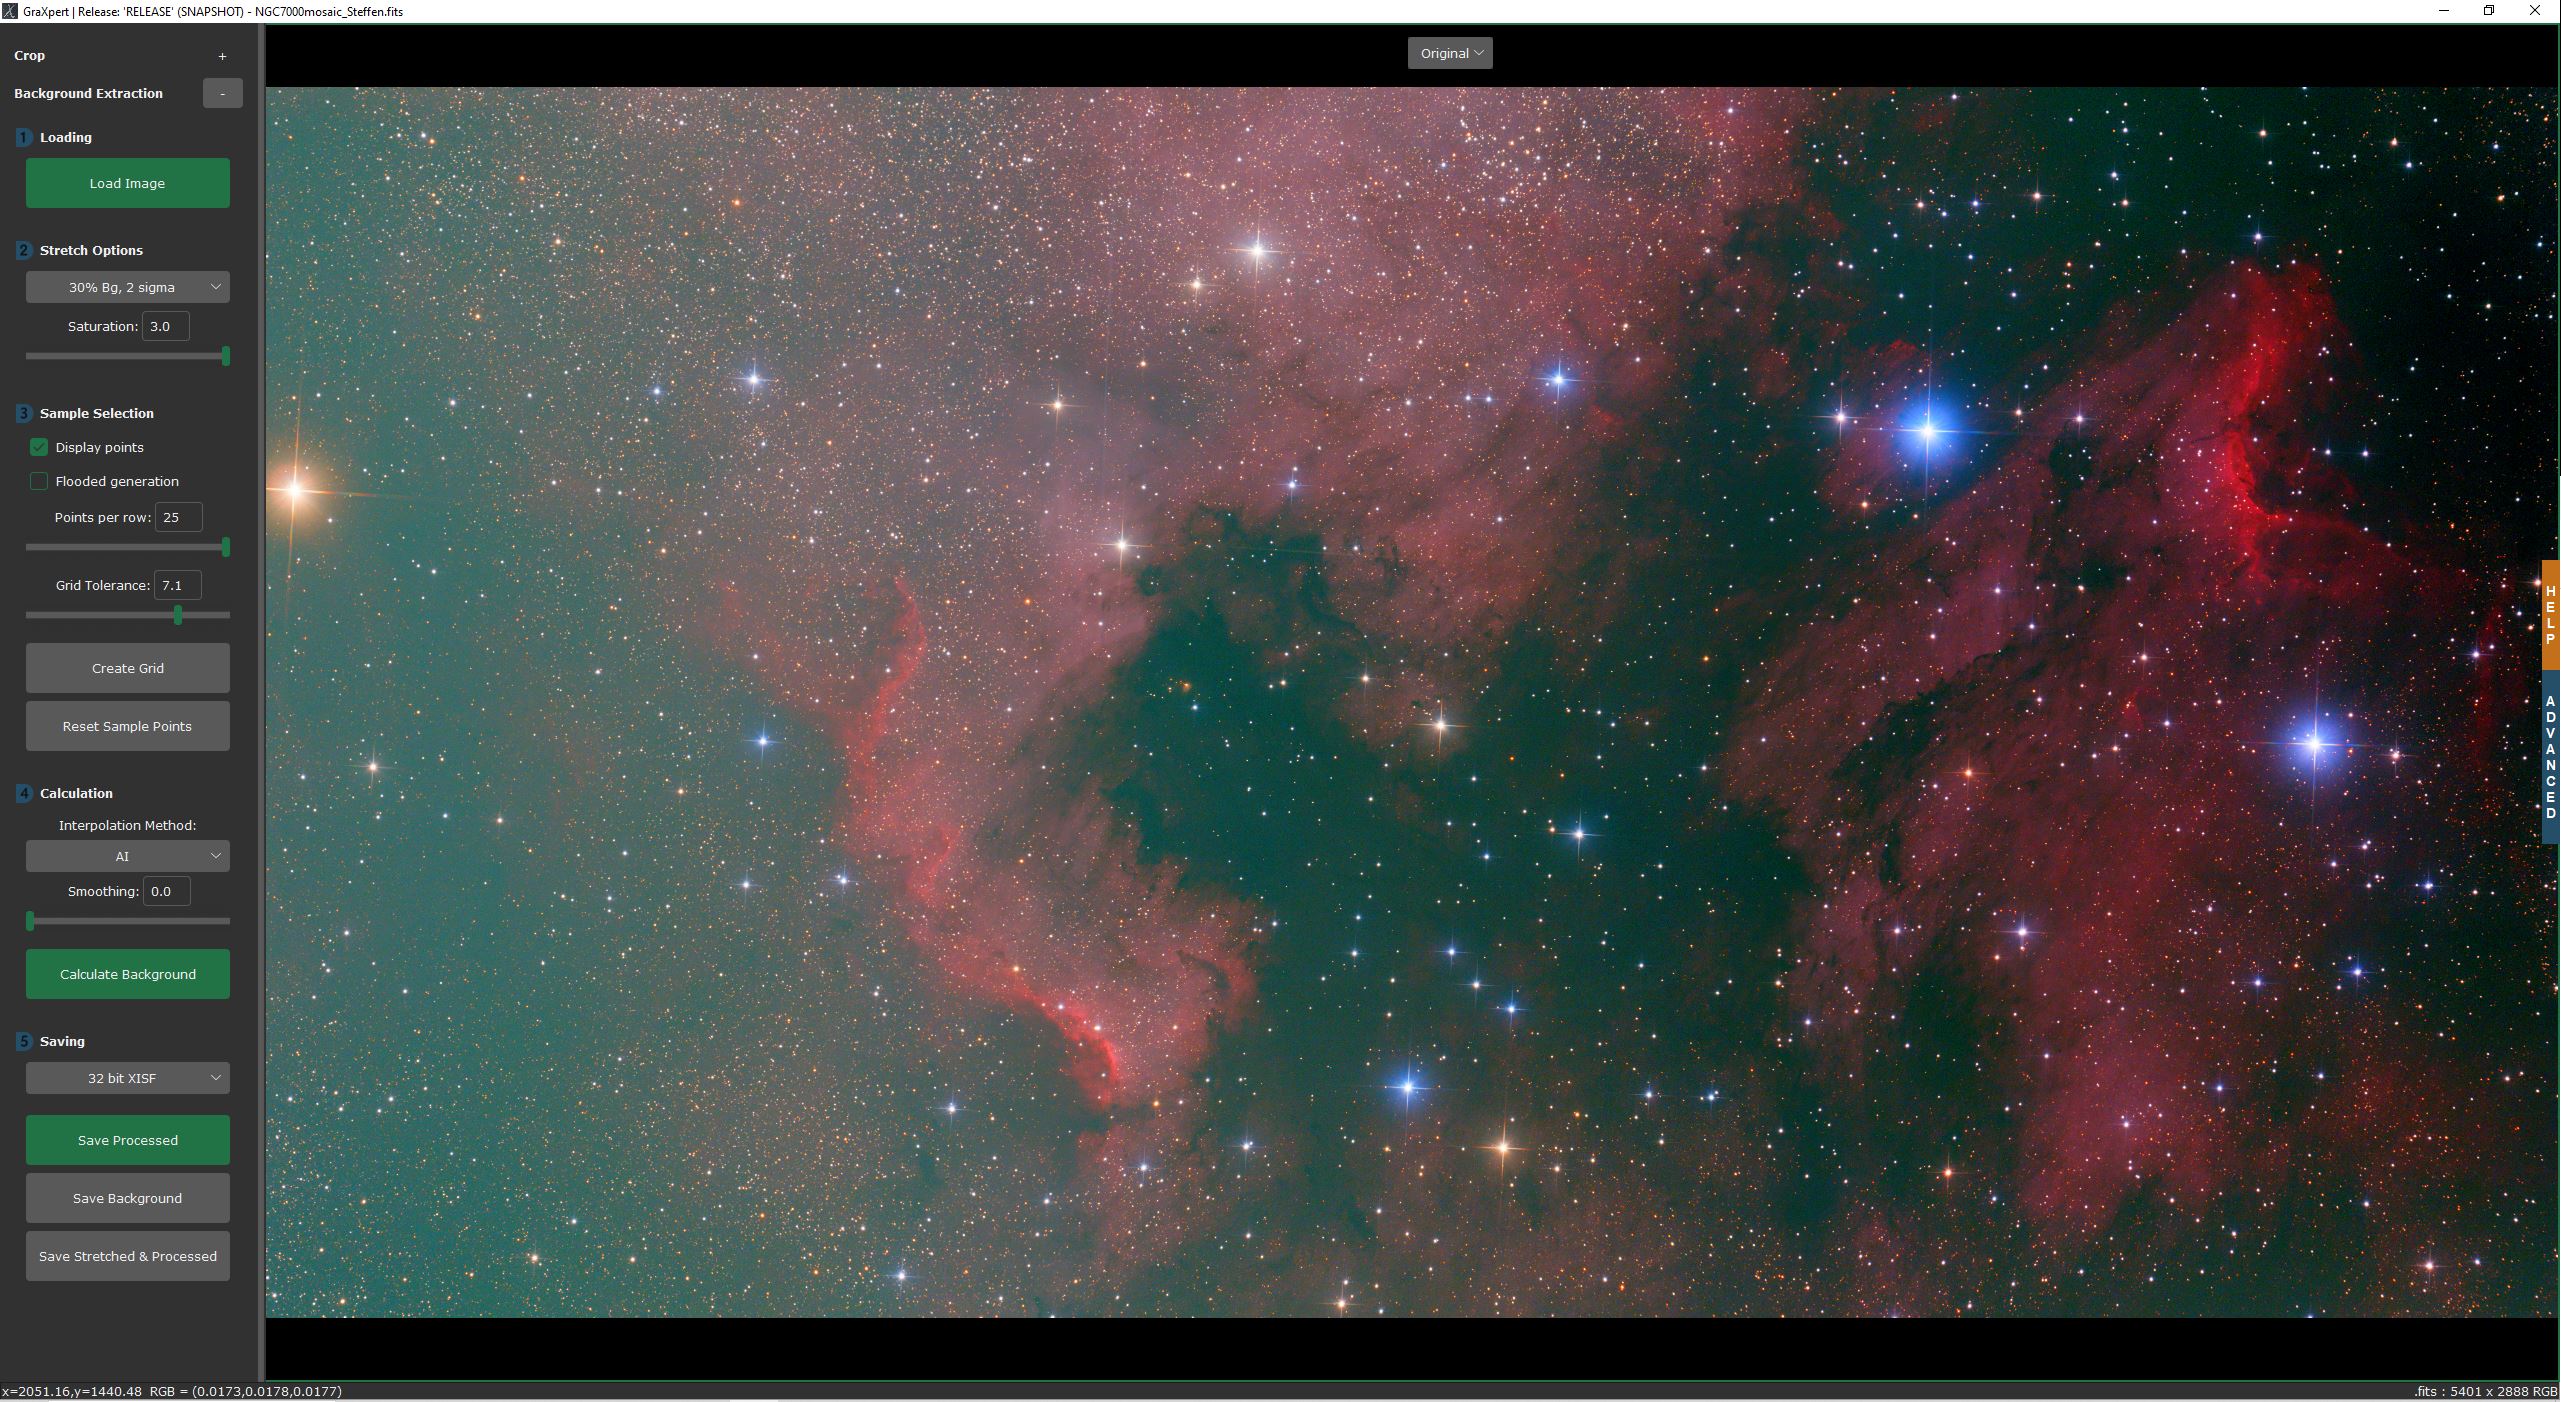 |
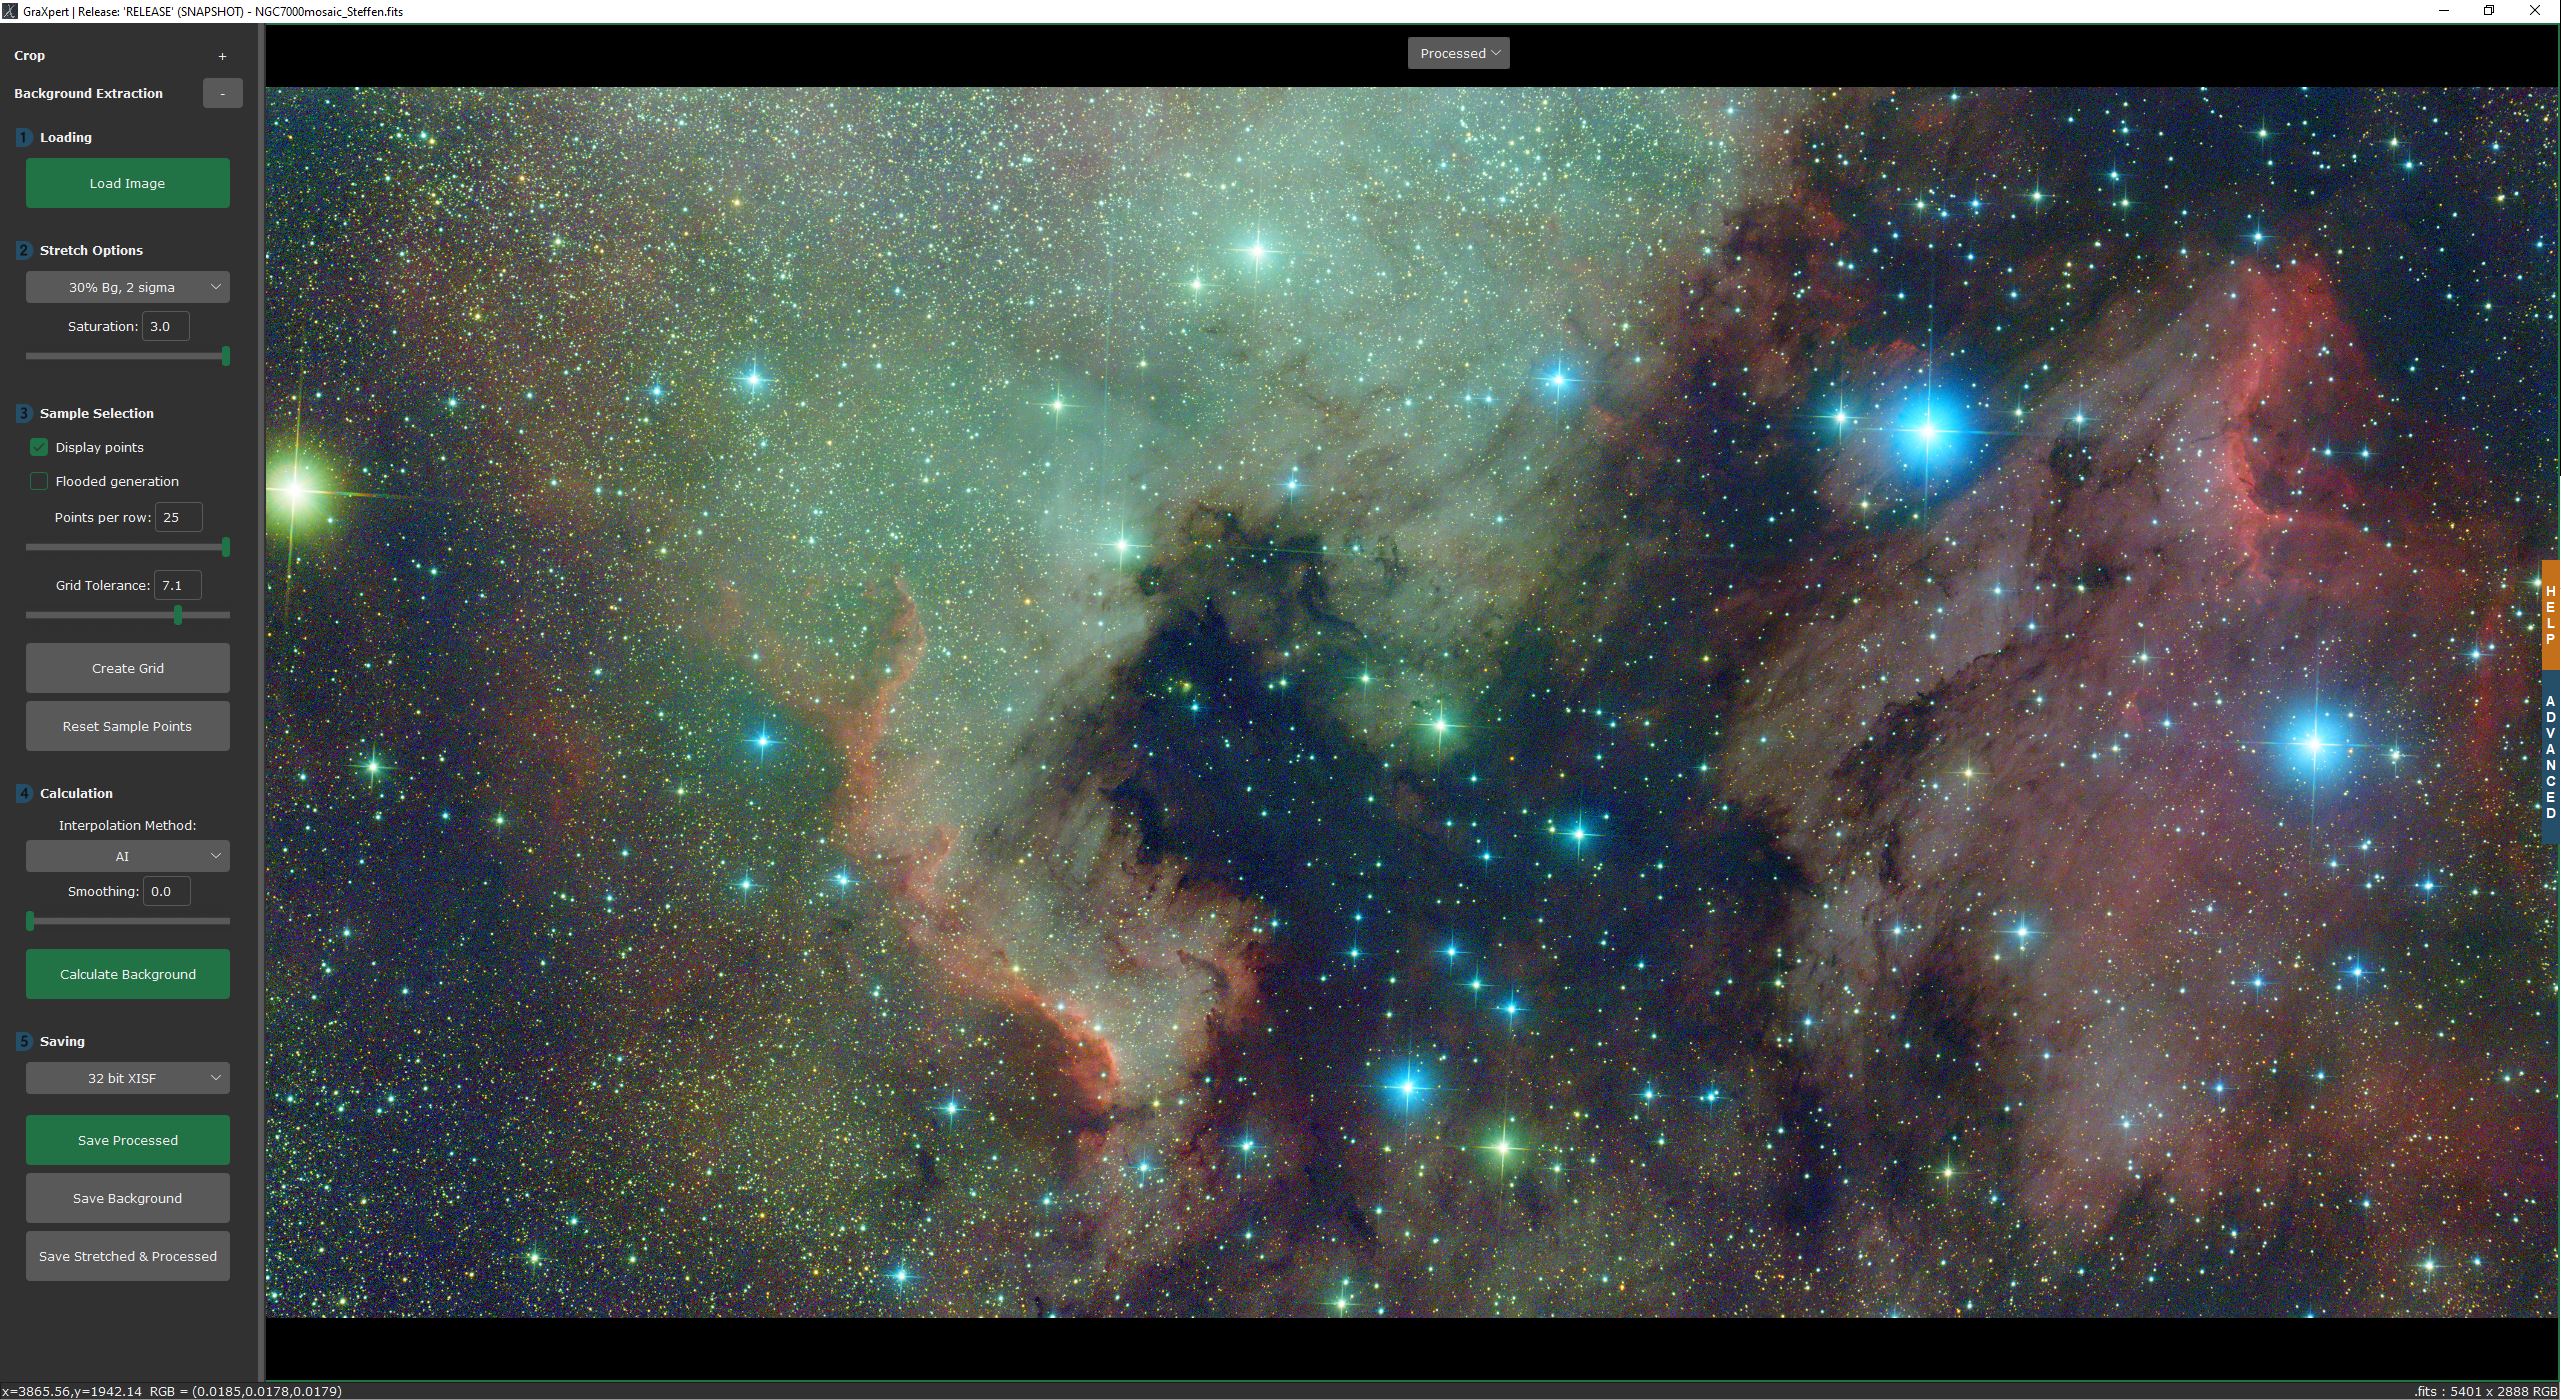 |
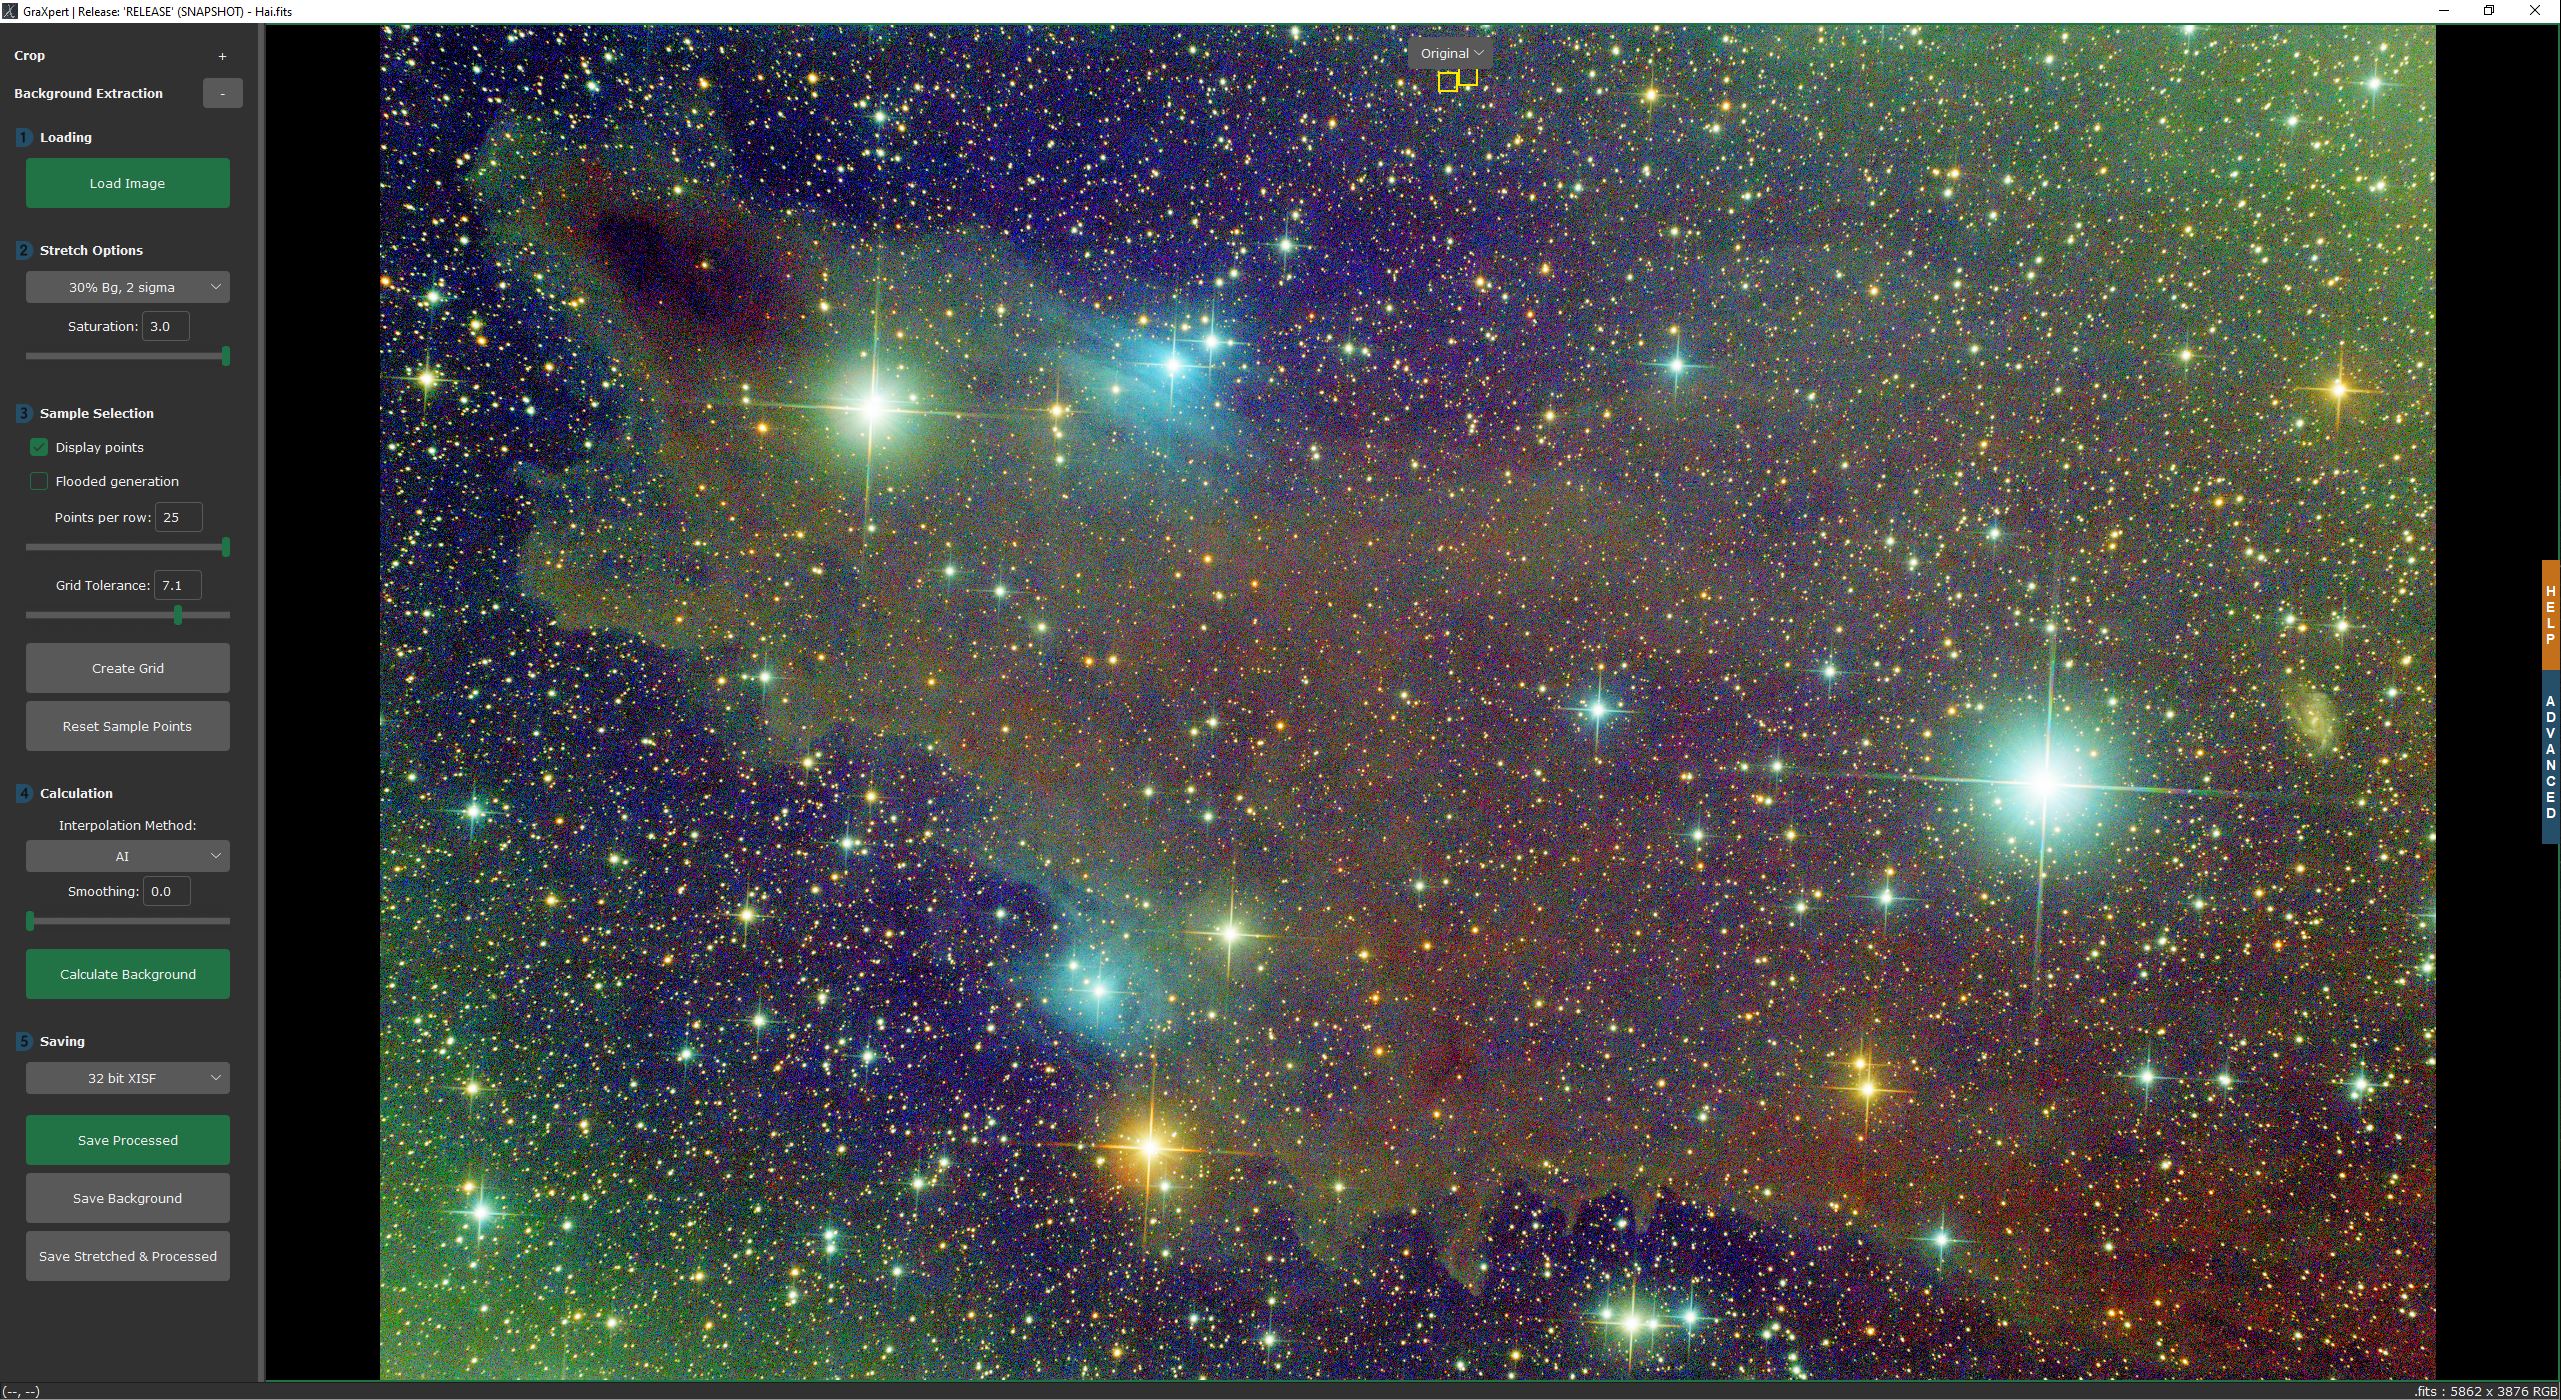 |
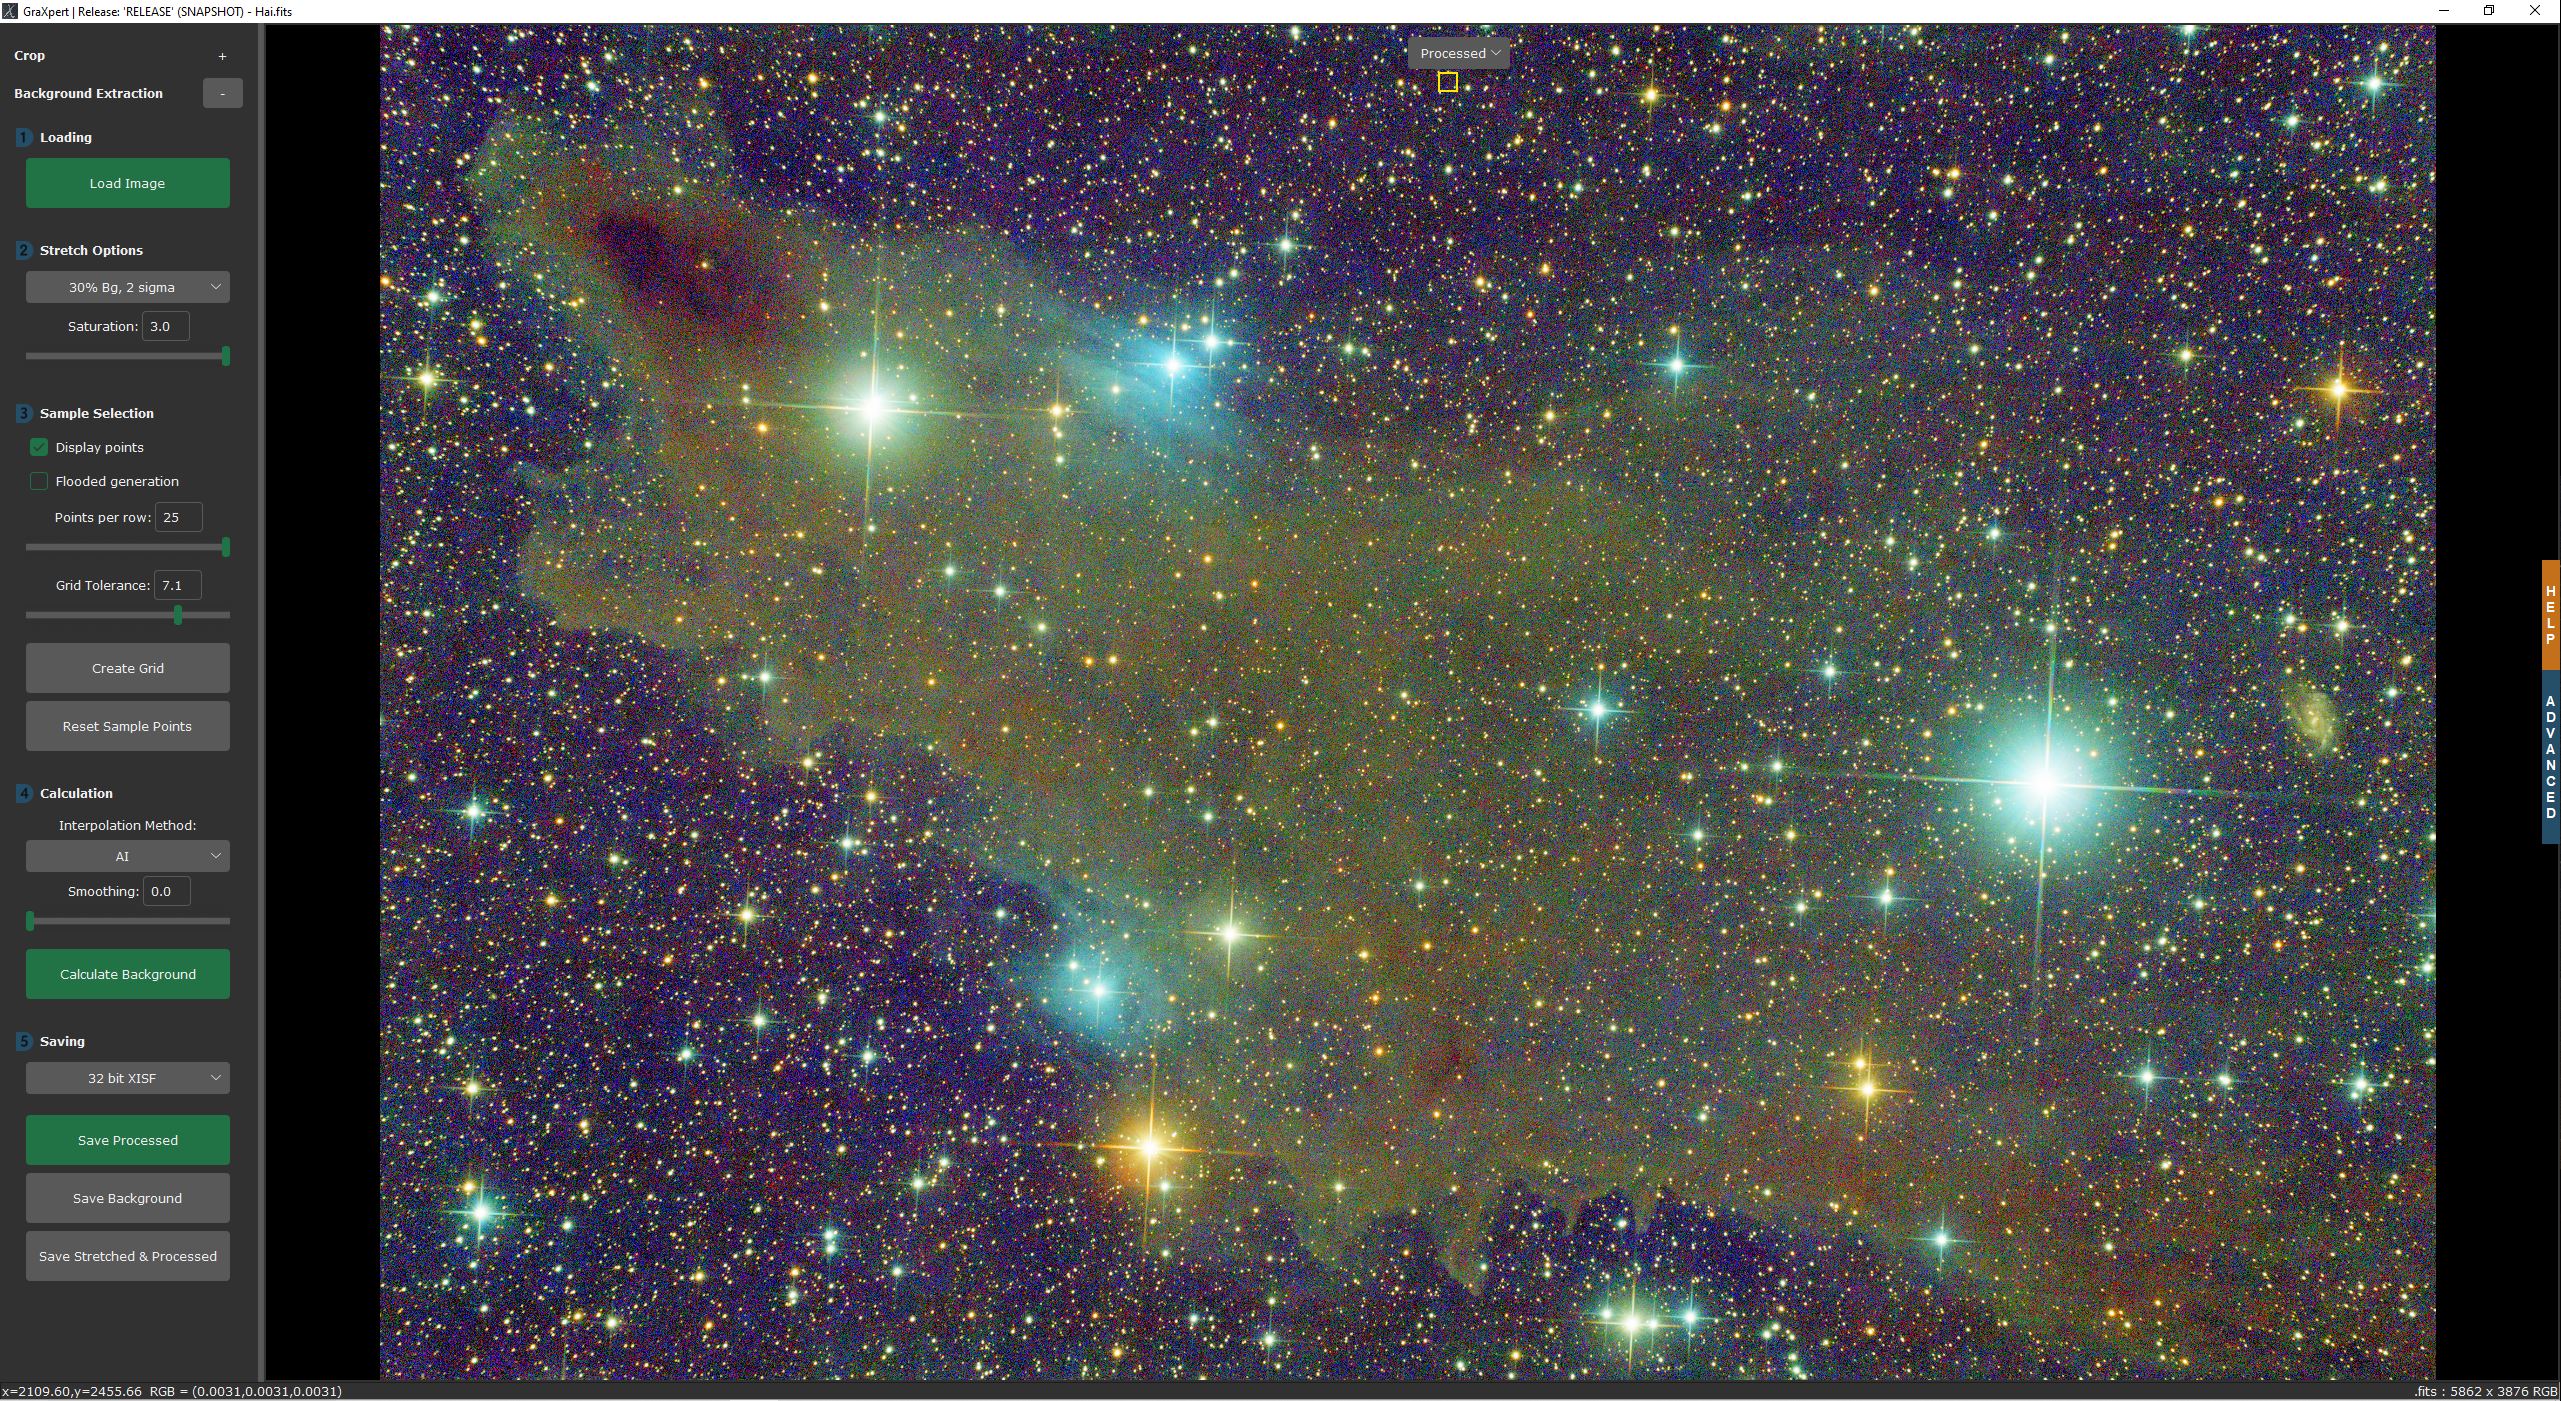 |
Homepage: https://www.graxpert.com
Download: https://github.com/Steffenhir/GraXpert/releases/latest
Cross-Platform Installation
We are currently testing an optional cross-platform system for installing graxpert - which allows much smaller installation images and automated download/updates.
We do this via the the python pypi.org repository 'app-store.' This is particularly important if you'd like to have GPU acceleration support for non Nvidia GPUs. To install via this mechanism:
- Install python runtime for your OS. The default install should automatically include the python package manager 'pip'.
- At a shell prompt type the correct flavor of graxpert to install for your needs.
- brew install pipx python-tk@3.13; pipx install --python python3.13 graxpert\[cpuonly\] - Use this if you are on OS-X - it is poorly named, but it will still use the CoreML Apple GPU support
- pip install graxpert[cuda] - Use this if you have an Nvidia GPU
- pip install graxpert[rocm] --pip-args="-f https://repo.radeon.com/rocm/manylinux/rocm-rel-7.0/" - Use this if you have an AMD GPU
- pip install graxpert[openvino] - Use this if you don't have an advanced GPU or don't know what you have (provides sizable acceleration on most modern Intel CPUs)
- pip install graxpert[directml] - Use this if you want the Windows DirectML acceleration (not as fast as the options above but widely supported and easy to install)
- pip install graxpert[cpuonly] - If you encounter bugs with any of our GPU versions, please file a bug and temporarily use this version (which excludes all GPU code)
If you are an advanced python user and know about the 'pipx' tool, we recommend that you use that tool instead of pip for installs.
AMD GPU library installation
If you are using an AMD GPU and the python packages above, you'll probably need to install the latest AMD GPU software.
For Ubuntu linux the instructions run:
wget https://repo.radeon.com/amdgpu-install/7.0.1/ubuntu/noble/amdgpu-install_7.0.1.70001-1_all.deb
sudo apt install ./amdgpu-install_7.0.1.70001-1_all.deb
sudo apt update
sudo apt install rocm python3-tk
sudo usermod -a -G render,video $LOGNAME # Add the current user to the render and video groups
For other OSes see the instructions here.
Legacy Installation
You can download the latest official release of GraXpert here. Select the correct version for your operating system. For macOS, we provide different versions for Intel processors (x86_64) and for apple silicon (arm64).
Windows: After downloading the .exe file, you should be able to start it directly.
Linux: Before you can start GraXpert, you have to make it executable by running chmod u+x ./GraXpert-linux
macOS: After opening the .dmg file, simply drag the GraXpert icon into the applications folder. GraXpert can now be started from the applications folder.
Command-Line Usage
GraXpert comes with a graphical user interface. However, the AI method which does not need the selection of any background sample points can also be executed from the command line. Here are the available command-line arguments and their descriptions:
- -cmd [image_operation]: This flag indicates which AI model to use. Options are "background-extraction" (default) or "denoising".
- filename: The path of the unprocessed image (required).
- -output [output_file_name]: Specify the name of the output image (without file ending). Otherwise the image will be saved with the suffix '_GraXpert' added to the original file name.
- -preferences_file: Allows GraXpert commandline to run all extraction methods based on a preferences file that contains background grid points.
- -gpu: Set to 'false' in order to disable gpu acceleration during AI inference, otherwise set to 'true' to enable it.
- -ai_version [version]: Specify the version of the AI model to use. If not provided, it defaults to the latest available version. You can choose from locally available versions and remotely available versions.
Specific commands to each operation:
Background Extraction:
- -correction [type]: Select the background correction method. Options are "Subtraction" (default) or "Division."
- -smoothing [strength]: Adjust the strength of smoothing, ranging from 0.0 (no smoothing) to 1 (maximum smoothing).
- -bg: Also save the generated background model.
Denoising:
- -strength [value]: Adjust the strength of denoising, ranging from 0.0 (minimum) to 1 (maximum). Default: "0.5".
- -batch_size [value]: Number of image tiles which Graxpert will denoise in parallel. Be careful: increasing this value might result in out-of-memory errors. Valid Range: 1..32, default: "4".
Examples
The following examples show how GraXpert can be used from the command line in Windows. For Linux and macOS, you have to do the following replacements:
Linux: Replace GraXpert-win64.exe by GraXpert-linux
macOS: Replace GraXpert-win64.exe by GraXpert.app/Contents/MacOS/GraXpert
Basic Usage:
GraXpert-win64.exe my_image.fits
Specify AI Model Version '1.1', correction type 'Division', smoothing '0.1', and save background model:
GraXpert-win64.exe my_image.fits -ai_version 1.1 -correction Division -smoothing 0.1 -bg
Installation for Developers
This guide will help you get started with development of GraXpert on Windows, Linux, and macOS. Follow these steps to clone the repository, create a virtual environment with Python, install the required packages, and run GraXpert from the source code.
Clone the repository
Open your terminal or command prompt and use git to clone the GraXpert repository:
git clone https://github.com/Steffenhir/GraXpert
cd GraXpert
Option 1: Manual developer environment setup
Setup the Virtual Environment
We recommend using a virtual environment to isolate the project's dependencies. Ensure you have Python>=3.10 installed on your system before proceeding. Here's how to set up a virtual environment with Python: Windows:
# Create a new virtual environment with Python 3.10
python -m venv graxpert-env

# Activate the virtual environment
graxpert-env\Scripts\activate
Linux and macOS:
# Create a new virtual environment with Python 3.10
python3 -m venv graxpert-env

# Activate the virtual environment
source graxpert-env/bin/activate
Install required packages
All the requirements can be found in the requirements.txt file. You can install them with:
Windows and Linux:
pip install -r requirements.txt
macOS:
pip3 install -r requirements.txt

"""
For macOS, we have to install tkinter separately.
We use the version provided by brew because it is newer
and solves issues with macOS Sonoma. Please use the version matching with your Python version.
"""
brew install python-tk
Option 2: Automatic setup with devcontainers
This project includes an (optional) devcontainer configuration. If you are using any editor with built-in devcontainer support (i.e. VScode or jetbrains etc...), you should get prompted to "Reopen in a devcontainer?"
If you choose to use a devcontainer a docker (or podman) based container environment will be created for your development. This environment appears to be a Debian machine (regardless of your host-OS). All windowing/file/network operations are forwarded through your host.
This provides a nice 'guaranteed' repeatable build/debug environment for all developers.
Running GraXpert
Once you have set up the virtual environment (using either of the options above), you can start GraXpert in your shell:
python -m graxpert.main
1 maintainer

Metadata
1 maintainer
Release files for graxpert 3.2.0a3
For a detailed explanation of source distributions (sdists) and built distributions (wheels), please see the package formats documentation.
Source distribution (sdist)
| File | Size | Uploaded | |
|---|---|---|---|
| graxpert-3.2.0a3.tar.gz | 8.6 MB | Details |
Built distribution (wheel)
| File | Interpreter | ABI | Platform | Reset |
|---|---|---|---|---|
| graxpert-3.2.0a3-py3-none-any.whl | Python 3 | none | any | Details |
Total release size: 12.0 MB
Release files / graxpert-3.2.0a3.tar.gz
| Download URL | graxpert-3.2.0a3.tar.gz |
|---|---|
| Size | 8.6 MB |
| Tags | Source |
|
SHA-256 checksum How to use checksums |
f0f933ee287ebd1c50172b036a8c6f445290f4d395f19622c744450e8ddbe147
|
|
BLAKE2b-256 checksum How to use checksums |
4b5eed01d896d06279c0aa0fda6dc31ada272b6cf845e4643cd8ac6f332c34f0
|
| Upload date | |
|
Uploaded using Trusted Publishing? What is trusted publishing? |
Yes |
| Uploaded via |
twine/7.0.0 CPython/3.13.14
|
Provenance
Provenance describes where a file came from. On PyPI, provenance is shared via attestations, which provide a verifiable record of the build or publishing details. View details, limitations and caveats.


PyPI Publish Attestation
PyPI verified that this artifact, at this checksum, originated from the publisher listed below.
Signed by GitHub Actions, verified by PyPI on Sep 22, 2026.
Transparency logRelease files / graxpert-3.2.0a3-py3-none-any.whl
| Download URL | graxpert-3.2.0a3-py3-none-any.whl |
|---|---|
| Size | 3.4 MB |
| Tags | Python 3 |
|
SHA-256 checksum How to use checksums |
96a967a53e40746ff497308940b129a7110952d3860ed8ab3db80c8d2ef952b1
|
|
BLAKE2b-256 checksum How to use checksums |
57ff9a0201f0bcb37400d45ba84f34da850305929236c0e39e96d0a52c0ebe6f
|
| Upload date | |
|
Uploaded using Trusted Publishing? What is trusted publishing? |
Yes |
| Uploaded via |
twine/7.0.0 CPython/3.13.14
|
Provenance
Provenance describes where a file came from. On PyPI, provenance is shared via attestations, which provide a verifiable record of the build or publishing details. View details, limitations and caveats.
PyPI Publish Attestation
PyPI verified that this artifact, at this checksum, originated from the publisher listed below.
Signed by GitHub Actions, verified by PyPI on Sep 22, 2026.
Transparency log













