Python GUI Toolkit for Tk (guitk): simplify the layout and construction of tkinter graphical user interfaces in python.

Project description
Python GUI Toolkit for TK (GUITk)
Synopsis
GUITk is a declarative framework for building nice-looking, cross-platform GUIs with tkinter inspired by SwiftUI.
GUITk allows you to build complete GUI applications with a few lines of code. GUITk makes it easy to layout your GUI elements and respond to events using a declarative syntax. Because GUITk is built on top of tkinter, you can access the underlying tkinter API if you need to but for many use cases, you can build your GUI without needing to know much about tkinter.
GUITk apps are built by subclasses the guitk.Window class. Your GUI elements are layed out using a guitk.HLayout (horizontal layout) or guitk.VLayout (vertical layout) object which takes care of placing all widgets in the window using a declarative syntax. This is much simpler than using the underlying tkinter grid manager or pack geometry managers.
GUITk is in early beta but is in constant development so check back frequently if this interests you or open an issue to start a conversation about what pain points this project could help you solve!
Documentation is available at GUITk.
GUITk has no dependencies outside of the Python standard library. (Though if Pillow is installed, GUITk will use it to load images.)
Code Example
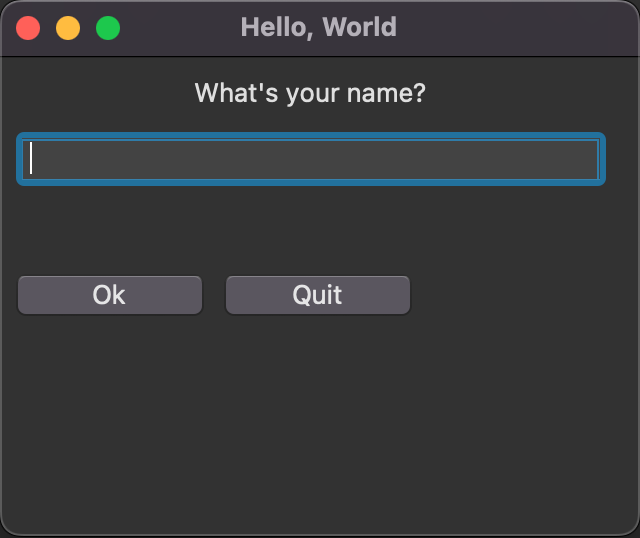
Simple HLayout

"""Simple Hello World example using guitk """

import guitk as ui


# subclass guitk.Window as the starting point for your app's main window
class HelloWindow(ui.Window):
    def config(self):
        """Configure the window"""

        # set the window title
        self.title = "Hello, World"

        # define a layout for the window
        # the layout manager will automatically add widgets to the window
        with ui.HLayout():
            ui.Label("What's your name?")
            ui.Entry(key="name", focus=True)
            ui.Button("Ok", key="ok")

    @ui.on(key="ok")
    def on_ok(self, event: ui.Event):
        """Handle the Ok button click"""
        print("Hello, ", self.get("name").value)


# run your event loop
if __name__ == "__main__":
    HelloWindow().run()
Motivation
The goal of GUITk is to make it very easy to create simple and attractive GUI apps with python. It borrows ideas from several other libraries include PySimpleGUI, SwiftUI, textual, and applepy. GUITk builds on tkinter which ships with the Python standard library and works across many platforms. tkinter is a mature and powerful GUI framework but requires a fair bit of boiler plate and understanding of the underlying framework to use effectively. GUITk attempts to simplify this by providing a higher level interface to tkinter while still allowing you to access the underlying tkinter API if you need to.
Though you can build simple apps without knowing much about tkinter, a basic understanding of tkinter will be helpful when building with GUITk. I highly recommend Mark Roseman's excellent Modern Tkinter for Busy Python Developers book as a starting point.
Is GUITk for you?
GUITk is still beta software so I would not use it for anything really important. That said, I am using GUITk regularly for small projects and it is working well for me. If you want to build a simple GUI for your Python app using a minimal amount of code and without having to think too much about the geometry of your window, GUITk might be worth trying. GUITk has no dependencies outside the Python standard library so it's easy to add to your project and it should work across many platforms.
If you need complex widgets or native OS features like drag & drop, notifications, etc. or a native OS look & feel, then GUITk is not the best choice as it's built on tkinter which does not offer these features.
Supported Platforms
GUITk requires Python 3.9+ and is currently tested on macOS Ventura (13.x) and macOS Catalina (10.15.7). It should work on any platform that supports tkinter but this has not been tested. If you run into issues on a particular platform, please open an issue.
Installation
python3 -m pip install guitk
Anatomy of a guitk program
"""Hello World example using guitk """

import guitk as ui


class HelloWorld(ui.Window):
    # subclass guitk.Window as the starting point for your app's main window
    def config(self):
        # Your Window class needs to define a config() method that describes the layout, title, etc for your app
        # config() is called by the Window class when the Window is being created

        # Title for the window
        self.title = "Hello, World"

        # optionally set size as a tuple of (width, height)
        self.size = (320, 240)

        # you can also use self.geometry for consistency with tkinter
        # self.geometry = "320x240"

        # Define the window's contents
        # guitk.Label corresponds to a tkinter.ttk.Label, etc.
        # optionally provide a unique key to each element to easily reference the element later
        # use a HLayout or VLayout class to define the layout of the window
        # HLayout arranges widgets horizontally, VLayout arranges widgets vertically
        with ui.VLayout():
            # use a VLayout to stack the widgets vertically
            # standard tkinter layout options such as sticky and weight are supported
            ui.Label("What's your name?", sticky="ew", anchor="center", weightx=1)
            # each widget can be assigned a key, which should be unique, to easily reference the widget later
            # set focus=True so the Entry box has focus when the window is displayed
            ui.Entry(key="entry_name", focus=True, weightx=1, sticky="ew")
            ui.Label("", width=40, key="output")
            with ui.HStack():
                # align these two buttons in a horizontal row using HStack
                ui.Button("Ok")
                ui.Button("Quit")

    # Every Window class has 3 special methods that can be overridden to provide custom behavior
    # you do not need to provide any of these methods if you do not need to customize the default behavior
    # (the default behavior is to do nothing)
    # These special methods are: setup(), teardown(), and handle_event()

    def setup(self):
        """Perform any initialization needed before the Window is displayed"""
        # your setup() method is called by the Window class after config() just before the Window is displayed
        # use this to initialize any internal state you need
        # you do not need to provide a setup() method if no initialization is needed
        print("setup")

    def teardown(self):
        """Perform any cleanup needed before destroying the window"""
        # your teardown() method is called by the Window class after the Window is closed
        # use this to clean up before the Window is destroyed
        # you do not need to provide a teardown() method if no cleanup is needed
        print("teardown")

    def handle_event(self, event: ui.Event):
        """handle_event() is called by the Window class when an event occurs"""
        # you do not need to provide a handle_event() method if you prefer to use
        # the @on decorator to bind functions to events (see below)
        # handle_event() is a useful place to put code that needs to run for every event
        # or for use during debugging
        print(f"handle_event: {event}")

    @ui.on(key="Quit")
    def on_quit(self):
        # return the value of the Entry box
        self.quit(self["entry_name"].value)

    @ui.on(key="Ok")
    @ui.on(event_type=ui.EventType.EntryReturn)
    def on_ok(self):
        # User pressed the OK button or the Return key inside the Entry box
        # the @on decorator can be used to bind a function to an event
        # @on can be repeated to bind the function to multiple events
        # set the output Label to the value of the Entry box
        # individual widgets can be accessed by their key; the window object acts as a dictionary of widgets
        greeting = f"Hello {self['entry_name'].value}! Thanks for trying guitk."

        # if you prefer, you can use get() instead of the dictionary syntax
        self.get("output").value = greeting


if __name__ == "__main__":
    # instantiate your Window class and run it
    name = HelloWorld().run()
    print(f"Hello {name}")
Documentation
Documentation can be found here. Take a look at the examples directory for a number of examples on use of various widgets.
Testing
There are currently no automated tests as I haven't figured out how to do these with tkinter. I am working on adding tests and there are several tests that run with pytest in the tests directory. These are not automated and require user interaction.
You can also run python3 -m guitk which opens a window with examples of all the widgets. I find this useful for quick testing of layout and widget behavior.
Contributors
Contributions welcome! If this project interests you, open an Issue or send a PR!
TODO
- Basic prototype
- Frame
- Label
- Entry
- Button
- Checkbutton
- Radiobutton
- Text
- ScrolledText
- Treeview
- Listbox
- Combobox
- Spinner
- Other widgets
- Menus
- Tooltips
- Documentation
- Add docstrings
- Add type hints to public API
- Tests
License
Licensed under the MIT License.
See Also
- Textual - An amazing Python framework for building user interfaces in the terminal.
- PySimpleGUI - A Python GUI Framework.
- applepy - A declarative GUI framework for developing native macOS applications in Python 3.


Download files
Download the file for your platform. If you're not sure which to choose, learn more about installing packages.
Source Distribution
Built Distribution
Filter files by name, interpreter, ABI, and platform.
If you're not sure about the file name format, learn more about wheel file names.
Copy a direct link to the current filters
File details
Details for the file guitk-0.4.5.tar.gz.
File metadata
- Download URL: guitk-0.4.5.tar.gz
- Upload date:
- Size: 59.6 kB
- Tags: Source
- Uploaded using Trusted Publishing? No
- Uploaded via: twine/5.1.1 CPython/3.11.7
File hashes
| Algorithm | Hash digest | |
|---|---|---|
| SHA256 |
2e077a026309811cfddeac565e98efe4cd2574e4cf0a24512ba33845927bd7f4
|
|
| MD5 |
bcc871a4c1d0d2deeb388b70510eb85b
|
|
| BLAKE2b-256 |
4c23a7faa2c1770e8b579ecf915d123e720da66825587d24b9930be3610bf0b6
|
File details
Details for the file guitk-0.4.5-py3-none-any.whl.
File metadata
- Download URL: guitk-0.4.5-py3-none-any.whl
- Upload date:
- Size: 80.6 kB
- Tags: Python 3
- Uploaded using Trusted Publishing? No
- Uploaded via: twine/5.1.1 CPython/3.11.7
File hashes
| Algorithm | Hash digest | |
|---|---|---|
| SHA256 |
544ff335a96e276f99cac2efe07ea456b64f7f7b72371d045bb7c0f92c1307ab
|
|
| MD5 |
279cc53c007c7e9adad2f91ae6b6a9da
|
|
| BLAKE2b-256 |
2c7523894c033f554531b653b0bcaca9cfa6e70d404719cacb8f106d9ddf1f3a
|


