A minimalistic implementation of the Monte Carlo Tree Search algorithm for planning problems fomulated as gymnaisum reinforcement learning environments.

Project description


GYMCTS
A Monte Carlo Tree Search Implementation for Gymnasium-style Environments.
- Github: GYMCTS on Github
- GitLab: GYMCTS on GitLab
- Pypi: GYMCTS on PyPi
- Documentation: GYMCTS Docs
Description
This project provides a Monte Carlo Tree Search (MCTS) implementation for Gymnasium-style environments as an installable Python package. The package is designed to be used with the Gymnasium interface. It is especially useful for combinatorial optimization problems or planning problems, such as the Job Shop Scheduling Problem (JSP). The documentation provides numerous examples on how to use the package with different environments, while focusing on scheduling problems.
A minimal working example is provided in the Quickstart section.
It comes with a variety of visualisation options, which is useful for research and debugging purposes. It aims to be a base for further research and development for neural guided search algorithms.
Quickstart
To use the package, install it via pip:
pip install gymcts
The usage of a MCTS agent can roughly organised into the following steps:
- Create a Gymnasium-style environment
- Wrap the environment with a GymCTS wrapper
- Create a MCTS agent
- Solve the environment with the MCTS agent
- Render the solution
The GYMCTS package provides a two types of wrappers for Gymnasium-style environments:
DeepCopyMCTSGymEnvWrapper: A wrapper that uses deepcopies of the environment to save a snapshot of the environment state for each node in the MCTS tree.ActionHistoryMCTSGymEnvWrapper: A wrapper that saves the action sequence that lead to the current state in the MCTS node.
These wrappers can be used with the GymctsAgent to solve the environment.
The wrapper implement methods that are required by the GymctsAgent to interact with the environment.
GYMCTS is designed to use a single environment instance and reconstructing the environment state form a state snapshot, when needed.
NOTE: MCTS works best when the return of an episode is in the range of [-1, 1]. Please adjust the reward function of the environment accordingly (or change the ubc-scaling parameter of the MCTS agent). Adjusting the reward function of the environment is easily done with a NormalizeReward or TransformReward Wrapper.
env = NormalizeReward(env, gamma=0.99, epsilon=1e-8)
env = TransformReward(env, lambda r: r / n_steps_per_episode)
FrozenLake Example (DeepCopyMCTSGymEnvWrapper)
A minimal example of how to use the package with the FrozenLake environment and the NaiveSoloMCTSGymEnvWrapper is provided in the following code snippet below. The DeepCopyMCTSGymEnvWrapper can be used with non-deterministic environments, such as the FrozenLake environment with slippery ice.
import gymnasium as gym

from gymcts.gymcts_agent import GymctsAgent
from gymcts.gymcts_deepcopy_wrapper import DeepCopyMCTSGymEnvWrapper

from gymcts.logger import log

# set log level to 20 (INFO)
# set log level to 10 (DEBUG) to see more detailed information
log.setLevel(20)

if __name__ == '__main__':
    # 0. create the environment
    env = gym.make('FrozenLake-v1', desc=None, map_name="4x4", is_slippery=True, render_mode="ansi")
    env.reset()

    # 1. wrap the environment with the deep copy wrapper or a custom gymcts wrapper
    env = DeepCopyMCTSGymEnvWrapper(env)

    # 2. create the agent
    agent = GymctsAgent(
        env=env,
        clear_mcts_tree_after_step=False,
        render_tree_after_step=True,
        number_of_simulations_per_step=50,
        exclude_unvisited_nodes_from_render=True
    )

    # 3. solve the environment
    actions = agent.solve()

    # 4. render the environment solution in the terminal
    print(env.render())
    for a in actions:
        obs, rew, term, trun, info = env.step(a)
        print(env.render())

    # 5. print the solution
    # read the solution from the info provided by the RecordEpisodeStatistics wrapper
    # (that DeepCopyMCTSGymEnvWrapper uses internally)
    episode_length = info["episode"]["l"]
    episode_return = info["episode"]["r"]

    if episode_return == 1.0:
        print(f"Environment solved in {episode_length} steps.")
    else:
        print(f"Environment not solved in {episode_length} steps.")
FrozenLake Example (DeterministicSoloMCTSGymEnvWrapper)
A minimal example of how to use the package with the FrozenLake environment and the DeterministicSoloMCTSGymEnvWrapper is provided in the following code snippet below. The DeterministicSoloMCTSGymEnvWrapper can be used with deterministic environments, such as the FrozenLake environment without slippery ice.
The DeterministicSoloMCTSGymEnvWrapper saves the action sequence that lead to the current state in the MCTS node.
import gymnasium as gym

from gymcts.gymcts_agent import GymctsAgent
from gymcts.gymcts_action_history_wrapper import ActionHistoryMCTSGymEnvWrapper

from gymcts.logger import log

# set log level to 20 (INFO)
# set log level to 10 (DEBUG) to see more detailed information
log.setLevel(20)

if __name__ == '__main__':
    # 0. create the environment
    env = gym.make('FrozenLake-v1', desc=None, map_name="4x4", is_slippery=False, render_mode="ansi")
    env.reset()

    # 1. wrap the environment with the wrapper
    env = ActionHistoryMCTSGymEnvWrapper(env)

    # 2. create the agent
    agent = GymctsAgent(
        env=env,
        clear_mcts_tree_after_step=False,
        render_tree_after_step=True,
        number_of_simulations_per_step=50,
        exclude_unvisited_nodes_from_render=True
    )

    # 3. solve the environment
    actions = agent.solve()

    # 4. render the environment solution in the terminal
    print(env.render())
    for a in actions:
        obs, rew, term, trun, info = env.step(a)
        print(env.render())

    # 5. print the solution
    # read the solution from the info provided by the RecordEpisodeStatistics wrapper
    # (that DeterministicSoloMCTSGymEnvWrapper uses internally)
    episode_length = info["episode"]["l"]
    episode_return = info["episode"]["r"]

    if episode_return == 1.0:
        print(f"Environment solved in {episode_length} steps.")
    else:
        print(f"Environment not solved in {episode_length} steps.")
FrozenLake Video Example

To create a video of the solution of the FrozenLake environment, you can use the following code snippet:
import gymnasium as gym

from gymcts.gymcts_agent import GymctsAgent
from gymcts.gymcts_deepcopy_wrapper import DeepCopyMCTSGymEnvWrapper

from gymcts.logger import log

log.setLevel(20)

from gymnasium.envs.toy_text.frozen_lake import FrozenLakeEnv

if __name__ == '__main__':
    log.debug("Starting example")

    # 0. create the environment
    env = gym.make('FrozenLake-v1', desc=None, map_name="4x4", is_slippery=False, render_mode="rgb_array")
    env.reset()

    # 1. wrap the environment with the deep copy wrapper or a custom gymcts wrapper
    env = DeepCopyMCTSGymEnvWrapper(env)

    # 2. create the agent
    agent = GymctsAgent(
        env=env,
        clear_mcts_tree_after_step=False,
        render_tree_after_step=True,
        number_of_simulations_per_step=200,
        exclude_unvisited_nodes_from_render=True
    )

    # 3. solve the environment
    actions = agent.solve()

    # 4. render the environment solution
    env = gym.wrappers.RecordVideo(
        env,
        video_folder="./videos",
        episode_trigger=lambda episode_id: True,
        name_prefix="frozenlake_4x4"
    )
    env.reset()

    for a in actions:
        obs, rew, term, trun, info = env.step(a)
    env.close()

    # 5. print the solution
    # read the solution from the info provided by the RecordEpisodeStatistics wrapper (that DeepCopyMCTSGymEnvWrapper wraps internally)
    episode_length = info["episode"]["l"]
    episode_return = info["episode"]["r"]

    if episode_return == 1.0:
        print(f"Environment solved in {episode_length} steps.")
    else:
        print(f"Environment not solved in {episode_length} steps.")
Job Shop Scheduling (CustomWrapper)
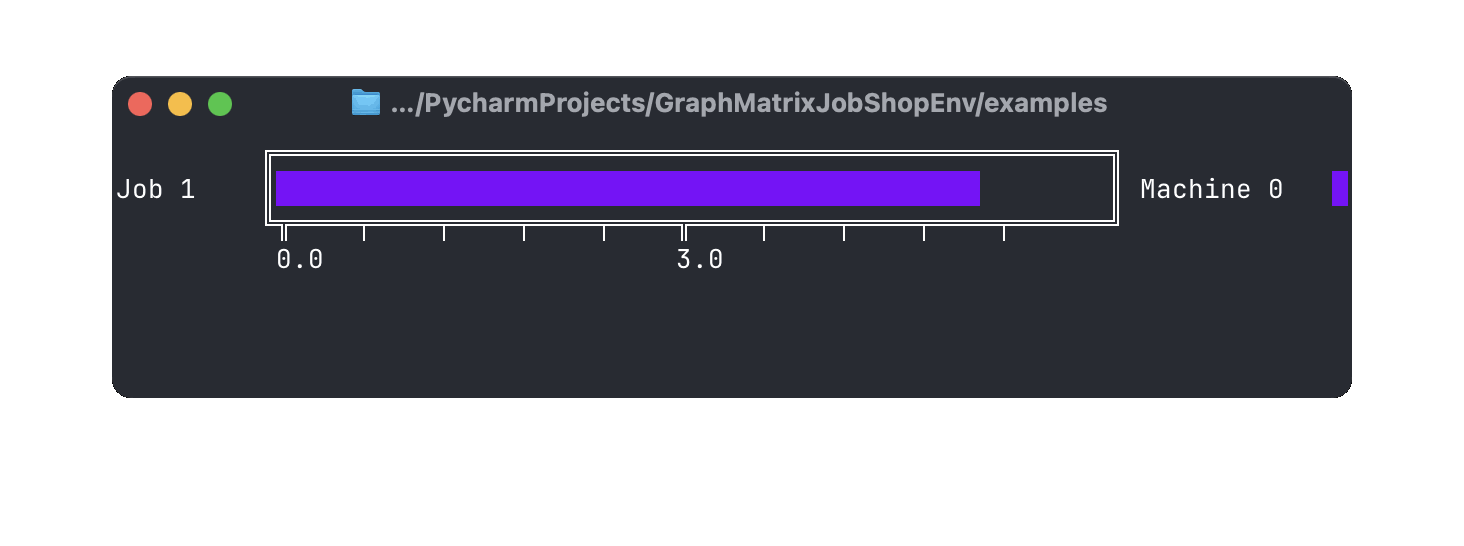
The following code snippet shows how to use the package with the graph-jsp-env environment.
First, install the environment via pip:
pip install graph-jsp-env
and a utility package for JSP instances:
pip install jsp-instance-utils
Then, you can use the following code snippet to solve the environment with the MCTS agent:
```python
from typing import Any

import random

import gymnasium as gym

from graph_jsp_env.disjunctive_graph_jsp_env import DisjunctiveGraphJspEnv
from jsp_instance_utils.instances import ft06, ft06_makespan

from gymcts.gymcts_agent import GymctsAgent
from gymcts.gymcts_env_abc import GymctsABC

from gymcts.logger import log


class GraphJspGYMCTSWrapper(GymctsABC, gym.Wrapper):

    def __init__(self, env: DisjunctiveGraphJspEnv):
        gym.Wrapper.__init__(self, env)

    def load_state(self, state: Any) -> None:
        self.env.reset()
        for action in state:
            self.env.step(action)

    def is_terminal(self) -> bool:
        return self.env.unwrapped.is_terminal()

    def get_valid_actions(self) -> list[int]:
        return list(self.env.unwrapped.valid_actions())

    def rollout(self) -> float:
        terminal = env.is_terminal()

        if terminal:
            lower_bound = env.unwrapped.reward_function_parameters['scaling_divisor']
            return - env.unwrapped.get_makespan() / lower_bound + 2

        reward = 0
        while not terminal:
            action = random.choice(self.get_valid_actions())
            obs, reward, terminal, truncated, _ = env.step(action)

        return reward + 2

    def get_state(self) -> Any:
        return env.unwrapped.get_action_history()


if __name__ == '__main__':
    log.setLevel(20)

    env_kwargs = {
        "jps_instance": ft06,
        "default_visualisations": ["gantt_console", "graph_console"],
        "reward_function_parameters": {
            "scaling_divisor": ft06_makespan
        },
        "reward_function": "nasuta",
    }

    env = DisjunctiveGraphJspEnv(**env_kwargs)
    env.reset()

    env = GraphJspGYMCTSWrapper(env)

    agent = GymctsAgent(
        env=env,
        clear_mcts_tree_after_step=True,
        render_tree_after_step=True,
        exclude_unvisited_nodes_from_render=True,
        number_of_simulations_per_step=50,
    )

    root = agent.search_root_node.get_root()

    actions = agent.solve(render_tree_after_step=True)
    for a in actions:
        obs, rew, term, trun, info = env.step(a)

    env.render()
    makespan = env.unwrapped.get_makespan()
    print(f"makespan: {makespan}")
Visualizations
The MCTS agent provides a visualisation of the MCTS tree. Below is an example code snippet that shows how to use the visualisation options of the MCTS agent.
The following metrics are displayed in the visualisation:
N: the number of visits of the nodeQ_v: the average return of the nodeubc: the upper confidence bound of the nodea: the action that leads to the nodebest: the highest return of any rollout from the node
Q_v and ubc have a color gradient from red to green, where red indicates a low value and green indicates a high value.
The color gradient is based on the minimum and maximum values of the respective metric in the tree.
The visualisation is rendered in the terminal and can be limited to a certain depth of the tree. The default depth is 2.
import gymnasium as gym

from gymcts.gymcts_agent import GymctsAgent
from gymcts.gymcts_action_history_wrapper import ActionHistoryMCTSGymEnvWrapper

from gymcts.logger import log

# set log level to 20 (INFO)
# set log level to 10 (DEBUG) to see more detailed information
log.setLevel(20)

if __name__ == '__main__':
    # create the environment
    env = gym.make('FrozenLake-v1', desc=None, map_name="4x4", is_slippery=False, render_mode="ansi")
    env.reset()

    # wrap the environment with the wrapper or a custom gymcts wrapper
    env = ActionHistoryMCTSGymEnvWrapper(env)

    # create the agent
    agent = GymctsAgent(
        env=env,
        clear_mcts_tree_after_step=False,
        render_tree_after_step=False,
        number_of_simulations_per_step=50,
        exclude_unvisited_nodes_from_render=True,  # weather to exclude unvisited nodes from the render
        render_tree_max_depth=2  # the maximum depth of the tree to render
    )

    # solve the environment
    actions = agent.solve()

    # render the MCTS tree from the root
    # search_root_node is the node that corresponds to the current state of the environment in the search process
    # since we called agent.solve() we are at the end of the search process
    log.info(f"MCTS Tree starting at the final state of the environment (actions: {agent.search_root_node.state})")
    agent.show_mcts_tree(
        start_node=agent.search_root_node,
    )

    # the parent of the terminal node (which we are rendering below) is the search root node of the previous step in the
    # MCTS solving process
    log.info(
        f"MCTS Tree starting at the pre-final state of the environment (actions: {agent.search_root_node.parent.state})")
    agent.show_mcts_tree(
        start_node=agent.search_root_node.parent,
    )

    # render the MCTS tree from the root
    log.info(f"MCTS Tree starting at the root state (actions: {agent.search_root_node.get_root().state})")
    agent.show_mcts_tree(
        start_node=agent.search_root_node.get_root(),
        # you can limit the depth of the tree to render to any number
        tree_max_depth=1
    )

State of the Project
This project is complementary material for a research paper. It will not be frequently updated.
Minor updates might occur.
Significant further development will most likely result in a new project. In that case, a note with a link will be added in the README.md of this project.
Dependencies
This project specifies multiple requirements files.
requirements.txt contains the dependencies for the environment to work. These requirements will be installed automatically when installing the environment via pip.
requirements_dev.txt contains the dependencies for development purposes. It includes the dependencies for testing, linting, and building the project on top of the dependencies in requirements.txt.
requirements_examples.txt contains the dependencies for running the examples inside the project. It includes the dependencies in requirements.txt and additional dependencies for the examples.
In this Project the dependencies are specified in the pyproject.toml file with as little version constraints as possible.
The tool pip-compile translates the pyproject.toml file into a requirements.txt file with pinned versions.
That way version conflicts can be avoided (as much as possible) and the project can be built in a reproducible way.
Development Setup
If you want to check out the code and implement new features or fix bugs, you can set up the project as follows:
Clone the Repository
clone the repository in your favorite code editor (for example PyCharm, VSCode, Neovim, etc.)
using https:
git clone https://github.com/Alexander-Nasuta/gymcts.git
or by using the GitHub CLI:
gh repo clone Alexander-Nasuta/gymcts
if you are using PyCharm, I recommend doing the following additional steps:
- mark the
srcfolder as source root (by right-clicking on the folder and selectingMark Directory as->Sources Root) - mark the
testsfolder as test root (by right-clicking on the folder and selectingMark Directory as->Test Sources Root) - mark the
resourcesfolder as resources root (by right-clicking on the folder and selectingMark Directory as->Resources Root)
Create a Virtual Environment (optional)
Most Developers use a virtual environment to manage the dependencies of their projects.
I personally use conda for this purpose.
When using conda, you can create a new environment with the name 'my-graph-jsp-env' following command:
conda create -n gymcts python=3.11
Feel free to use any other name for the environment or an more recent version of python. Activate the environment with the following command:
conda activate gymcts
Replace gymcts with the name of your environment, if you used a different name.
You can also use venv or virtualenv to create a virtual environment. In that case please refer to the respective documentation.
Install the Dependencies
To install the dependencies for development purposes, run the following command:
pip install -r requirements_dev.txt
pip install tox
The testing package tox is not included in the requirements_dev.txt file, because it sometimes causes issues when
using github actions.
Github Actions uses an own tox environment (namely 'tox-gh-actions'), which can cause conflicts with the tox environment on your local machine.
Reference: Automated Testing in Python with pytest, tox, and GitHub Actions.
Install the Project in Editable Mode
To install the project in editable mode, run the following command:
pip install -e .
This will install the project in editable mode, so you can make changes to the code and test them immediately.
Run the Tests
This project uses pytest for testing. To run the tests, run the following command:
pytest
For testing with tox run the following command:
tox
Builing and Publishing the Project to PyPi
In order to publish the project to PyPi, the project needs to be built and then uploaded to PyPi.
To build the project, run the following command:
python -m build
It is considered good practice use the tool twine for checking the build and uploading the project to PyPi.
By default the build command creates a dist folder with the built project files.
To check all the files in the dist folder, run the following command:
twine check dist/**
If the check is successful, you can upload the project to PyPi with the following command:
twine upload dist/**
Documentation
This project uses sphinx for generating the documentation.
It also uses a lot of sphinx extensions to make the documentation more readable and interactive.
For example the extension myst-parser is used to enable markdown support in the documentation (instead of the usual .rst-files).
It also uses the sphinx-autobuild extension to automatically rebuild the documentation when changes are made.
By running the following command, the documentation will be automatically built and served, when changes are made (make sure to run this command in the root directory of the project):
sphinx-autobuild ./docs/source/ ./docs/build/html/
This project features most of the extensions featured in this Tutorial: Document Your Scientific Project With Markdown, Sphinx, and Read the Docs | PyData Global 2021.
Contact
If you have any questions or feedback, feel free to contact me via email or open an issue on repository.
Release history Release notifications | RSS feed


Download files
Download the file for your platform. If you're not sure which to choose, learn more about installing packages.
Source Distribution
Built Distribution
Filter files by name, interpreter, ABI, and platform.
If you're not sure about the file name format, learn more about wheel file names.
Copy a direct link to the current filters
File details
Details for the file gymcts-1.4.4.tar.gz.
File metadata
- Download URL: gymcts-1.4.4.tar.gz
- Upload date:
- Size: 33.0 kB
- Tags: Source
- Uploaded using Trusted Publishing? No
- Uploaded via: twine/6.0.1 CPython/3.11.13
File hashes
| Algorithm | Hash digest | |
|---|---|---|
| SHA256 |
6fb15c459b99dfff88ce228d2998eb4f5c64e464614f8339c7fcdda696890acc
|
|
| MD5 |
7c1cb8b18b04f714d88aa752f77dd274
|
|
| BLAKE2b-256 |
a756b5c0fb5eed371d4b25c8bebdf98a54b6c37daa2ac6a0be5cc9444655545c
|
File details
Details for the file gymcts-1.4.4-py3-none-any.whl.
File metadata
- Download URL: gymcts-1.4.4-py3-none-any.whl
- Upload date:
- Size: 31.8 kB
- Tags: Python 3
- Uploaded using Trusted Publishing? No
- Uploaded via: twine/6.0.1 CPython/3.11.13
File hashes
| Algorithm | Hash digest | |
|---|---|---|
| SHA256 |
e55a38122f09b8c09af5a75114dc0fe3779b4cf74da33c5238fdab04bb8476fb
|
|
| MD5 |
ec93b4ee518a15eeaea3b91f0fc25e11
|
|
| BLAKE2b-256 |
499759d7006d16f783df531073ac3040dbef71323c77a09209e6bf39d5a3db9b
|


