Model Context Protocol (MCP) server integrating Geekbot data and tools to Claude AI

Project description
Geekbot MCP


Unlock your Geekbot data within your LLM applications 🚀
Geekbot MCP (Model Context Protocol) server acts as a bridge, connecting LLM client applications (like Claude, Cursor, Windsurf, etc.) directly to your Geekbot workspace. This allows you to interact with your standups, reports, and team members seamlessly within your conversations using natural language.
Key Features ✨
- Access Standup and Poll Information: List all standups and polls in your Geekbot workspace. 📊
- Retrieve Standup Reports and Poll Results: Fetch reports and poll results with filters for specific standups, users, or date ranges. 📄
- View Team Members: Get a list of members you collaborate with in Geekbot. 👥
- Post Standup Reports: Post a standup report to Geekbot. 📝
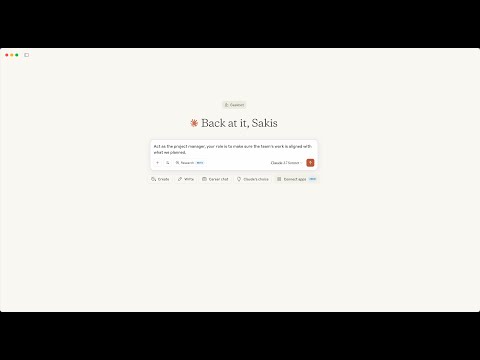
Check the video:
Installation 💻
Installing via Smithery
To install Geekbot MCP as a remote server via Smithery:
npx -y @smithery/cli install @geekbot-com/geekbot-mcp --client claude
The remote server will automatically be updated to the latest version with each release.
More information onSmithery's Data Policy
Manual Installation
Requires Python 3.10+ and uv.
-
Install Python 3.10+ (if you haven't already):
-
macOS:
brew install python@3.10
See Homebrew Python installation guide for more details.
-
Ubuntu/Debian:
sudo apt update
sudo apt install python3.10
-
Windows: Download and install from Python.org.
See Windows Python installation guide for more details.
-
-
Install uv (if you haven't already):
-
macOS/Linux: In your terminal, run the following command:
curl -LsSf https://astral.sh/uv/install.sh | sh
-
Windows: In your PowerShell, run the following command:
powershell -ExecutionPolicy ByPass -c "irm https://astral.sh/uv/install.ps1 | iex"
(See uv installation docs for more options.)
-
-
Install/Upgrade Geekbot MCP:
-
macOS/Linux: In your terminal, run the following command:
uv tool install --upgrade geekbot-mcp
-
Windows: In your PowerShell, run the following command:
uv tool install --upgrade geekbot-mcp
-
Configuration ⚙️
After installling Geekbot MCP, you can connect it to your an LLM client desktop application (e.g., Claude Desktop, Cursor, Windsurf, etc.):
-
Get your Geekbot API Key: Find it in your Geekbot API/Webhooks settings 🔑.
-
Find your
uvexecutable path:
-
Linux/macOS: In your terminal, run the following command:
which uv
-
Windows: In your PowerShell, run the following command:
(Get-Command uv | Select-Object -ExpandProperty Path) -replace '\\', '\\'
- Configure your LLM client desktop application: Each LLM client that supports MCP provides a configuration file that you can edit to add Geekbot MCP server.
If you are using a different LLM client, please refer to the documentation of your client to learn how to configure the MCP server.
After you locate the configuration file, edit it to add Geekbot MCP server:
    {
      "mcpServers": {
        "geekbot-mcp": {
          "command": "UV-PATH",
          "args": [
            "tool",
            "run",
            "geekbot-mcp"
          ],
          "env": {
            "GB_API_KEY": "YOUR-API-KEY"
          }
        }
      }
    }
Make sure to replace:
UV-PATHwith the path to youruvexecutable from step 2YOUR-API-KEYwith your Geekbot API key from step 1
Usage 💡
Once configured, your LLM client application will have access to the following tools and prompts to interact with your Geekbot data:
Tools 🛠️
list_standups
Purpose: Lists all the standups accessible via your API key. Useful for getting an overview or finding a specific standup ID.
Example Prompt: "Hey, can you list my Geekbot standups?"
Data Fields Returned:
id: Unique standup identifier.name: Name of the standup.channel: Associated communication channel (e.g., Slack channel).time: Scheduled time for the standup report.timezone: Timezone for the scheduled time.questions: List of questions asked in the standup.participants: List of users participating in the standup.owner_id: ID of the standup owner.confidential: Whether the standup is confidential.anonymous: Whether the standup is anonymous.
list_polls
Purpose: Lists all the polls accessible via your API key. Useful for getting an overview or finding a specific poll ID.
Example Prompt: "Hey, can you list my Geekbot polls?"
Data Fields Returned:
id: Unique poll identifier.name: Name of the poll.time: Scheduled time for the poll.timezone: Timezone for the scheduled time.questions: List of questions asked in the poll.participants: List of users participating in the poll.creator: The poll creator.
fetch_reports
Purpose: Retrieves specific standup reports. You can filter by standup, user, and date range.
Example Prompts:
- "Fetch the reports for submitted yesterday in the Retrospective."
- "Show me reports from user John Doe for the 'Weekly Sync' standup."
- "Get all reports submitted to the Daily Standup standup after June 1st, 2024."
Available Filters:
standup_id: Filter by a specific standup ID.user_id: Filter reports by a specific user ID.after: Retrieve reports submitted after this date (YYYY-MM-DD) 🗓️.before: Retrieve reports submitted before this date (YYYY-MM-DD) 🗓️.
Data Fields Returned:
id: Unique report identifier.reporter_name: Name of the user who submitted the report.reporter_id: ID of the user who submitted the report.standup_id: ID of the standup the report belongs to.created_at: Timestamp when the report was submitted.content: The actual answers/content of the report.
post_report
Purpose: Posts a report to Geekbot.
Example Prompt: "Hey, can you post the report for the Daily Standup standup?"
Data Fields Returned:
id: Unique report identifier.reporter_name: Name of the user who submitted the report.reporter_id: ID of the user who submitted the report.standup_id: ID of the standup the report belongs to.created_at: Timestamp when the report was submitted.content: The actual answers/content of the report.
list_members
Purpose: Lists all team members you share standups with in your Geekbot workspace.
Example Prompt: "Who are the members in my Geekbot workspace?"
Data Fields Returned:
id: Unique member identifier.name: Member's full name.email: Member's email address.role: Member's role within Geekbot (e.g., Admin, Member).
fetch_poll_results
Purpose: Retrieves specific poll results. Requires a poll id and optionally a date range.
Example Prompt: "Hey, what was decided about the new logo in Geekbot polls?"
Data Fields Returned:
total_results: Total number of results.question_results: List of question results.
Prompts 💬
weekly_rollup_report
Purpose: Generates a comprehensive weekly rollup report that summarizes team standup responses, highlights key updates, identifies risks and mitigation strategies, outlines next steps, and tracks upcoming launches.
Tips 💡
-
Review Tool Usage: Make the agent ask for your explicit approval for each tool action and not allow automatic tool calls. This safety feature ensures you maintain control over sensitive operations, particularly when posting reports to Geekbot. You'll be prompted to review and approve each tool call before execution, helping prevent unintended data submissions.
-
Ask for preview: Before posting a report, ask the agent to preview the report and not actually post it. This will give you a chance to review the report and make sure it is correct or make changes to it before posting it to Geekbot.
-
Limit the volume of retrieved data: If you are using the
fetch_reportstool, limit the date range to a reasonable period. This will help prevent the agent from retrieving a large amount of data and causing performance issues. Have in mind that the agent will apply limits in the number of reports it can retrieve.
Arguments:
standup_id: ID of the standup to include in the rollup report.
Development 🧑💻
Interested in contributing or running the server locally?
Setup Development Environment
# 1. Clone the repository
git clone https://github.com/geekbot-com/geekbot-mcp.git
cd geekbot-mcp

# 2. Install uv (if needed)
# curl -LsSf https://astral.sh/uv/install.sh | sh

# 3. Create a virtual environment and install dependencies
uv sync
Running Tests ✅
# Ensure dependencies are installed (uv sync)
pytest
Contributing 🤝
Contributions are welcome! Please fork the repository and submit a Pull Request with your changes.
License 📜
This project is licensed under the MIT License.
Acknowledgements 🙏
- Built upon the Anthropic Model Context Protocol framework.
- Leverages the official Geekbot API.
Release history Release notifications | RSS feed

Download files
Download the file for your platform. If you're not sure which to choose, learn more about installing packages.
Source Distribution
Built Distribution
Filter files by name, interpreter, ABI, and platform.
If you're not sure about the file name format, learn more about wheel file names.
Copy a direct link to the current filters
File details
Details for the file iflow_mcp_geekbot_mcp-0.3.4.tar.gz.
File metadata
- Download URL: iflow_mcp_geekbot_mcp-0.3.4.tar.gz
- Upload date:
- Size: 115.5 kB
- Tags: Source
- Uploaded using Trusted Publishing? No
- Uploaded via: uv/0.6.9
File hashes
| Algorithm | Hash digest | |
|---|---|---|
| SHA256 |
5eb790fcf34ea3cfb82704880c8b7476cedf00b244ffbc6c03aeea5b7eef84df
|
|
| MD5 |
6a7aa1d3efe24a806399a69ef8797775
|
|
| BLAKE2b-256 |
c07720f5ae373c15f71d17ae6110bb41f8bcbaf0acfbdfd38eb336140d8af229
|
File details
Details for the file iflow_mcp_geekbot_mcp-0.3.4-py3-none-any.whl.
File metadata
- Download URL: iflow_mcp_geekbot_mcp-0.3.4-py3-none-any.whl
- Upload date:
- Size: 19.0 kB
- Tags: Python 3
- Uploaded using Trusted Publishing? No
- Uploaded via: uv/0.6.9
File hashes
| Algorithm | Hash digest | |
|---|---|---|
| SHA256 |
a953ec8bd03d170953eff552ea836f514b88c0cb3abe994b1425dcb9d0435aca
|
|
| MD5 |
2c2cf04adc1e4f05bd3eb9fdb7b810aa
|
|
| BLAKE2b-256 |
7f64d111f933d90d58491d2d122d6918b58fe271cbbdda2f9e85b42a5646499a
|


